Opening and choice of a storage
In order to start video recovery operations in the program, first and foremost, you need to ensure that the digital medium that stores the recordings is mounted in its storages navigation pane. After that, it can be selected there with a single click of a mouse or the arrow keys on the keyboard. Yet, it should be pointed out that the objects in this pane are just virtual substitutes for the real data carriers that get addressed in a safe-read only mode.
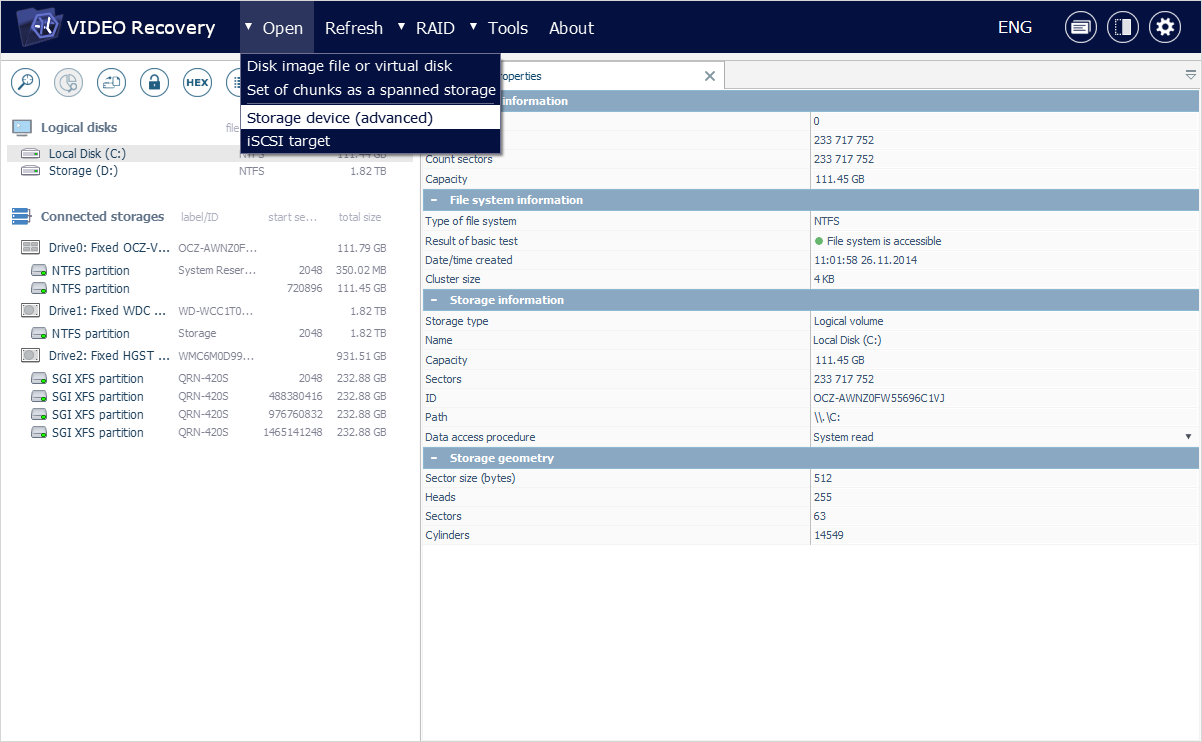
The means applied for opening are determined by the type of storage that contains the video data:
Physical storage device
All physical storage devices currently attached to the local computer are detected by the software automatically and get listed in the storages navigation pane.
This pane is updated by default after the application is (re)started and can also be refreshed on demand with the help of the "Refresh" item in the main menu.
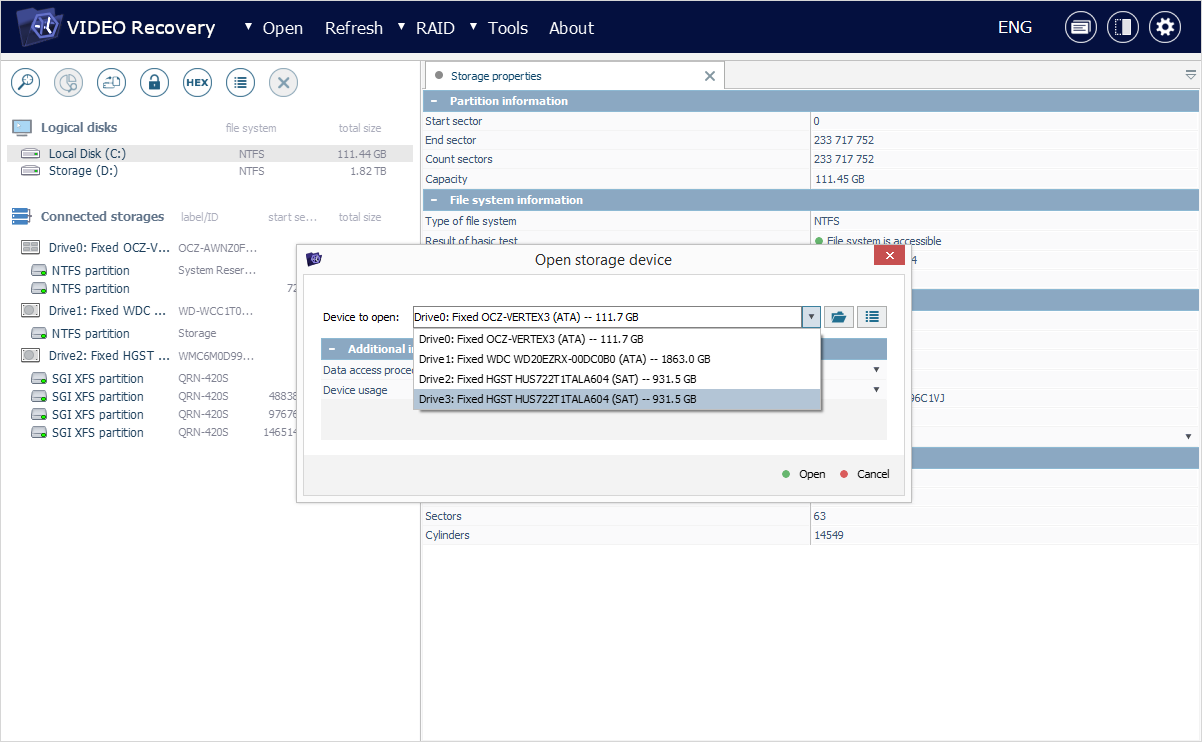
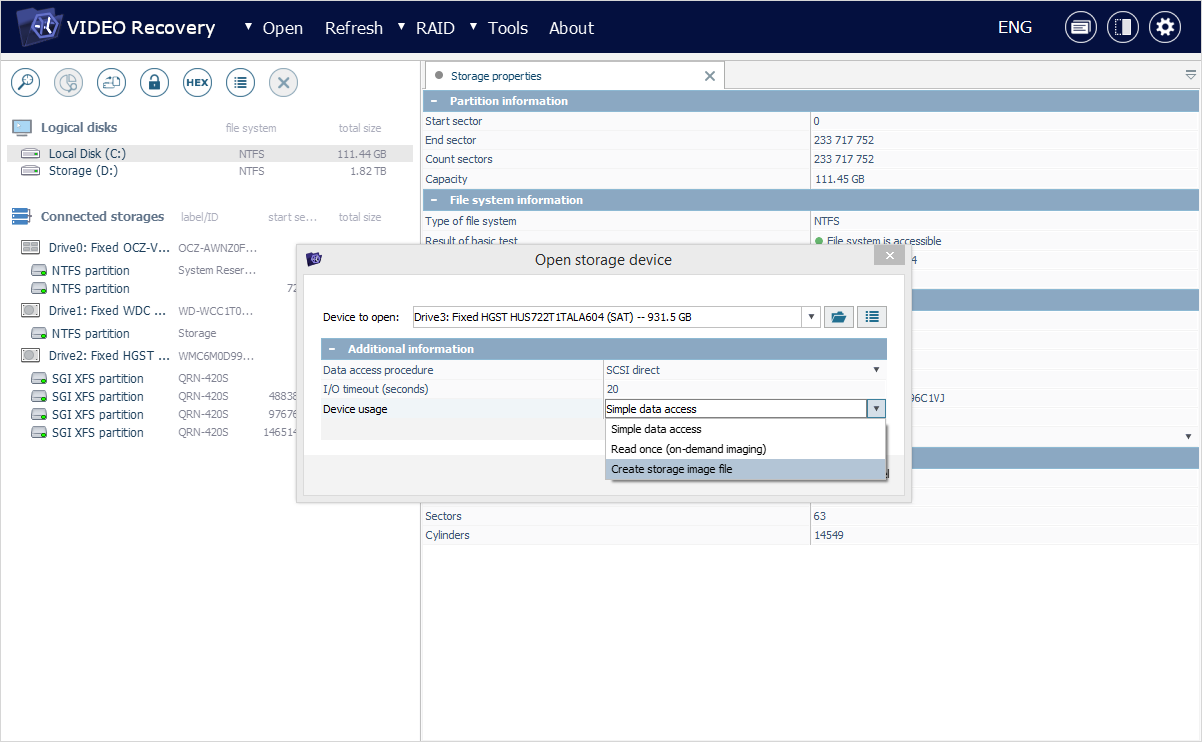
However, if the physical storage device that holds the required videos is missing from the list, or you want to specify extended parameters related to its reading, you may load it into the software using the "Open storage device" dialog.
This element is available via "Storage device (advanced)" option from the "Open" item in the main menu of UFS Explorer Video Recovery.
The launched window is composed of the following items:
-
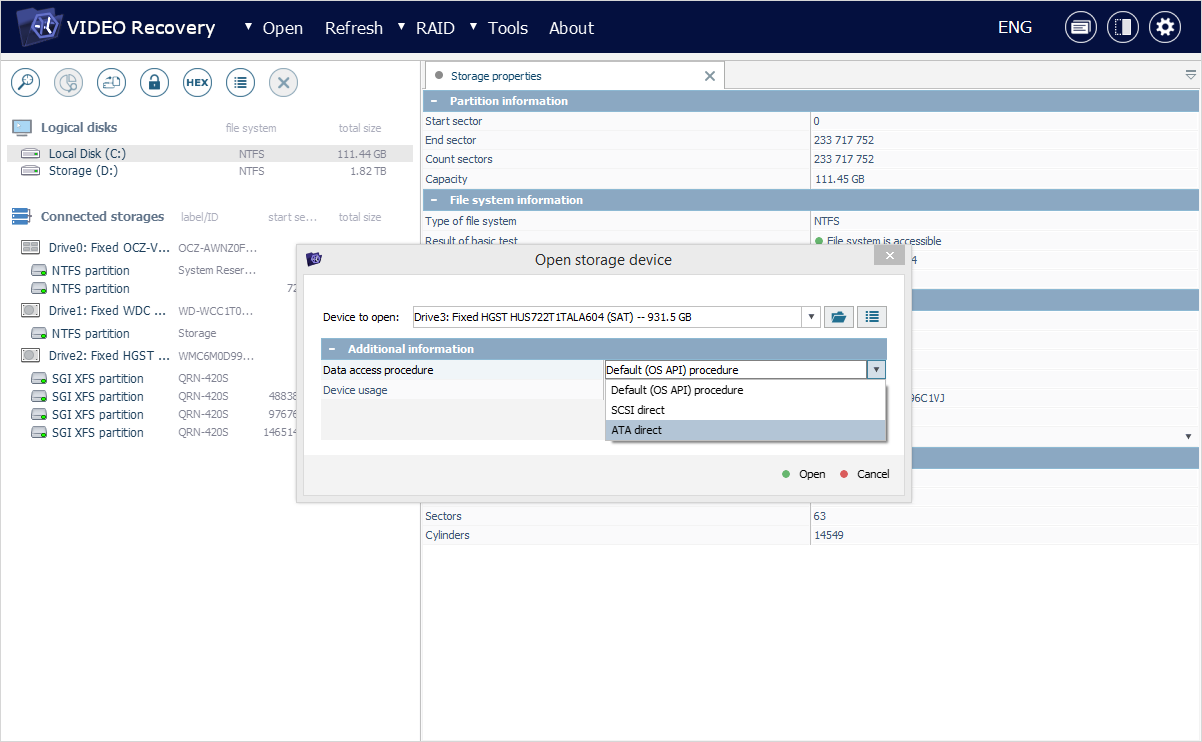
Device to open
In the drop-down list, you will see all the drives that are connected to the computer, along with the information about their sizes. Choose the required drive to add it to the storages navigation pane for further video recovery manipulations.
-
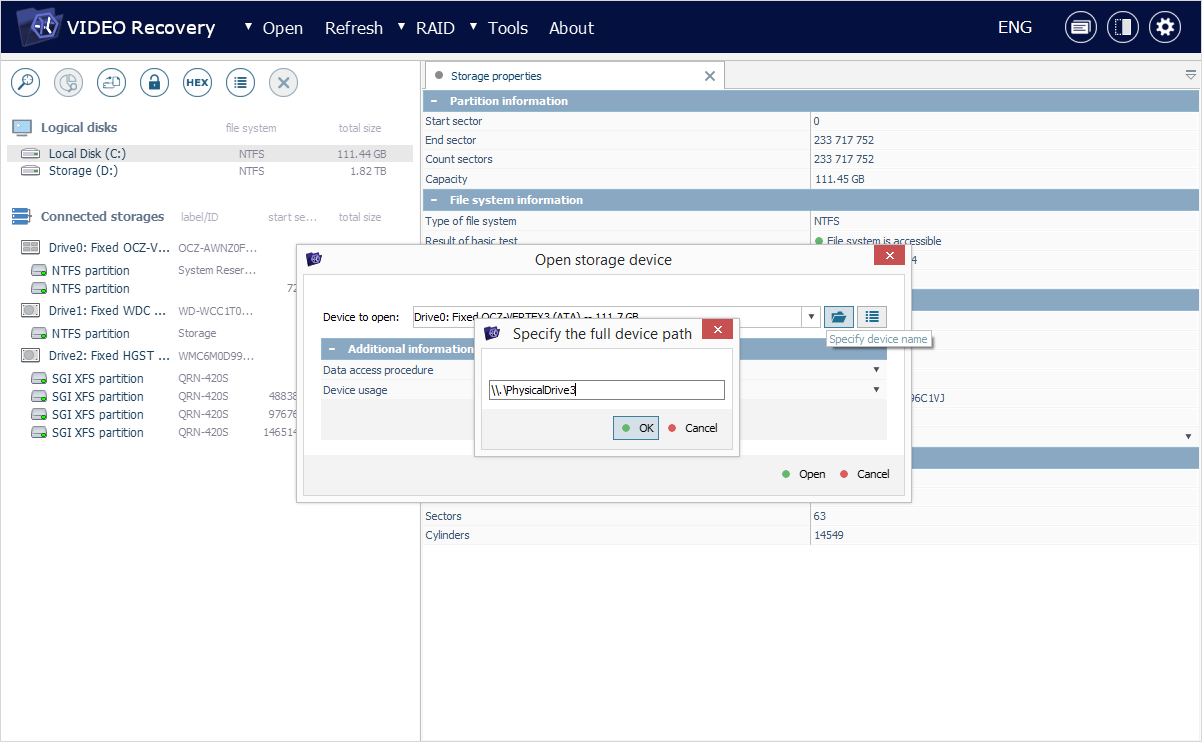
Specify device name
This button serves as an alternative to drive selection and can be employed to open a storage device by entering the absolute path to its location defined in accordance with the convention of the current OS.
-
Refresh devices
This button can be used to update the list of attached storage devices.

-
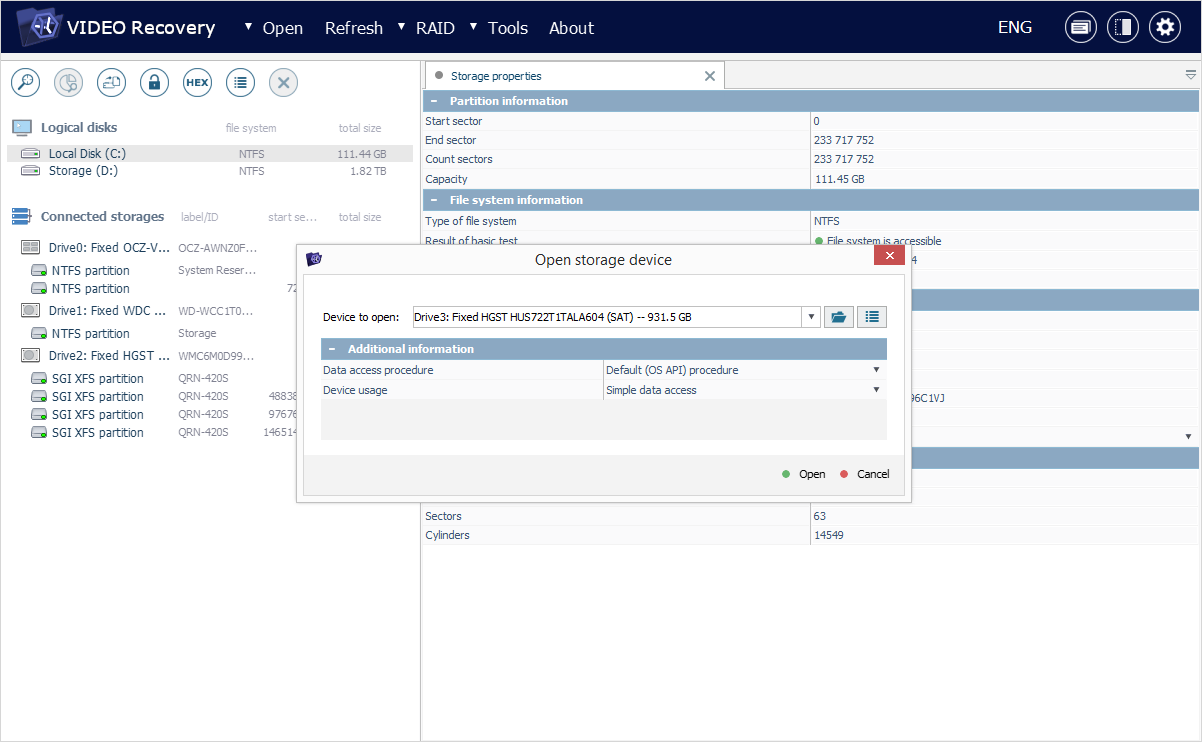
Additional information
This section presents a set of advanced parameters based on which the storage will be processed.
-
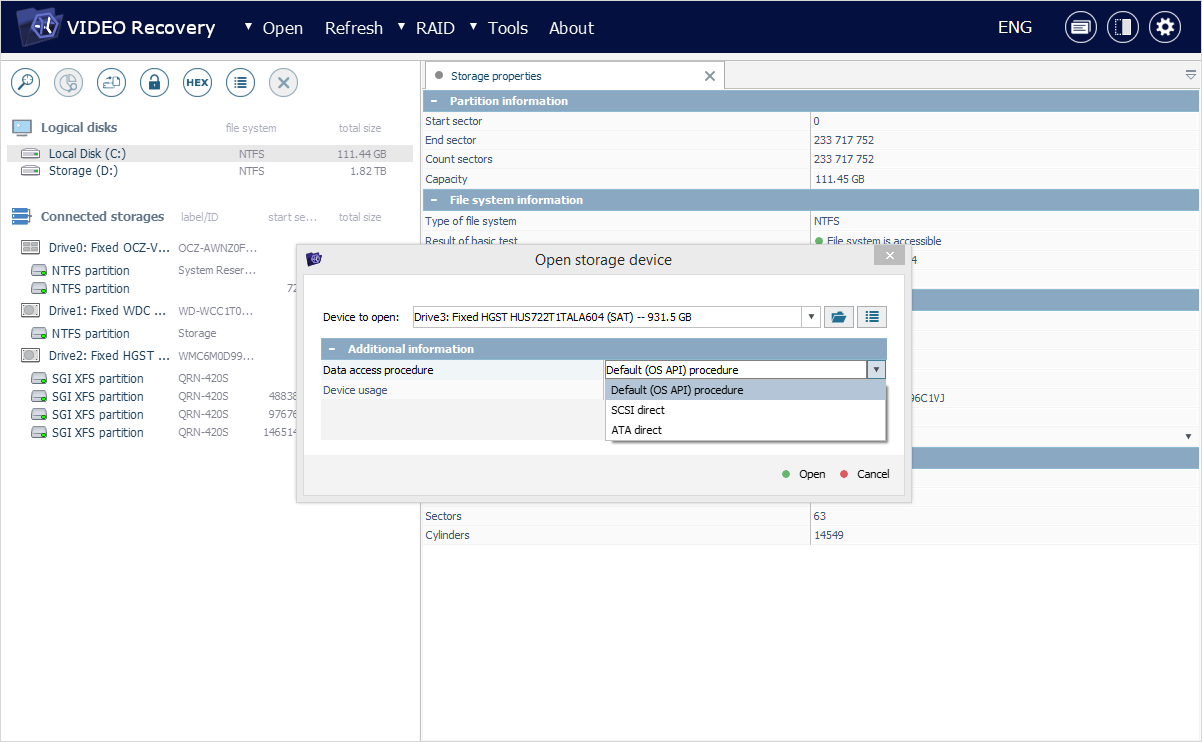
Data access procedure
This parameter allows you to choose the mode for accessing the digital medium, in particular, to activate a controlled procedure for a problematic drive (for instance, when it shows the signs of failure or operates unstably):
-
Default (OS API) procedure – the option implies that the standard algorithms of the operating system will be used to access the selected drive. Though this technique works well for intact devices, it is not recommended for faulty ones due to the lack of control over reading and possible hanging in case an I/O error occurs.
-
ATA Direct – this mode entails the use of the ATA driver for access to PATA/SATA drives. Such an approach allows minimizing the number of read requests and setting up control over I/O errors.
-
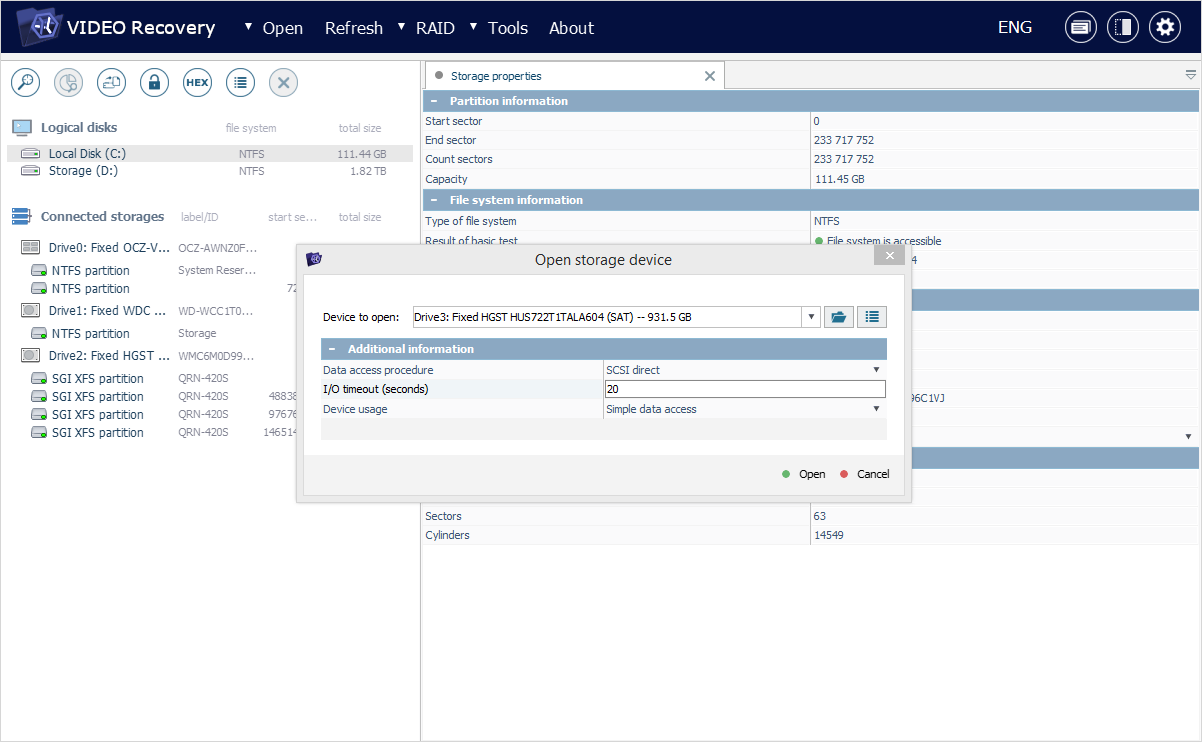
SCSI Direct – this procedure is based on the use of the SCSI driver for reading all storage devices, except for PATA/SATA drives with a direct connection. It enables their controlled reading with the diagnostics of I/O errors (when the employed USB adapter supports such a diagnostics).

-
-
I/O timeout (seconds)
This parameter can be used to specify the period to wait for a response from the storage device in case an I/O is encountered. Yet, the option cannot be used when the storage is processed via the default (OS API) procedure.
-
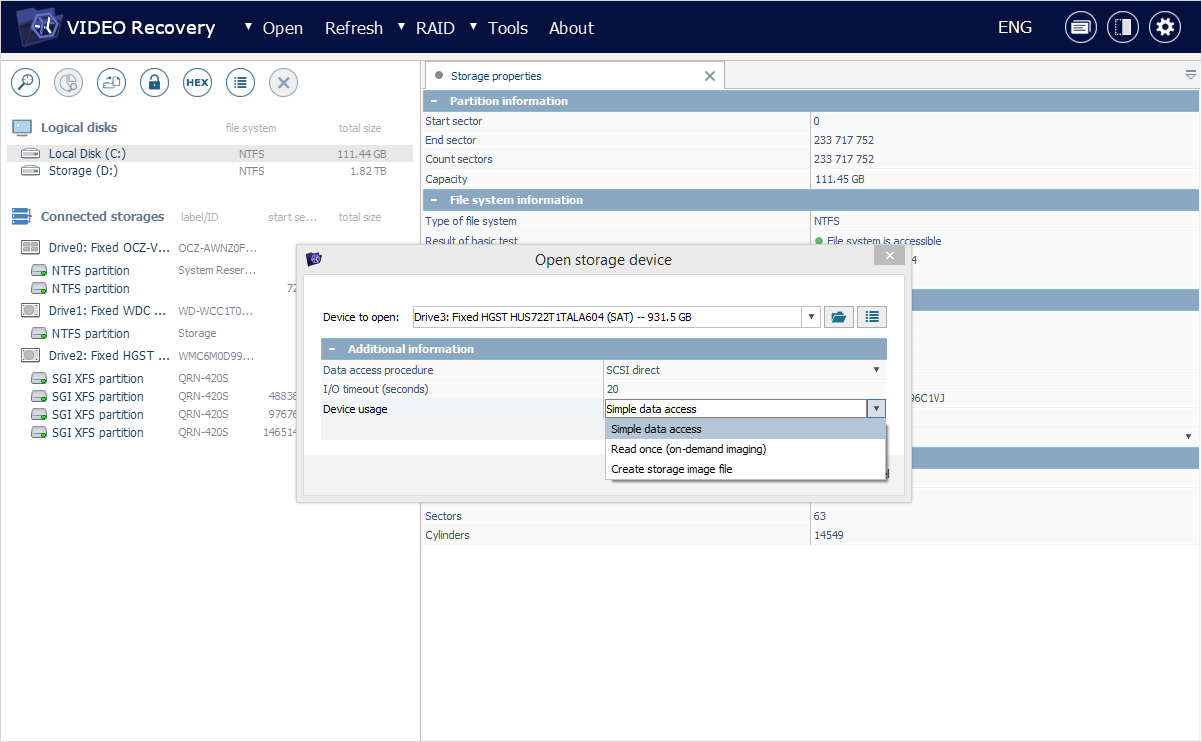
Device usage
This parameter sets up the method of further processing of the selected drive in the software:
-
Simple data access – it will be opened in the storages navigation pane with the given parameters.
-
Read-once (on-demand imaging) – one-time reading of the "requested" blocks on the storage will be performed, with their immediate transfer to a sparse image file (*.sdlsp). The subsequent reading of these blocks will be carried out from the created disk image, instead of sending a repeated request to the original location. Such a function is advantageous when you need to retrieve only a portion of the data from an unstable drive.
-
Create storage image file – the selected storage device will be opened directly with the Disk Imager component, without additional access to it. The option is optimal for cases when an image of the entire defective drive is required.
-
Virtual storage
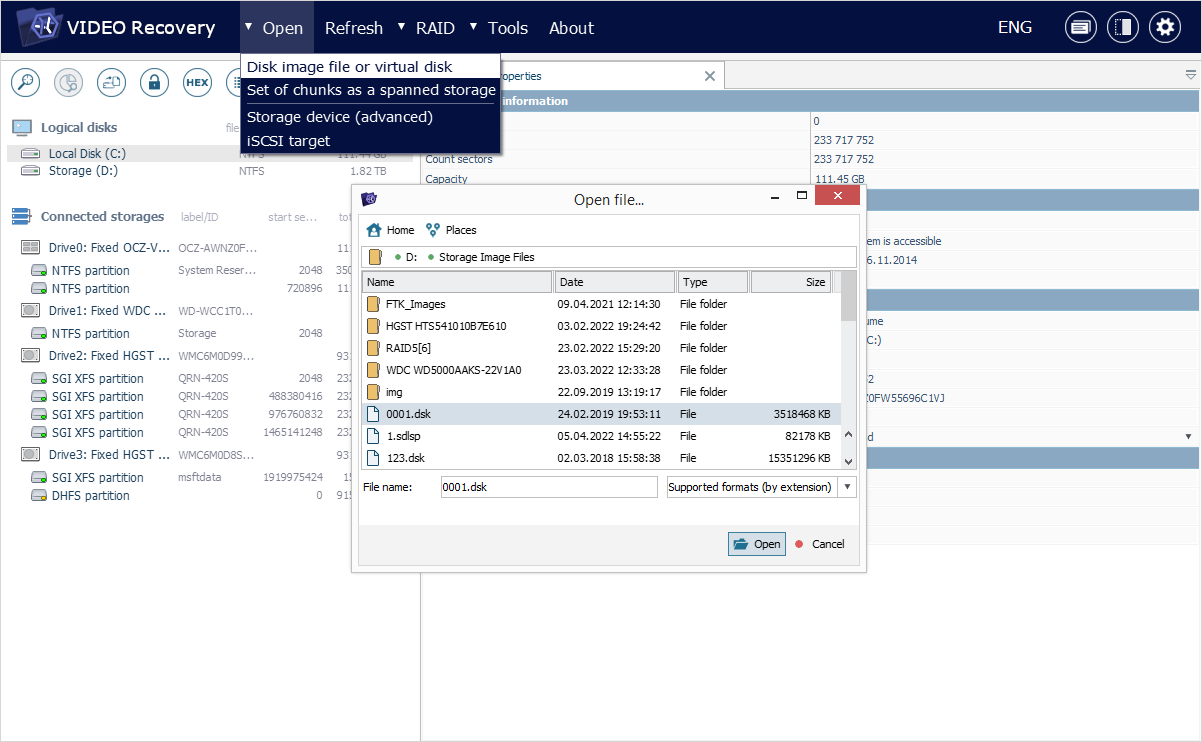
Unlike "real" drives, virtual storages do not show up automatically in the storages navigation pane of UFS Explorer Video Recovery. Yet, you can use the "Disk image file or virtual disk" subitem of the "Open" item in the main menu to mount supported virtual disks and disk images for their further use in the program, including ones created with forensic tools (EnCase Imager, FTK Disk Imager). After that, browse to the location of the file that corresponds to your virtual storage, select it and hit the "Open" button.
Logical volume
UFS Explorer Video Recovery identifies partitions with the supported file systems (including specific CCTV and DVR formats) and lists them under the respective physical drive, disk image/virtual disk or reconstructed complex storage elements in the storages navigation pane, without the need for any special manipulations.
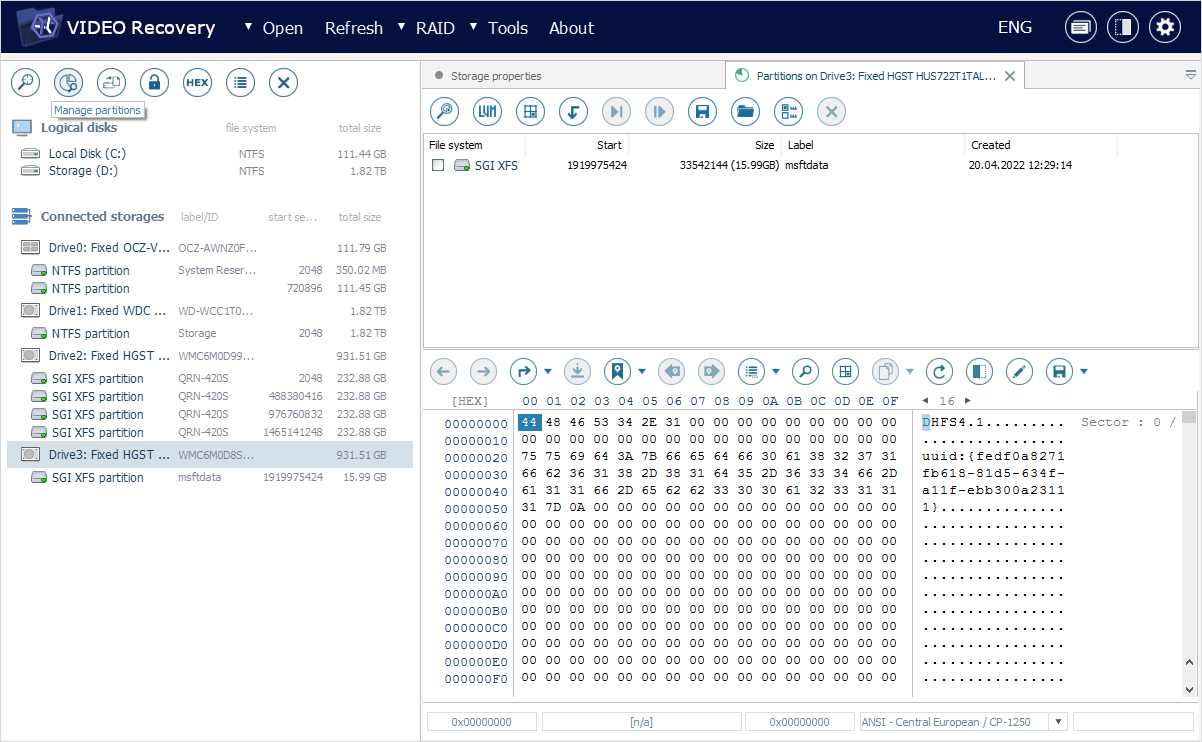
However, when the necessary partition wasn’t detected due to a certain problem or its type has not been recognized, you may perform a more fundamental search using the Partition Manager component.
Also, please note that an encrypted volume has to be deciphered with the help of the decryption techniques integrated into UFS Explorer Video Recovery prior to any access to it.
Set of chunks a spanned storage
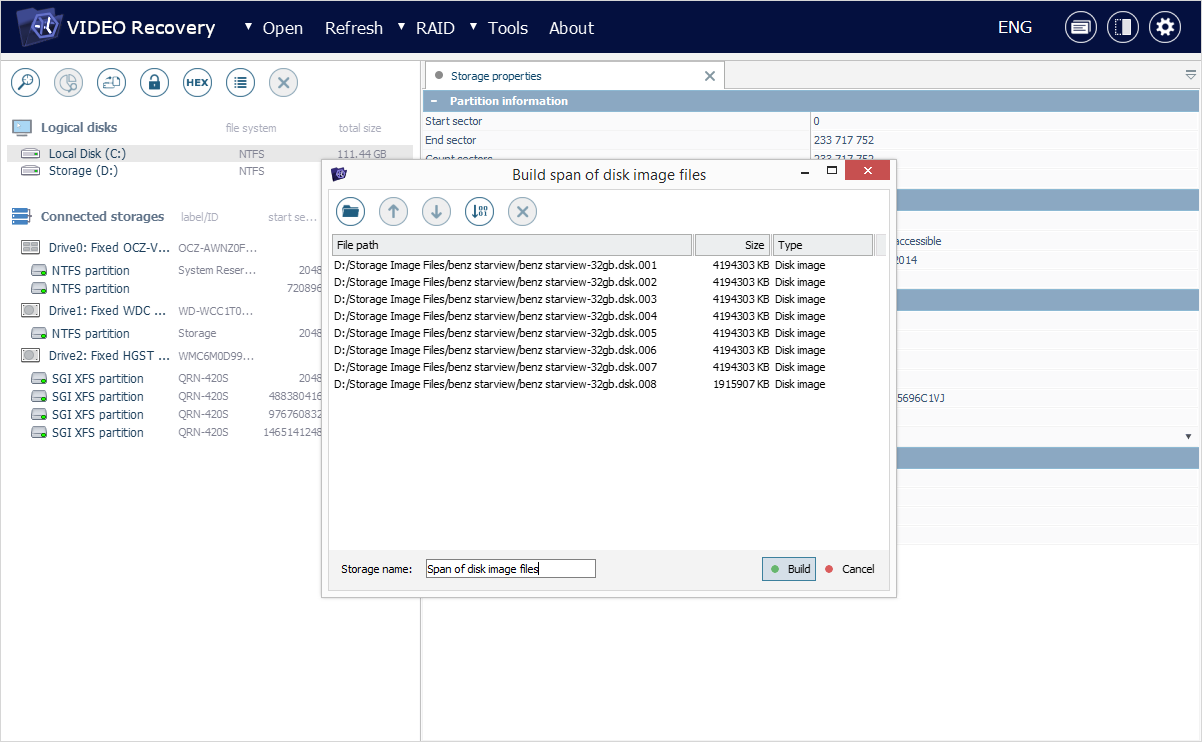
Several disk image files can be combined into a single storage and then loaded into UFS Explorer Video Recovery using "Set of chunks a spanned storage" subitem of the "Open" item in the main menu of the program. This function may come in handy when a disk image file has been divided into parts, for example, because its size couldn’t fit onto a single storage device.
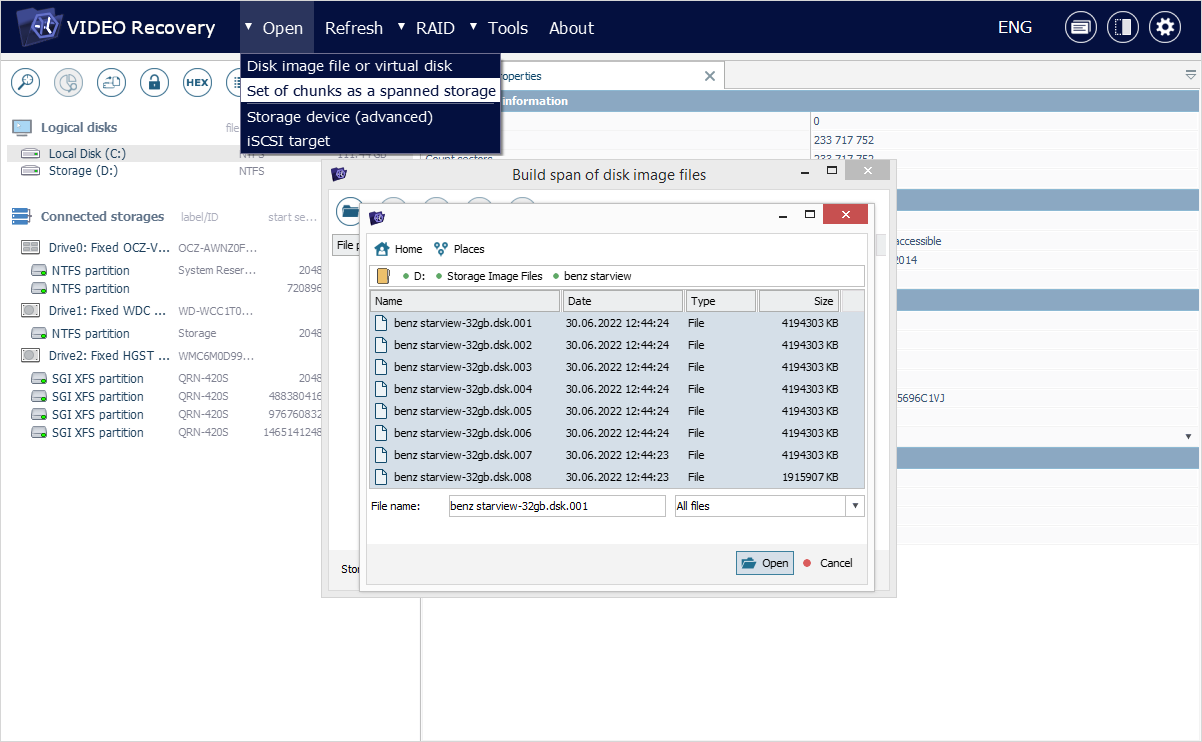
In the opened dialog, specify the location of each file that constitute the image using the "Add files" button, and then configure their order with the help of arrow-like buttons. Provide the name for your disk image in the "Storage name" field that will be displayed in the storages navigation pane. After that, hit the "Build" button.
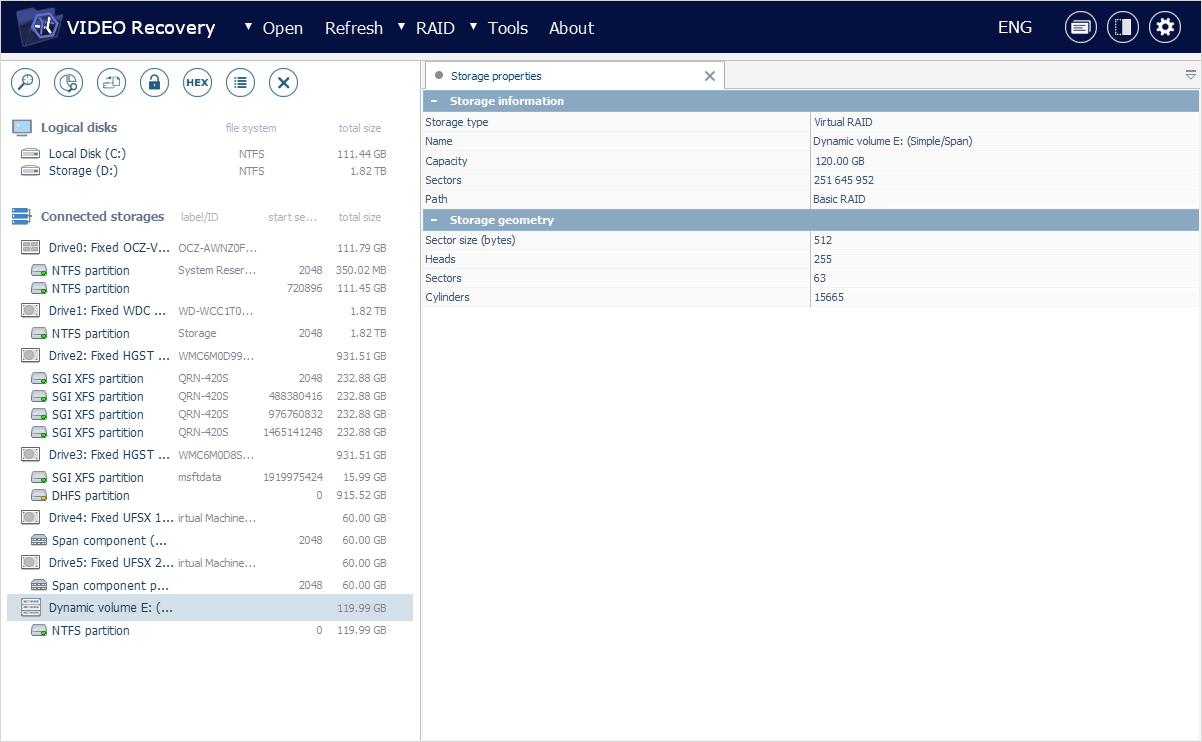
Complex storage
When the reconstruction of a complex storage is supported by UFS Explorer Video Recovery and it is possible by means the metadata present on the drives, the array may be built automatically by the software. In this case, it will immediately appear in the storages navigation pane after you launch the application or hit the "Refresh" button. If this didn’t take place, you need to assemble the storage manually using the RAID Builder component.
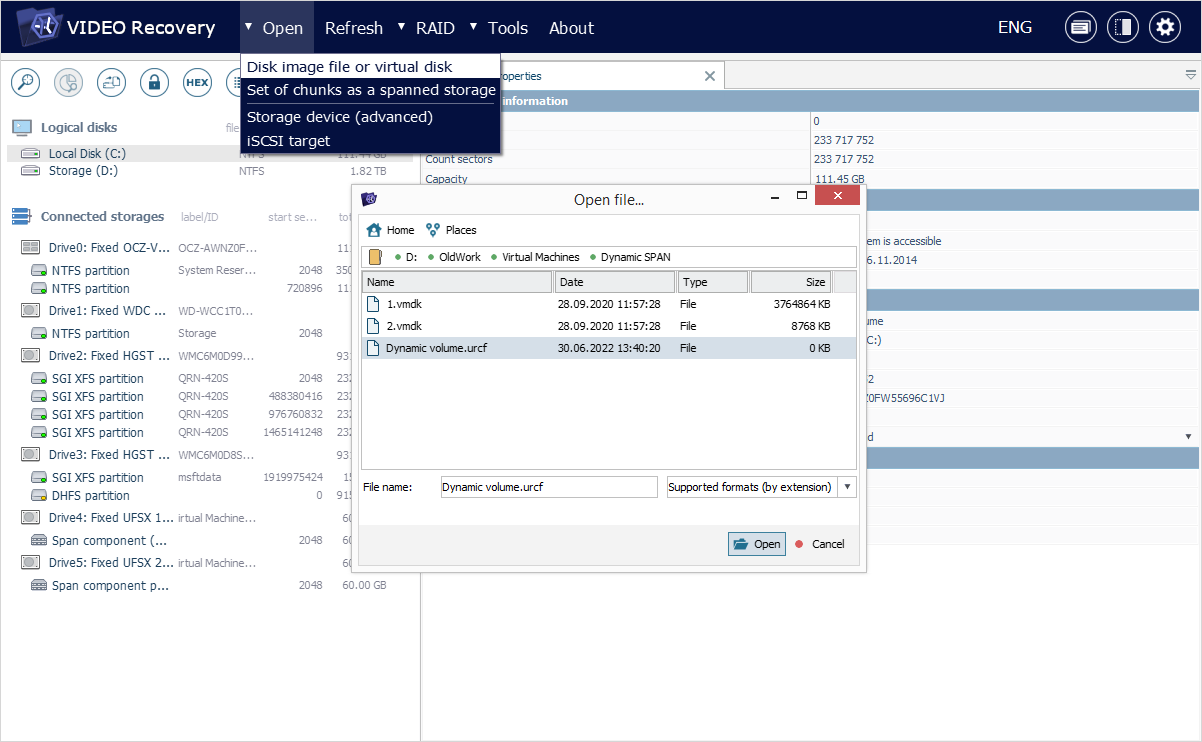
Saved RAID configuration
It is possible to load a *.urcf file with the RAID configuration that has been saved beforehand in the RAID Builder element. For this, use the "Disk image file or virtual disk" option from the "Open" item in the main menu of the program.
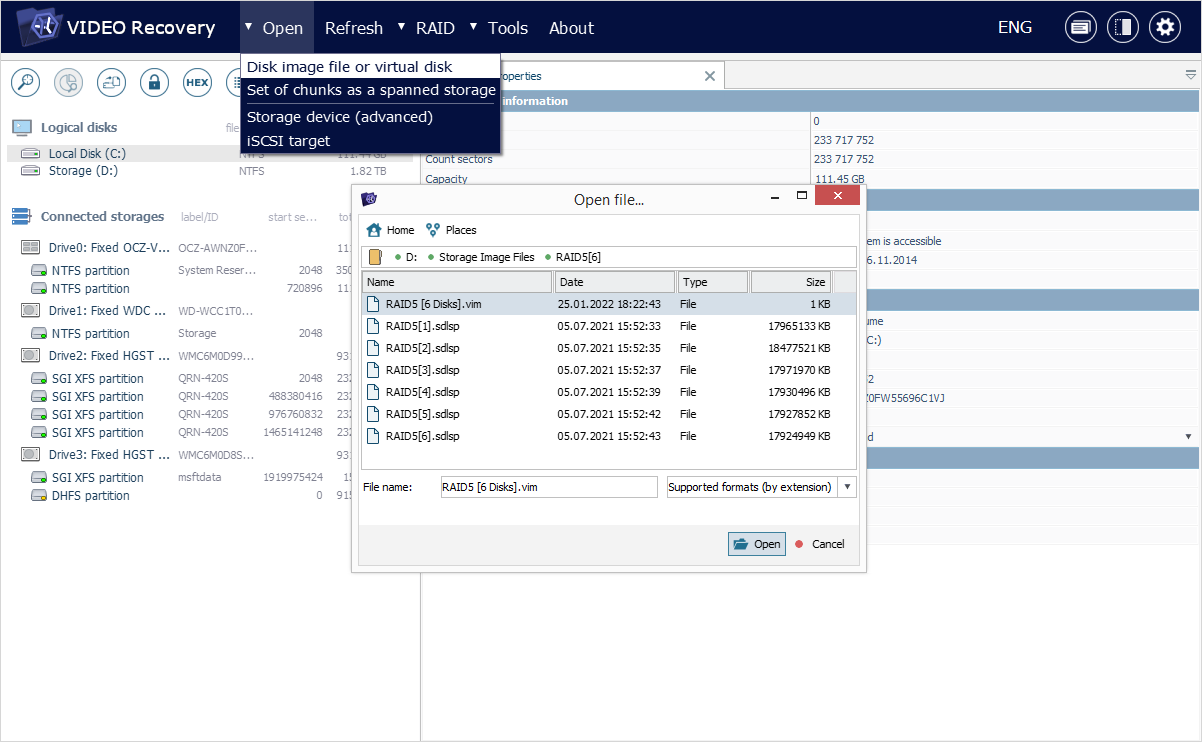
Runtime Software Virtual Image file
A Runtime Software Virtual Image file of the *.vim format can also be opened in the software with the help of the "Disk image file or virtual disk" option from the "Open" item in the main menu.
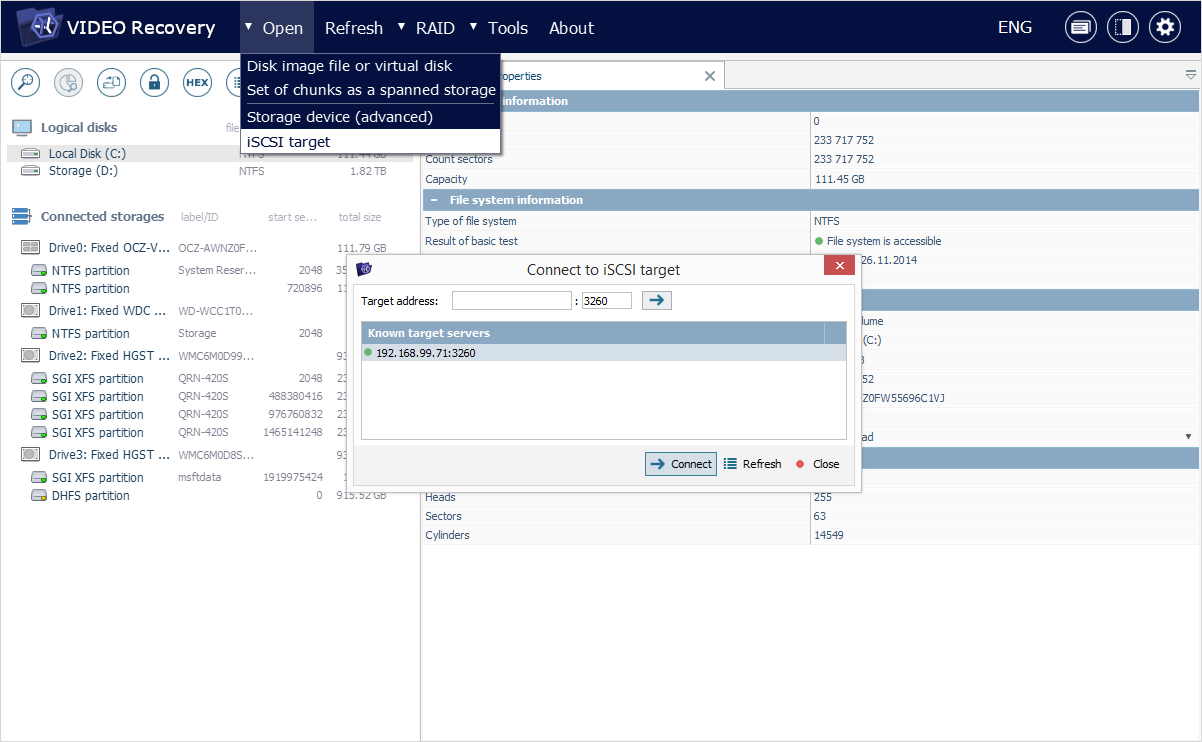
iSCSI Target
UFS Explorer Video Recovery makes it possible to connect to an operating iSCSI server within your network. In order to achieve this, employ the "iSCSI Target" option from the "Open" item in the main menu. In the opened window, define the target IP address and port. Following that, you can select the required target device and open it in the software in the "read only" mode.