Creating an extended report on video data
Extended report on files with checksums
UFS Explorer Video Recovery provides the possibility to create an enhanced report on the selected video files and establish control over their integrity via checksums. Such a measure makes it easy to compare the values generated for them using the chosen cryptographic hash function and ensure that they have not been altered or corrupted afterwards.
A checksum value of a file uniquely represents its contents. Therefore, if the checksums computed for it at different times or dates are identical, that would indicate that the file remains unchanged. In contrast, even a minor modification to the file will result in a completely different checksum.
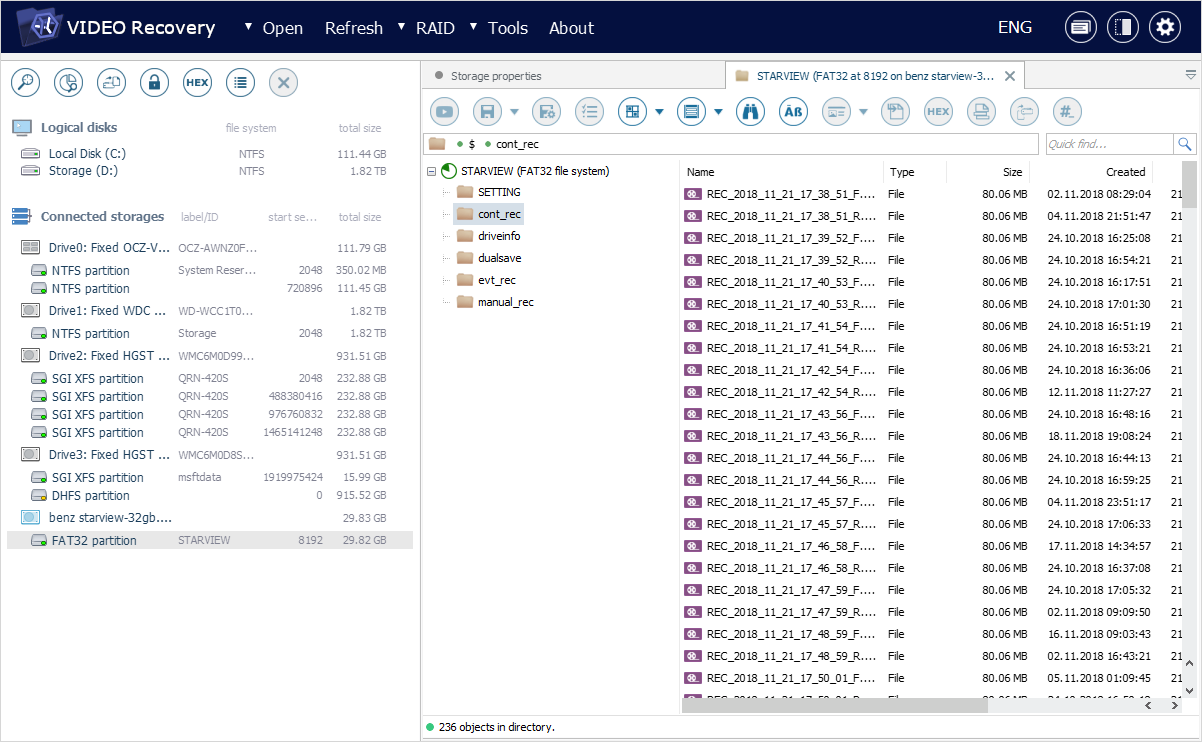
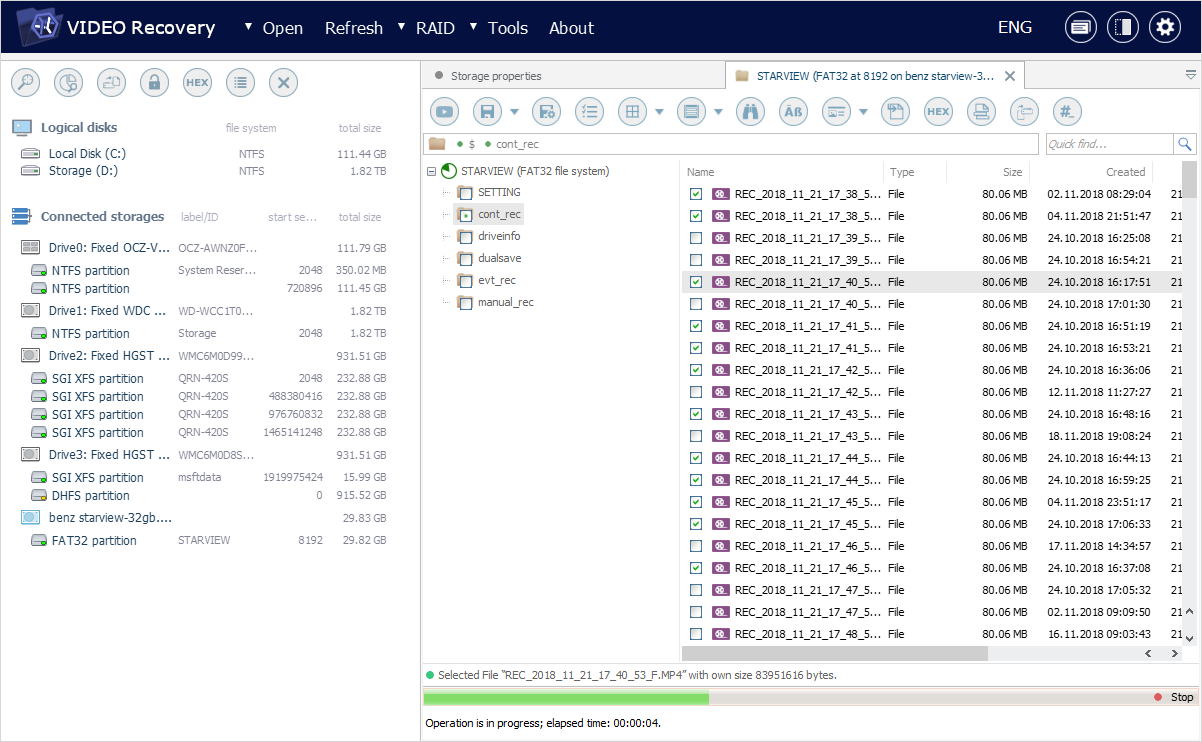
In order to utilize this function, to begin with, launch the Explorer (file browser) element for the required partition with a double click, the Enter key or the "Explore file system" option in the partition’s context menu. If your partition (or a scan result item) has already been opened in Explorer, simply proceed to the next step.
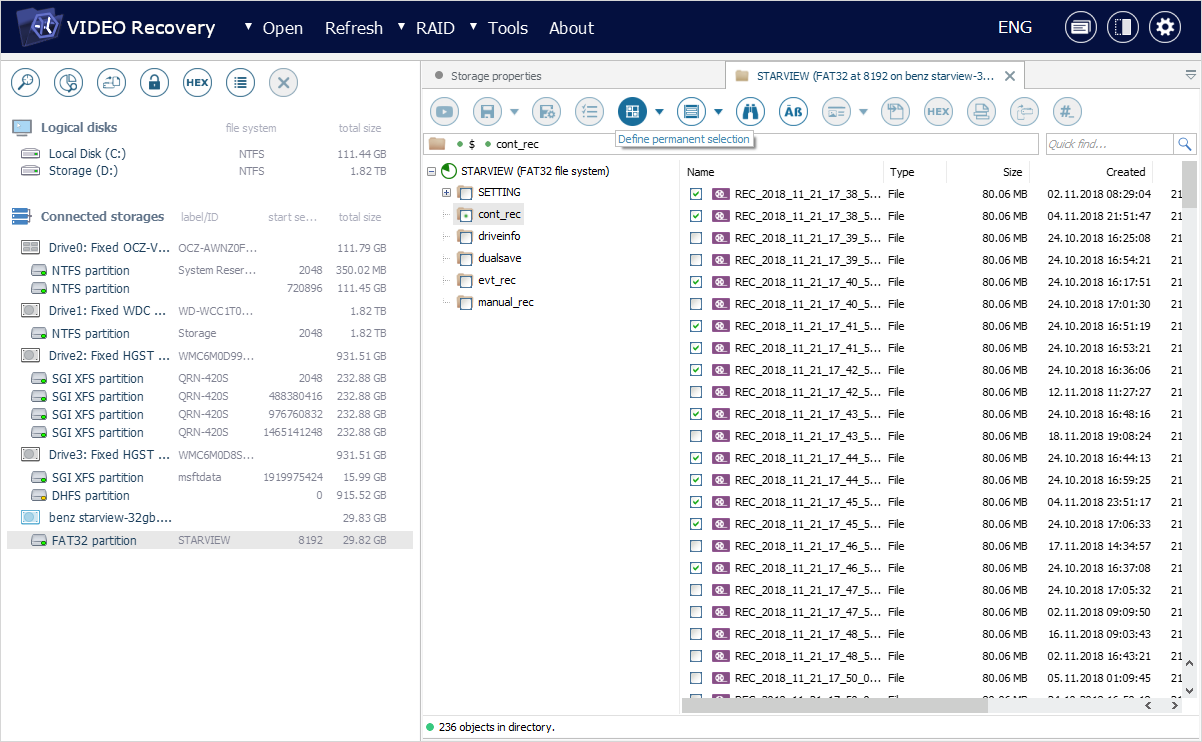
After that, activate the "Define permanent selection" tool from the main toolbar of Explorer to choose the folders/files for which the report will be built. Use the checkboxes next to them or the "Mark for copying" context menu option to select the necessary ones. Alternatively, pick out several files or folders in the same folder by clicking on them one by one while holding the "Shift" or "Ctrl" key.
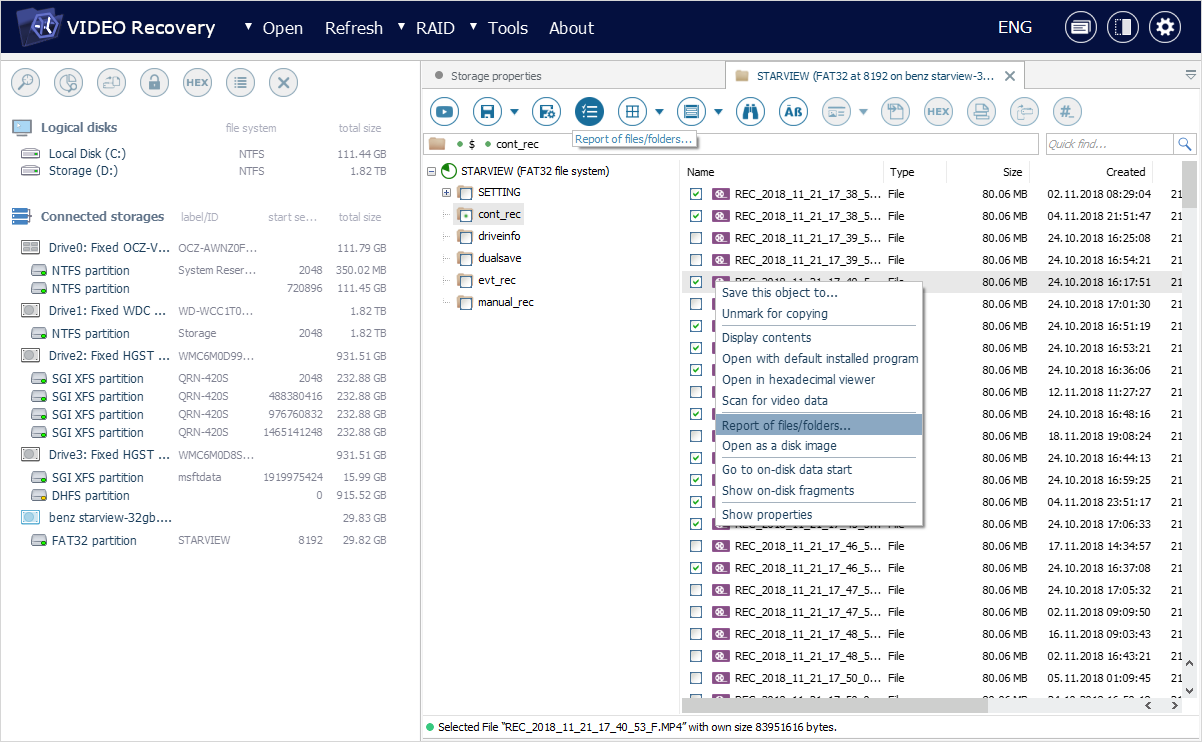
Having selected all the required items, get the "Report of files/folders" tool from the main toolbar of Explorer or the context menu launched with a right click of your mouse.
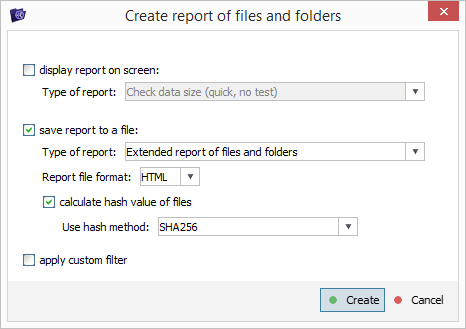
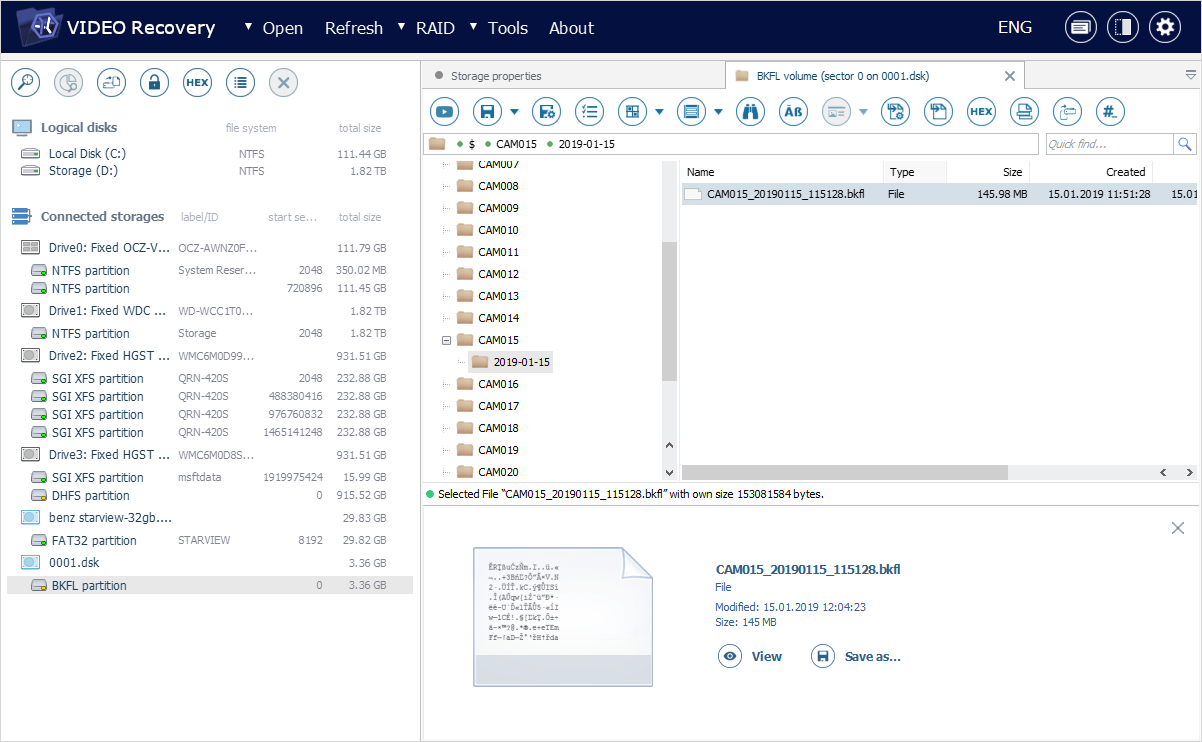
In the opened dialog, enable the "Save report to file" option. After that, set up the "Type of report" parameter as "Extended report of files and folders" by choosing the respective variant from the drop-down list.
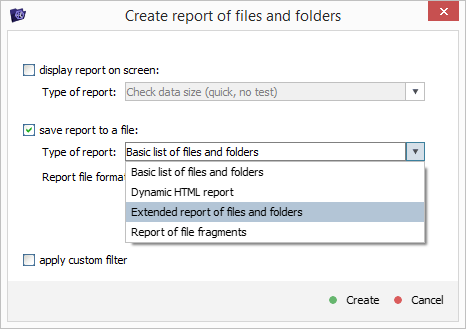
You may also define the format of a file to which the report will be saved: choose *.csv, *.xml or *.html from the "Report file format" drop-down list.
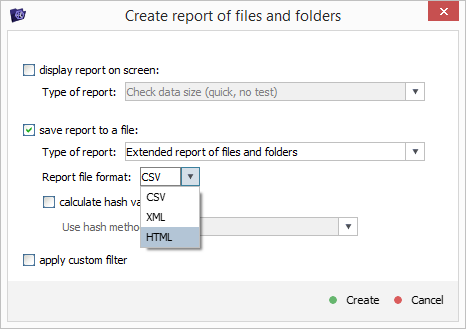
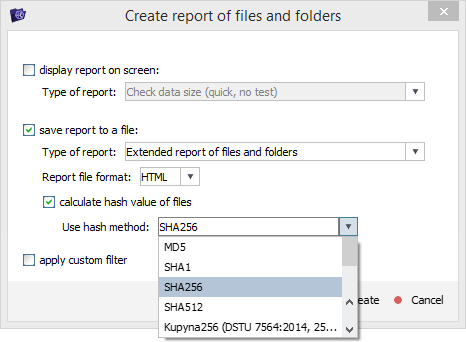
In order to enable the control via checksums, put a checkmark next to the "Calculate hash value of files" option.
The preferred checksum algorithm can be chosen from the "Use hash method" drop-down list.
Having specified the needed parameters, hit the "Create" button to start generating the report. In the opened dialog, provide a name and location for the file that is not found on the processed storage.
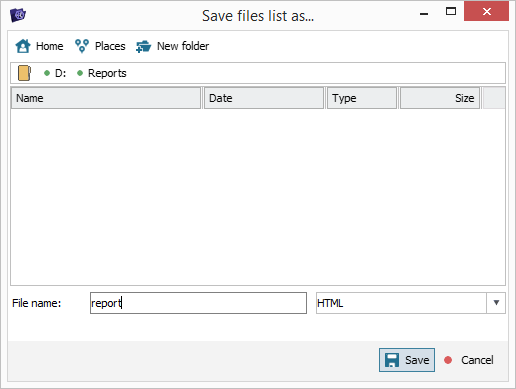
After you press the "Save" button, the software will begin the operation, with its progress indicated in a dedicated pane at the bottom. When it is completed, you will see a confirmation window that allows opening the report right away. In case you decline this prompt, you may open it anytime later by going to the corresponding location in the operating system.
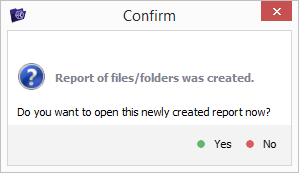
If you click "Yes", the file will be opened immediately in the application that was configured as a default one for this type of files in your OS.
The created report will contain the information about the scanned storage, its file system, the date and time when the report was created and the hash method that has been employed to calculate the checksums for files.
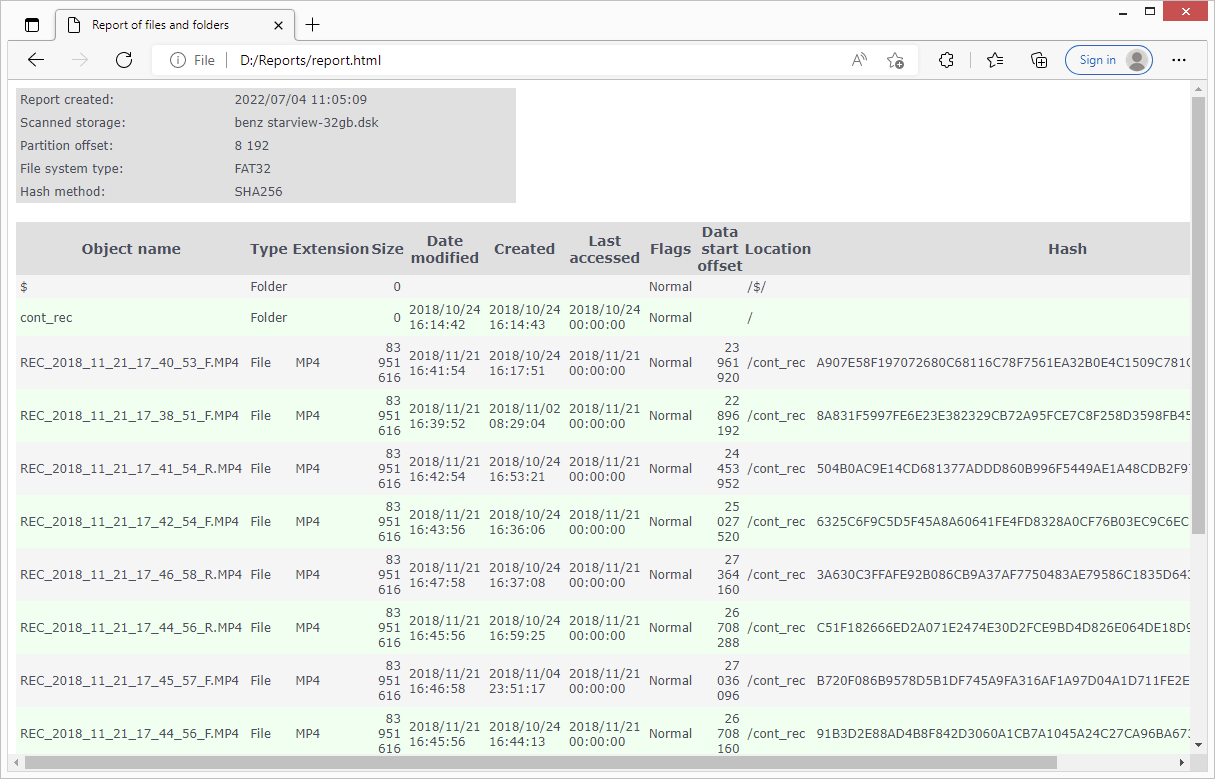
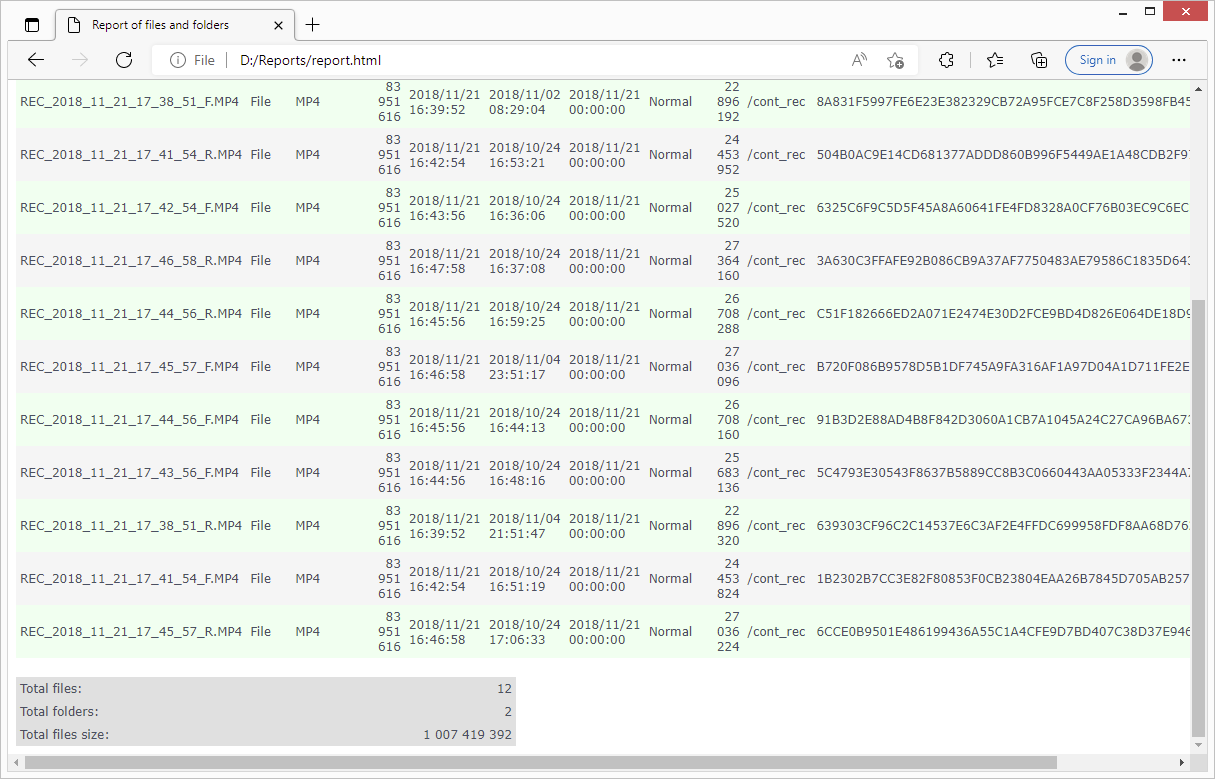
Below you will find the list of files, their properties (size, date of creation/last modification, path, etc.) and the actual checksum values.
At the bottom of the report, the software will provide the statistics for the total number of files, folders and their overall size.
In order to verify checksums, you will need to repeat the above-described procedure for the same set of files selected in the program. Yet, please make sure that you choose the very same algorithm that has been previously used to generate the checksums. Applying different hash methods to identical files will render different checksum values.
Report on the allocation of frames
In addition to the list of video files with their checksums, the software offers an option to create a report on the frames that constitute the video stream. Such a report can be employed for further data analysis, for example, when a recording is fragmented and may be stored in parts on different locations.
To generate this type of report, first and foremost, open Explorer (file browser) for the partition that contains the video data. For this, you may click on it twice, use the Enter key or the "Explore file system" option in its context menu.

Next, pick out the required video file and select it using your mouse or the arrow keys from the keyboard. Make sure the "Define permanent selection" tool is deactivated in the main toolbar of Explorer, since this function is not supported for multiple files.
Having selected the required video, get the "Report of files/folders" tool from the main toolbar of Explorer or an equivalent option in the file’s context menu.

In the opened window, choose the "Save report to file" option and define the "Type of report" parameter as "Report of file fragments".
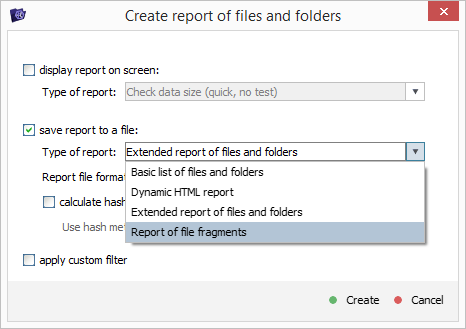
It is also possible to use the "Report file format" drop-down list to change the format to *.csv, *.xml or *.html.
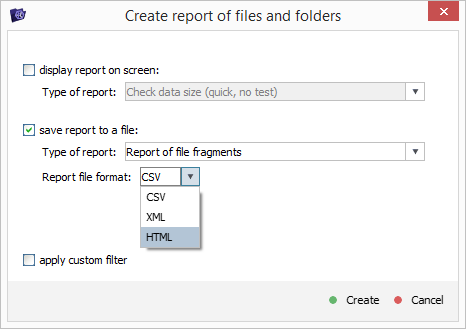
Having decided on the desired parameters, press the "Create" button to let the program start forming your report. In the opened window, specify a name and folder for this file that is not located on the source storage.
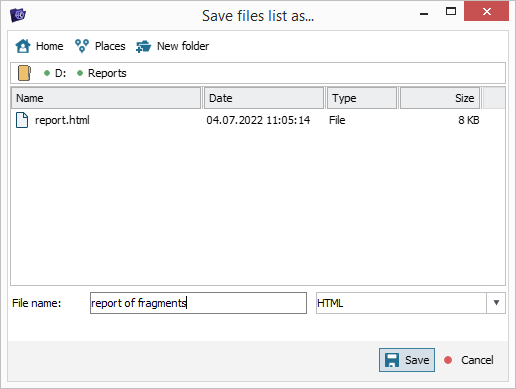
After you hit "Save", the creation process will begin. When it is finished, a pop-up window will offer you to open the report file on the spot. If you click "No", you may refer to it later by opening the respective folder using the means of your operating system.
If you agree to the prompt, the file will be opened instantly in your OS via the default application installed for this format of files.
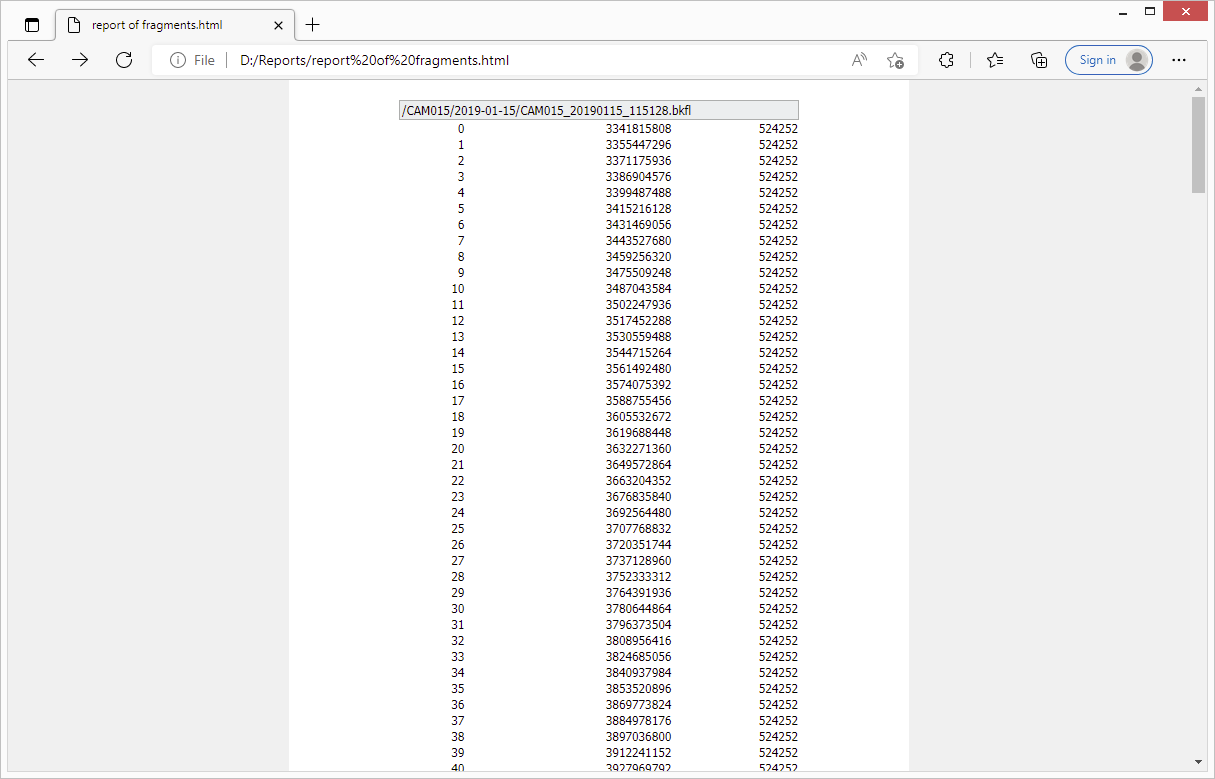
The report itself will contain the file’s path, the sequence of frames with their logical and physical positions and sizes in bytes.