Can I recover data from an encrypted storage?
It is probably not a secret that the modern world almost fully relies on digital technologies. This makes security of sensitive information a matter of increased concern. Not only businesses and institutions, but also home users are becoming ever more vigilant when it comes to protection of valuable data. Customer information, company secrets, intellectual property items, accountancy or any personal data, like identity, health and financial information are vulnerable to cyberattacks, especially when simply left as they are. In view of this, more and more people are deploying encryption tools on their storage devices. They perform mathematical calculations to encode the data and ensure its non-readability for any unauthorized person. At the same time, such files remain unprotected from failures or damages within the system, let alone the data loss risks derived from the implementation of this technology. There is even a common belief that encrypted data cannot be restored. But in fact, though encryption adds complexity to the recovery process, in most cases, it doesn’t prevent it entirely.
Specifics of data recovery from encrypted storages
Encryption tools transform data into cipher-text which can be unlocked only with decryption credentials, usually a password or a unique sequence of symbols referred to as a decryption key. The unavailability of this information makes it impossible to decrypt the drive neither by the authorized user nor by a data recovery utility. In addition, every encryption instrument allocates a certain area on the storage to be encrypted where special metadata required for the decryption procedure is saved. Although the exact location and the content of this area vary for different encryption solutions, in case it gets corrupted or overwritten, no matter the reason, the ciphered data becomes impossible to decipher, i.e. inaccessible for any software and even for authorized users that have the correct password or the corresponding recovery key.
If you have the right password/decryption key and the critical metadata wasn’t severely damaged, as a rule, there are quite high chances to salvage files from an encrypted disk. However, there are still several more factors to take into account when dealing with such data storage media:
- If the drive has bad sectors (no matter if it is encrypted or not), it is highly recommended to clone it and work with its disk image. The matter is that the number of corrupted sectors tends to increase during the operation of the device and it is literally impossible to predict which area of the drive will be affected next (for instance, it can be the one containing some crucial decryption metadata). The same applies to high-capacity disks with low performance – the drive may be unable to withstand the workload and fail during the procedure making data recovery more complicated or even impossible.
Warning: Please familiarize yourself with the peculiarities of the imaging process for defective disks.
- If you are not certain that you have the right decryption password/key, don’t try to decrypt the drive in your operating system, as it may get locked after multiple attempts to use the wrong one. Instead, employ the decryption techniques provided by data recovery software, which appeals to the physical device and emulates its operation, making it possible to guess the password by process of elimination.
- When overwritten, the data becomes unrecoverable. In this context, please mind that it is not always the user who overwrites data by saving new information to the drive. Your lost or deleted files may also get overwritten as a result of regular OS operations, not to mention the TRIM command automatically performed on SSDs, the usage of shredding programs or full-formatting the drive.
- If encryption was activated on the system startup drive in macOS 10.13 High Sierra and later, in order to enable data recovery from it, you will need to disable System Integrity Protection as demonstrated in Unblocking access to macOS drives. Also, please note that the procedure is not possible for internal drives on Macs that rely on custom Apple Silicon (M1 and later) or T2 security chips.
- Before trying to decrypt and restore data by yourself, ensure the health of your drive. If you suspect any kind of physical damage to the drive, please bring it to a reliable data recovery center, as your DIY recovery efforts can aggravate the situation and destroy your storage beyond repair.
How to recover files from an encrypted storage device
If the data was lost from your encrypted disk after some sort of logical failure, for instance, due to an unexpected system shutdown, OS crash or accidental deletion, but you still have at least one of the defense elements provided by your encryption utility (password, recovery key, key file, etc.), the right data recovery tool can easily bring the missing files back. SysDev Laboratories has conducted extensive research in this field, studying the technology behind different encryption utilities, and implemented these findings in the UFS Explorer and Recovery Explorer software solutions. The programs employ efficient decryption techniques for most popular methods of encryption, such as BitLocker, LUKS (both LUKS1 and LUKS2), TrueCrypt, VeraCrypt, FileVault 2 and APFS encryption, allowing the user to unlock the storage directly in the program’s interface and handle it just like any non-encrypted device.
In order to restore your files from an encrypted volume with the help of UFS Explorer Professional Recovery, take the following steps:
-
Download and install the application onto the computer. Its operating system has to match the version of the program.
Hint: If you have any difficulties with the installation of the utility, please refer to the installation manual for UFS Explorer Professional Recovery.
-
Connect your encrypted device to the machine. If possible, use the fastest available interface.
Hint: If you need to attach an internal hard drive from another computer, you can plug the disk into the motherboard of your PC or сonnect the drive externally using a USB to SATA/IDE adapter.
-
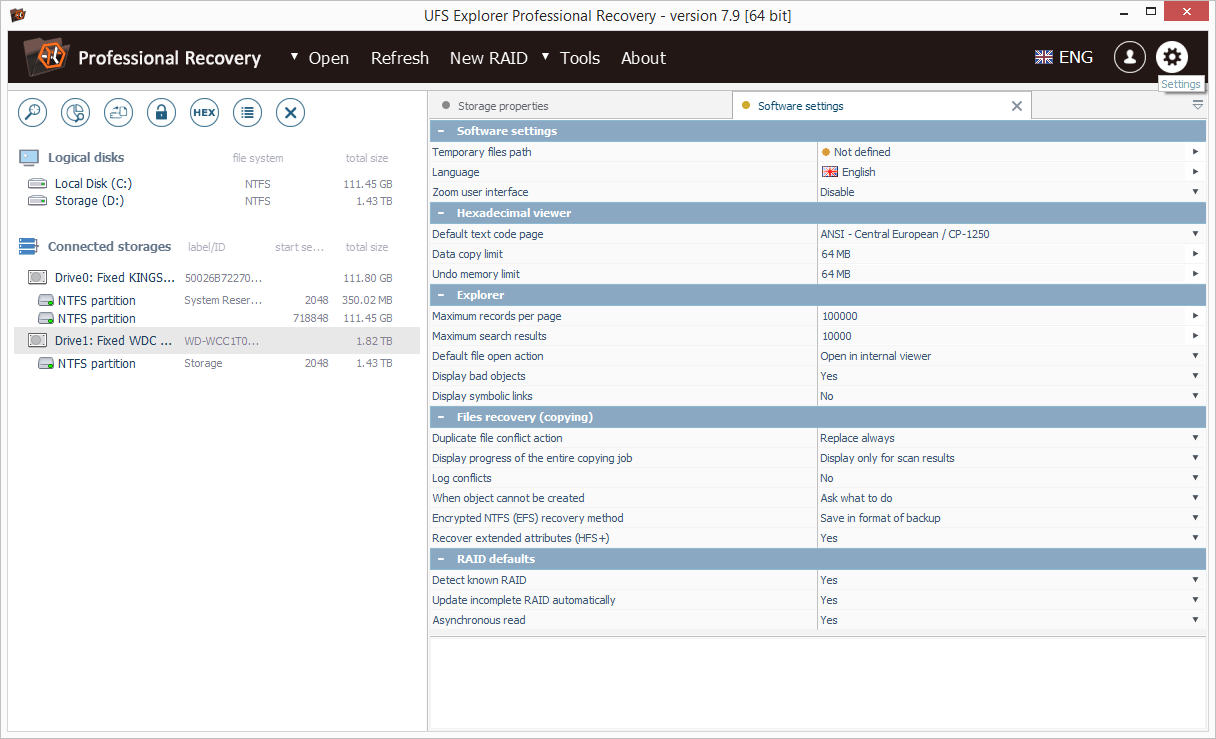
Launch the software and, if needed, change its parameters in the corresponding tab.
-
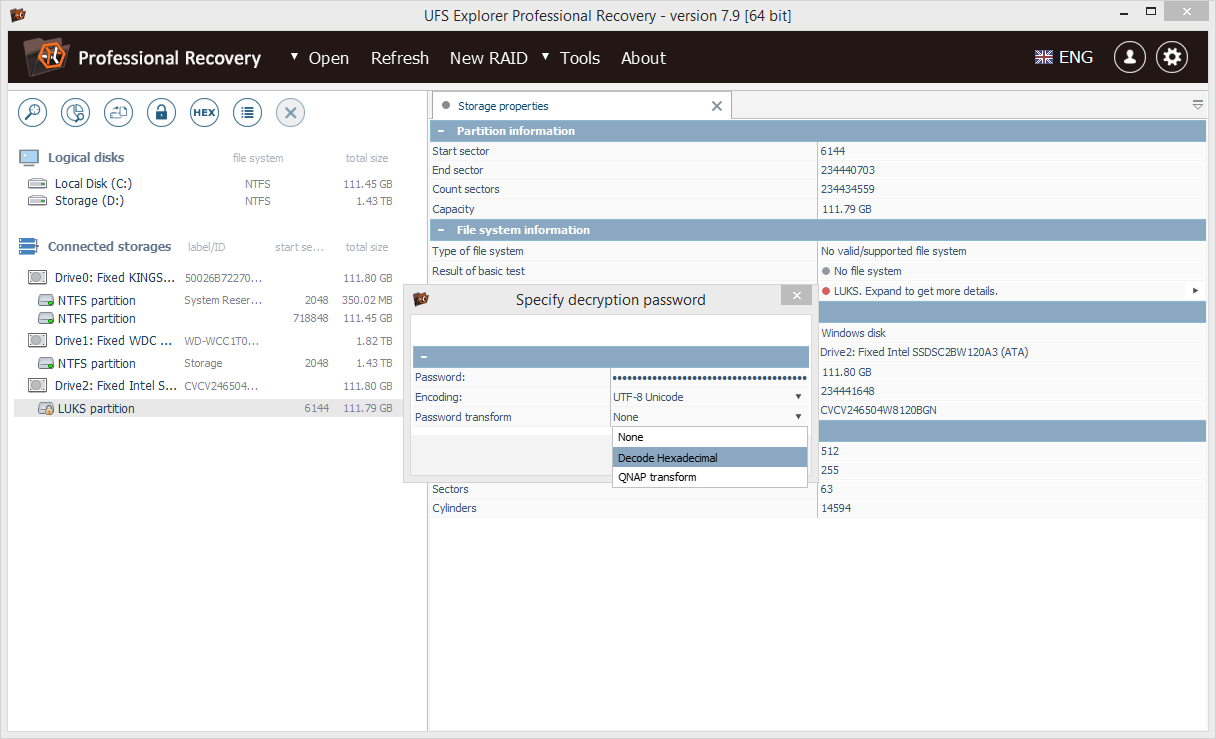
Find your encrypted drive/volume among the options under connected storages in the left pane of the main screen. It can usually be identified by the yellow padlock icon. In our case, a volume encrypted with LUKS is used as an example. Open its context menu and select the "Decrypt encrypted storage option".
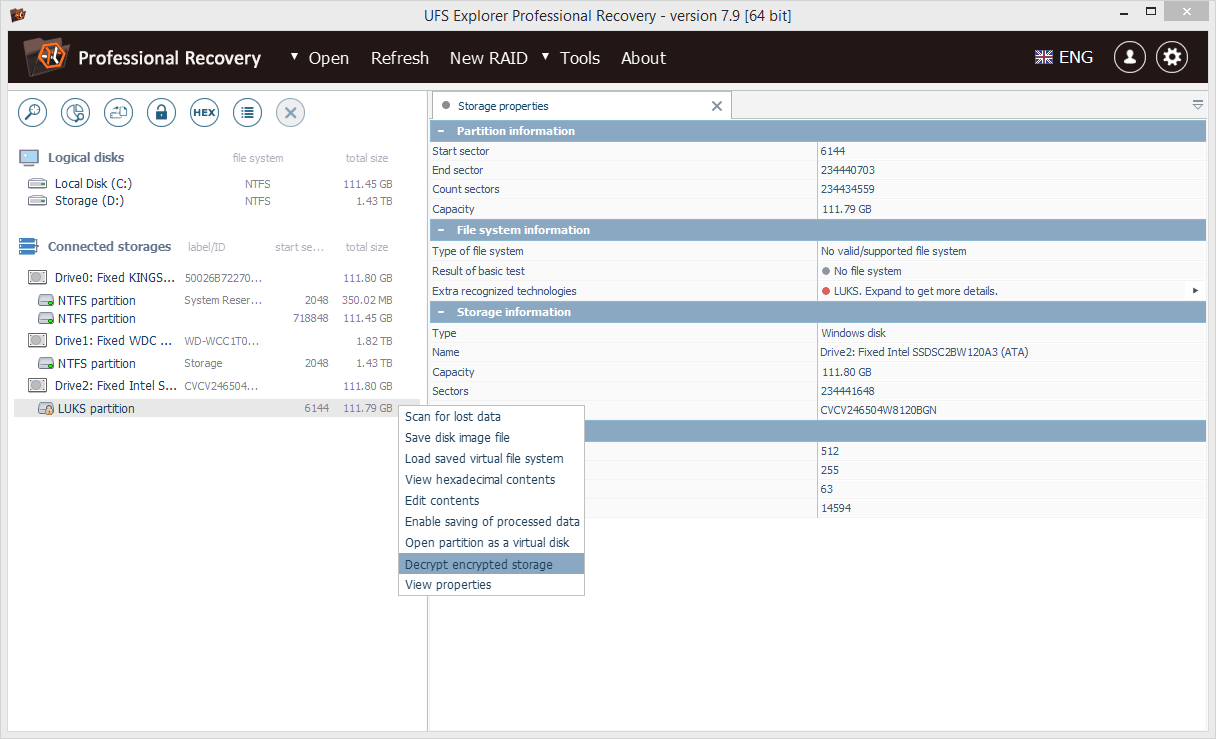
Note: If you are dealing with an HFS+ partition encrypted with FileVault 2, choose the "Open as Apple Core Storage volume" from the context menu instead.
Hint: If you want to learn more about how different drives and volumes are labeled in the interface of UFS Explorer, please refer to Identification of different storages and technologies.
-
Choose the decryption method which corresponds to the applied encryption technology and specify the correct user password or copy the recovery key from its file and paste it into the field.
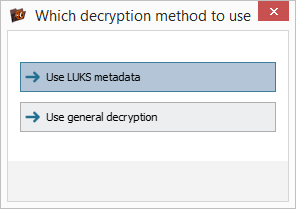
If the password for some reason contains unprintable symbols, it must be specified as hexadecimal code and "Password transform" must be enabled as "Decode Hexadecimal".
-
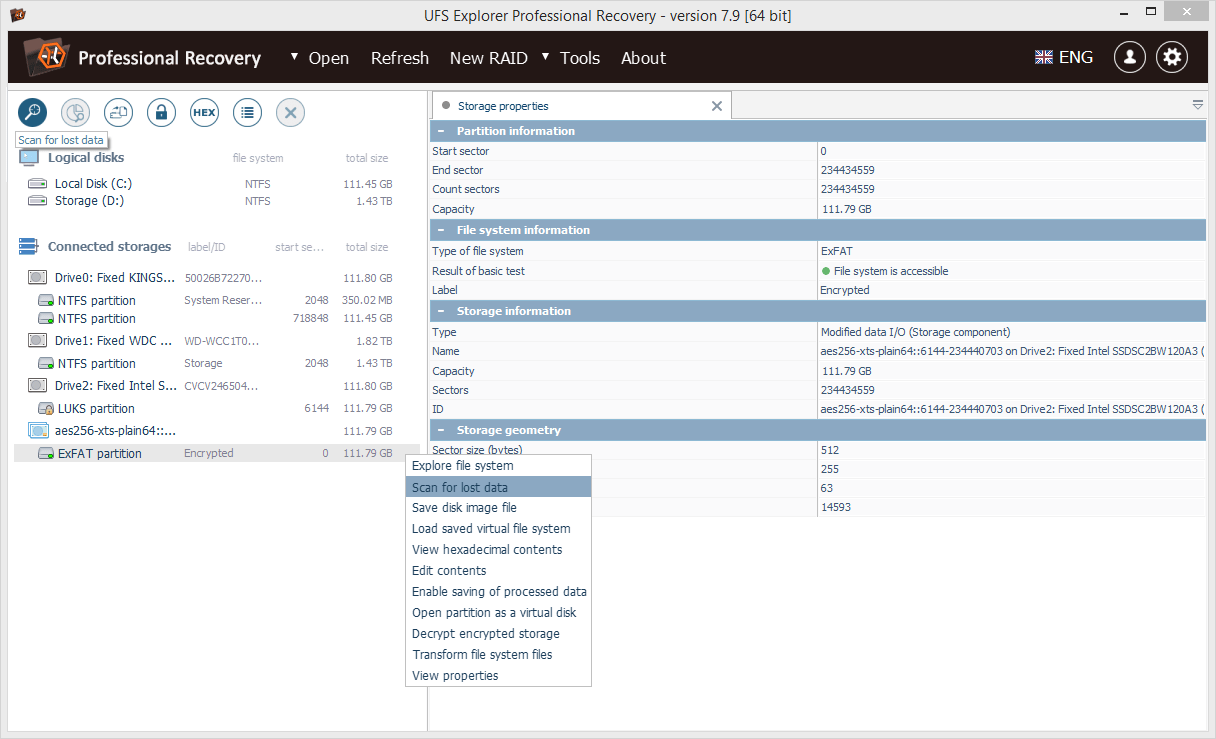
Once decrypted, the volume will be mounted by the program and shown in the Connected storages list. Select it (in our case, it is an exFAT partition) and launch its scanning for lost data with the help of the respective option from the toolbar at the top of the list of detected storages or in the storage context menu option.
Hint: To learn more about file systems and their types, please, refer to the basics of file systems.
-
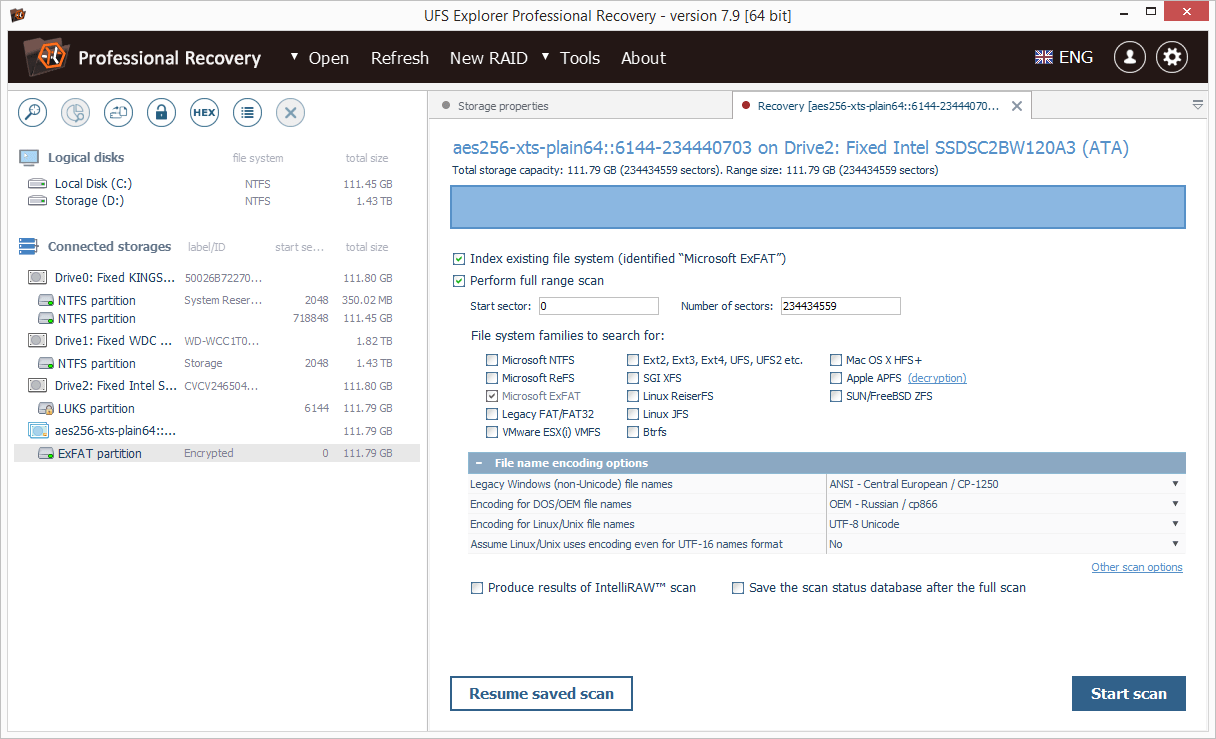
Provide the desired scan parameters. If you are sure concerning the file system type, deselect the rest of the file systems. After that, press "Start scan" and wait for the process to complete.
Hint: If you need help with setting up the scanning procedure, please, refer to the instruction on performing a storage scan.
-
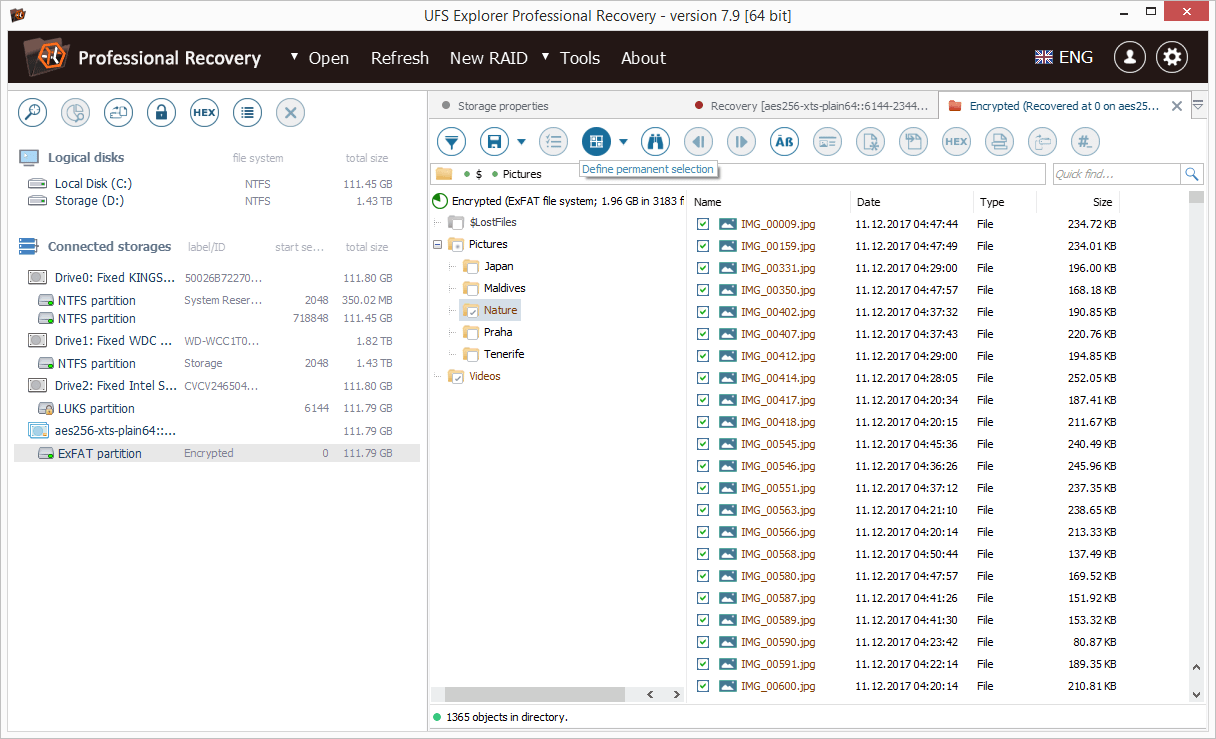
Explore the presented file system result: you may sort the files by name, date, type, utilize quick or advanced search and preview images, videos, audio files or PDF documents. After that, press "Define permanent selection" and choose the items you would like to copy by putting checkmarks right next to them.
Hint: The information provided in Evaluation and saving the results of data recovery may facilitate your work with the obtained folders and files.
-
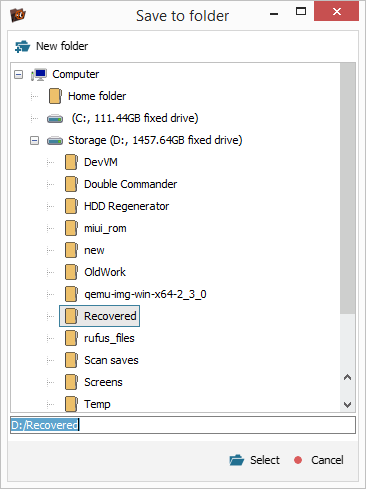
Press "Save selection" and choose a destination folder for these files in the pop-up window. Make sure you are saving them to a logical disk other than the one from which they are being recovered. Otherwise, the current data on the drive will be overwritten, with no chances to get it back.
Hint: The overall process of recovery of files lost or deleted from storages protected with specific technologies is also demonstrated in the articles dedicated to data recovery from LUKS, BitLocker and APFS-encrypted volumes.
Last update: June 05, 2024