Browsing the available video content
Browsing the data
UFS Explorer Video Recovery makes it simple to examine the content of a data carrier that contains video materials, whether it employs a typical general-purpose file system or some vendor-specific format.
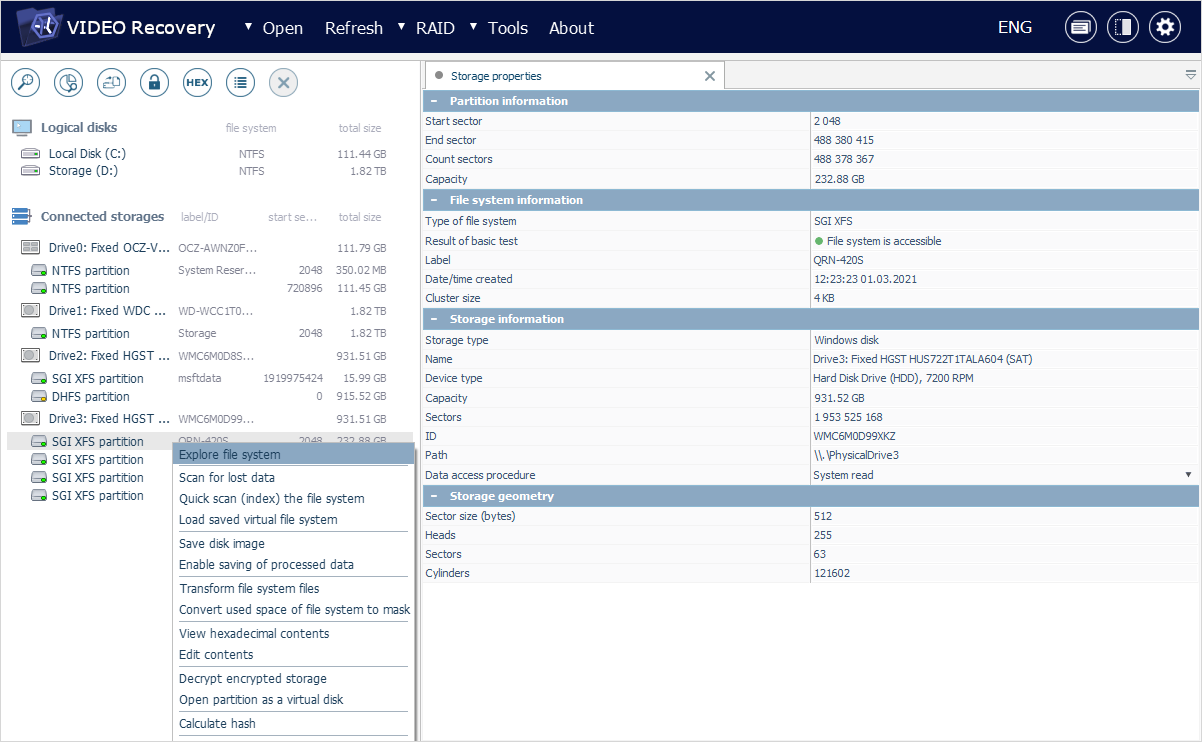
In order to start inspecting the video data, select the required partition in the storages navigation pane and launch the Explorer (file browser) element: for this, you can use a double click, the Enter key or the "Explore file system" option in the partition’s context menu.
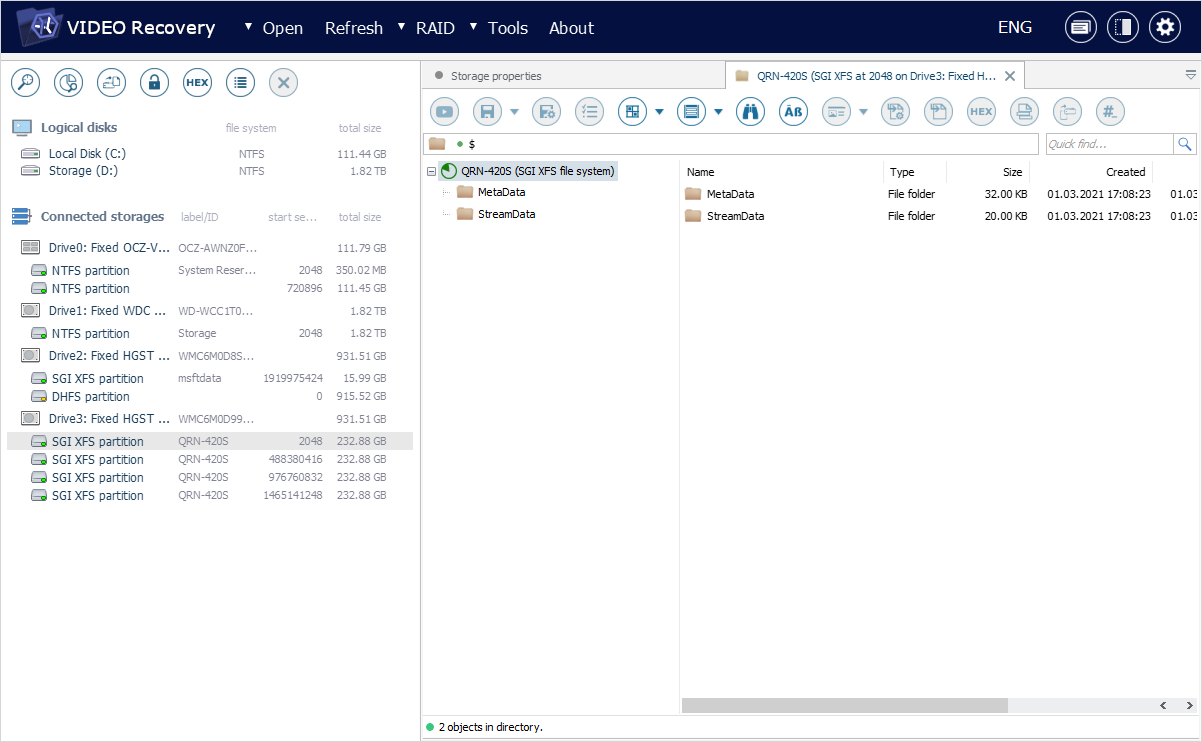
In the opened tab, you will see the main content area of Explorer and its folders navigation pane positioned closer to the left side. The main toolbar of Explorer will be situated at the top.
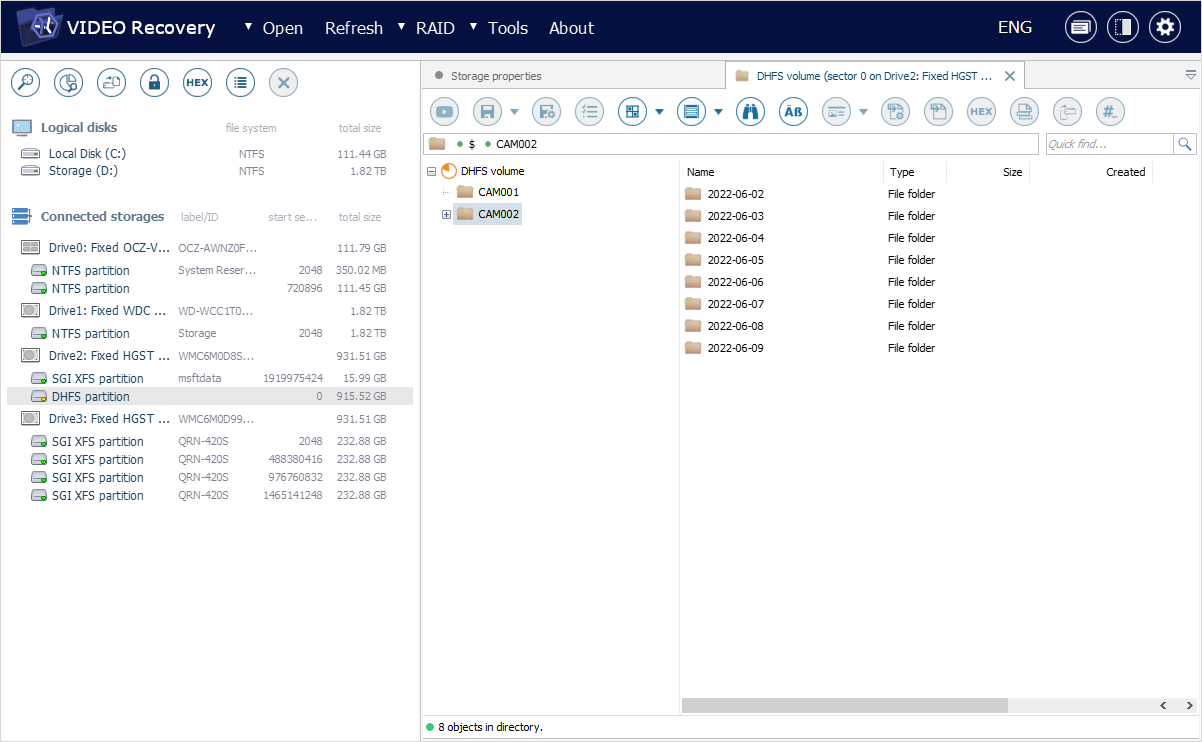
The directory structure of the opened partition is displayed in the folders navigation pane that is organized as a tree. The top of the tree corresponds to the available file system. A green icon next to the file system’s name is used to indicate readable file systems, while a red icon – damaged ones. Proprietary file systems of some video recorders may also be marked with a yellow icon, for instance, like WFS, DHFS, HIK, Mirage, Pinetron or BKFL.
The folders that belong to a particular file system are shown as its child nodes. You can browse them with the help of your mouse or the arrow keys from the keyboard. Each child node can also be opened using the "Plus" button next to it.
The folder structure of general-purpose file systems appears in its initial form, as it was created by the video recorder.
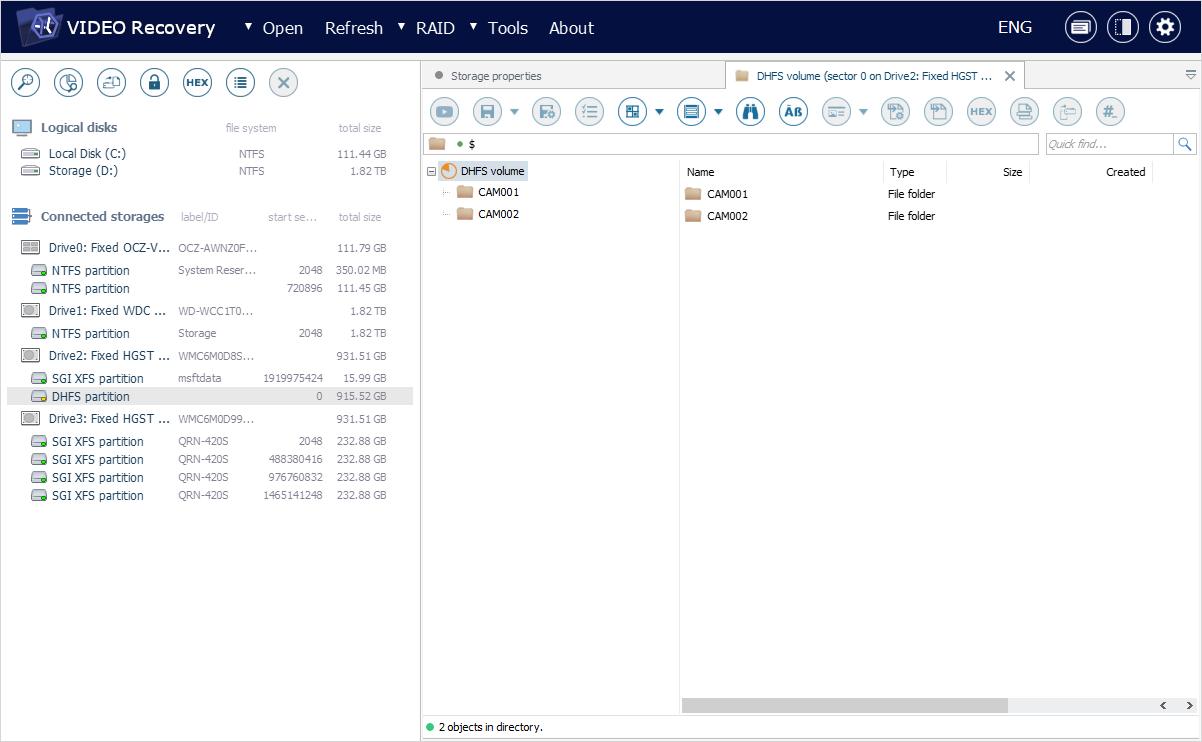
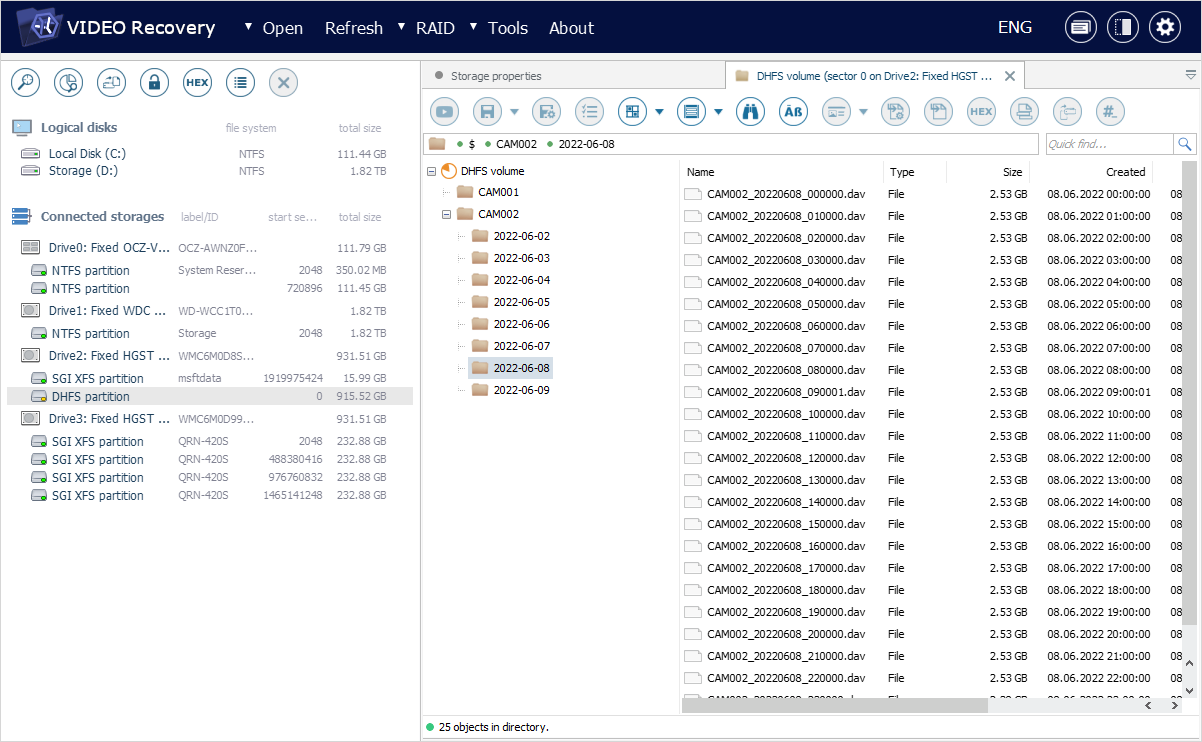
Proprietary file systems are automatically transformed by the program and presented in a convenient form of catalogs, regardless of what directory structure is provided by the recorder itself. Such virtually created containers serve for easy navigation through different cameras and dates of recording: in case of multiple cameras, choose the necessary one by the number used in the name of the "parent" folder and then go to the required date by selecting the respective "child" folder.
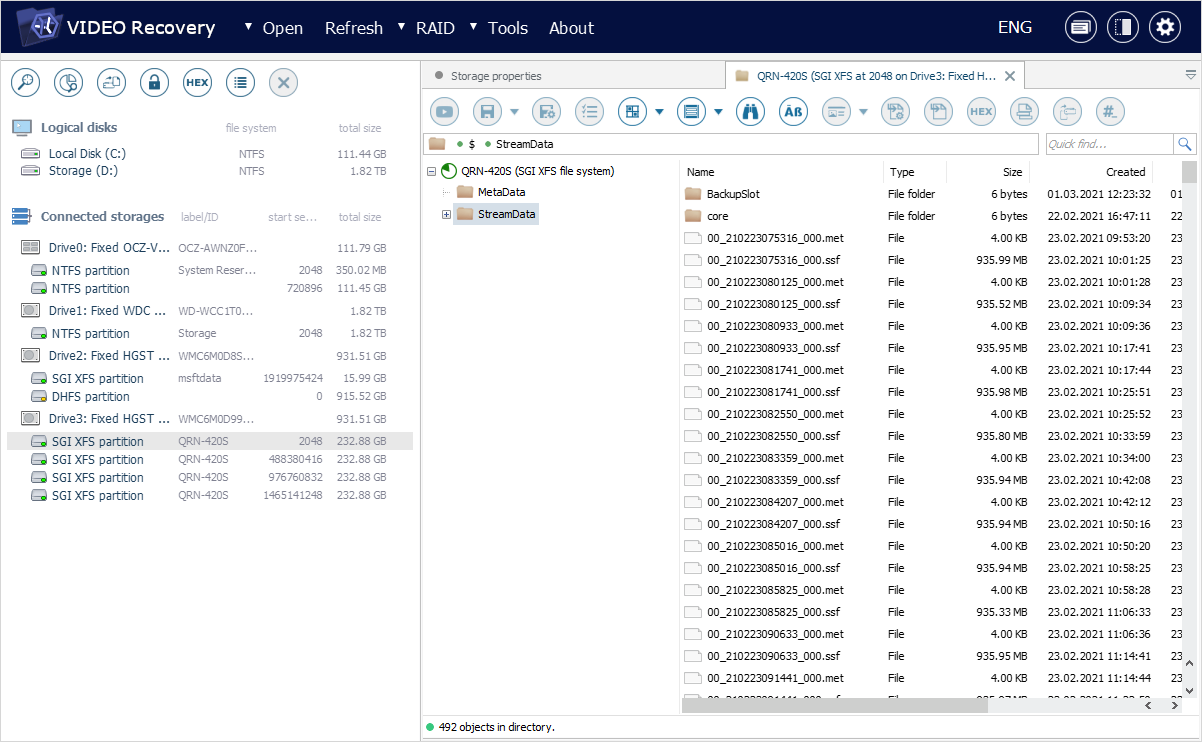
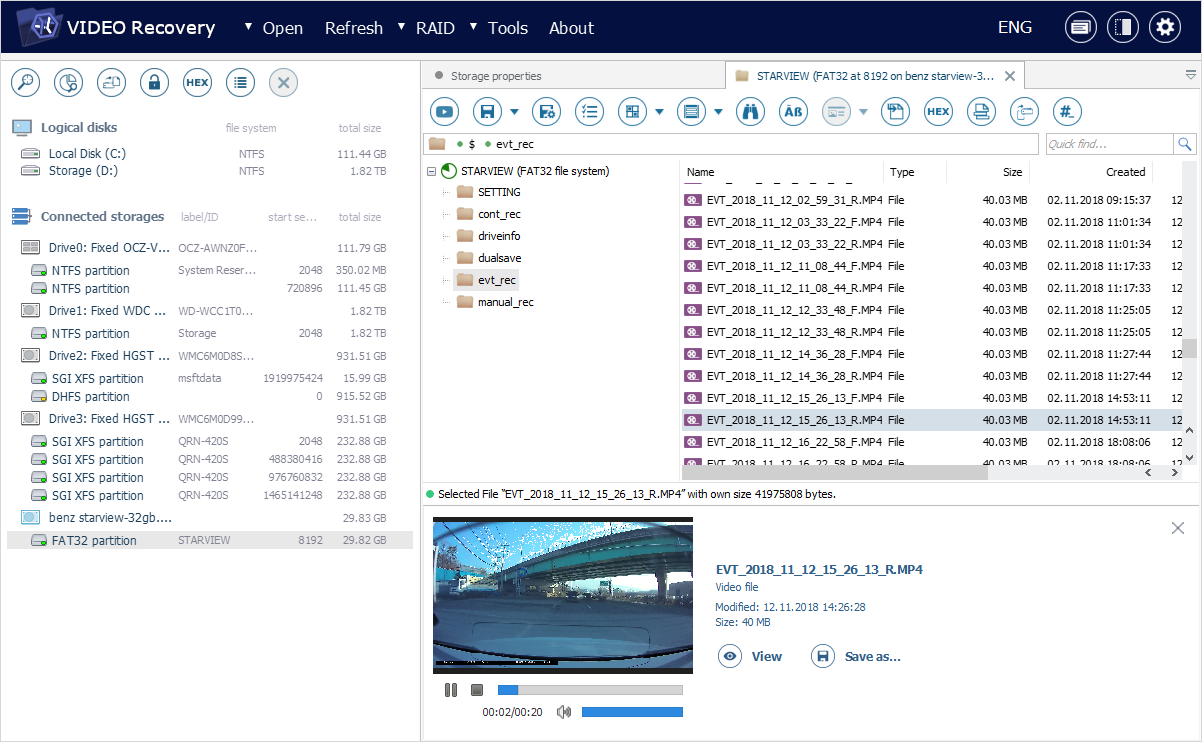
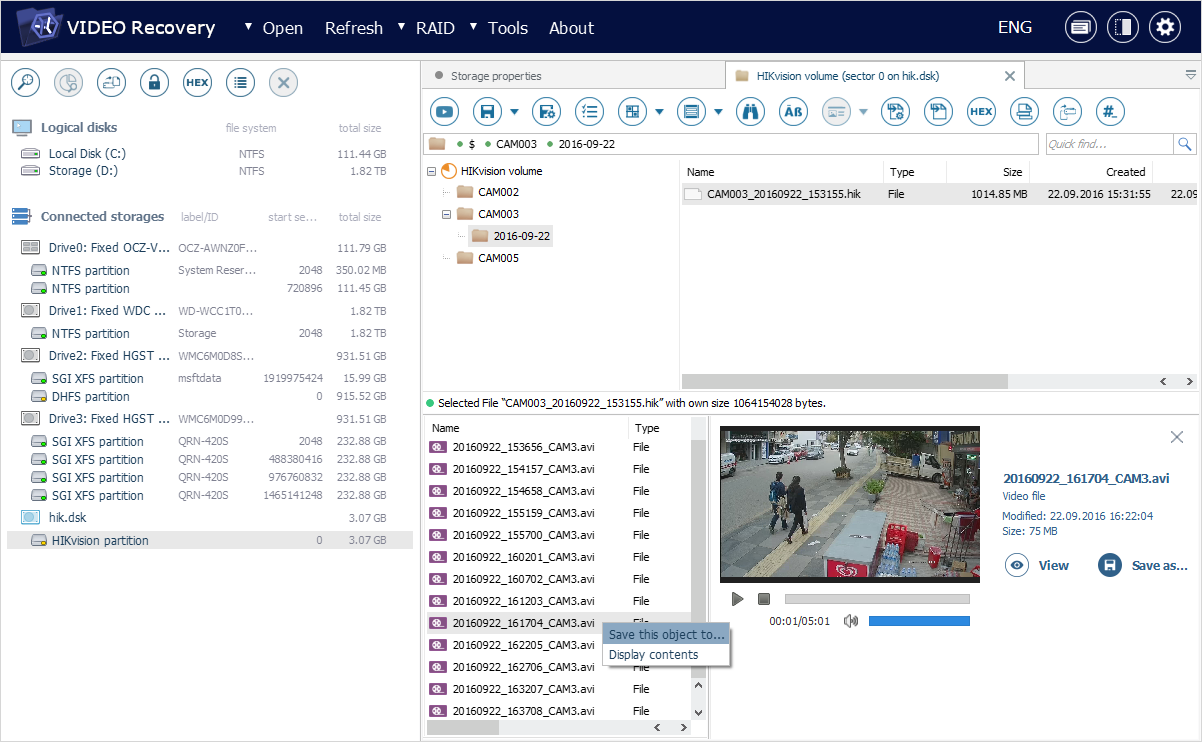
The video data available within the selected folder will be displayed in the main content area the way it appears in the file system, with files having their original extensions, names, last modification dates and sizes.
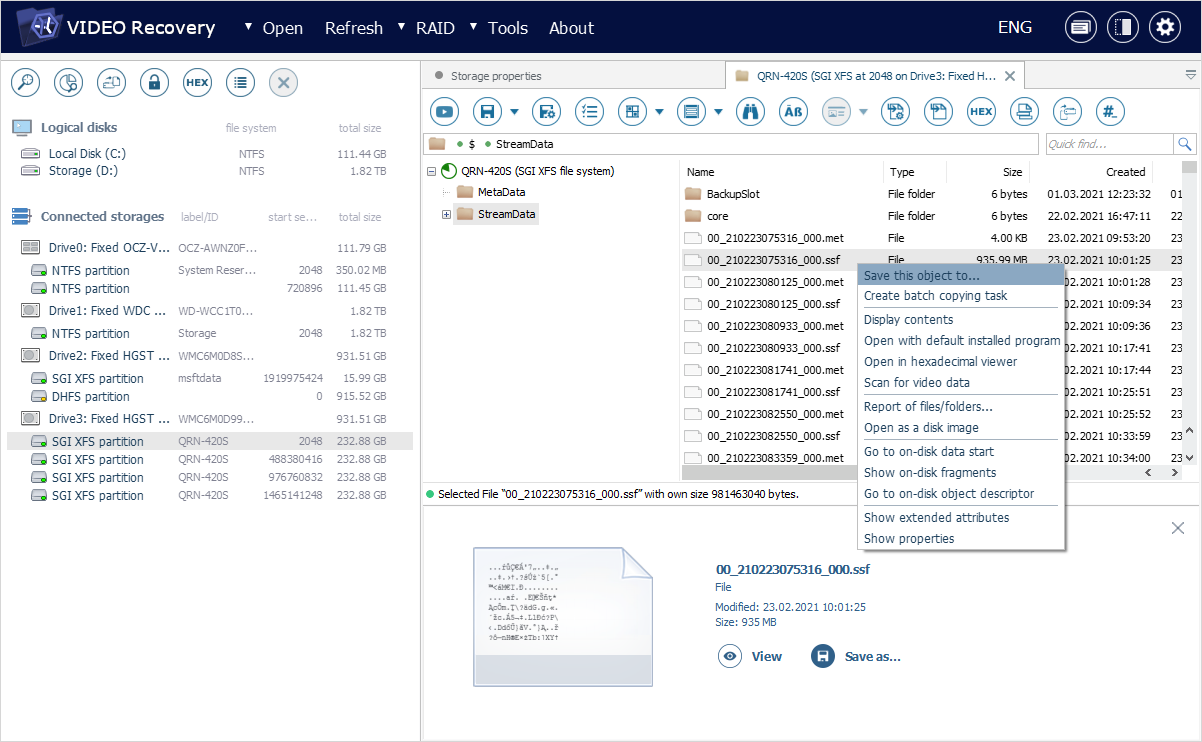
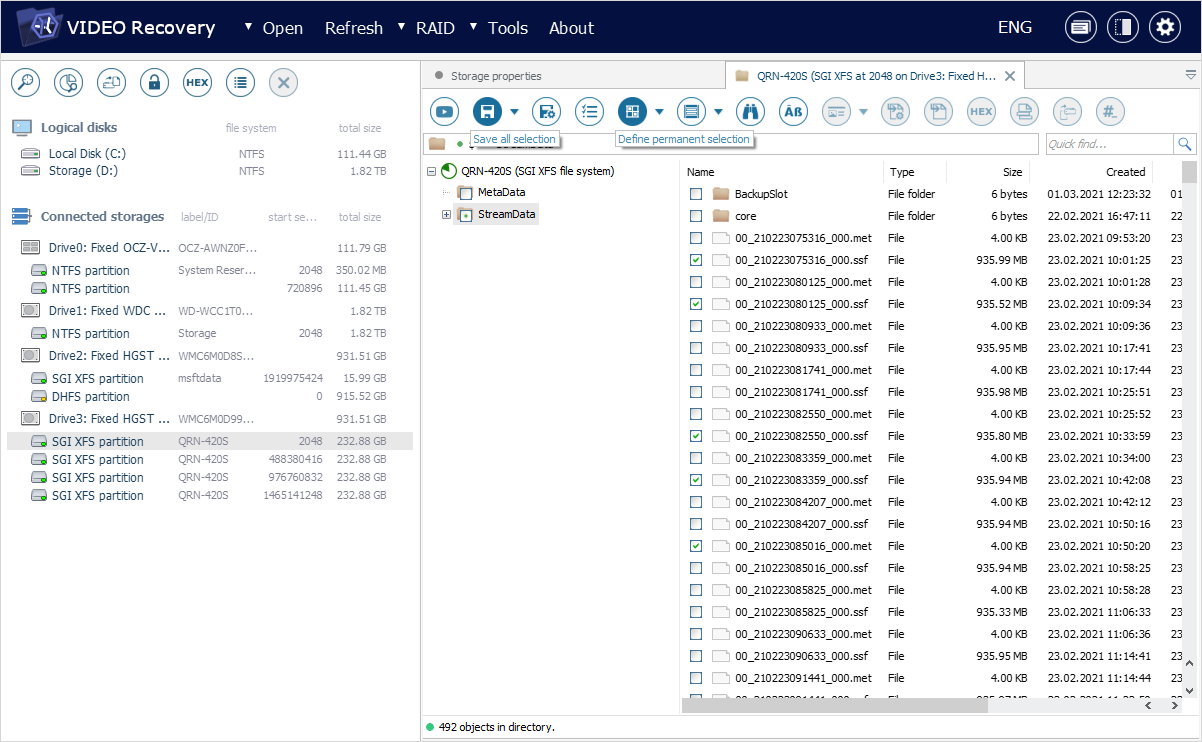
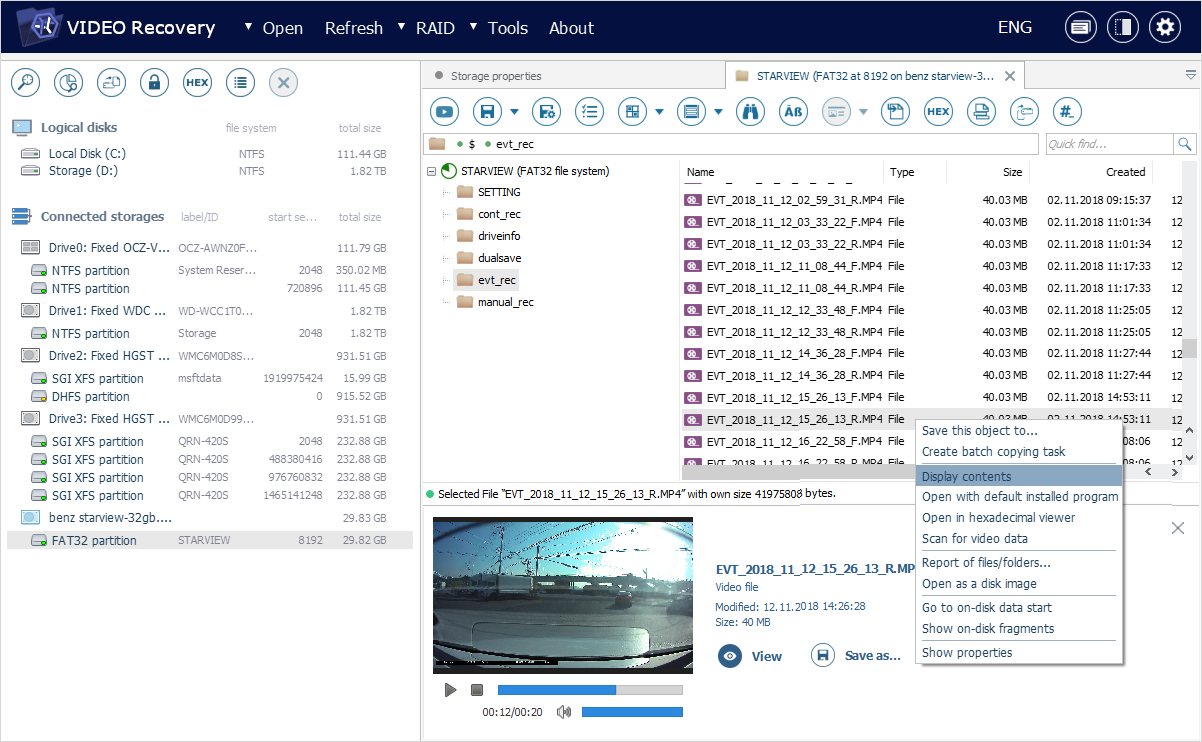
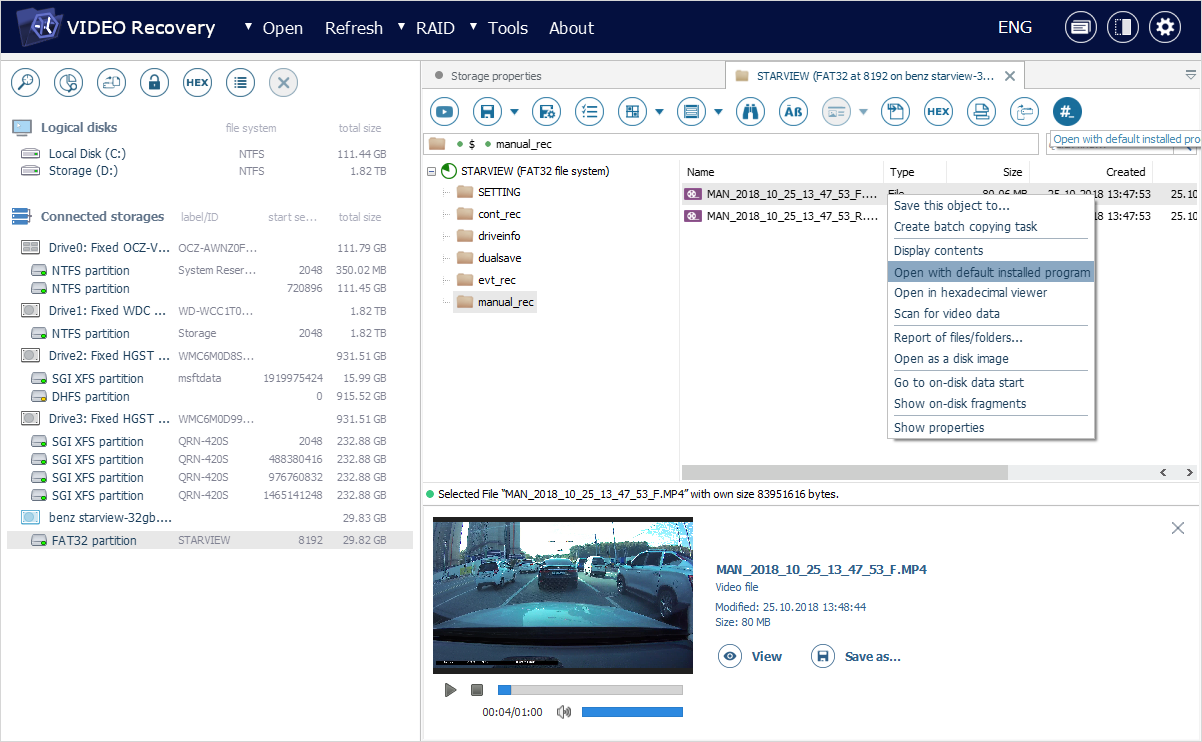
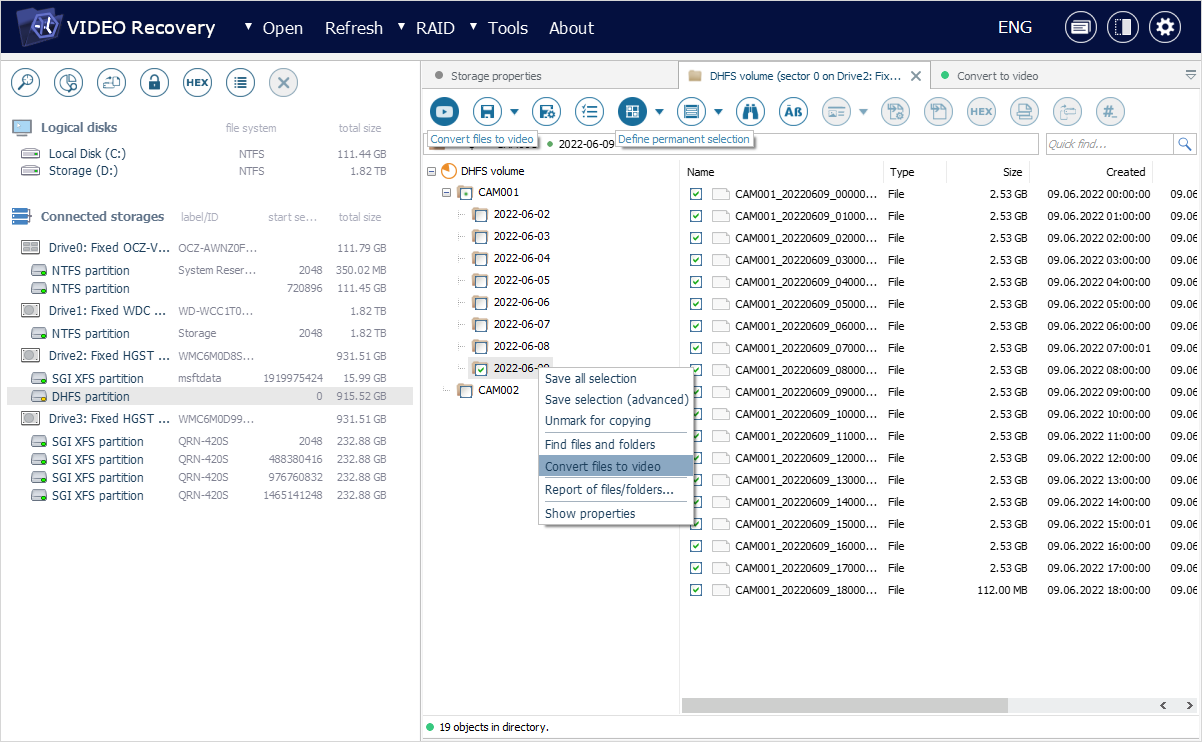
You may save the selected object in its original format using the "Save this object to…" option from its context menu or the "Save as…" button next to its thumbnail preview. Multiple objects can be saved using the combination of the "Define permanent selection" and "Save all selection" tools from the main toolbar.
Preview of videos
Certain recorders use common media files which enables their on-the-spot preview in the software (such as *.avi, *.mp4). In this case, when a file is selected in the main content area, the video will be played automatically as a thumbnail view in a dedicated pane at the bottom. In order to see the full preview, you can simply press the "View" button next to the thumbnail, double-click the video file in the main content area, use the "Enter" key or the "Display contents" option in its context menu.
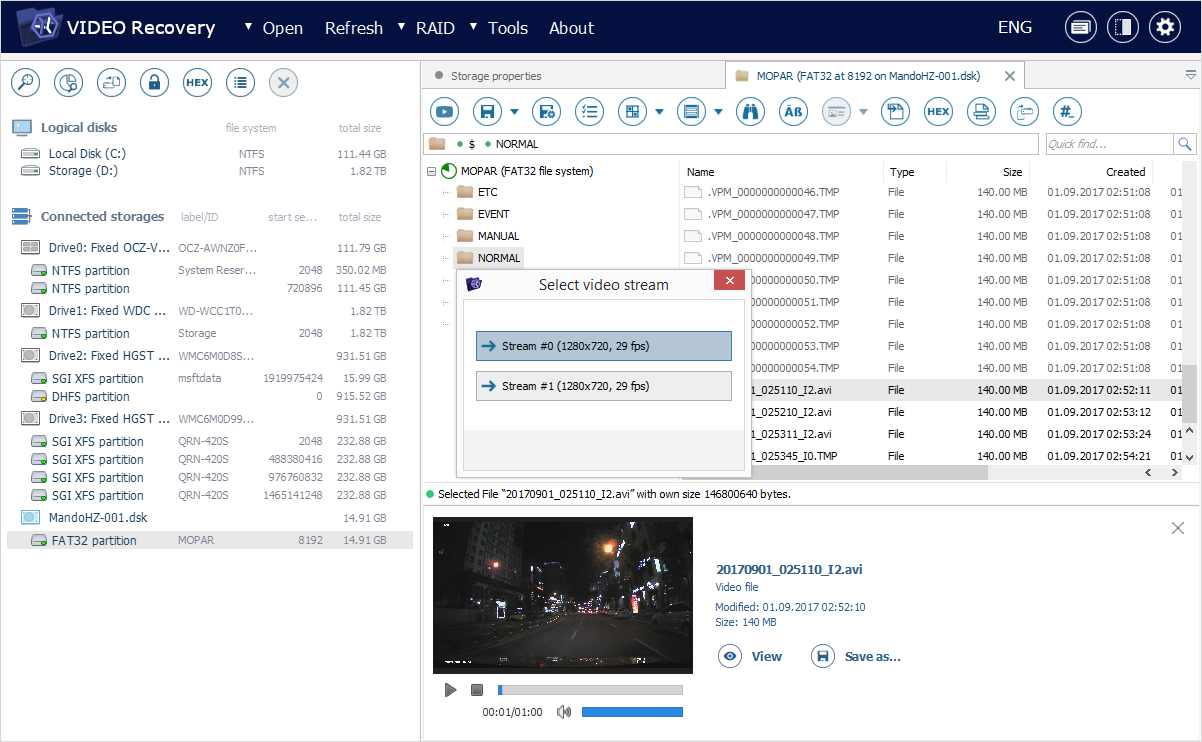
If the file contains multiple video streams, you will be prompted to select the one you need.
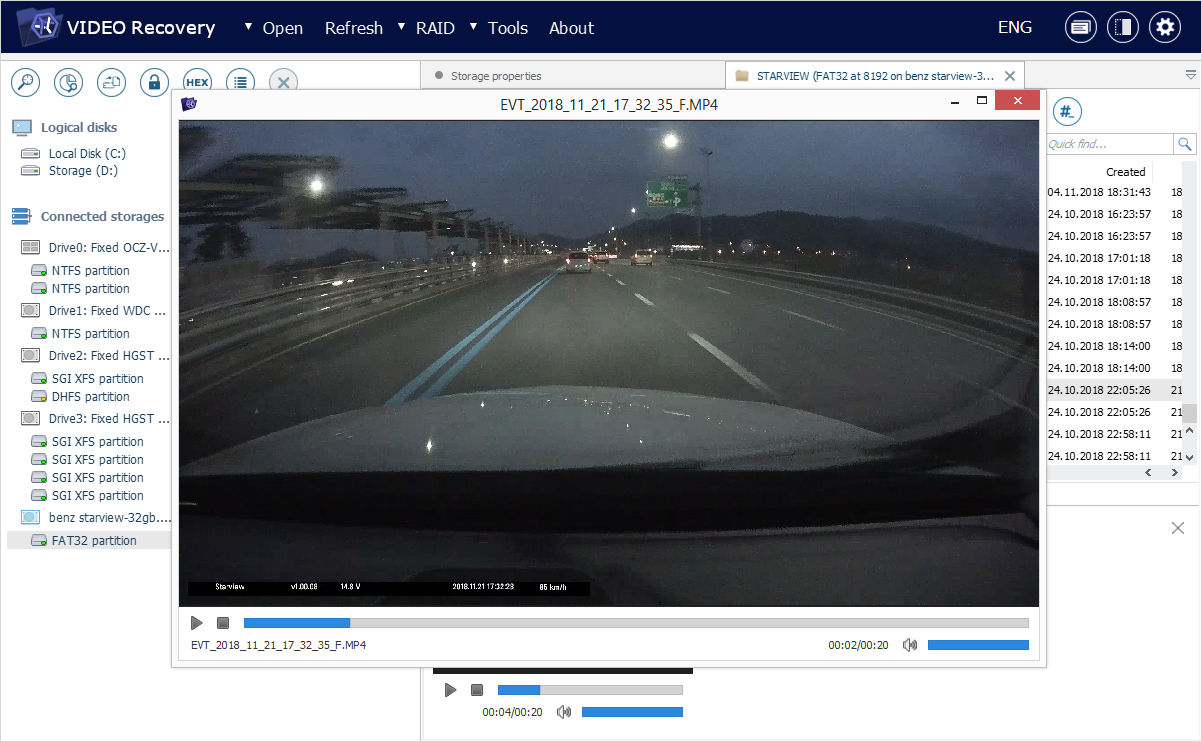
The video will be opened in the internal player of UFS Explorer. You can control its playback using the "play", "pause" and "stop" buttons in the lower left corner of the window. It is also possible to adjust the volume of the video using the slider positioned to the right.
Another alternative way to open a file is to use a video player that is set as default in your operating system. For this, select the video file in the main content area and get the "Open with default installed program" tool from the main toolbar or the same option in the file’s context menu. The file will be copied to the folder specified as the "Temporary files path" in the settings of UFS Explorer Video Recovery, and the software will automatically launch the necessary associated application.
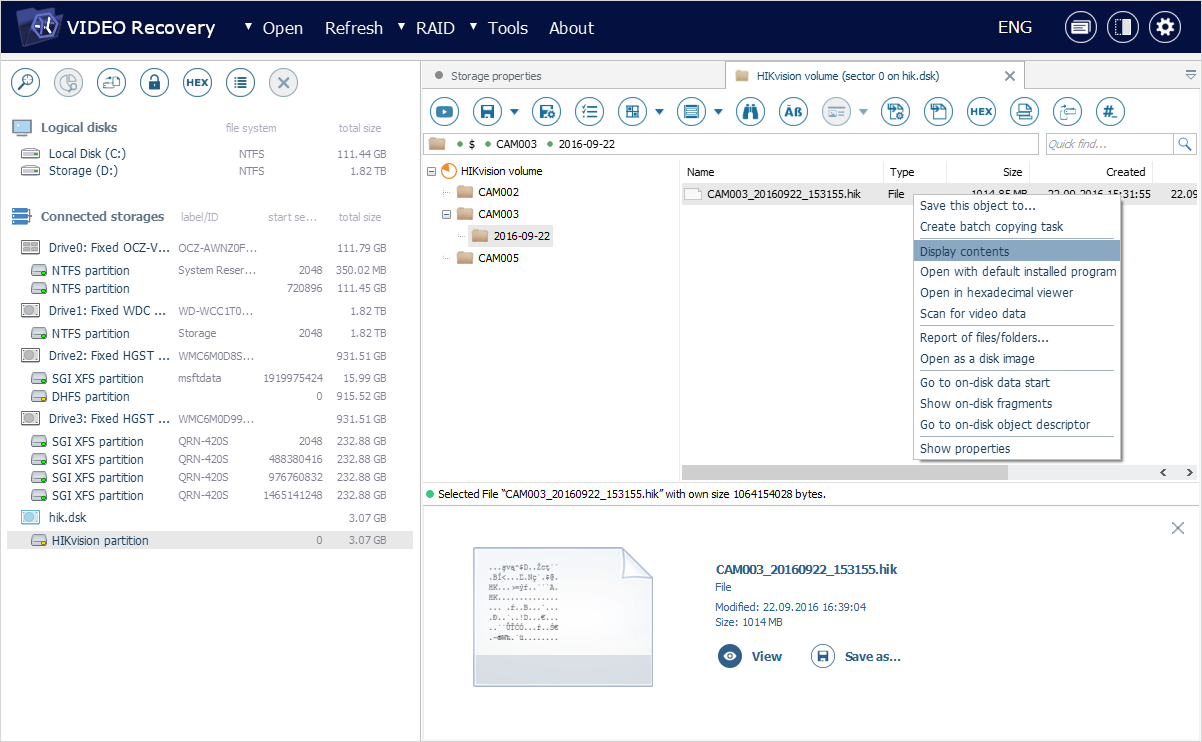
Yet, more frequently, surveillance systems employ their own specific file formats or even write data as raw stream, without using any container files. The thumbnail view of such videos in not visible right away in the software. In this situation, an additional conversion step is required, that will give the possibility to watch the footage, irrespective of the data writing standard used by the recorder.
To enable the preview, select the required video in the main content area using a double click, the "Enter" key, the "Display contents" option in the file’s context menu or the "View" button next to its thumbnail.
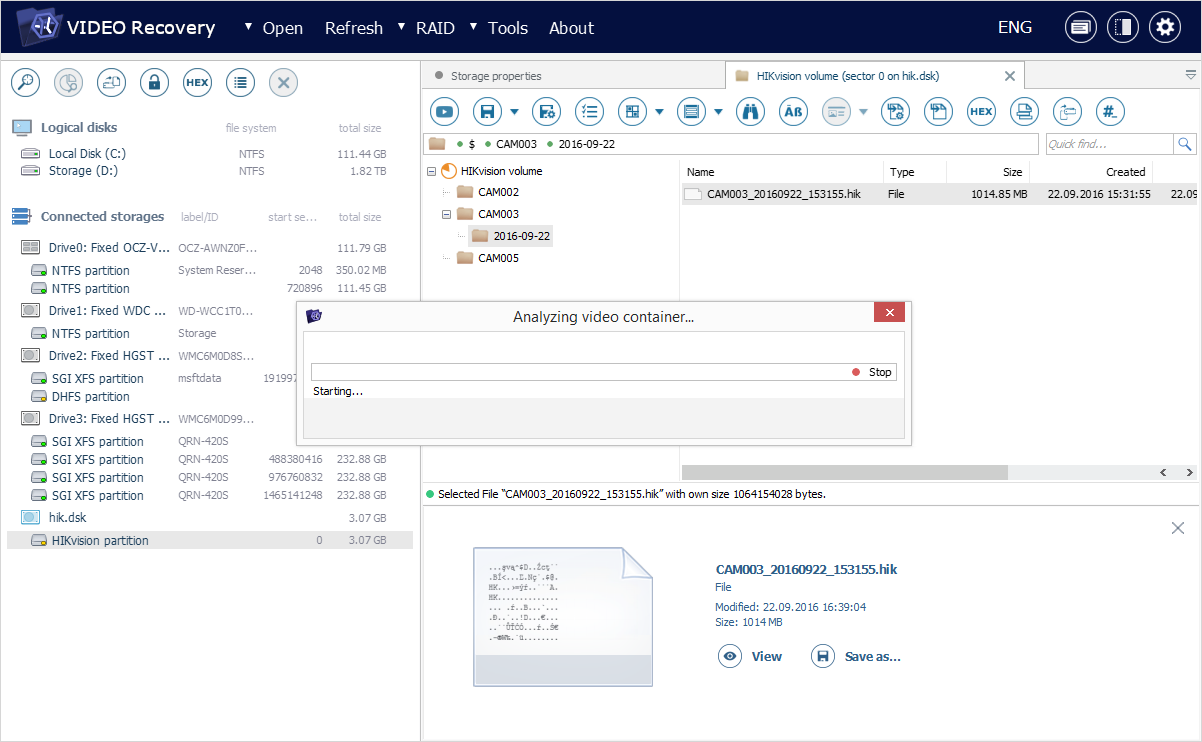
The program will thoroughly analyze the video stream and place its fragments in universal *.avi container files, without changing the initial content and order of frames. Upon completion, the results will be provided in a separate pane at the bottom of the Explorer tab and can be previewed like common media files.
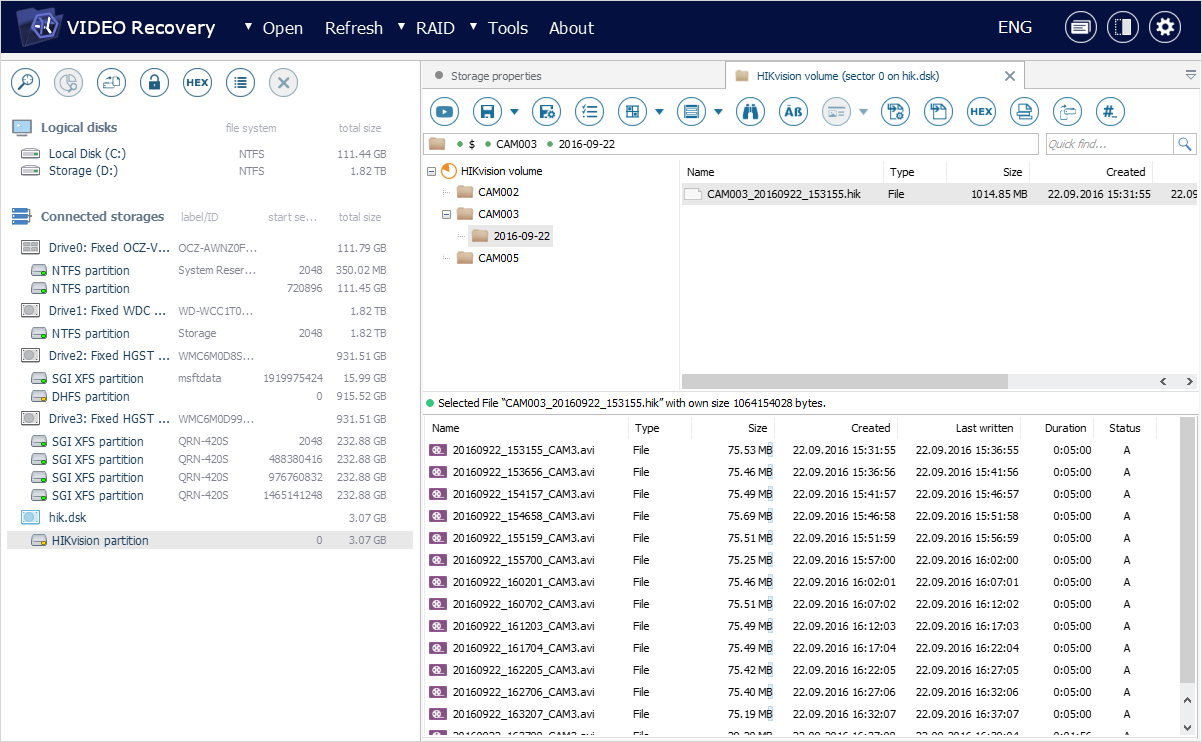
You may save any converted fragment for further use with the help of the "Save this object to…" option from its context menu or the "Save as…" button next to the thumbnail preview.
The software also allows performing virtual conversion of multiple videos for their subsequent saving in the uniform *.avi format. For this, activate the "Define permanent selection" tool from the main toolbar of Explorer and select the required items in the main content area. Alternatively, click on the videos one by one while holding the "Shift" or "Ctrl" key. Following this, apply the "Convert files to video" tool from the main toolbar or use the "Convert files to video" context menu option.
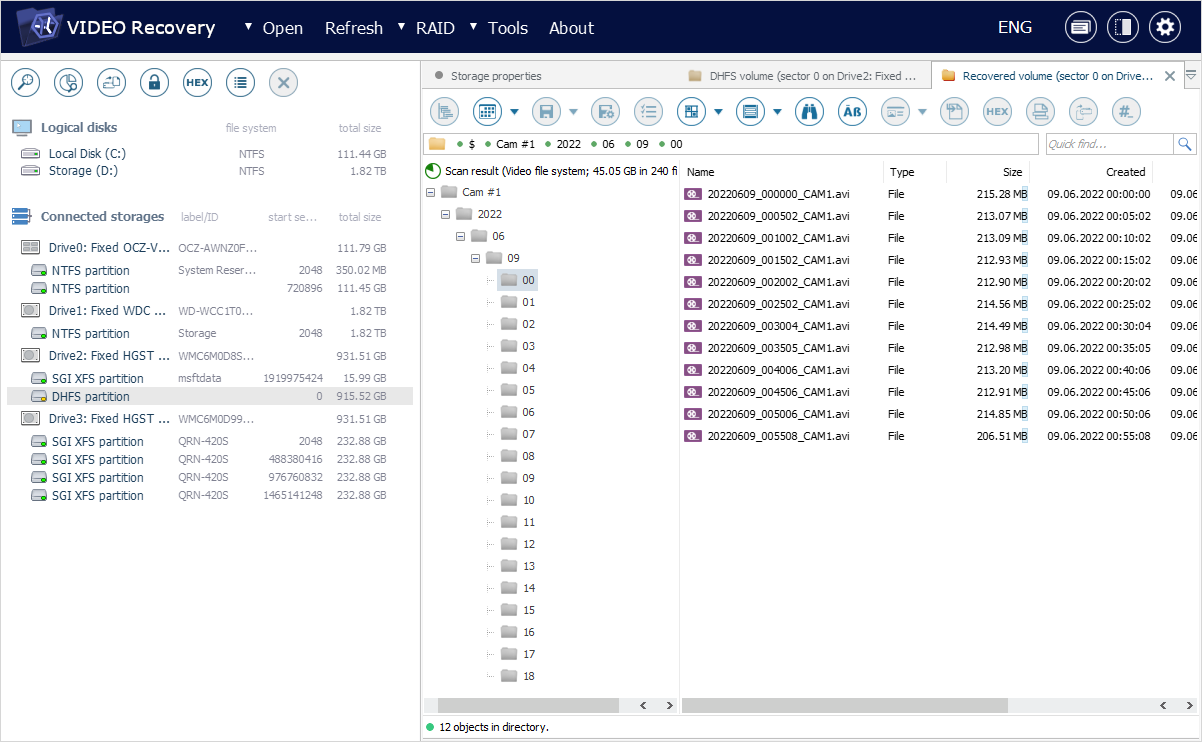
The converted content will be presented in a new tab of Explorer. The video files will be allocated to folders according to the camera, year, month and date of the original video creation.
Likewise, you may save these items using the combination of the "Define permanent selection" and "Save all selection" tools from the main toolbar.
