Work with the scan results
After the scanning procedure is accomplished, the program will provide one or several scan result items, depending on the number of file systems that have been discovered and the types of scan performed.
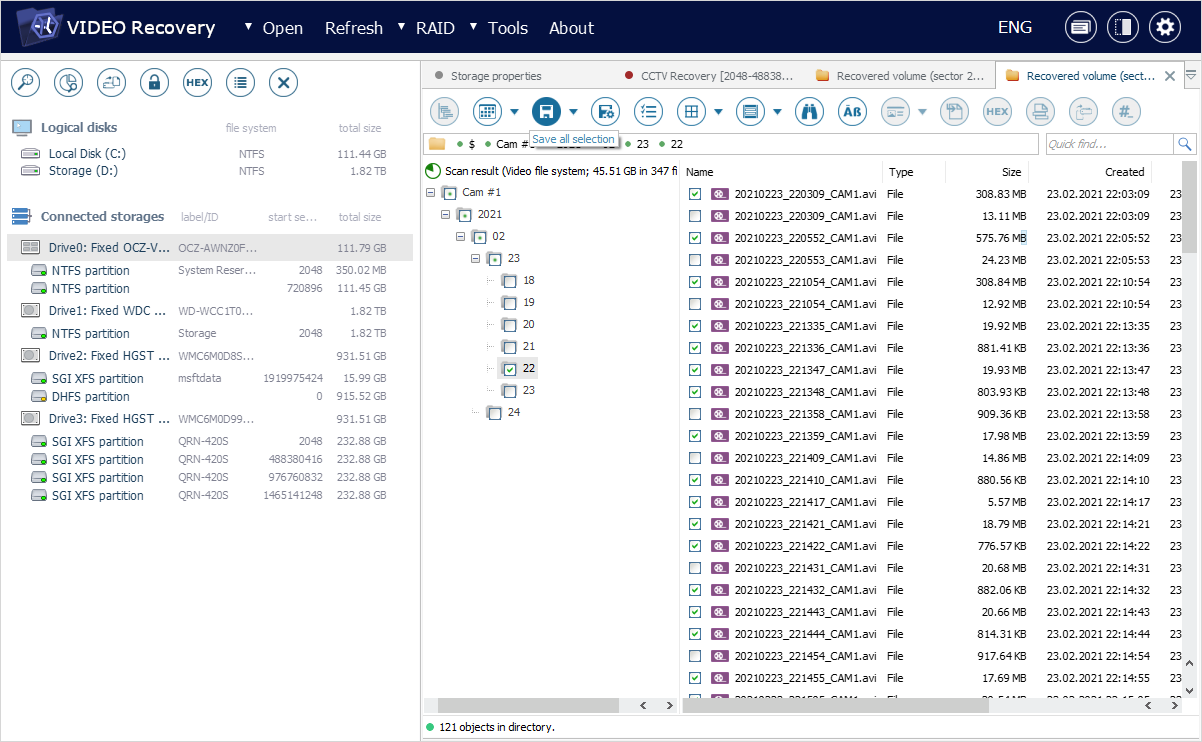
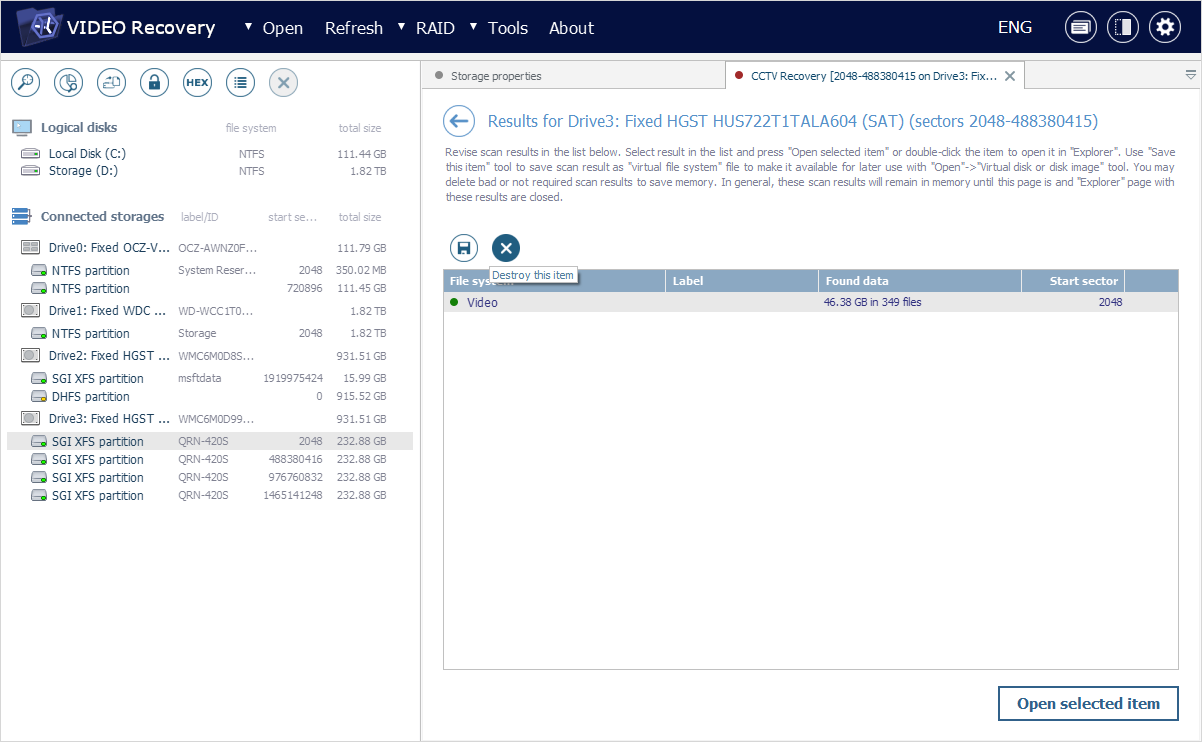
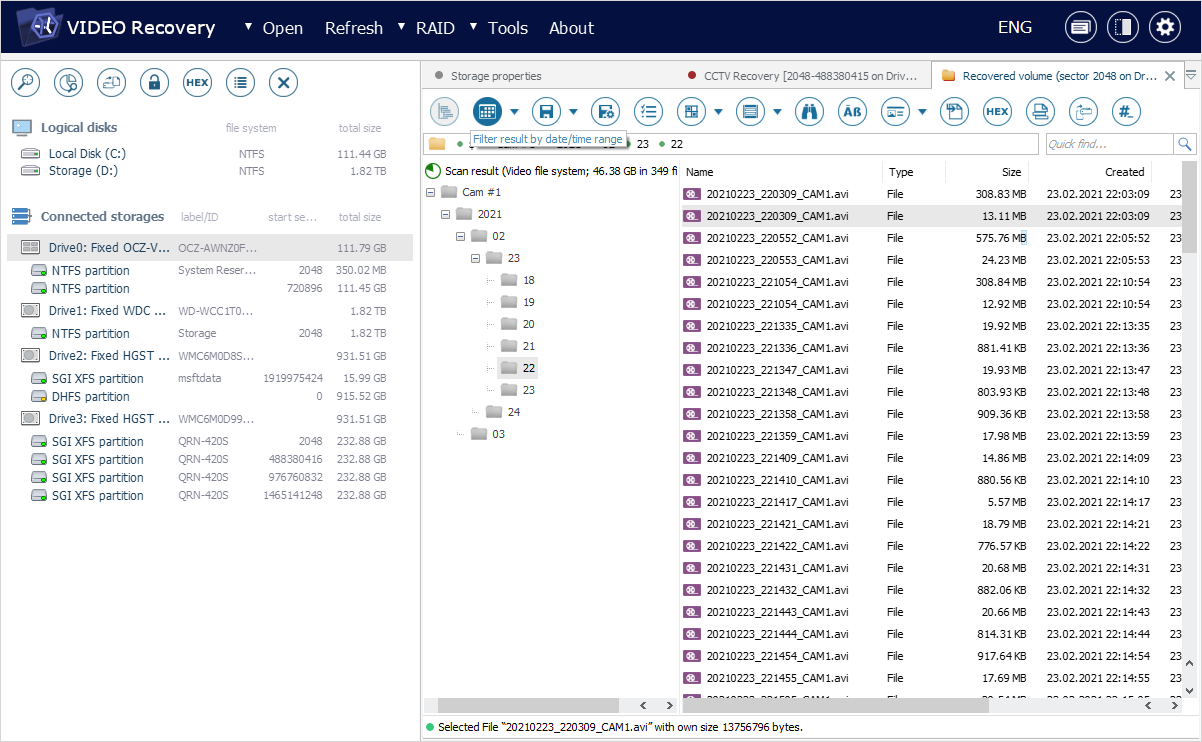
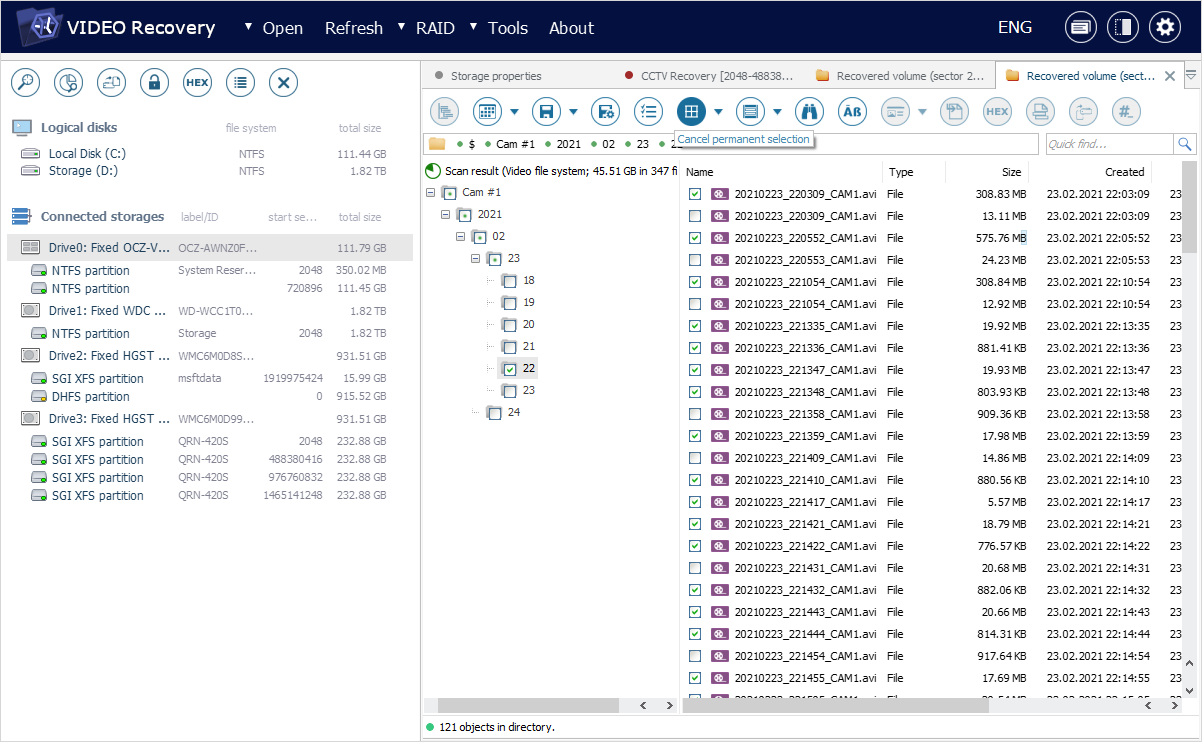
The results of a scan for CCTV and/or RIFF/QTFF recordings will be presented with a special "Video" label.
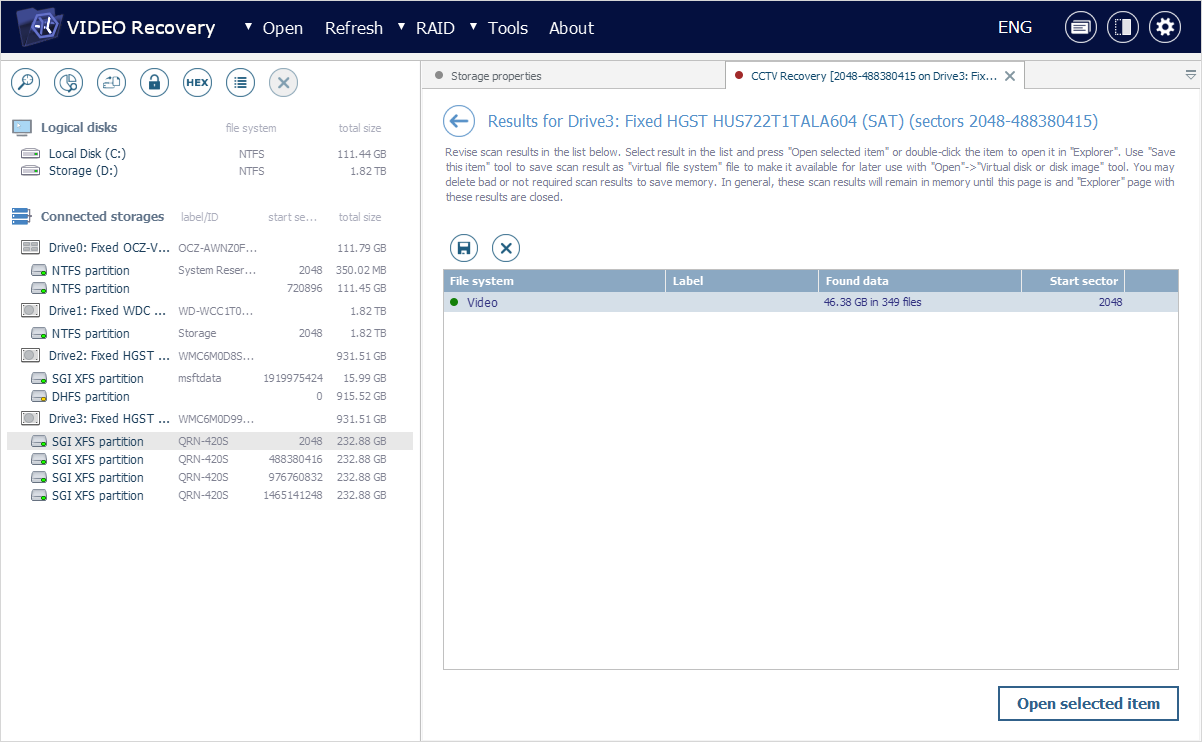
The items that contain a readable file system can be identified by a green icon, whereas damaged ones – by a red icon. The result of raw recovery will be listed separately and marked with a gray icon. The software also informs about the amount of data available in each of the items, the number of files and the offset at which they are located.
To open the required item in a new tab of Explorer, click on it twice or select it in the list and press the "Open selected item" button in the lower right corner.
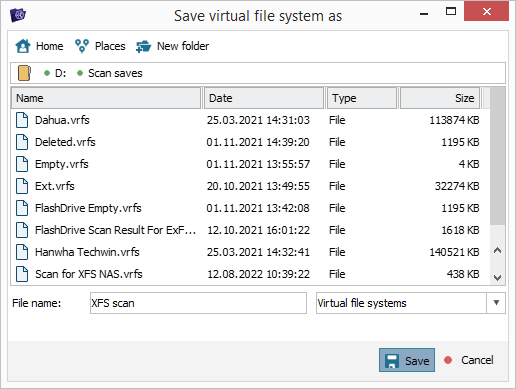
You can also save any of the necessary items as a *.vrfs file using the "Save this item" button. Such a file can be loaded into the software after its restart with the help of the "Disk image file or virtual disk" subitem of the "Open" item of the main menu. Otherwise, the item will be destroyed after you close this tab (unless its content remains opened in Explorer) or exit the program.

To get rid of the irrelevant scan results right away, you may use the "Destroy this item" button.
After you open the chosen scan result item in Explorer, the new tab you will see is slightly different from the one opened for browsing the existing content.
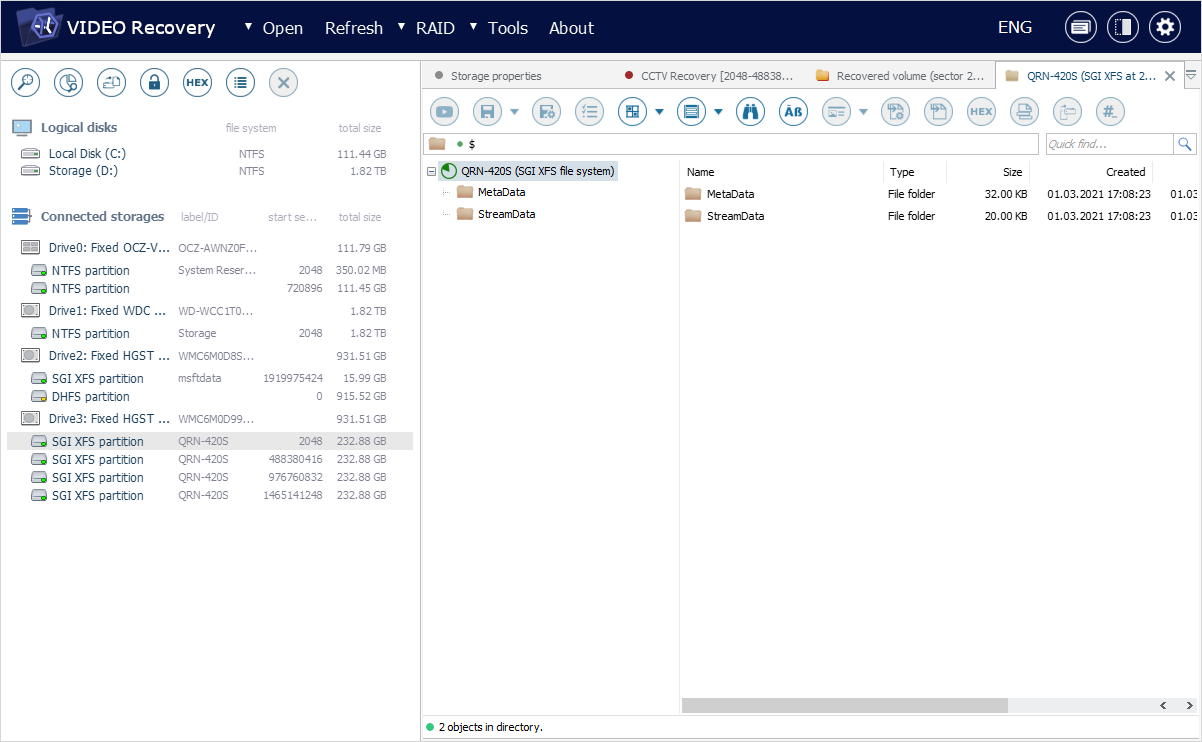
The folders and files restored after deletion will be displayed with red names, while hidden system folders – with gray names.
If you’ve performed a general search for lost data, the software will attempt to reproduce the initial structure of the analyzed file system, placing the files into folders they belong to. The files that didn’t preserve their directories are put into folders that have gray icons.
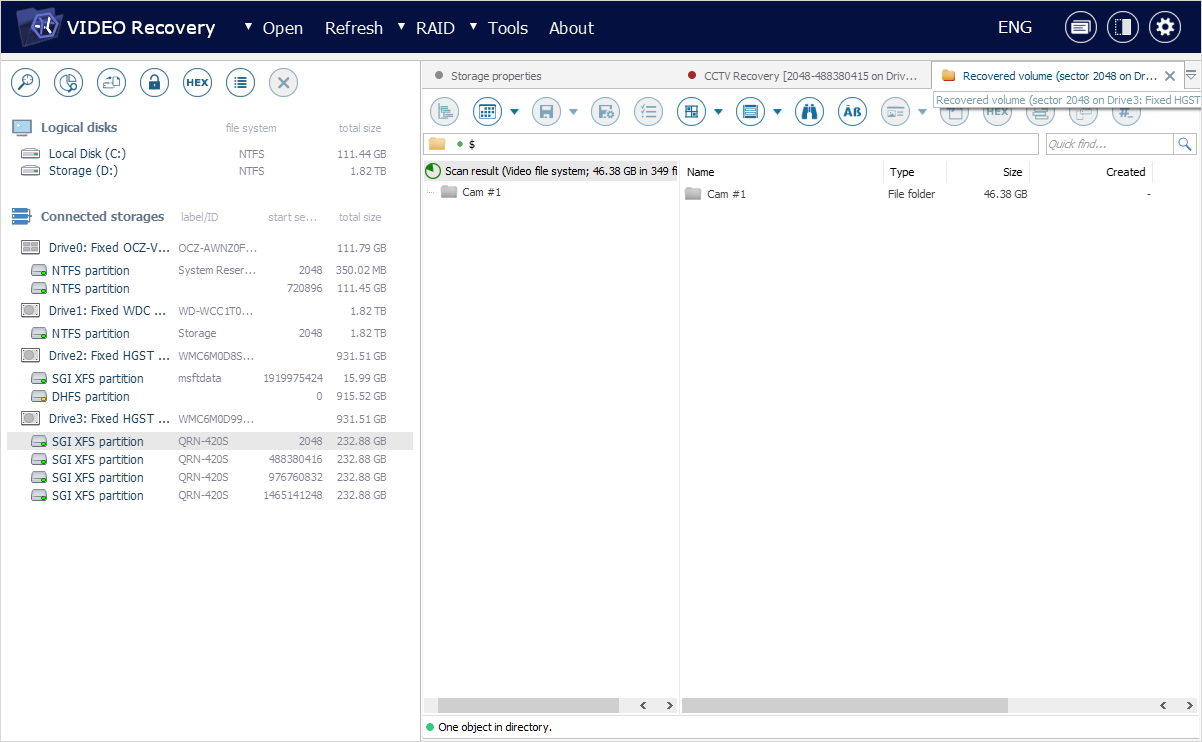
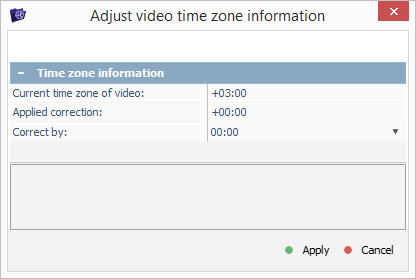
By contrast, in case you’ve launched a scan for lost footages, UFS Explorer Video Recovery will create new virtual containers for the retrieved videos that enable easy browsing through multiple cameras, years, months and dates of recording. You may also change the time zone in which the date/time is displayed for videos using the "Adjust video time" option from the context menu of a scan result item.
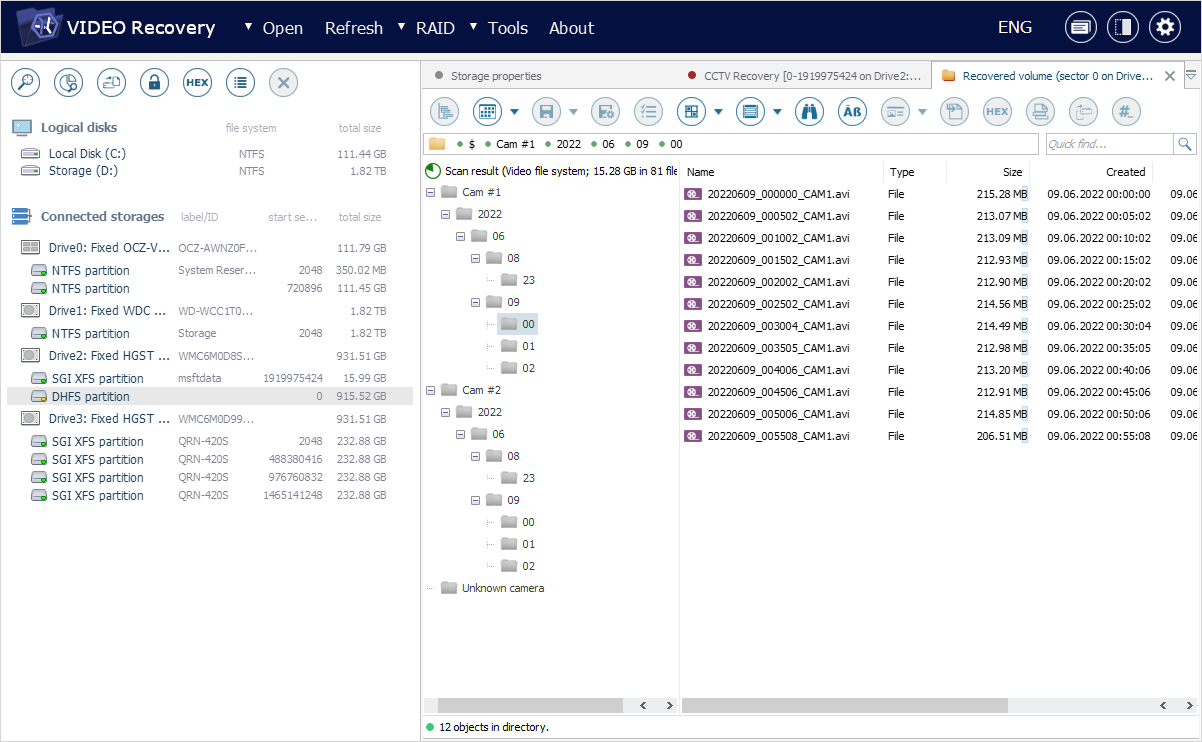

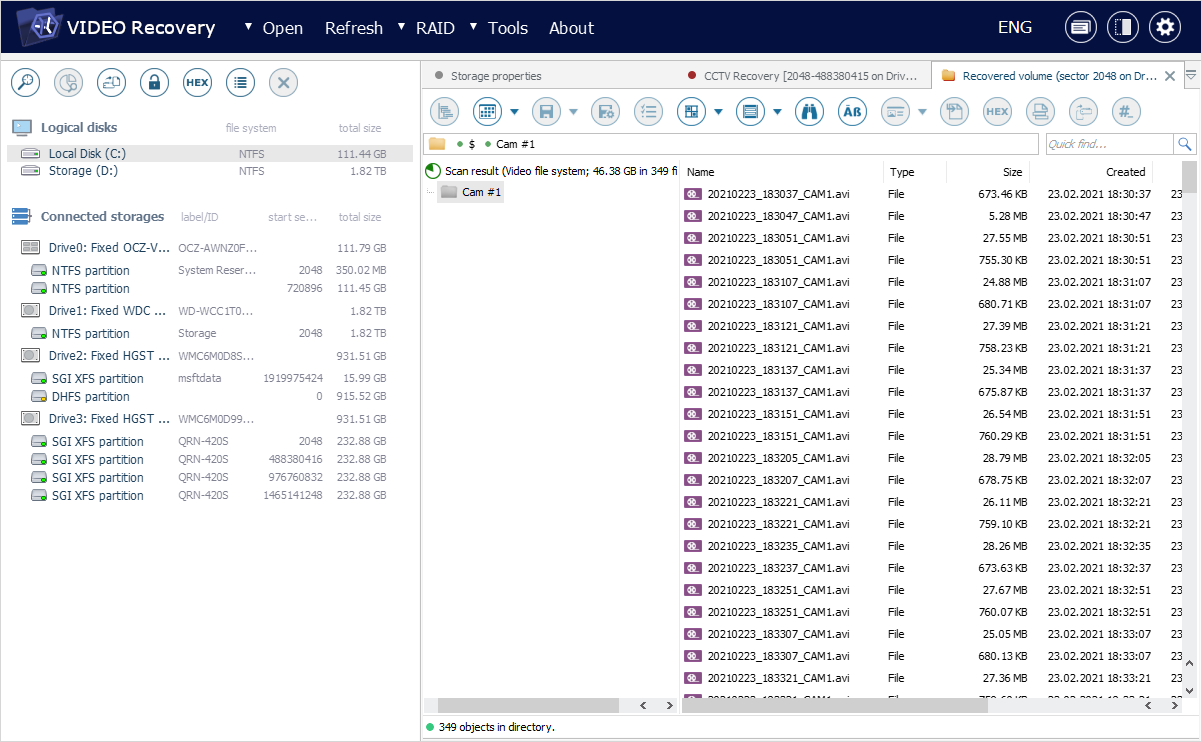
For convenience, it is possible to hide the containers and enumerate all files available in the given folder and its subfolders. For this, select a folder in the main content area and apply the "Show all files" tool from the main toolbar.

The recovered videos that have specific proprietary formats get wrapped by default into *.avi containers that are supported by the majority of media players. Yet, it is worthy of note that nothing is modified within the actual video or audio content – the original frames and their sequence remain entirely preserved.
Using the interface of Explorer, you can examine each video and chose the ones required for further saving.
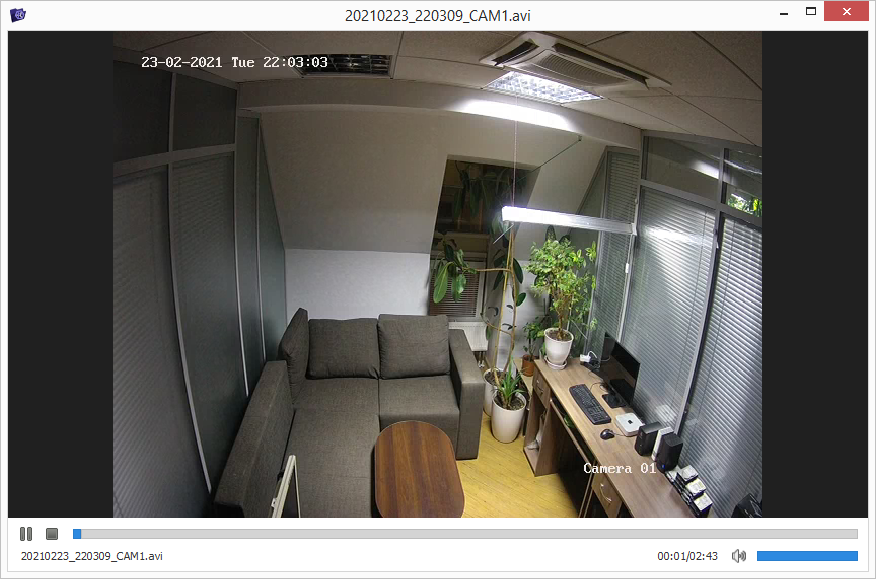
Select a video file in the main content area of Explorer to see its thumbnail view played automatically in a dedicated pane at the bottom. To open the full preview, hit the "View" button next to the thumbnail. As an alternative, you may click twice on the video file itself, use the "Enter" key or the "Display contents" option in its context menu.
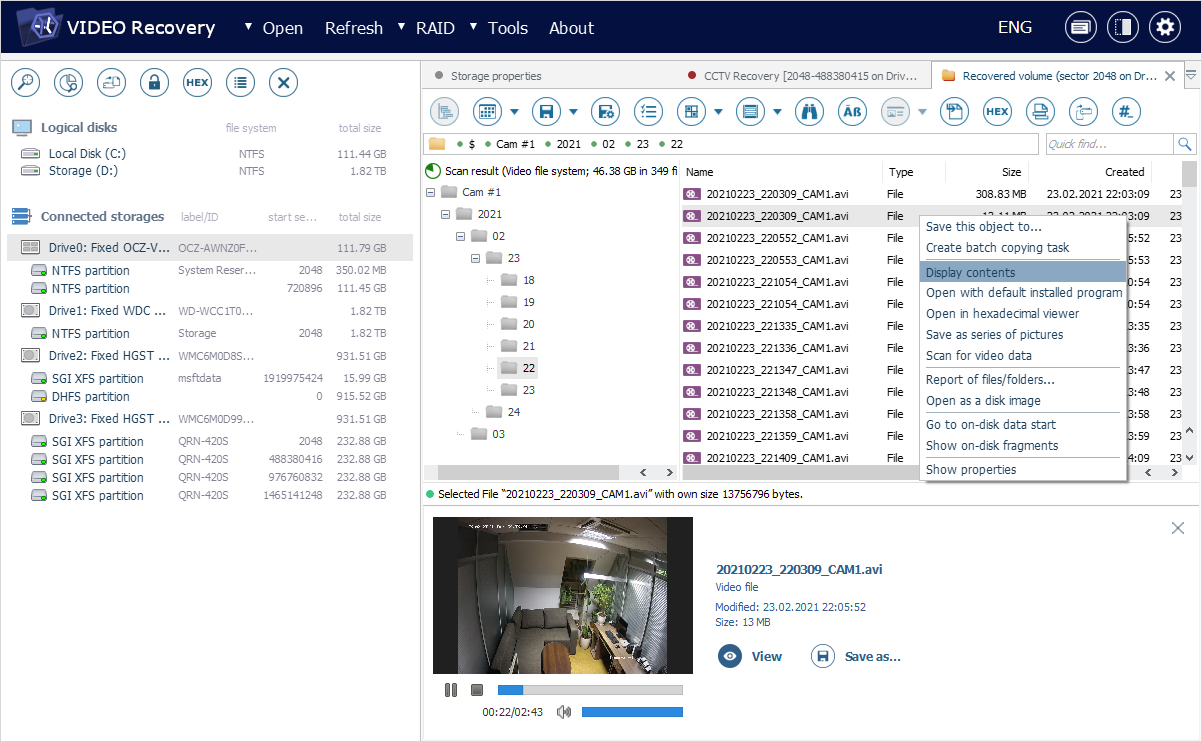
The mentioned actions launch the video in the internal player of UFS Explorer. If necessary, you may control its playback using the "play", "pause" and "stop" buttons in the lower left corner or adjust its volume using the slider in the lower right corner of the window.
In addition to this, the Explorer component offers the means you can utilize for filtering out the necessary files, viewing their properties, sorting them by different criteria, performing quick or advanced search, evaluating the amount of data or its consistency.
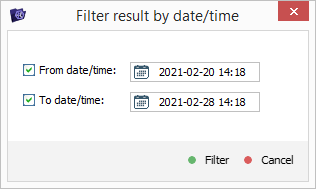
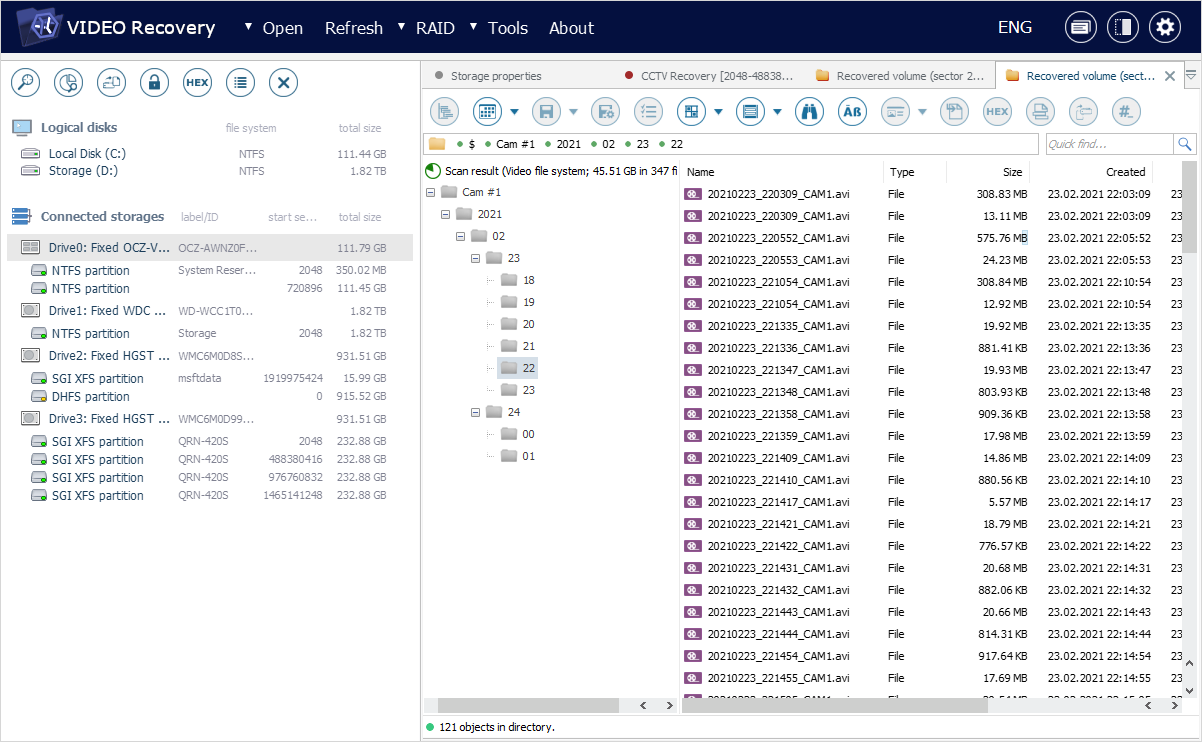
In order to separate the videos recorded within a particular period, find the "Filter result by date/time range" in the main toolbar of Explorer and use the date/time selection dialogs to specify the date/time frames.
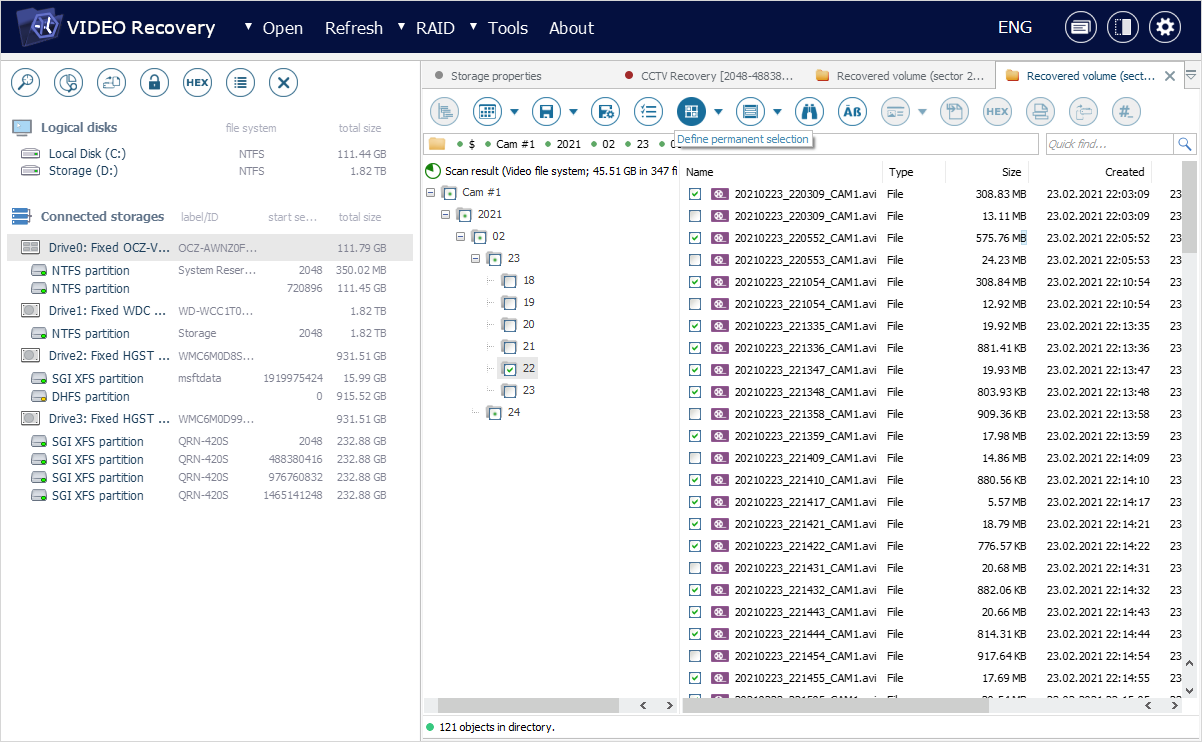
Having found the video files that have to be saved, enable the "Define permanent selection" tool from the main toolbar of Explorer. After that, you can use the checkboxes next to the folders and files or the "Mark for copying" or "Unmark for copying" context menu options to select/deselect them in the main content area. It is also possible to choose several files or folders in the same folder by holding the "Shift" or "Ctrl" key and clicking on them one by one.
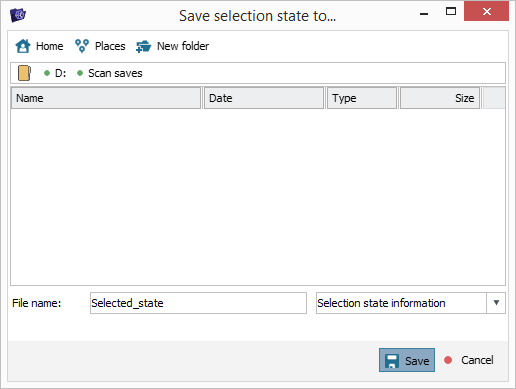
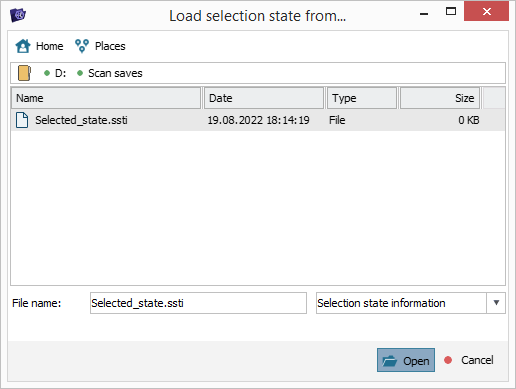
You can also save the information which of elements are currently selected. For this, launch the context menu of the "Define selection" tool and choose the "Save selection sate" option from it. In the opened window, provide the name for the *.ssti file and click "Save".
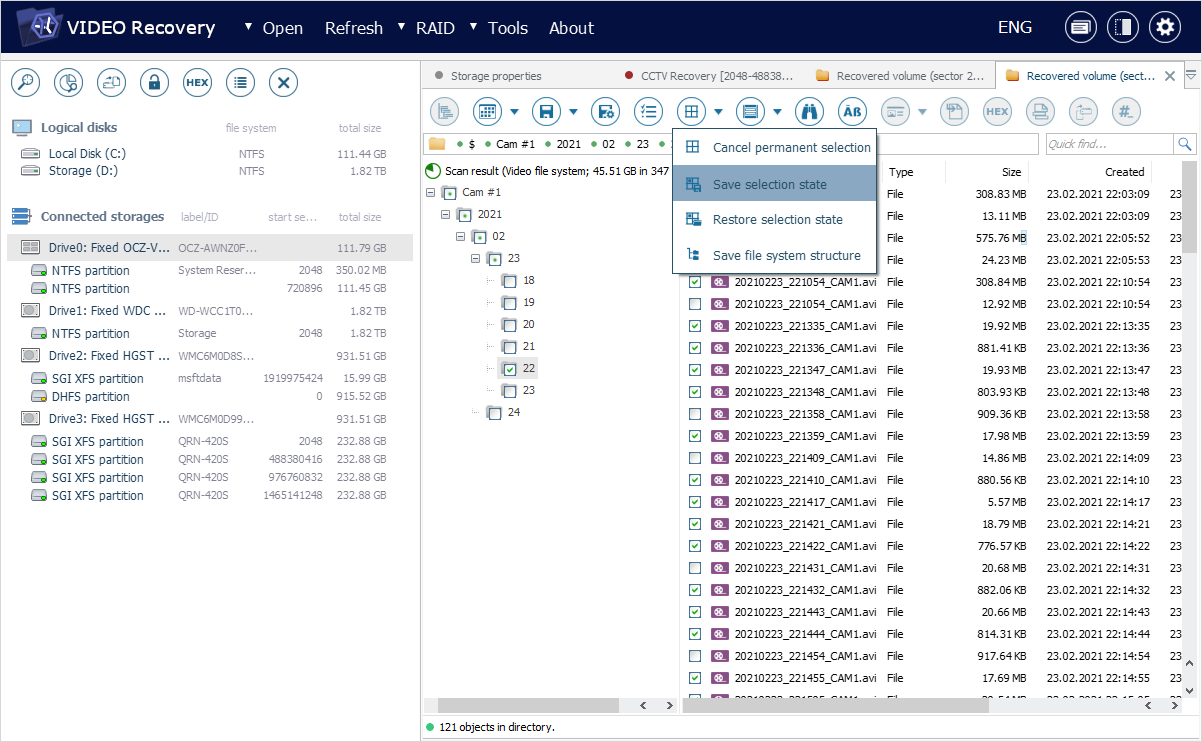
To restore the selection state using the created *.ssti file, choose the "Restore selection sate" option of "Define selection" tool and move to the location of the file.
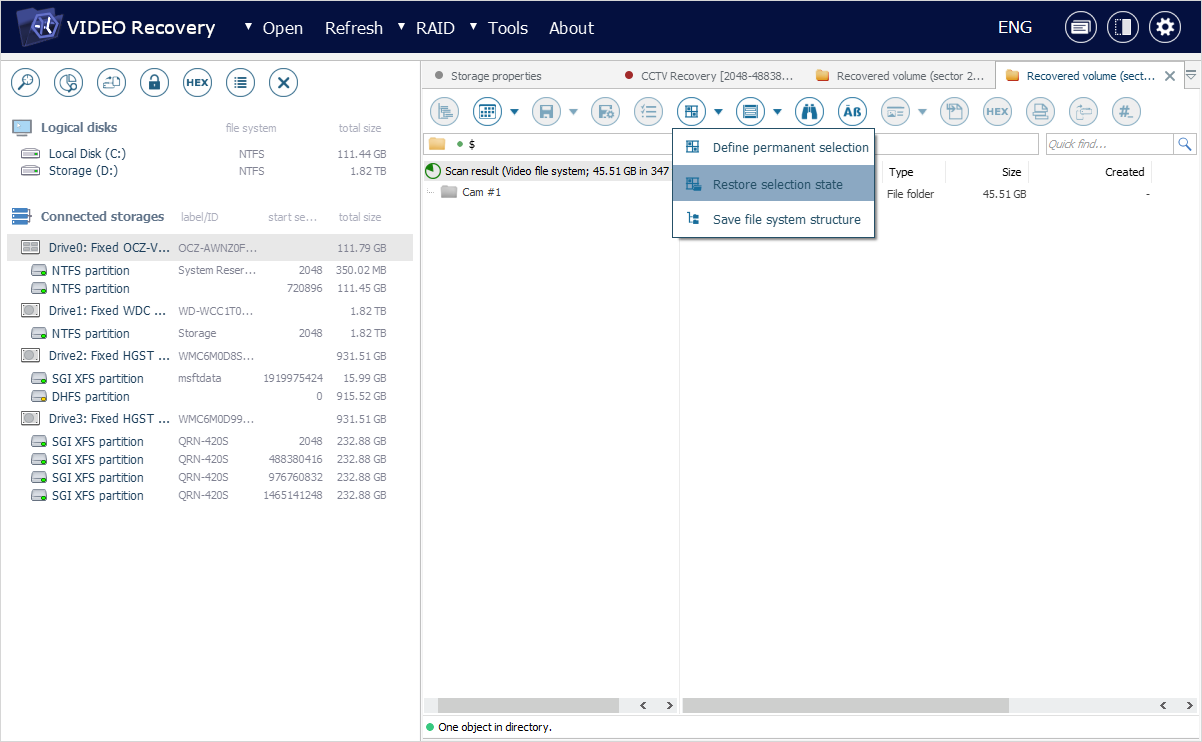
If you want to deselect all the elements selected at this moment, use "Cancel permanent selection" tool from the main toolbar of Explorer.
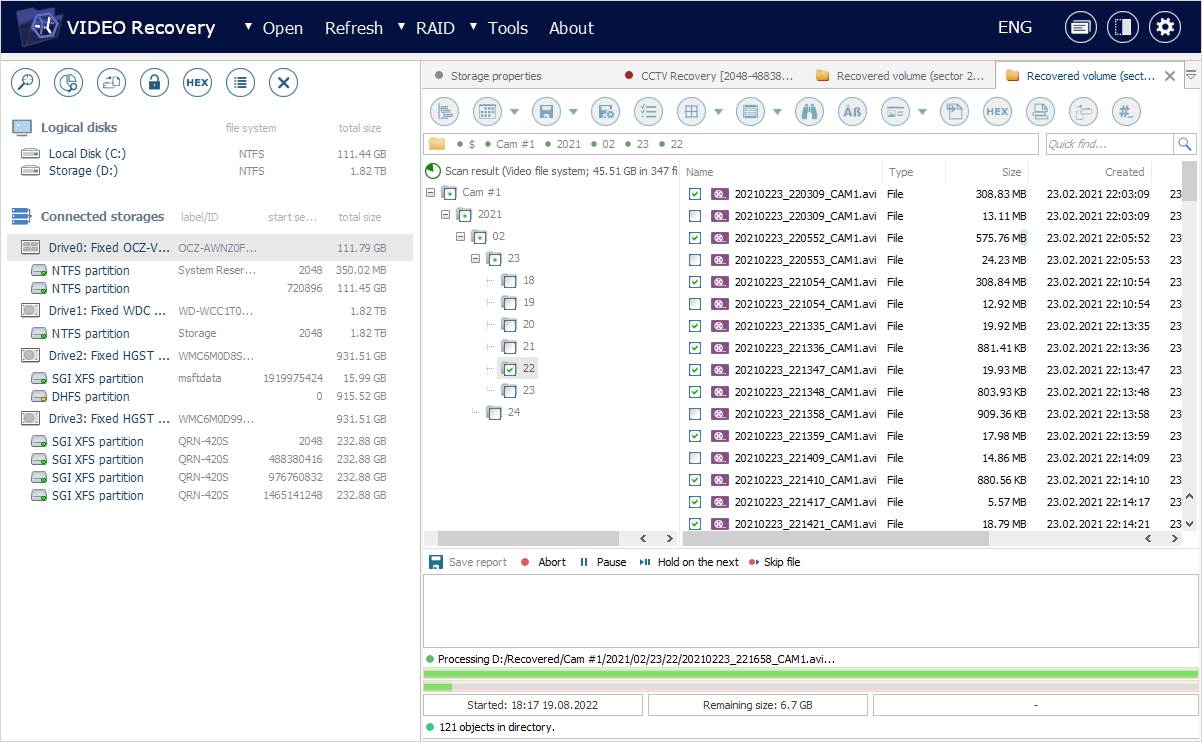
Having picked out the required items, you can begin the copying process.