Running a scan
Initiating the scanning procedure
When the necessary videos have not been discovered during the file system examination, this may mean that they were previously deleted or lost from the data carrier. In this case, you need to select this storage or its partition in the storages navigation pane and launch a scan for it to find the missing data. Yet, please mind that complex or specific storages may require preliminary assembly or transformation to enable a proper scanning operation.
In order to start a scan, use the "Scan for lost data" tool from the main toolbar of the program or the "Scan for lost data" option in the context menu of a storage.
After that, the software will offer you to choose between several scanning procedures, depending on the type of data you are looking for:
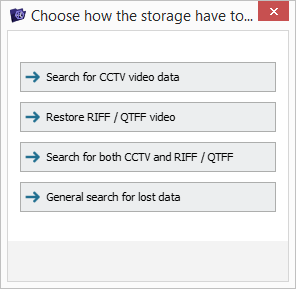
The first option allows analyzing the storage on the presence of known CCTV metadata patterns and extracting all relevant surveillance videos created by CCTV appliances, including deleted or damaged ones.
The second option makes it possible to search for video files that are based on the RIFF or QTFF media container formats, like *.avi, *.mov and others, that are commonly used by in-vehicle camcorders, including those that were removed, partly overwritten or not completed due to interruption.
The third option combines the first two variants of a scan: the application starts with the search for CCTV recordings and then proceeds to ones created by vehicle DVR systems.
The last option can be used to find and retrieve the entire data set that is present on the storage, without regard to the type of files.
Scan for CCTV video data
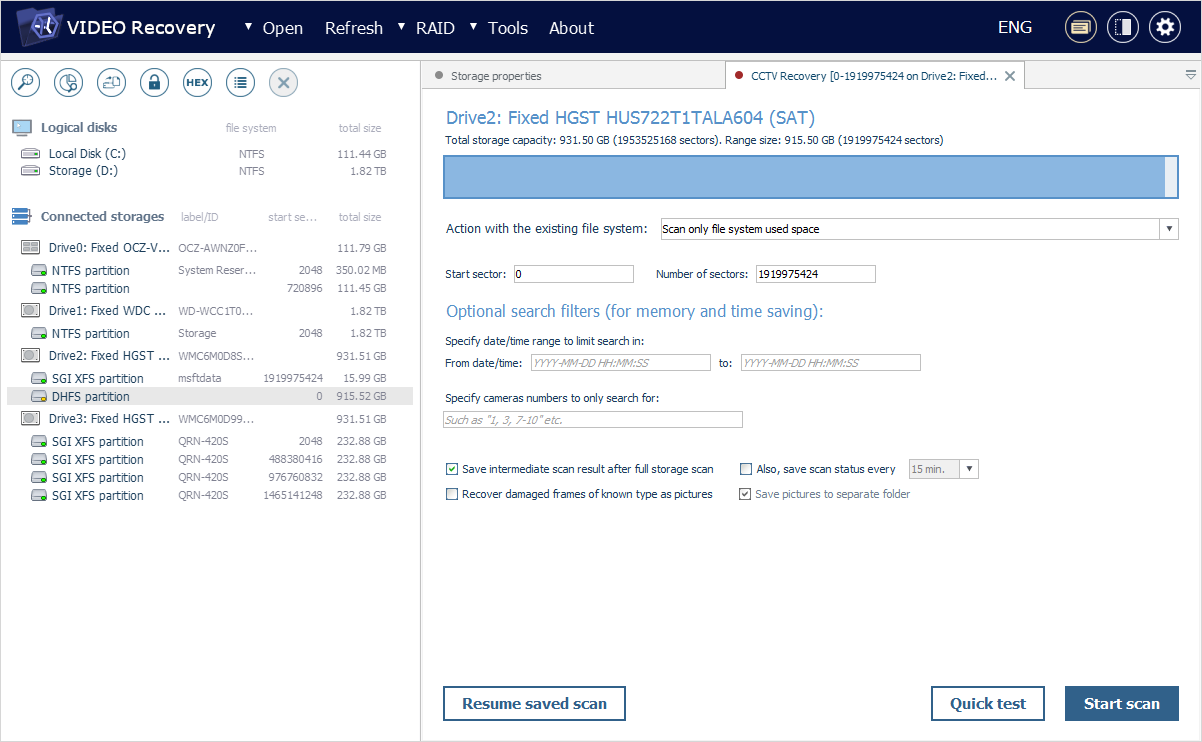
After you opt for the "Search for CCTV video data" method of storage processing, the software will open a new "CCTV Recovery" tab, in which you can adjust the scan parameters in accordance with your requirements.

The information about the source storage is automatically detected by the program and includes its name, total capacity and size in sectors.
The software also indicates the actual range of sectors on the storage that will be analyzed, along with its size. However, if you need to scan only a part of it, you can specify the values for the start sector and the number of sectors after it. The proportion of the scanned region in relation to the total capacity of the storage will be visualized with the help of the blue bar at the top.
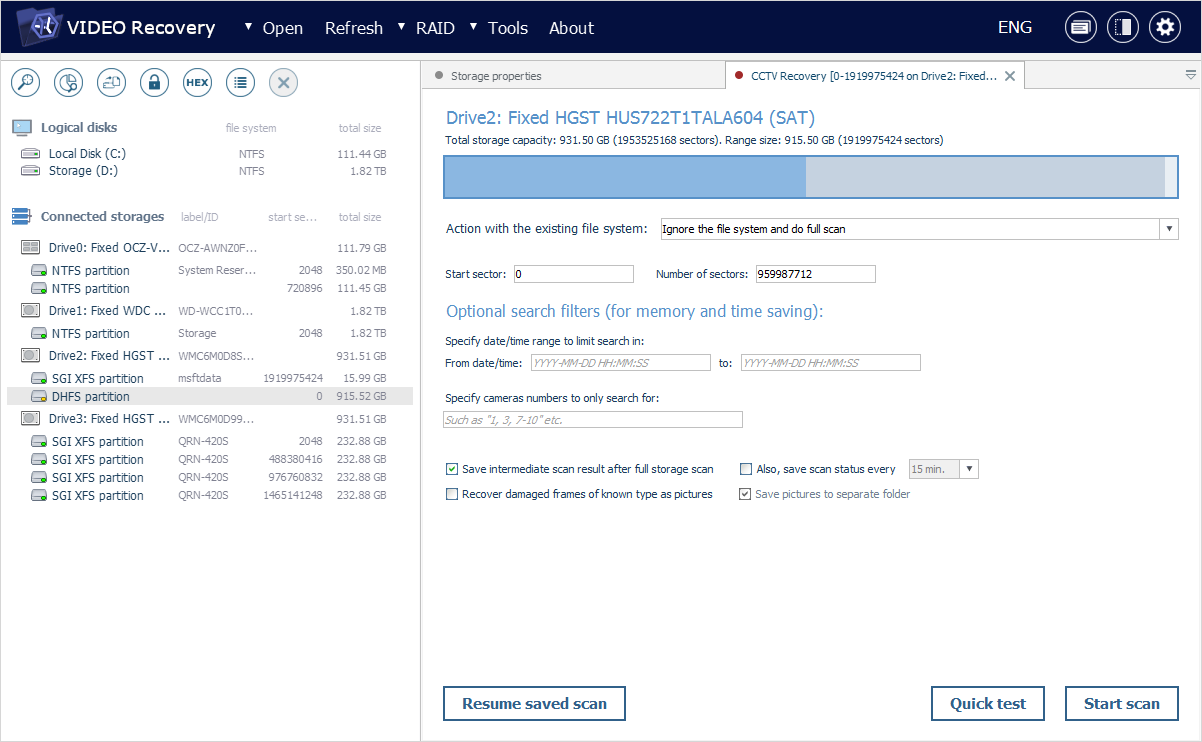
When a scan is set up for a partition with an identified valid file system, you can configure the way it will be handled by the software: the application can inspect the storage space occupied by this file system, analyze the areas that are considered to be "free" or ignore the file system altogether and scan the chosen region of the storage.

The "Optional search filters" section contains a set of parameters for restricting the scan output to recordings created within a specified date/time range and by particular surveillance cameras.
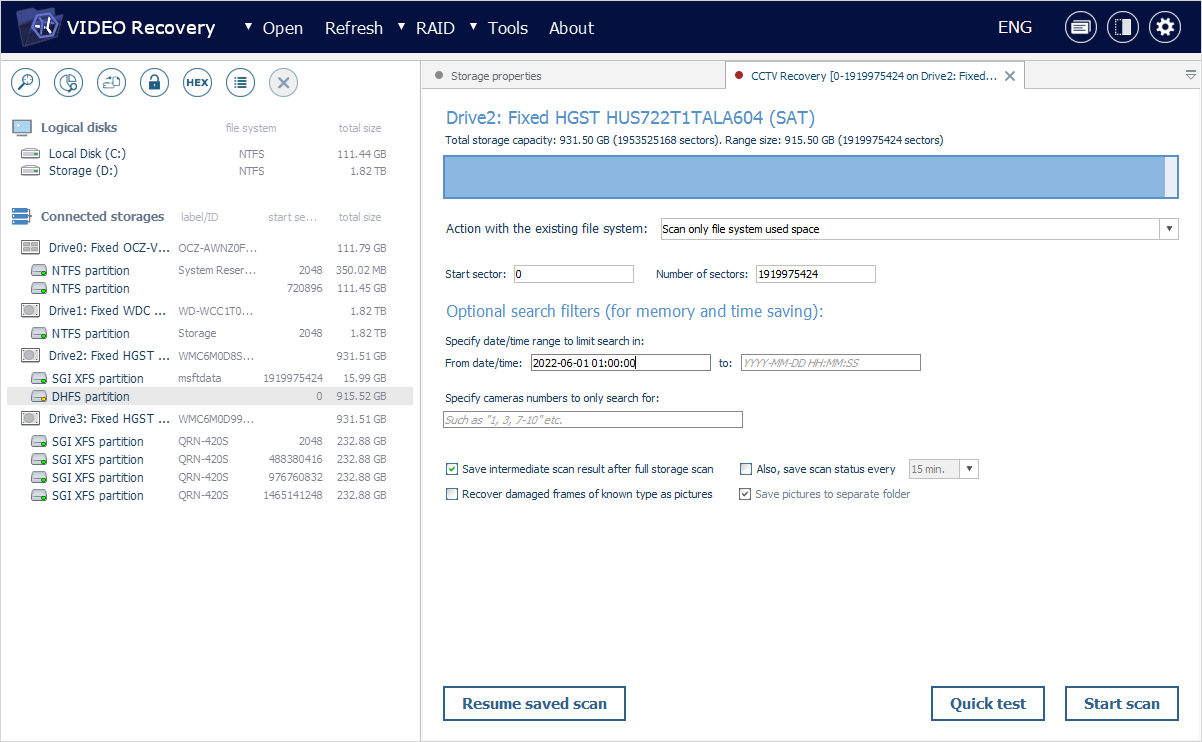
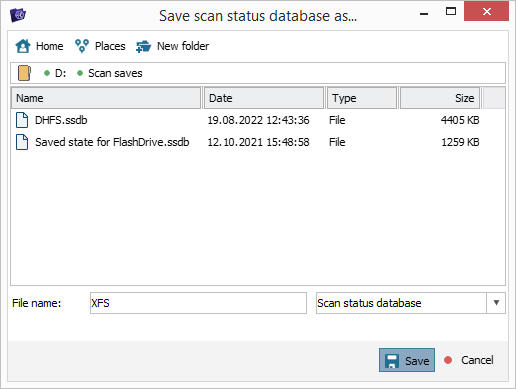
The checkbox next to the "Save intermediate scan result after full storage scan" option makes it possible to enable the saving of a database with the scan results to a *.ssdb file following the completion of the procedure.
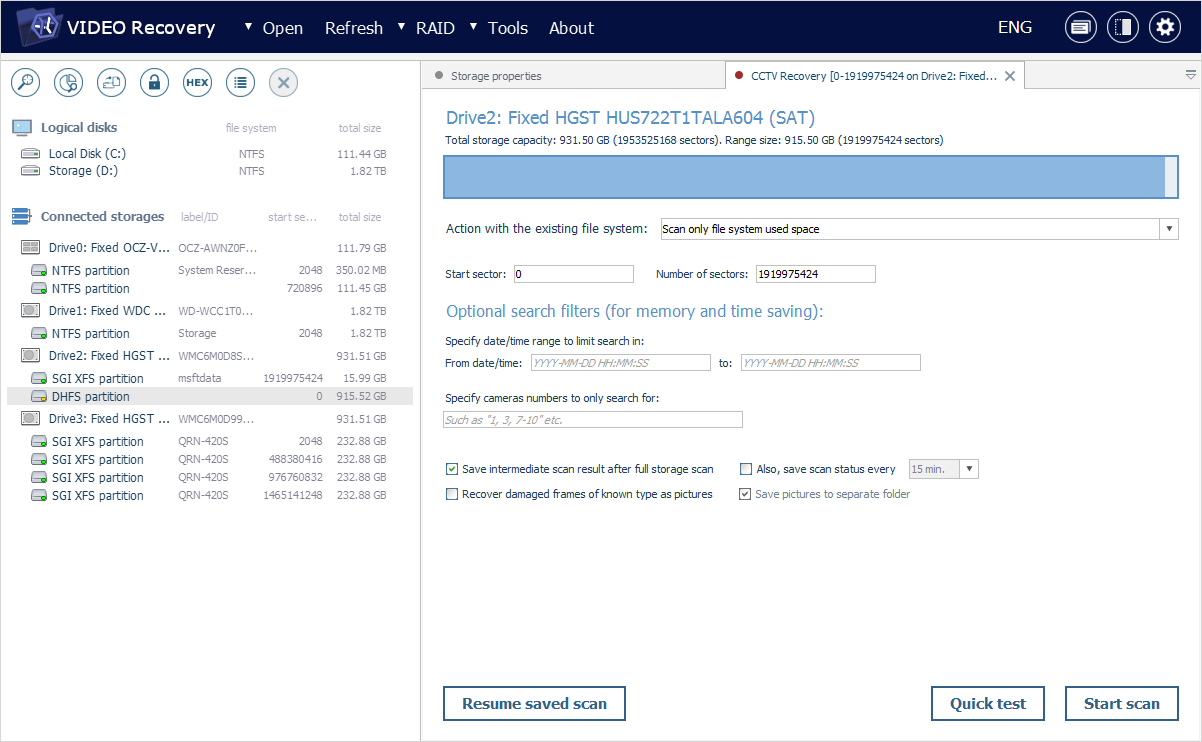
The software is also able to extract frames from a part of a video that is damaged and save them as separate still images. To activate this function, tick off the "Recover damaged frames of known type as pictures" option.

The "Save pictures to separate folder" option next to it allows creating a dedicated folder for the images within the target location.
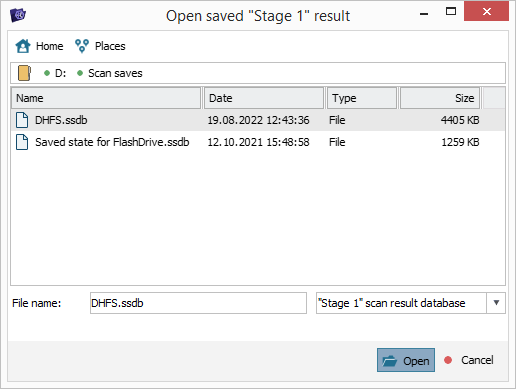
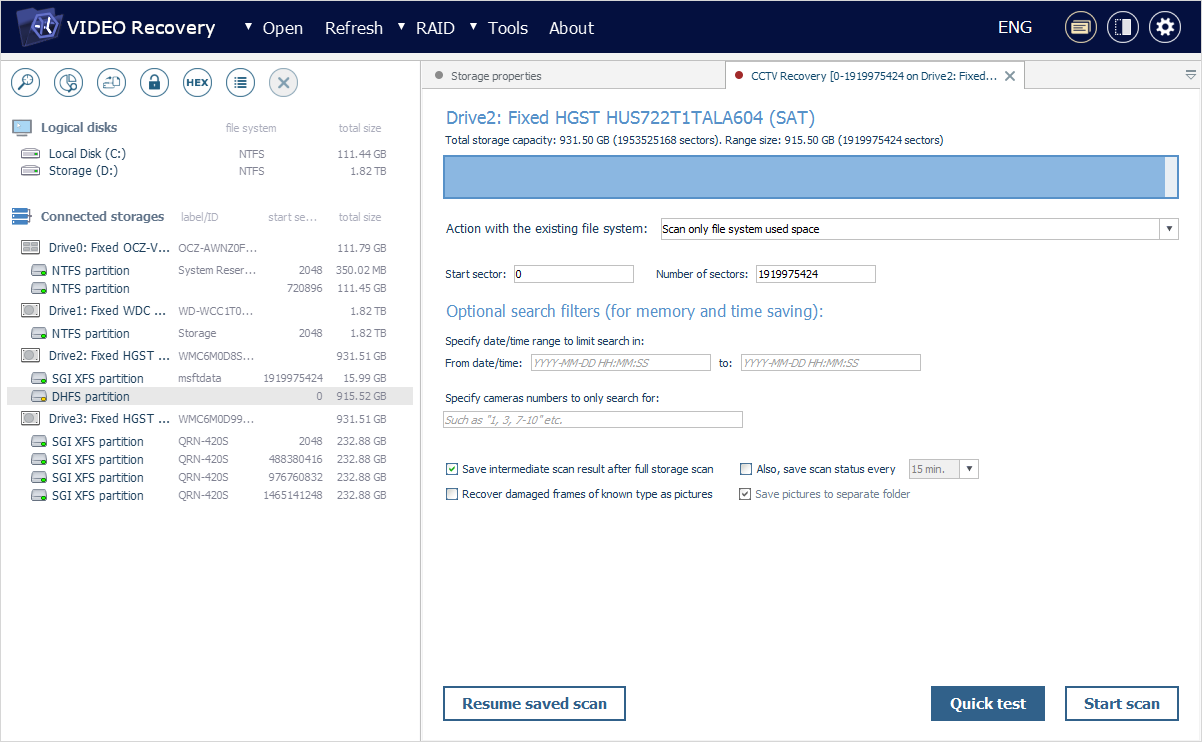
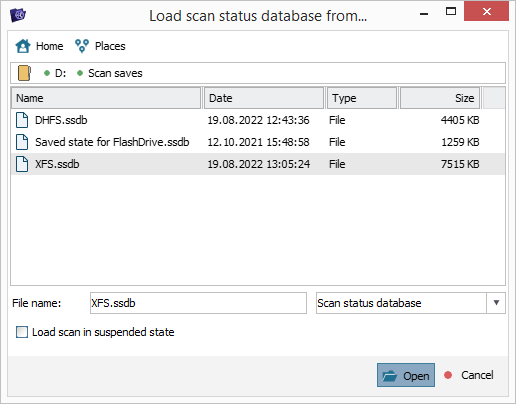
The "Resume saved scan" button located in the lower left corner of the tab can be used to continue the scanning operation on the connected storage from the spot when it was saved to an *.ssdb file. In the opened dialog, navigate to the file’s location and click "Open". The scan will be started right away, with the progress it had at the time of termination.
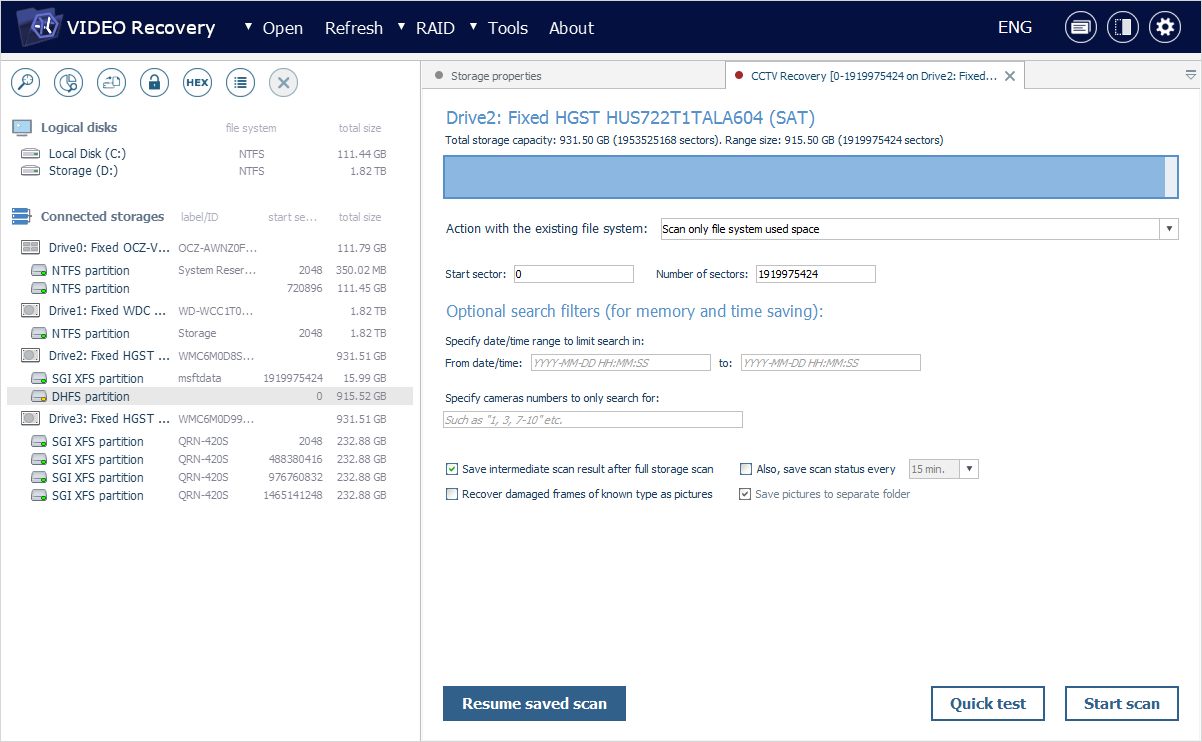
The "Quick test" button in the lower right corner makes it easy to check if the current data format is supported by UFS Explorer Video Recovery. If such a scan delivers any results, you can be sure that a time-consuming full scan is worth launching.
Press the "Start scan" button to go ahead to a full scan that will be performed on the basis of the defined parameters.
Scan for videos created by vehicle DVRs
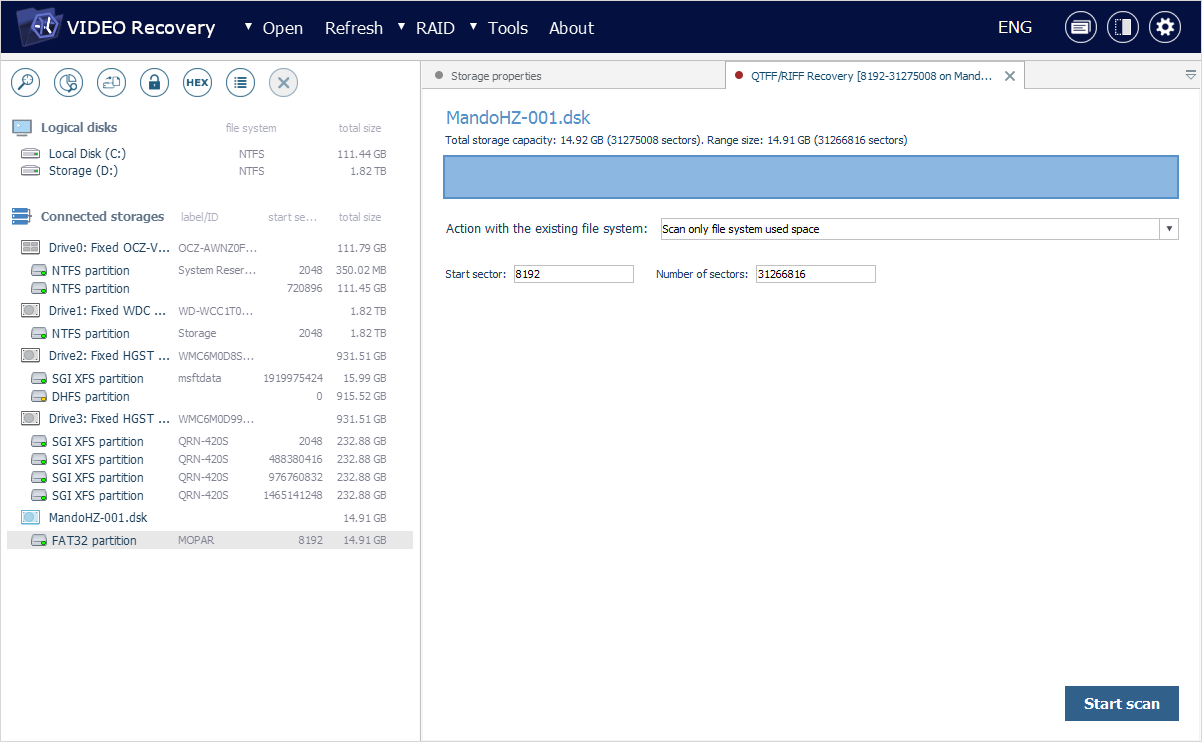
In case you decide on the "Restore RIFF/QTFF video" method of scanning, the program will open a new "QTFF/RIFF Recovery" tab with several parameters for adjusting the procedure.
First of all, you can see the name, capacity and size (in sectors) of the storage that will be examined for lost recordings.
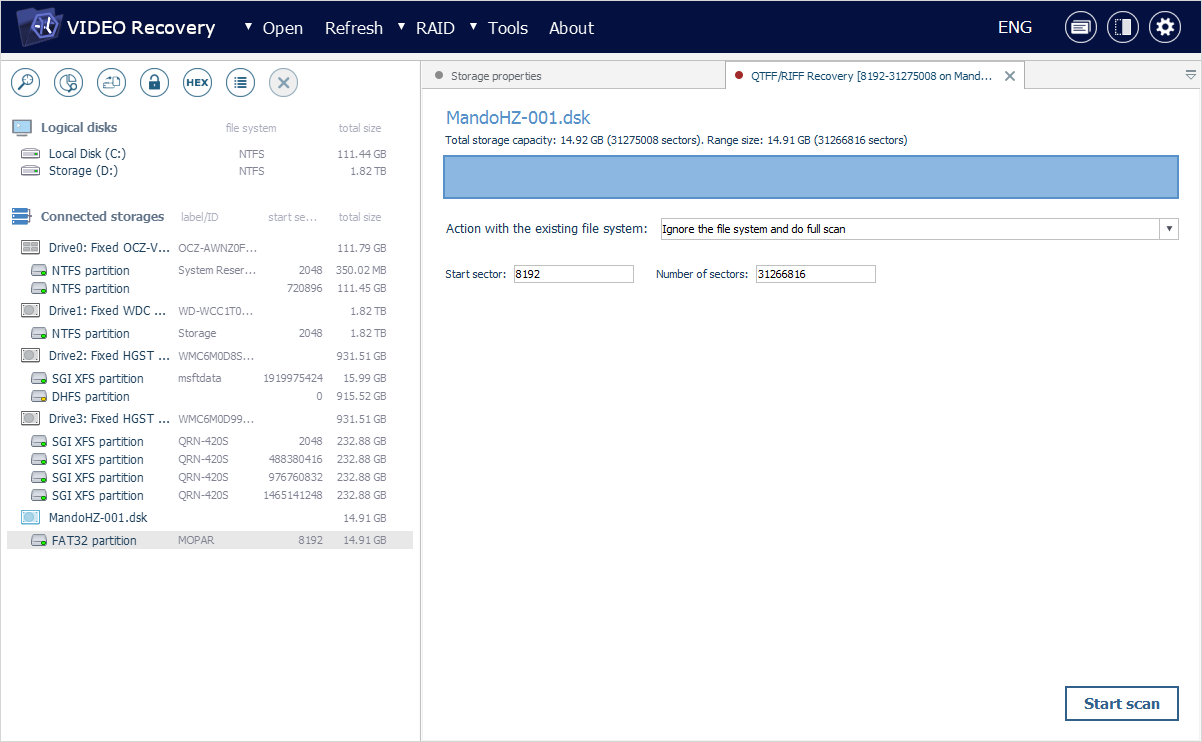
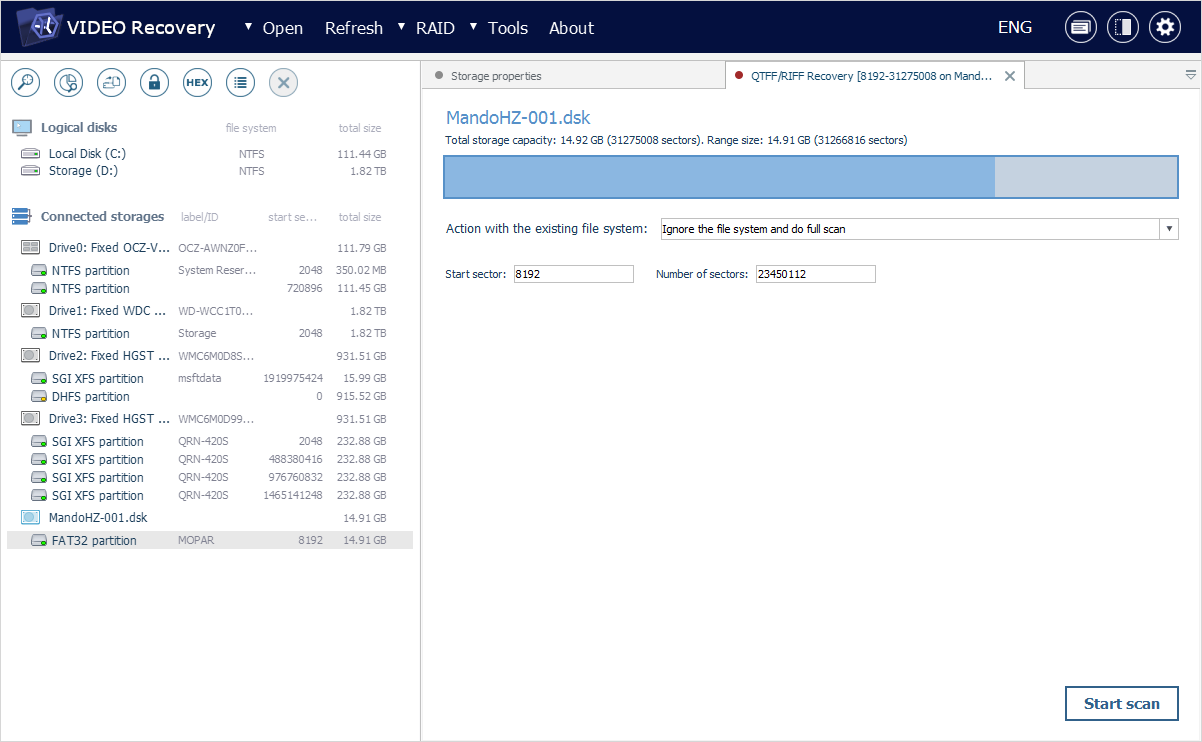
The range of sectors on it that will undergo analysis is indicated below. Yet, if you want to narrow down the search, you may specify the desired values for the start sector and the number of sectors after it.
The visualization bar at the top will reflect the proportion of the scanned range relative to the overall storage capacity.
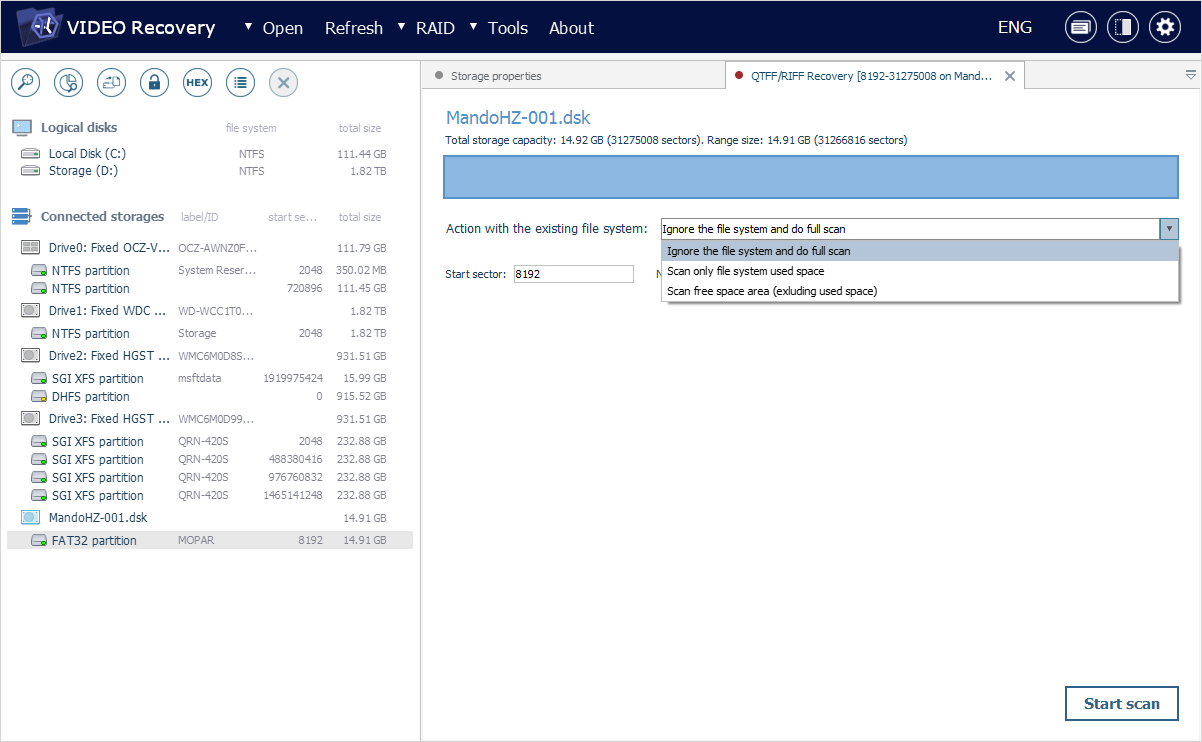
If a valid file system has been detected on a partition, you can configure its processing during a scan: the software can analyze the storage space it takes, check the areas that are defined as "free" according to its metadata or skip file system structures and scan the whole selected range on the storage.
After that, hit "Start scan" to initiate the scanning process.
Scan for both CCTV and DVR recordings
In case you choose the "Search for both CCTV and RIFF/QTFF" method of processing, you can configure the scan in the way described in the Scan for CCTV video data section.
Conventional scan for all data types
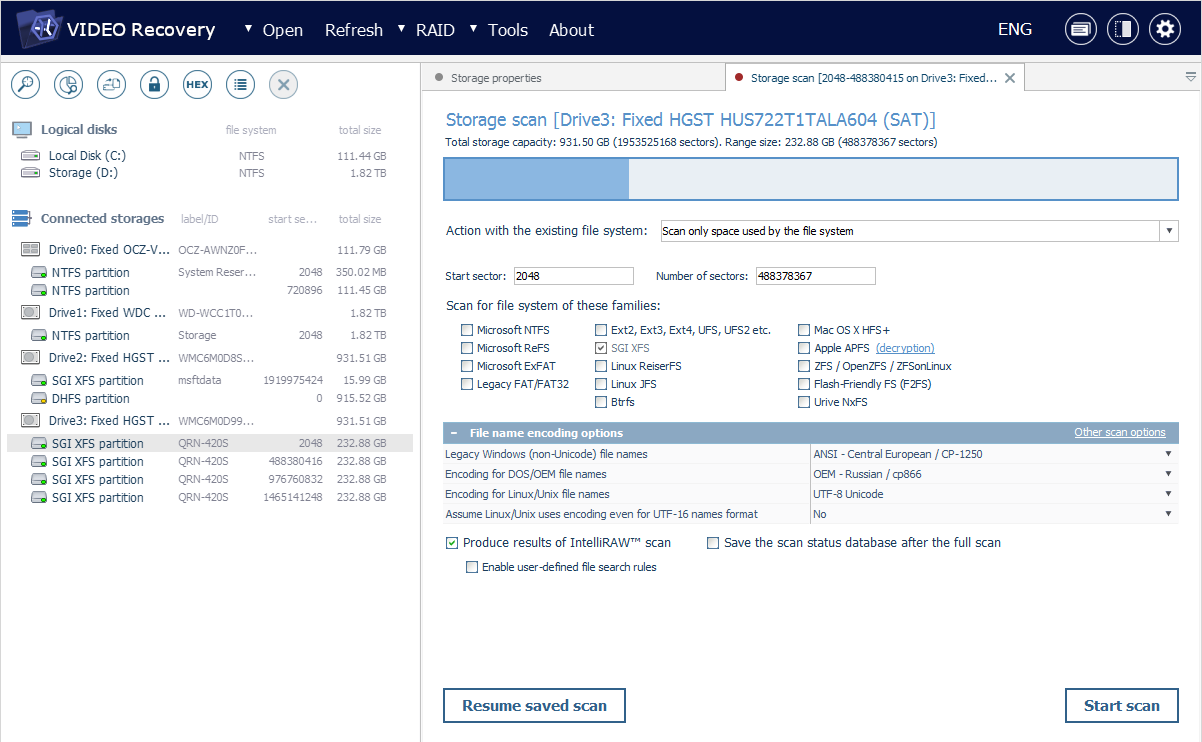
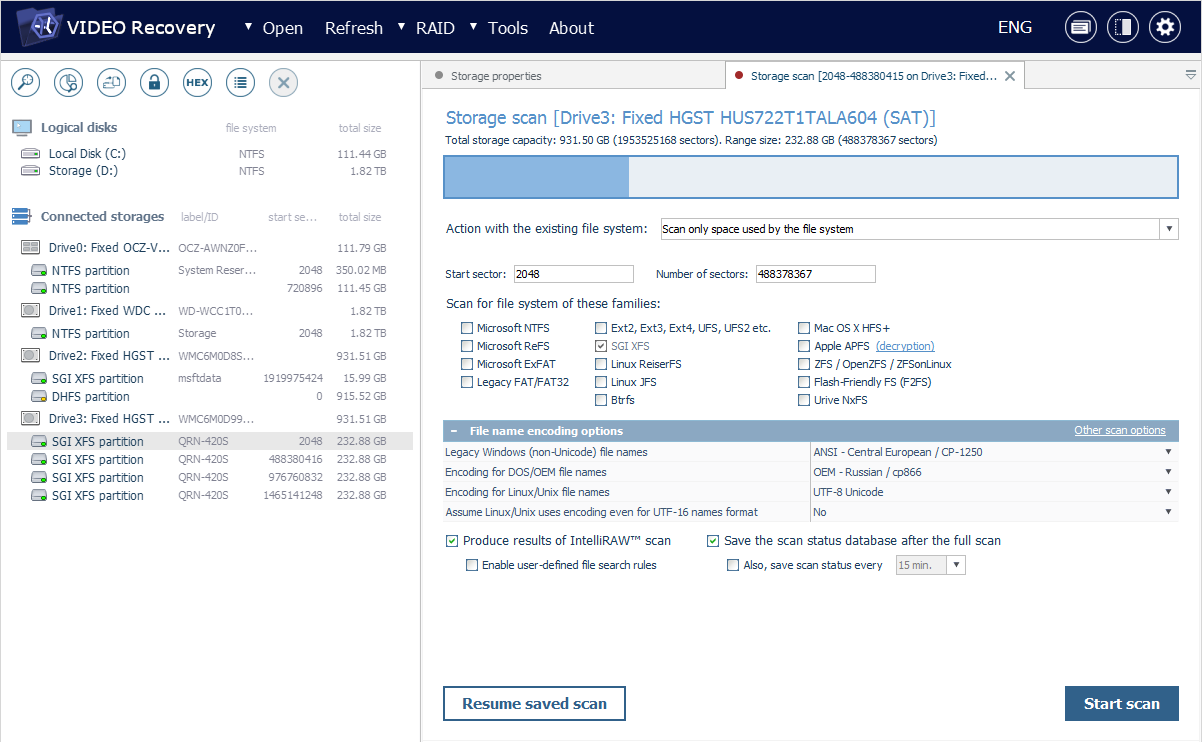
If you pick out "General search for lost data", the software will open a new "Recovery" tab for setting up a conventional scan of the selected storage.
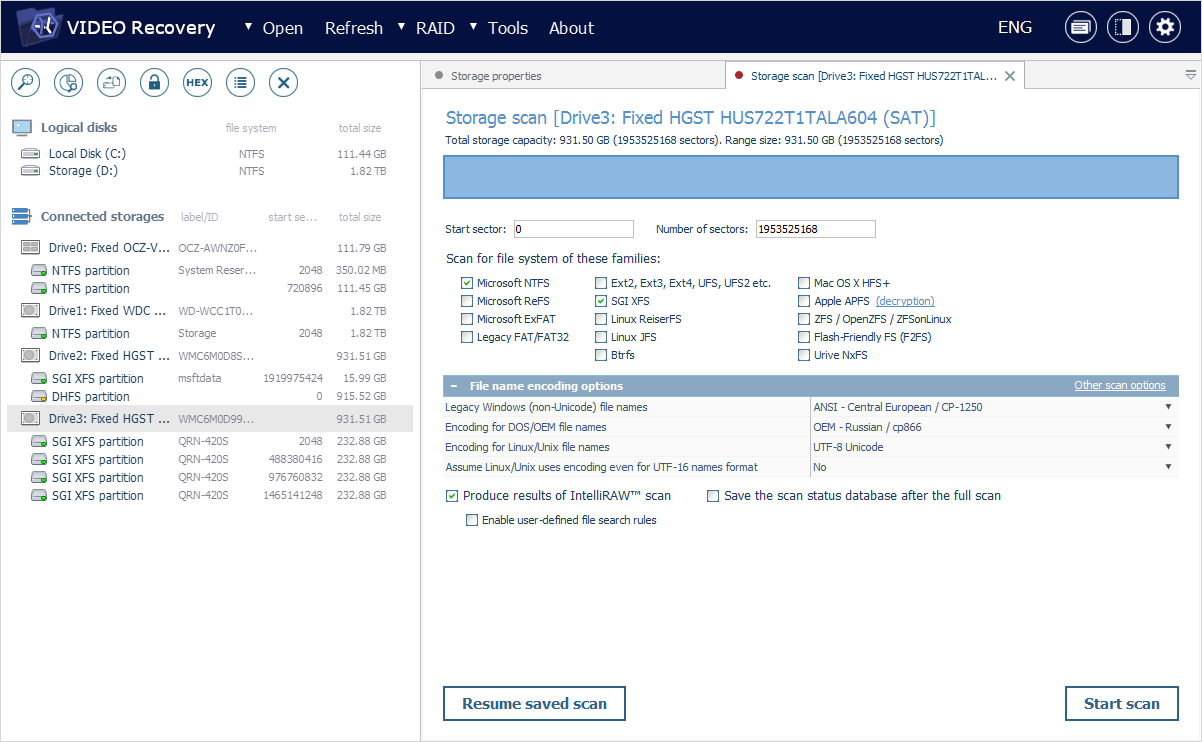
The top of this tab contains the information about the source storage that will be inspected for the missing data: its name, general capacity and size in sectors.
The scanned area on this storage is displayed automatically by the program. Yet, you may adjust it manually by specifying the values for the start sector and the number of sectors after it, for example, to analyze only a part of the storage.
The proportion of the chosen area relative to the capacity of the entire storage will be demonstrated by the visualization bar.
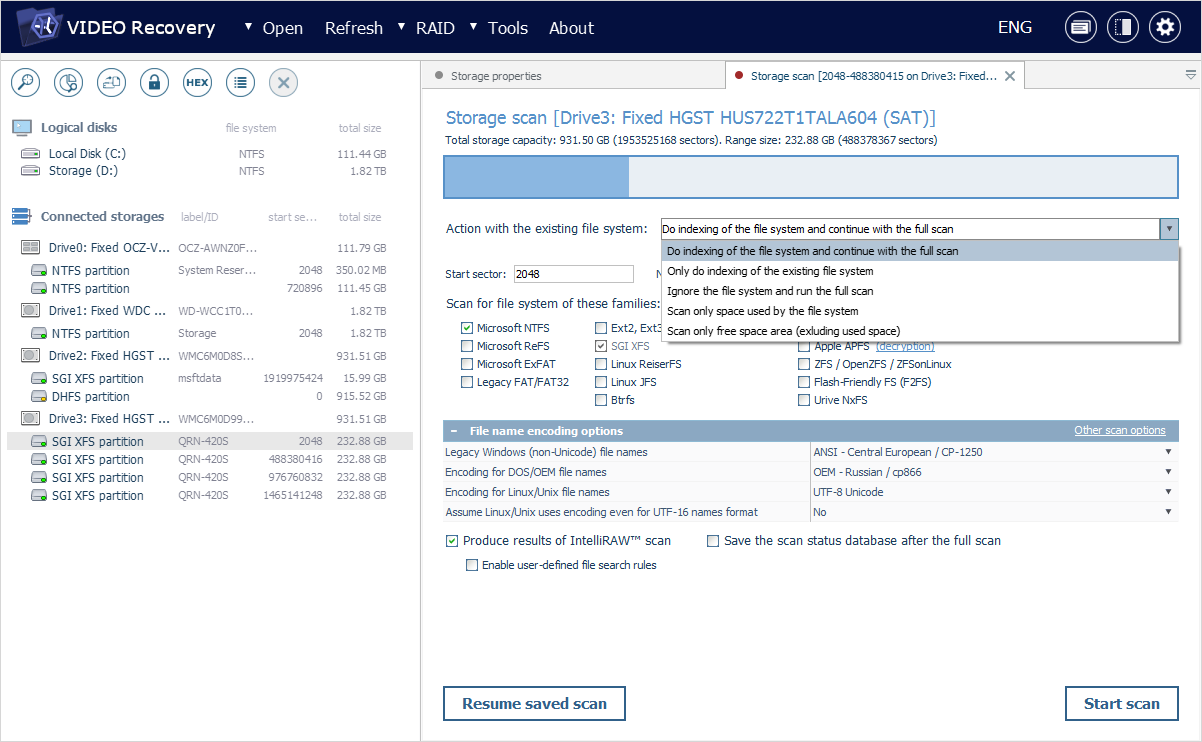
When a scan is launched for a partition that has a valid file system, you can establish how it will be processed by the software using the drop-down list next to the "Action with the existing file system" parameter. It is possible to perform its indexing, index the structure and then analyze the rest of the storage space, pass over the file system and scan the given region of the storage, examine solely the space occupied by this file system or, vice versa, leave out this space during the scan.
The "Scan for file systems of these families" section contains the list of file system types that will be searched during the scan. If you know for sure which file system was employed on the storage, you may disable the unnecessary variants.
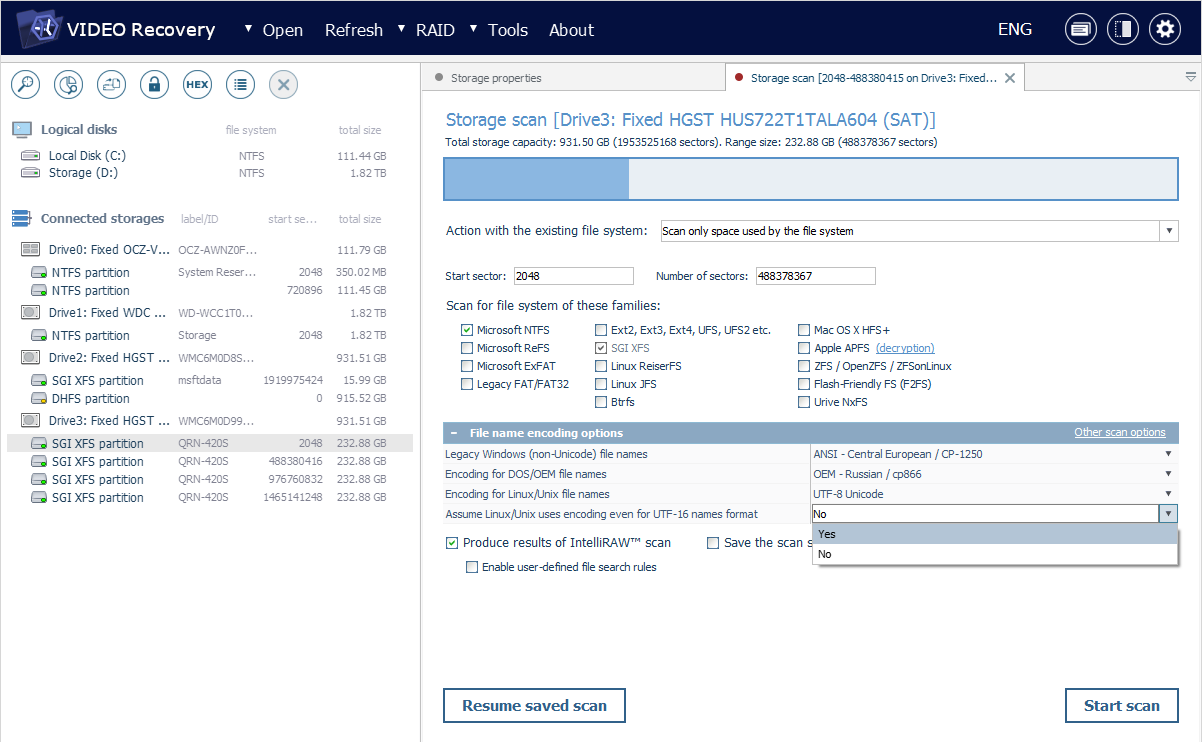
If required, you may also use the "File name encoding options" section to configure correct representation of file names for legacy (non-Unicode) Windows, DOS and Unix/Linux. Pick out the most appropriate encoding from the drop-down list opened with the arrow-like button at the end of the corresponding field.

The "Assume Linux/Unix uses encoding even for UTF-16 names format" option allows changing Unicode UTF-16 into the encoding that is normal for your file system. If the file system uses UTF-16 Unicode (for example, Linux JFS), the file names can be saved in UTF-16. If the file system uses any other encoding, select "Yes" for the accurate representation of file names.
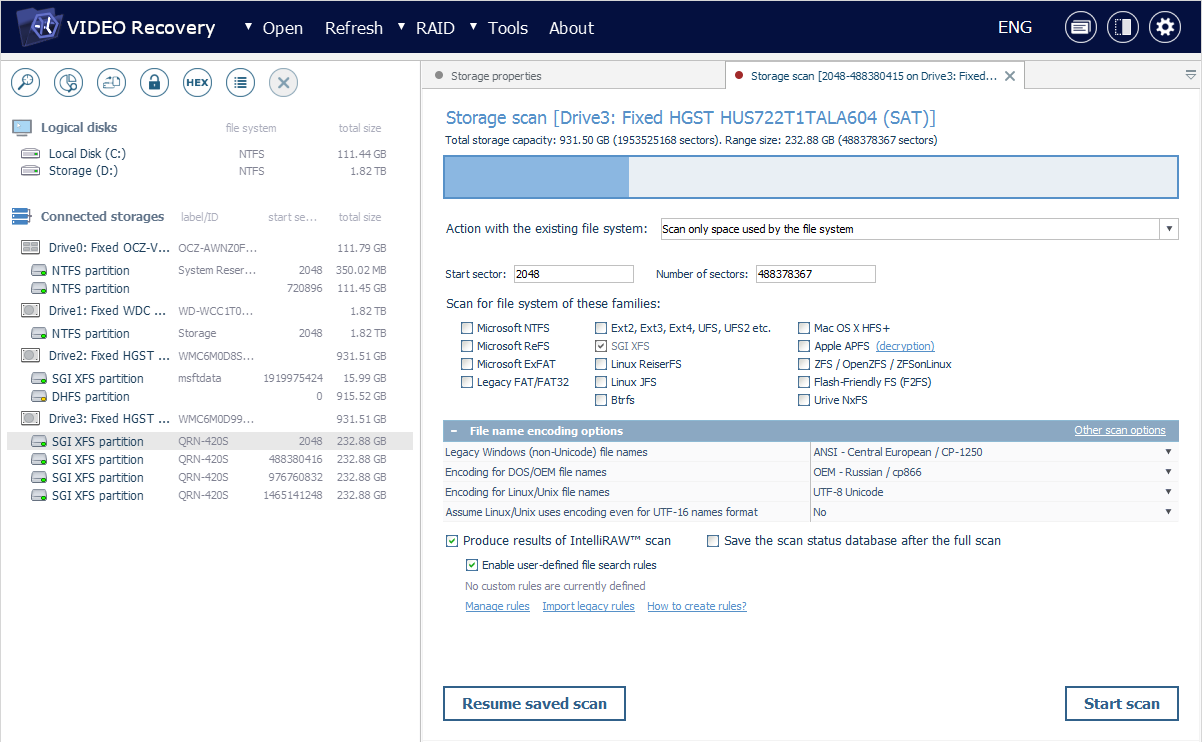
The "Produce results of IntelliRAW scan" option activates the method of "raw recovery" (IntelliRAW) to look for the data that couldn’t be found with the conventional file system scan.
If you want to extend the list of embedded IntelliRAW rules with your own previously defined file types, put a checkmark next to the "Enable user-defined search rules" option. Use the "Manage rules" or "Import legacy rules" buttons to make any adjustments.
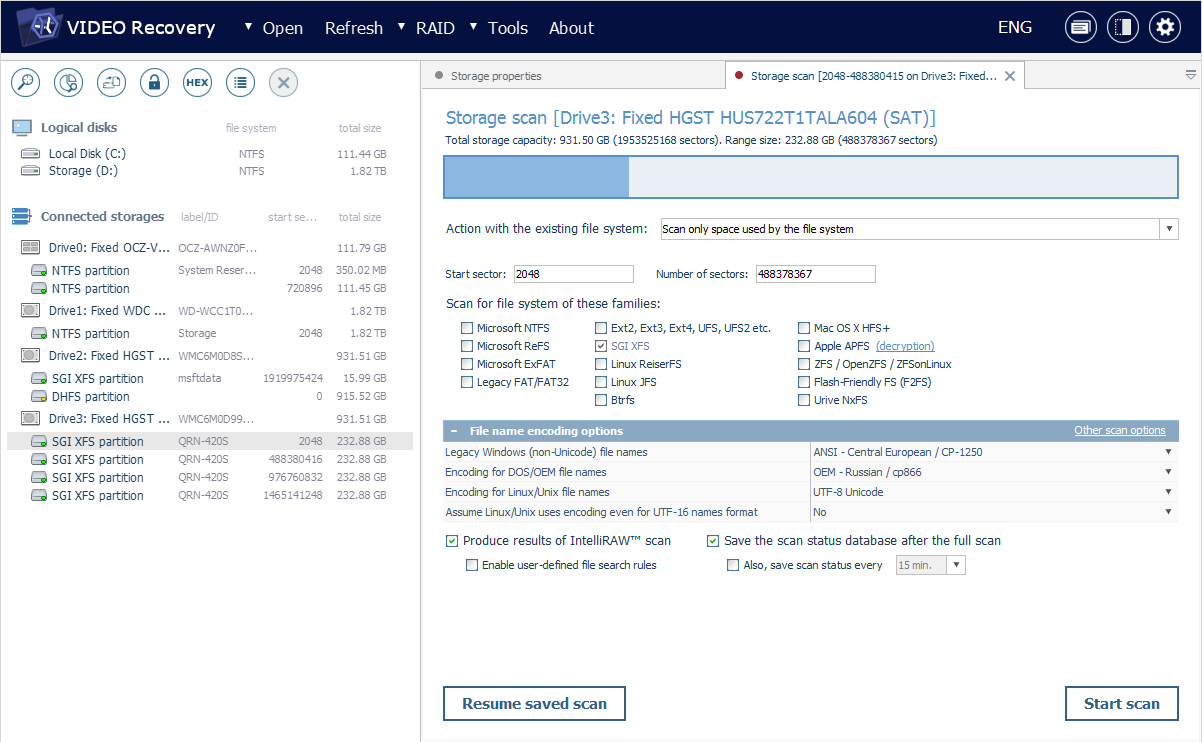
The "Save the scan status database after the full scan" option serves for saving of the information about the scanned structures on the analyzed storage to a *.ssdb file straight after the process is completed. When activated, it enables an additional option for specifying the time interval during which the scan status database will be saved automatically.
The "Resume saved scan" button at the bottom-left of the tab makes it possible to continue the scan with the progress it had when saved to a scan status database file. Go to the location of the *.ssdb file and click "Open". The process will begin right away from the point where it was stopped.
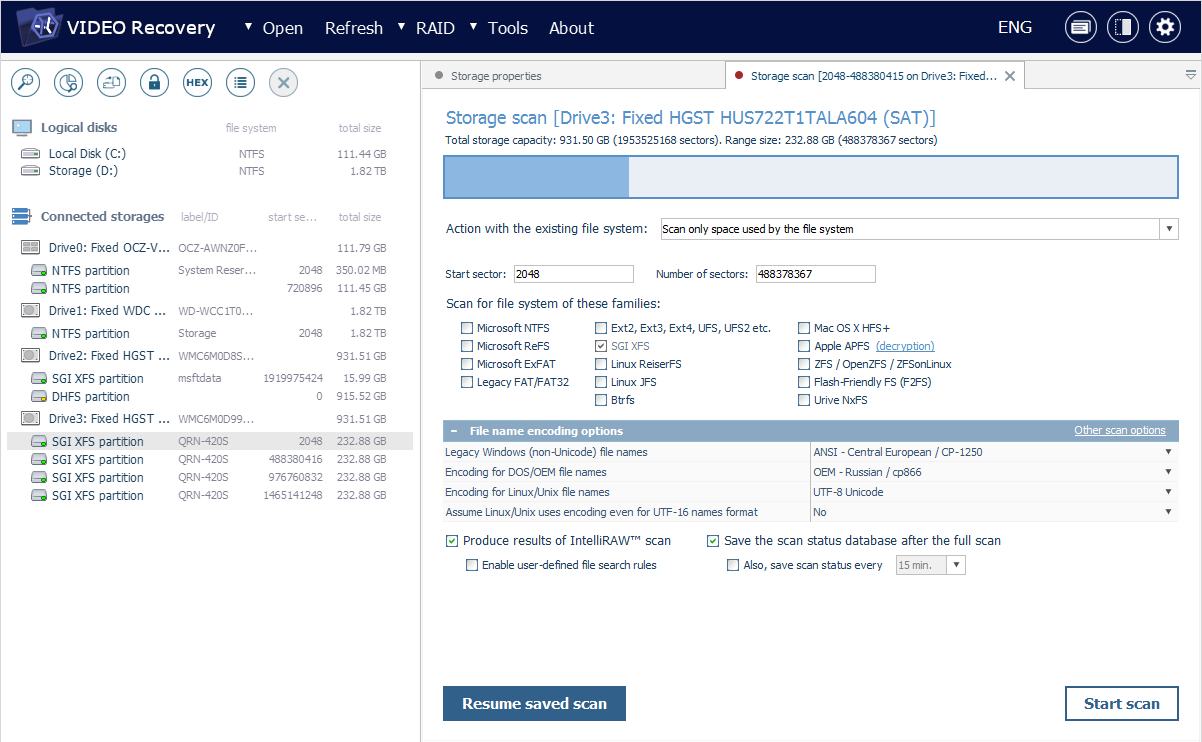
Press the "Start scan" to button to begin the scanning procedure according to the specified settings.
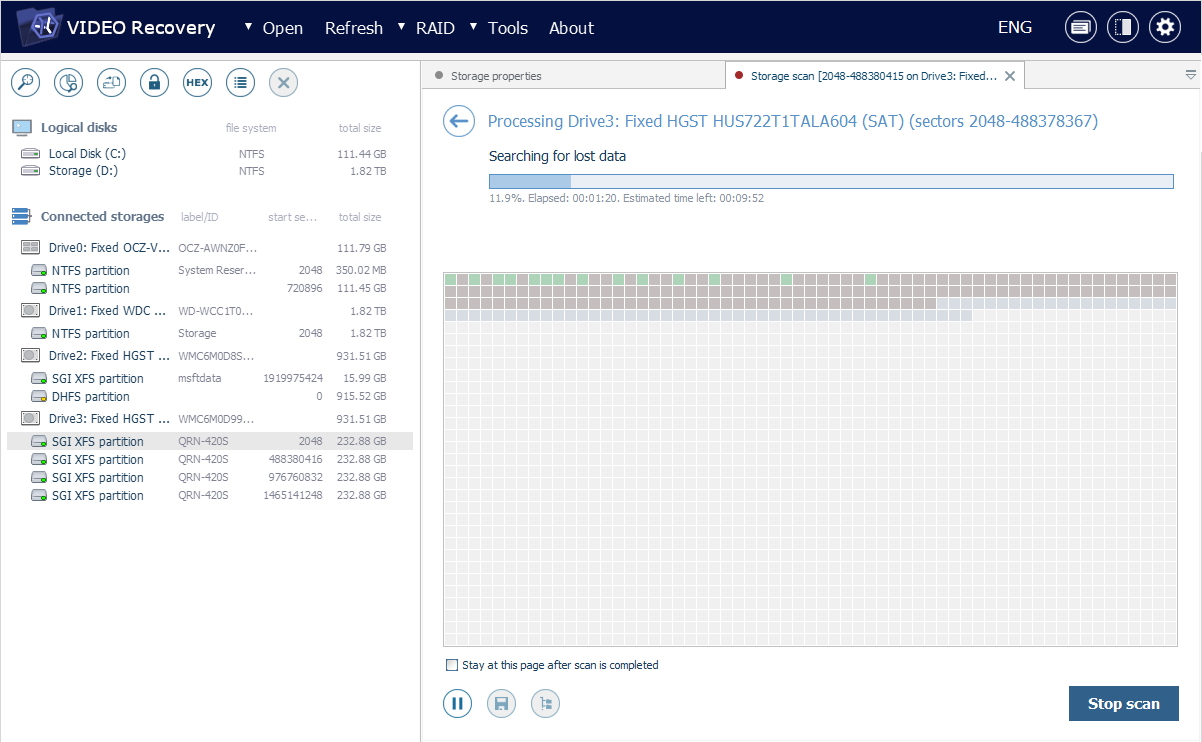
Control over scanning
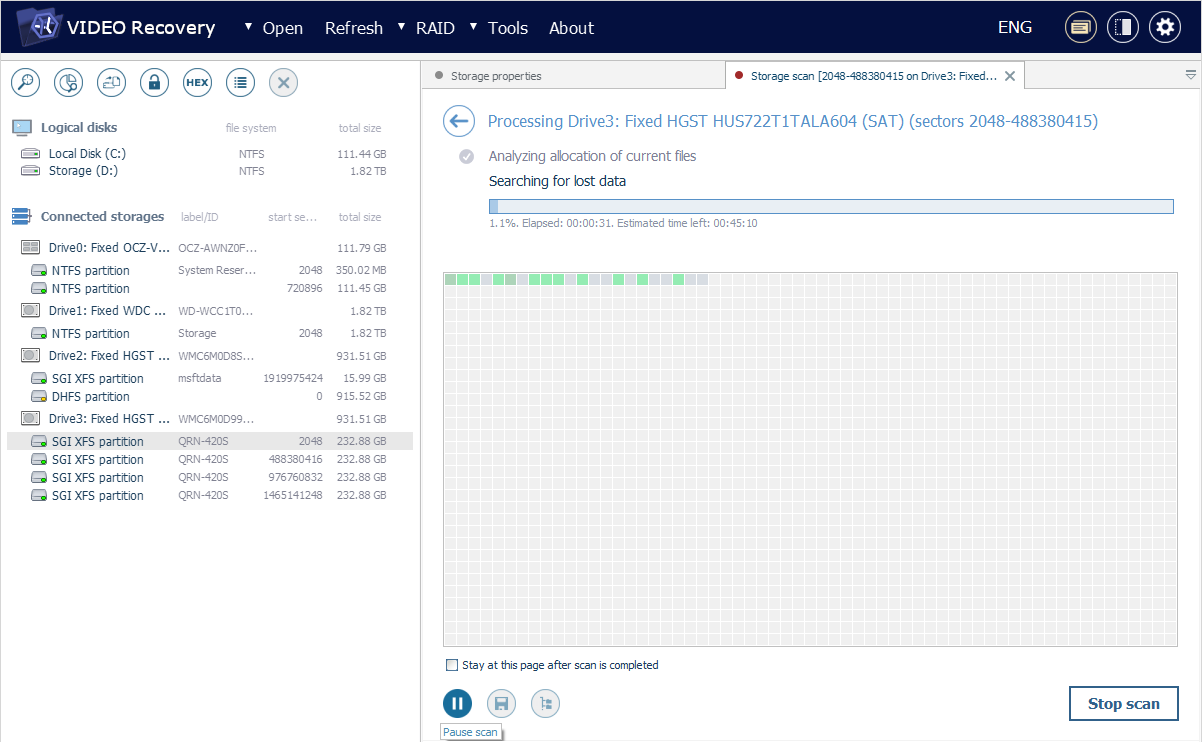
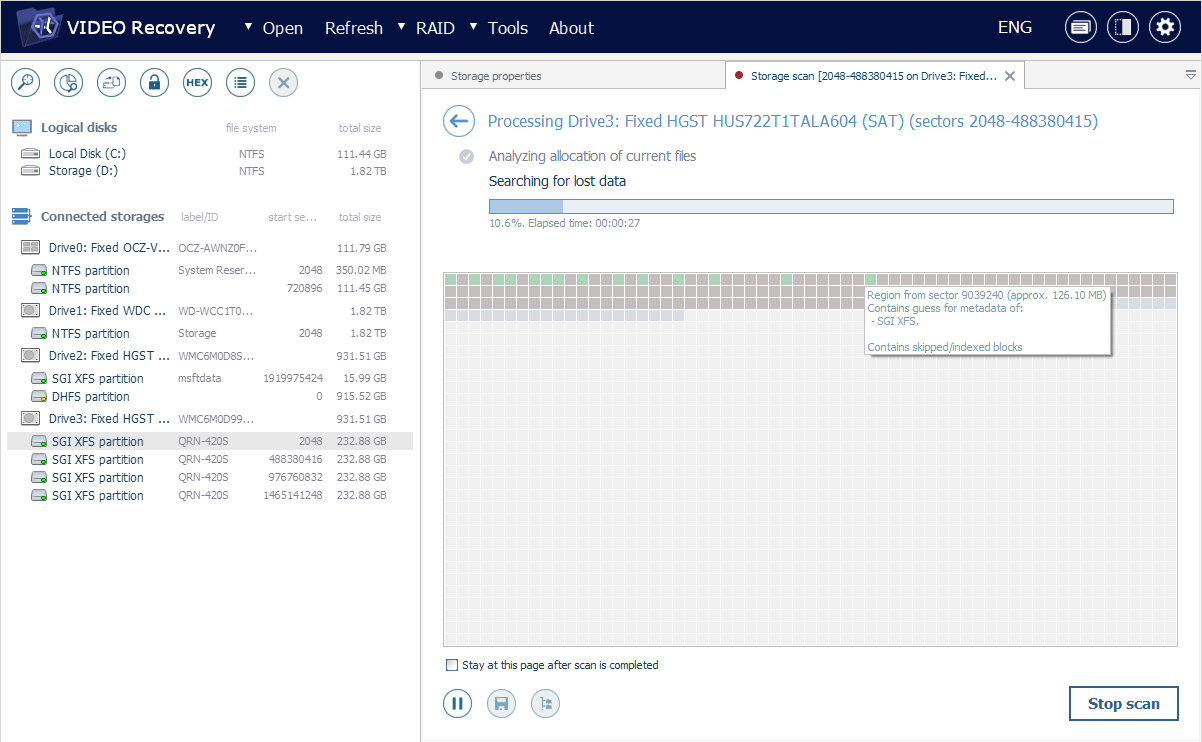
The progress of the operation can be observed with the help of the bar and the scan status indication.
The program also shows the percentage of the operation that has been completed and the amount of elapsed time.
You can pause the operation and save its current state to an *.ssdb file using the elements found in the buttons area at the bottom.
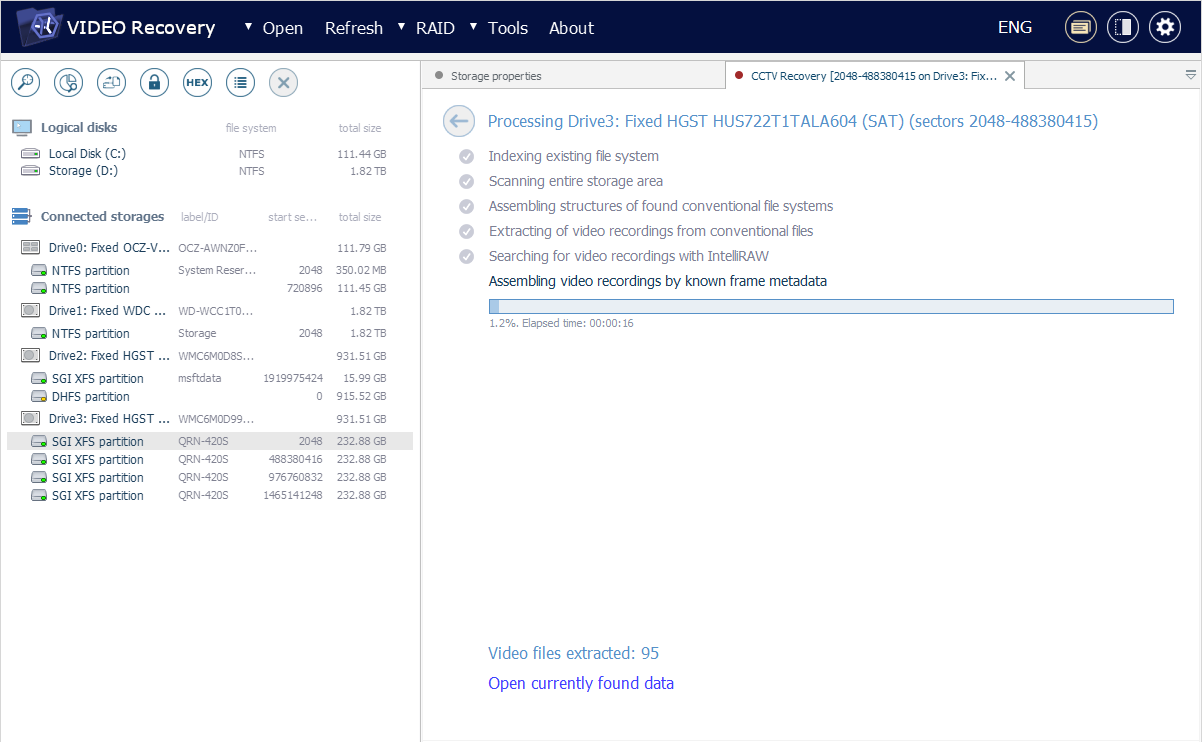
When the scan is performed for CCTV and/or RIFF/QTFF videos, after the status indication switches to "Extracting video files", you will be able to see the counter for video files that have been extracted. The "Open currently found data" button under it can be used to check the intermediate results in a new tab, and if necessary, return to the procedure after that.
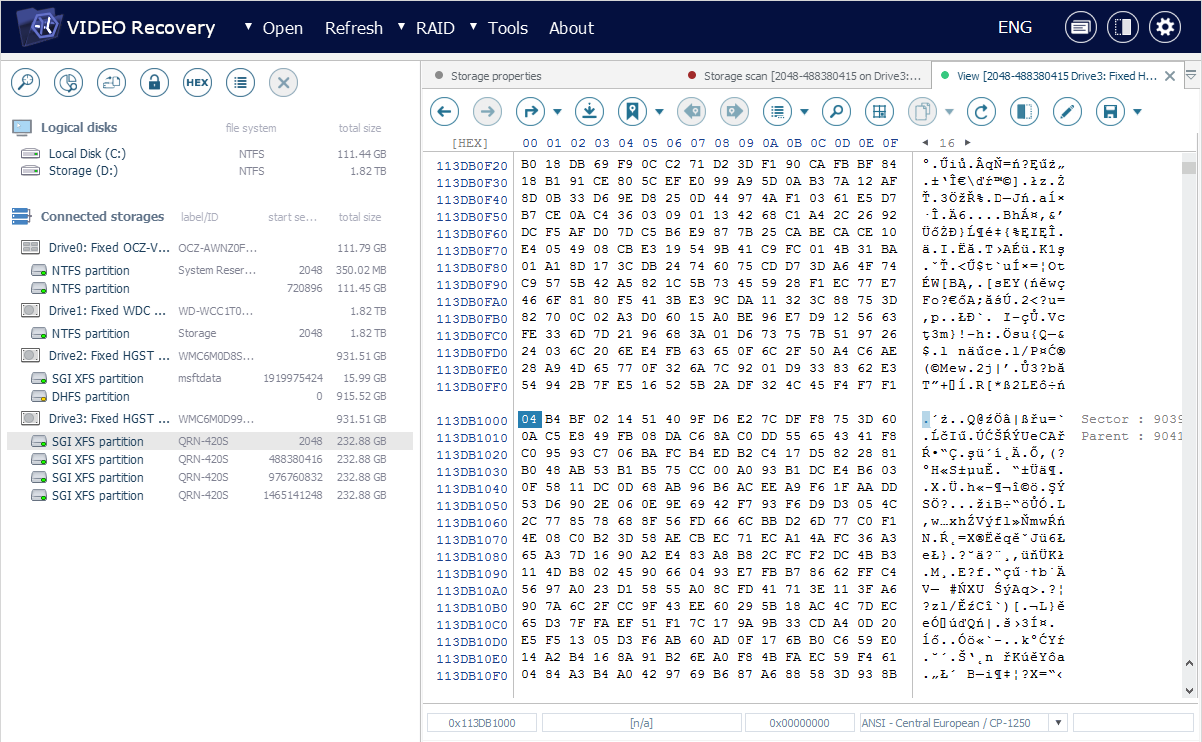
When the general search for lost data is running, you will also see the scan information map that shows the processed areas of the storage and objects that were identified, with their particular positions. You can double-click any cell to open a Hexadecimal Viewer tab for the respective position on the storage.
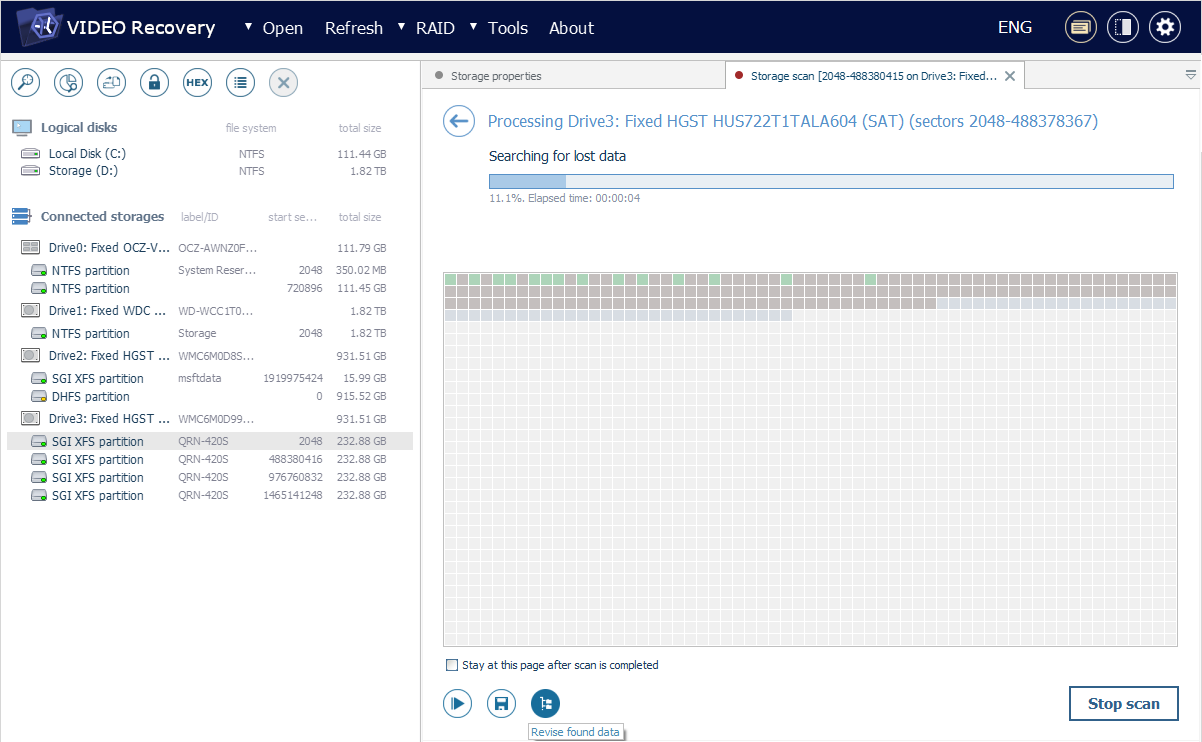
Also, during a conventional scan, you can check the intermediate scan results using the "Revise found data" button at the bottom.
The "Stop scan" button terminates the operation without saving its progress. If you use it during a scan, its results may be incomplete. That is why it is highly advised to wait until the end when the software shows the obtained output.