Installation
On Windows
The software can be installed on all operating systems of the Windows family starting from Windows® XP with Service Pack 3. It is also possible to run it under older versions of Windows starting from Windows NT 4 with Service Pack 6.
Please note that you should never download the installation file or install the program to the drive from which the data was lost. This may lead to its permanent damage and hamper further data recovery attempts. If the data was stored in a non-system partition, it is recommended to download and install the software to the system partition. If the files were lost from the system partition, it is highly advised to shut down the operating system and boot the computer using UFS Explorer Backup and Emergency Recovery CD.
Before starting the installation process, download the executable file of the Software Installer from the Download page of UFS Explorer. For this, press the "Download for Windows" button next to the required product and wait until the operation is completed.
Open the obtained file to start installing the program. In the first window, choose the language you want to be used by the Software Installer and hit the "Start" button.
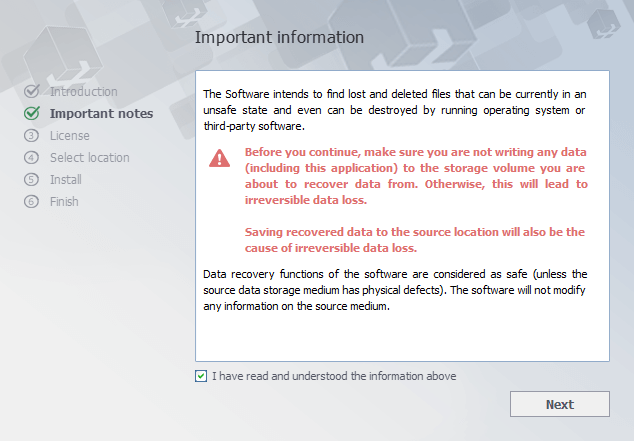
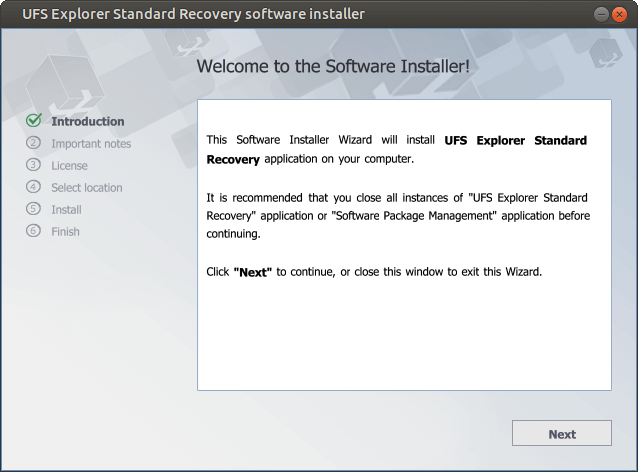
Read the introductory notes and click "Next" to proceed to the next step.

Familiarize yourself with the cautionary notes and confirm that you have understood this information by putting a tick in the checkbox.
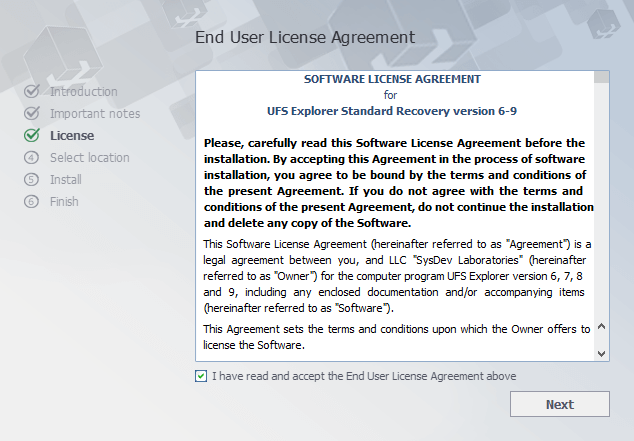
At the next step, you will see the End User License Agreement (EULA) for the product being installed. Read the text carefully and accept the terms of the agreement by inserting a checkmark. You will be able to continue the procedure only after the EULA is accepted.
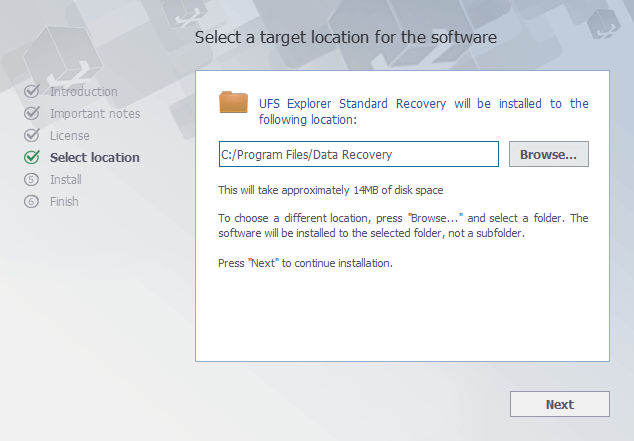
After that, you can choose the target folder that will be used for the installation. Click "Browse" to navigate to the necessary location, or keep the default folder picked out by the installer. In case of a software update from a previous version, the folder for installation will be automatically set as the folder of a previous software version.
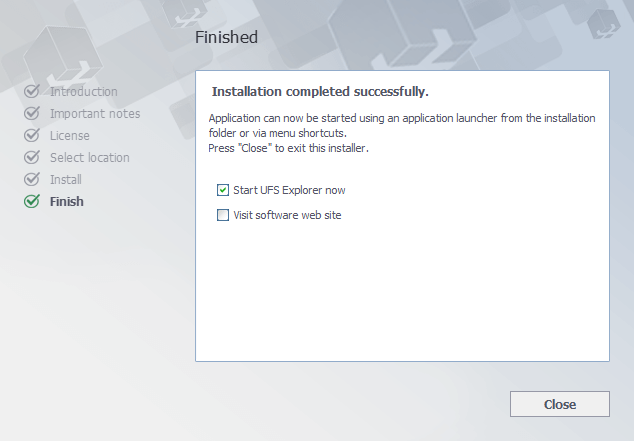
Then, the installer will prompt for the name of the product group in the "Start" menu (the default one is "Data Recovery"). At this stage, it will finish collecting the necessary information and initiate the installation process. After it completed, you will be able to launch the software right away by activating the "Start UFS Explorer now" option.
You can also run the software later using its shortcut in the "Start" menu ("All programs", then the software group (the default one is "Data Recovery") and then the name of the product – "UFS Explorer Standard Recovery", "UFS Explorer RAID Recovery" or "UFS Explorer Network RAID".
On macOS
The software can be installed on all versions of macOS starting from 10.15 Mavericks.
Please note that you should never download the installation file or install the program to the drive from which the data was lost. This may lead to its permanent damage and hamper further data recovery attempts. If the data was stored in a non-system partition, it is recommended to download and install the software to the system partition. If the files were lost from the system partition, it is highly advised to shut down the operating system and boot the computer using UFS Explorer Backup and Emergency Recovery CD.
Before starting the installation process, download the DMG-image file from the Download page of UFS Explorer. For this, press the "Download for macOS" button next to the required product and wait until the operation is completed.
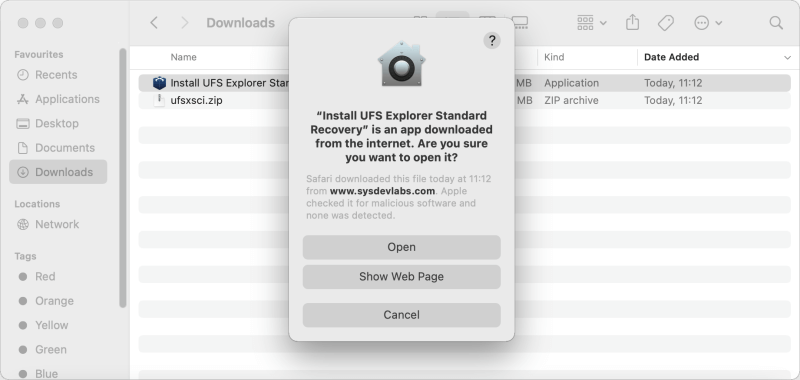
Extract the obtained installation file from the archive and open it using Finder.
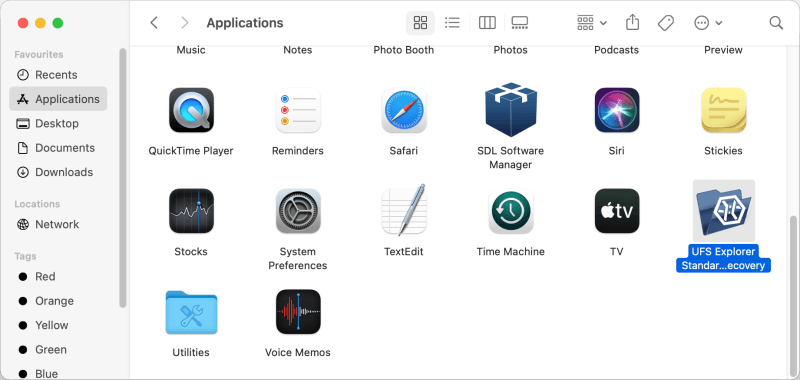
After the installation is finished, go to the "Applications" folder (the "⇧Shift + ⌘ Cmd + A" hotkeys), find the installed application (UFS Explorer Standard Recovery, UFS Explorer RAID Recovery or UFS Explorer Network RAID) and run it using its icon.
On Linux
The software can be installed on most modern Linux distributions, starting from Debian Linux 6.0 or compatible and above.
Please note that you should never download the installation file or install the program to the drive from which the data was lost. This may lead to its permanent damage and hamper further data recovery attempts. If the data was stored in a non-system partition, it is recommended to download and install the software to the system partition. If the files were lost from the system partition, it is highly advised to shut down the operating system and boot the computer using UFS Explorer Backup and Emergency Recovery CD.
Before starting the installation process, download the Universal Installer archive from the Download page of UFS Explorer, for example, into the "Downloads" folder. For this, press the "Download for Linux" button next to the required product and wait until the operation is completed.
Extract the content of the obtained archive. After that, navigate to the folder with the extracted content and launch the Software Installer. For this, you may need to enter your user password.
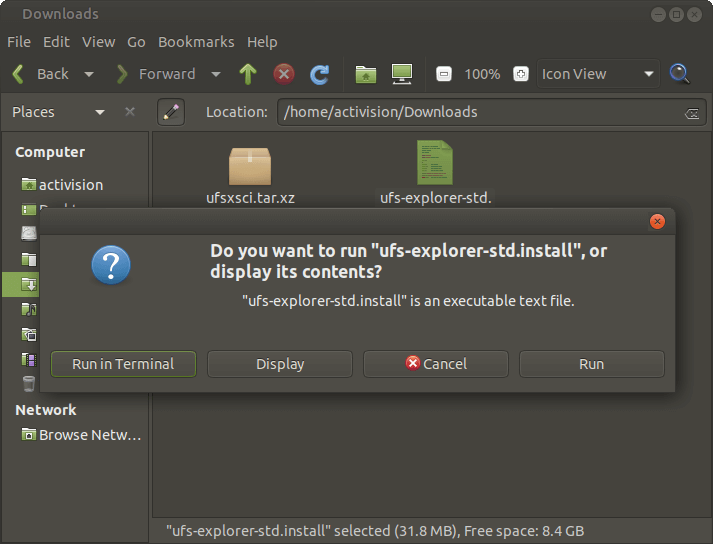
Follow the prompts provided by the Software Installer to complete the procedure.
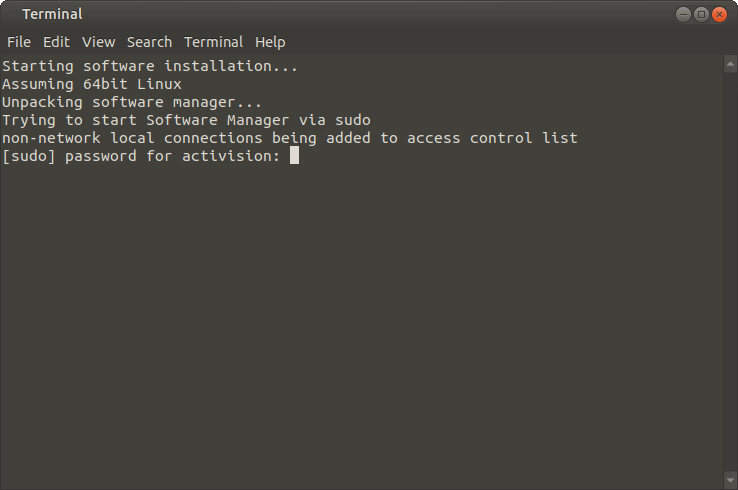
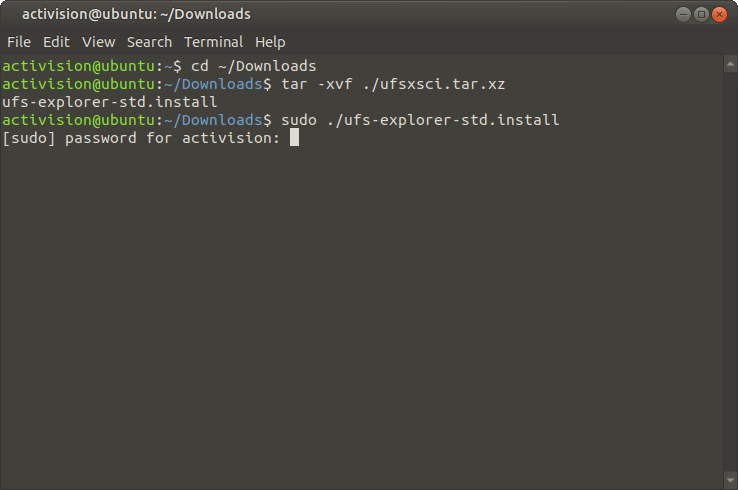
If the described standard installation procedure fails, you may install the software via the Terminal. In the Terminal, open the folder with the extracted file using the "cd" command (e.g. cd ~/Downloads).
Run the "install" script as a local Administrator, for example:
"sudo ./*.install" or "su root -c ./*.install"
Here "*.install" should be replaced with the name of the installation file – "ufs-explorer-std.install" for UFS Explorer Standard Recovery, "ufs-explorer-raid.install" for UFS Explorer RAID Recovery and "ufs-explorer-net.install" for UFS Explorer Network RAID.
The application can be started using its shortcut in the main menu of Window Manager (under "System utilities"). You can also execute the file using the Terminal.
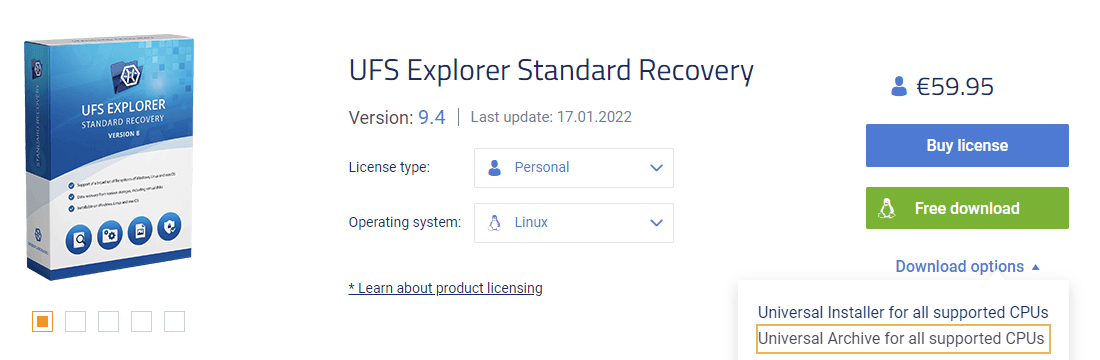
If this method fails as well, you may try launching the program via the Terminal using executable files from the Universal Archive downloaded from the page of the respective UFS Explorer product in the Software Store. For this, choose the second download option for Linux users.
Extract the content of the downloaded archive.
In the Terminal, enter the commands in the following order:
UFS Explorer Standard Recovery
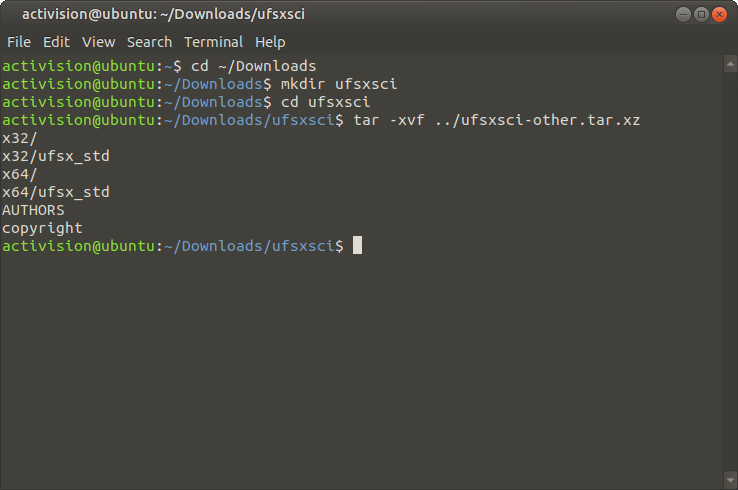
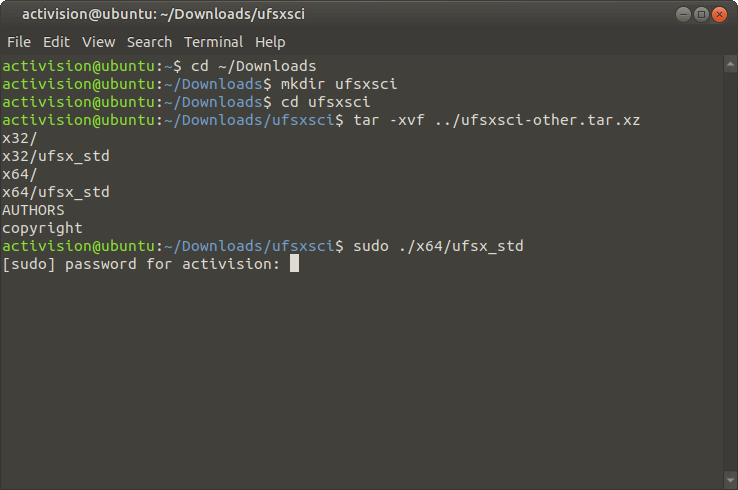
- cd ~/Downloads
- mkdir ufsxsci
- cd ufsxsci
- tar -xvf ../ufsxsci-other.tar.xz
UFS Explorer RAID Recovery
- cd ~/Downloads
- mkdir ufsxrci
- cd ufsxrci
- tar -xvf ../ufsxrci-other.tar.xz
UFS Explorer Network RAID
- cd ~/Downloads
- mkdir ufsxnci
- cd ufsxnci
- tar -xvf ../ufsxnci-other.tar.xz
Depending on the employed computer architecture, start software with one of the following commands:
UFS Explorer Standard Recovery
"sudo ./x32/ufsx_std" or "sudo ./x64/ufsx_std"
"su root -c ./x32/ufsx_std" or "su root -c ./x64/ufsx_std" for Debian
UFS Explorer RAID Recovery
"sudo ./x32/ufsx_raid" or "sudo ./x64/ufsx_raid"
"su root -c ./x32/ufsx_raid" or "su root -c ./x64/ufsx_raid" for Debian
UFS Explorer Network RAID
"sudo ./x32/ufsx_net" or "sudo ./x64/ufsx_net"
"su root -c ./x32/ufsx_net" or "su root -c ./x64/ufsx_net" for Debian
Following this, you will be prompted to enter your user password. After that, the software will be launched without installation. This method can also be used to run UFS Explorer on UFS Explorer Backup and Emergency Recovery CD, since all the applications on it are pre-installed and cannot be updated.
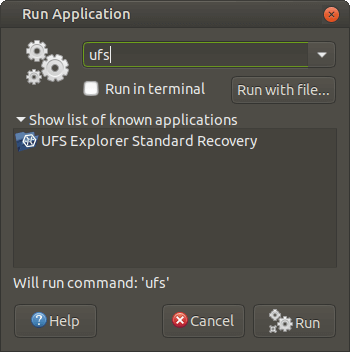
In GNOME:
- press Alt+F2 to invoke the "Start application" dialog;
- type "ufs" to find the program;
- select the required application from the list and ensure that the "Run in terminal" option is activated. After that, hit the "Run" button.
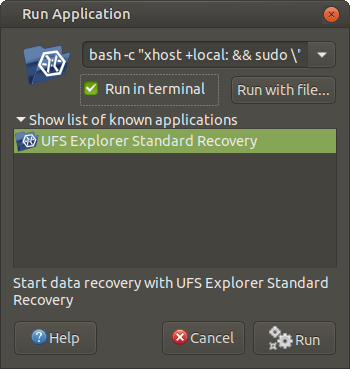
An alternative method is to enter the one of followings commands, enable the "Run in terminal" option and press the "Run" button:
UFS Explorer Standard Recovery
"bash -c "xhost +local: && sudo \"/usr/lib/ufs-explorer/ufs-explorer-std\" or "su root bash -c "xhost +local: && sudo \"/usr/lib/ufs-explorer/ufs-explorer-std\"
UFS Explorer RAID Recovery
"bash -c "xhost +local: && sudo \"/usr/lib/ufs-explorer/ufs-explorer-raid\" or "su root bash -c "xhost +local: && sudo \"/usr/lib/ufs-explorer/ufs-explorer-raid\"
UFS Explorer Network RAID
"bash -c "xhost +local: && sudo \"/usr/lib/ufs-explorer/ufs-explorer-net\" or "su root bash -c "xhost +local: && sudo \"/usr/lib/ufs-explorer/ufs-explorer-net\"
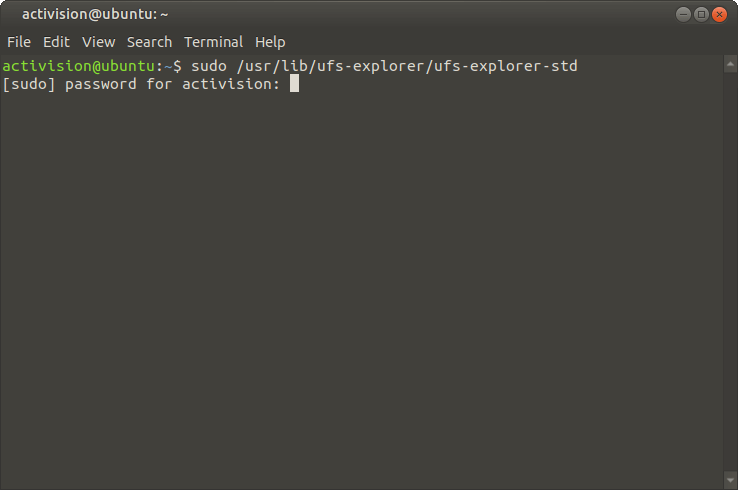
In the Terminal, type in one of the following commands:
UFS Explorer Standard Recovery
"sudo /usr/lib/ufs-explorer/ufs-explorer-std" or "su root -c /usr/lib/ufs-explorer/ufs-explorer-std"
UFS Explorer RAID Recovery
"sudo /usr/lib/ufs-explorer/ufs-explorer-raid" or "su root -c /usr/lib/ufs-explorer/ufs-explorer-raid"
UFS Explorer Network RAID
"sudo /usr/lib/ufs-explorer/ufs-explorer-net" or "su root -c /usr/lib/ufs-explorer/ufs-explorer-rnet"
If the installation fails anyway, you may need to check the missing libraries through LDD, add them and try installing the software one more time.