Hexadecimal Viewer *Only RAID Recovery, Network RAID
Overview
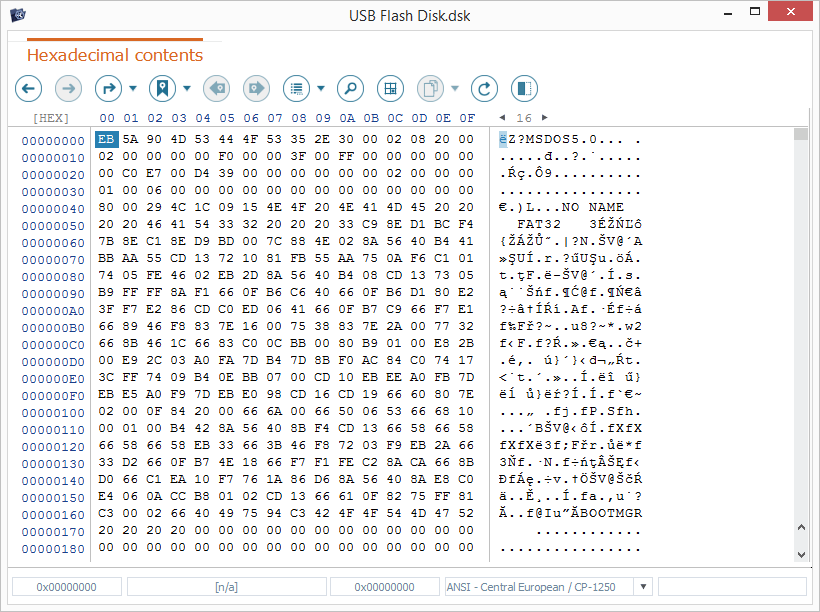
Hexadecimal Viewer comprises a set of means that facilitate low-level data analysis of storages (including physical drives, disk images, virtual disks, reconstructed complex storages), partitions and files in a hexadecimal representation. Please note that the items processed in it are handled in a safe read-only mode, without any impact on the original data of the source.
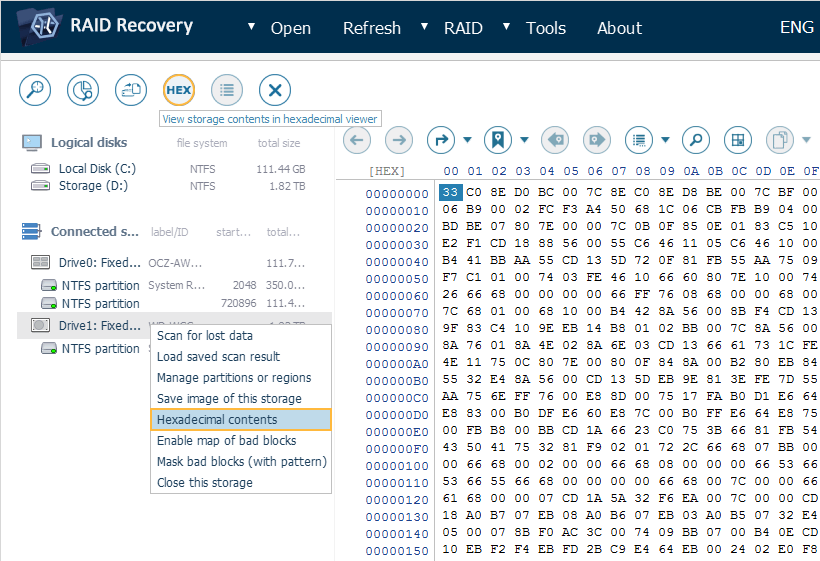
There are several ways to open Hexadecimal Viewer for a storage or partition: you can select it in the storages navigation pane and get the "View storage contents in hexadecimal viewer" tool from the main toolbar or use the "Hexadecimal contents" option in its context menu. Hexadecimal Viewer for files can be launched from the Explorer element: you can double-click a file, use the "Enter" key, the "Open" option in its context menu or the "View" button below the thumbnail preview and, if necessary, switch to the Hexadecimal contents tab.
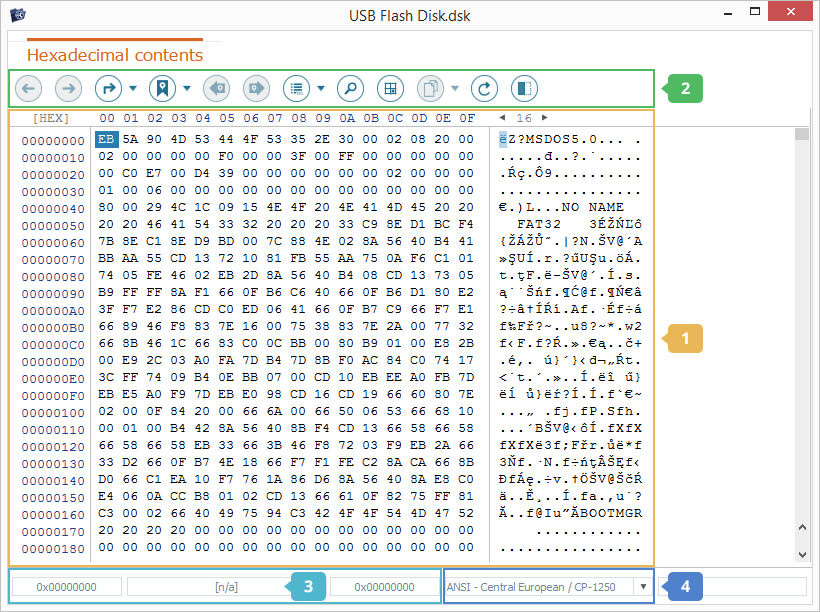
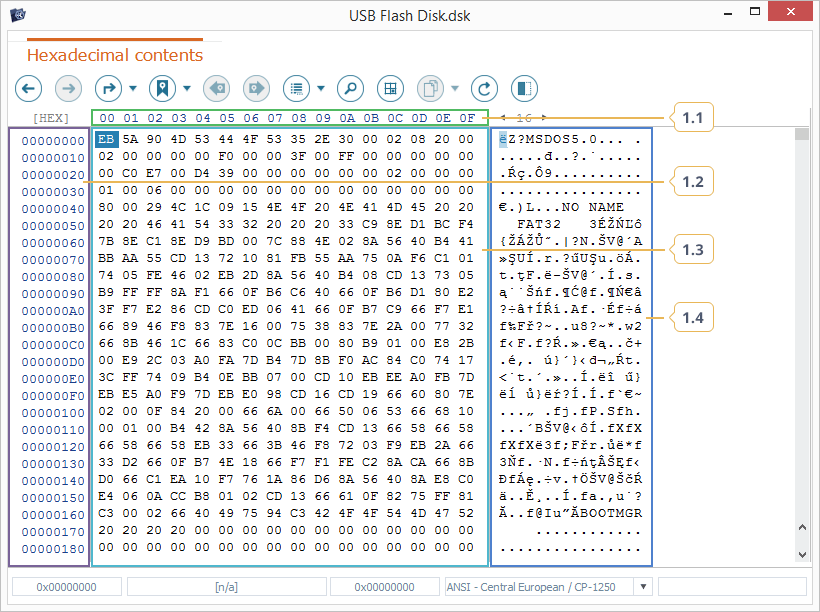
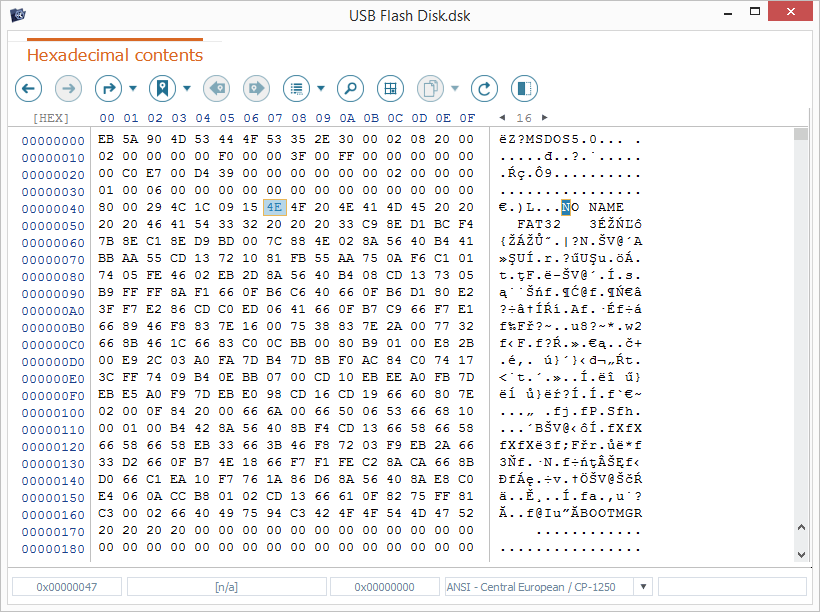
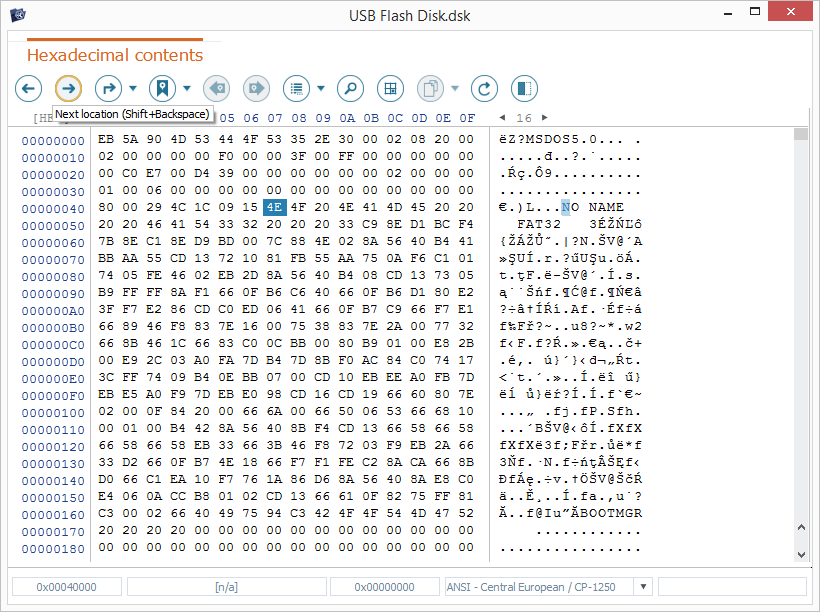
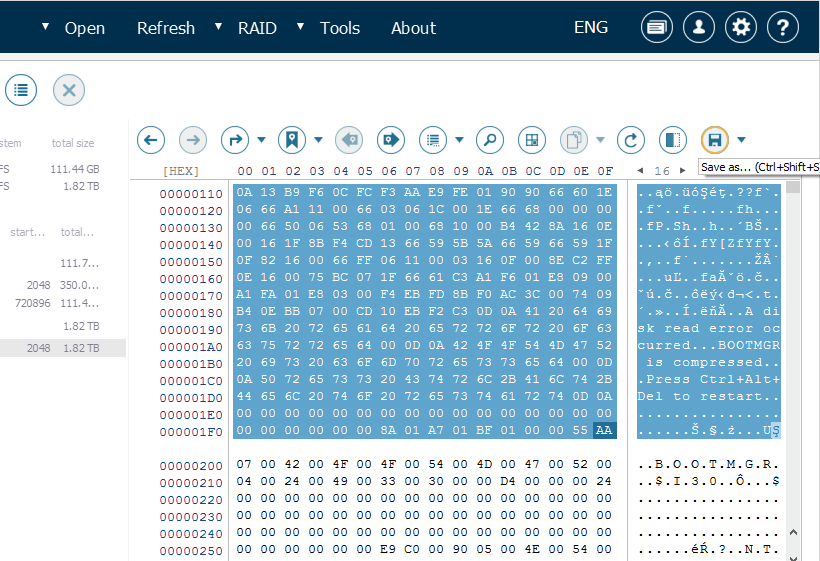
In the opened dialog, you can see the main content area (1) positioned at the center. The main toolbar (2) of Hexadecimal Viewer is located at the top of the window. The lower part of the window contains the contextual line (3) and the encoding box (4).
-
Main content area
The main content area of Hexadecimal Viewer consists of three sections:
-
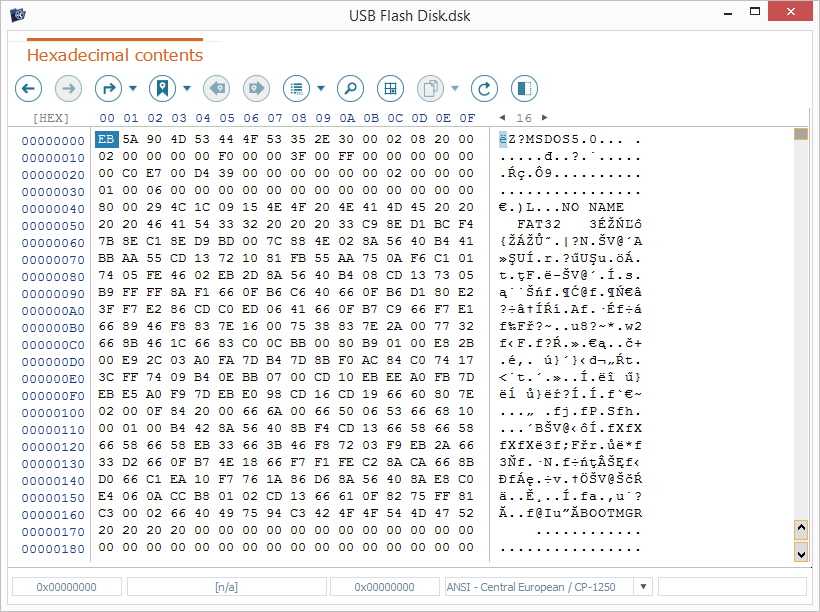
Byte address pane
This pane provides the offset for each column of bytes as a hexadecimal or decimal value, depending on the chosen address mode. By default, 16 columns are shown, their number can be changed by specifying the needed value after a double click or using the arrow-like buttons located next to the pane.
-
String address pane
This pane indicates the position of the first byte in the corresponding line (the so-called offset). It is possible to switch between the hexadecimal and decimal address modes using the button at the top.
The crossing of the string and byte address panes defines the address of each specific byte of data.
-
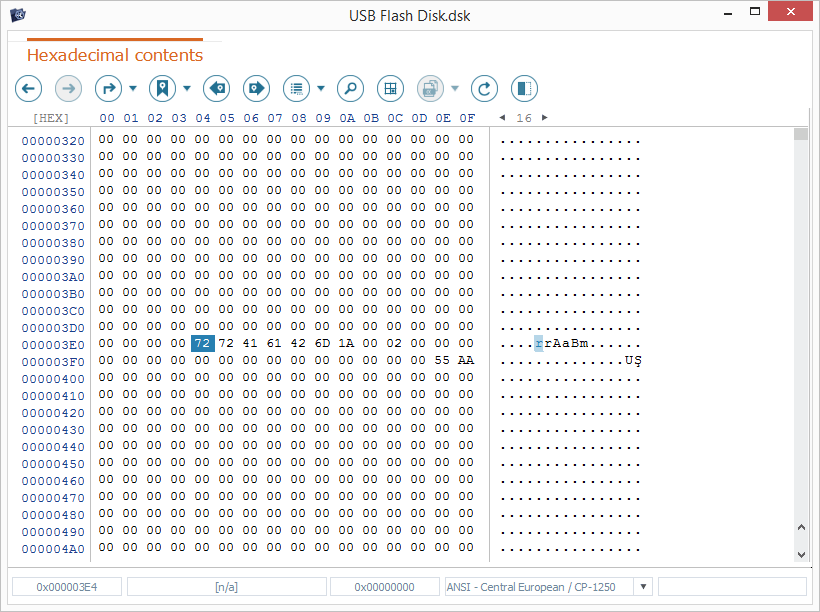
Hexadecimal data pane
This pane displays the actual data content presented as an array of hexadecimal bytes. Any byte in it is represented by two hex digits (from 0 to 9 and from A to F), each of them stands for 4 bits.
-
Text data pane
This pane presents the data content from the hexadecimal data pane as a series of text characters in the encoding set up via the encoding box. Both panes are synchronized: when you select a byte or a range in the hexadecimal view, its text representation is highlighted accordingly.
-
-
Main toolbar
The main toolbar of Hexadecimal Viewer provides access to the instruments available for work with the data content presented in the main content area. This pane offers the following tools:

-
Previous location
This tool allows taking a step backwards to the previous position of the cursor in the hexadecimal/text data pane. The maximum number of steps that can be taken depends on the value specified for the "Undo memory limit" in the program’s settings.
-
Next location
This option allows taking a step in the forward direction to the cursor’s position in the hexadecimal/text data pane after the "Previous location" tool has been applied. The number of possible steps depends on the number of backward steps taken and the value specified for the "Undo memory limit" in the program’s settings.
-
Go to…
This tool makes it possible to jump to a certain position in the hexadecimal data pane by specifying the desired parameters: offset, units (bytes, blocks of the defined size) and direction.
-
Mark position
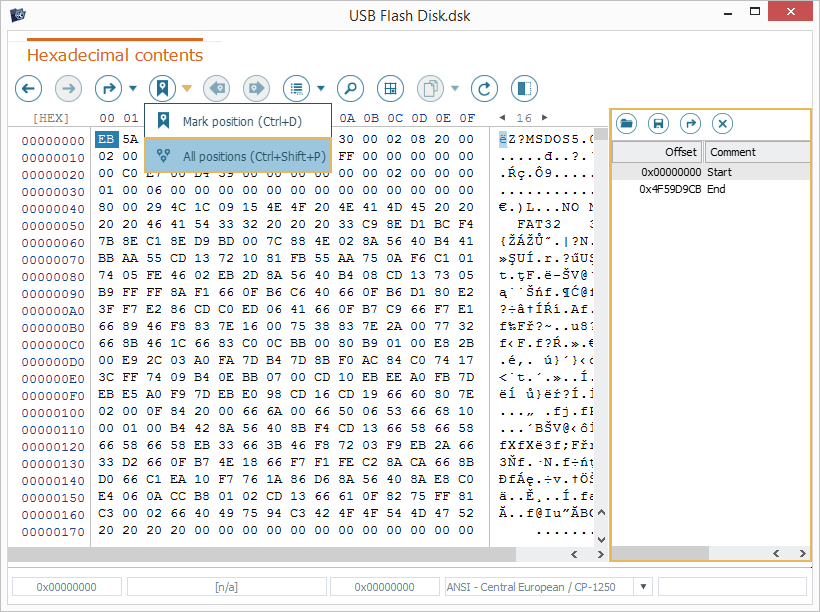
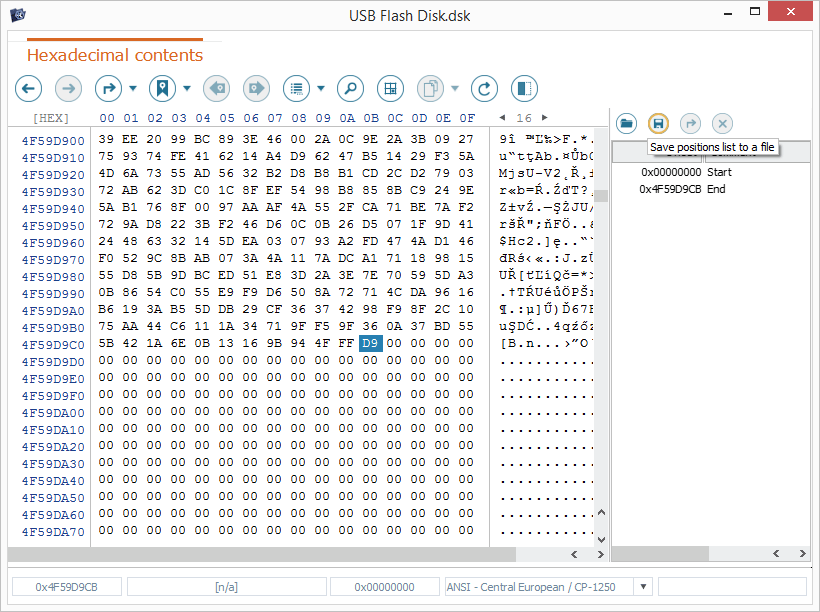
This tool opens a dialog for saving the current cursor’s position in the hexadecimal data pane, together with information about it specified by the user. The position will be added to the positions list that can be employed for "jumps" and saved to a separate *.hplst file for future use. The current list can be opened/hidden using the "All positions" option of this tool. Please note that all positions will be lost after restart of the software, unless they are saved to a file.
-
Previous position
This tool allows taking a step to a position located down in the list of marked positions.
-
Next position
This tool allows taking a step to a position located up in the list of marked positions.
-
Bind a structure
This tool makes it possible to apply the previously defined structure template to the data block at the current position of the cursor in the hexadecimal data pane. Such a template can be loaded from a text file via the "Import" dialog. Its details will be displayed in the "Structure details" window opened with the "View details" button and in the Information pane opened via the "Toggle Inspector panel" tool from the toolbar.
-
Find data
This function allows looking for a certain data pattern on the basis of the defined parameters. The search can be performed for values within the text data or hexadecimal data pane. Advanced hexadecimal data search with a special syntax is also available for more precise results.
-
Select range
This tool can be used to define a data range to be selected in the hexadecimal/text data pane for further operations.
-
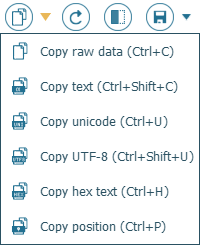
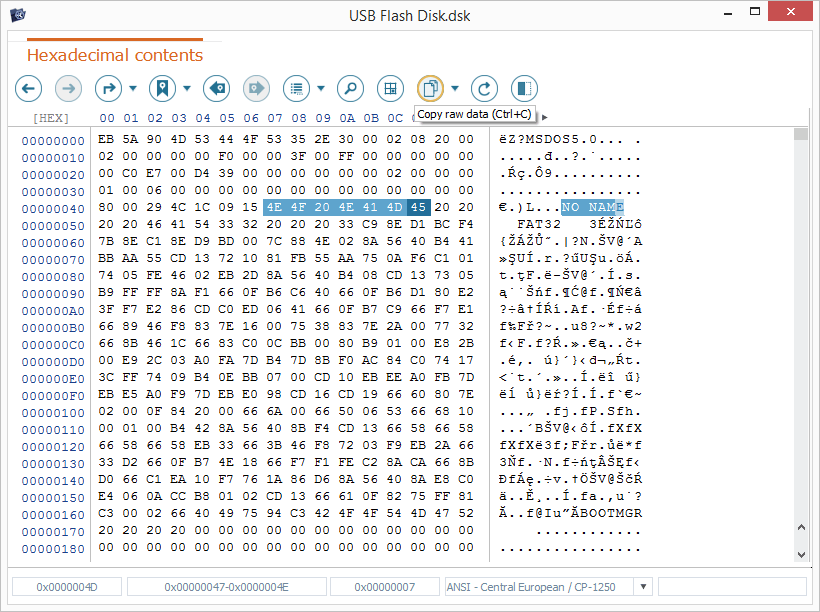
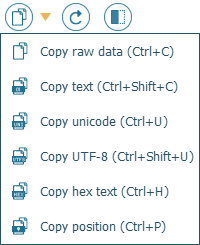
Copy
This tool enables the data copying mode. The maximum amount of data to be copied depends on the "Data copy limit" defined in the software settings. The type of value for the copying operation is chosen via the corresponding option in the drop-down list of the tool:
-
Copy raw data – copying of raw unformatted data selected in the hexadecimal data pane.
-
Copy text – copying of the character sequence selected in the text data pane.
-
Copy Unicode – copying of the selected character sequence in the two-byte Unicode encoding.
-
Copy UTF-8 – copying of the selected character sequence in the one-byte UTF-8 encoding.
-
Copy hex text – copying of the data selected in the hexadecimal data pane as text.
-
Copy position – copying of the value of the current cursor’s position.
-
-
Refresh
This option makes it possible to update the information within the currently processed data source.
-
Toggle inspector panel
This tool opens the Information pane for the processed data source. It provides the details about the current position of the cursor and selected data range, inclues the Inspector for raw data, properties for the data carrier and a number of settings for Hexadecimal Viewer. In order to hide this pane, you can press the button once again.
-
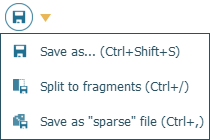
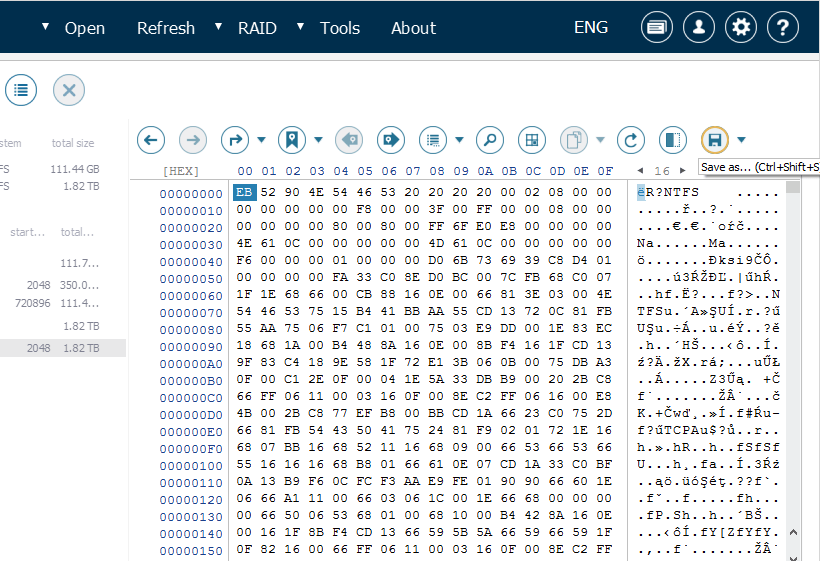
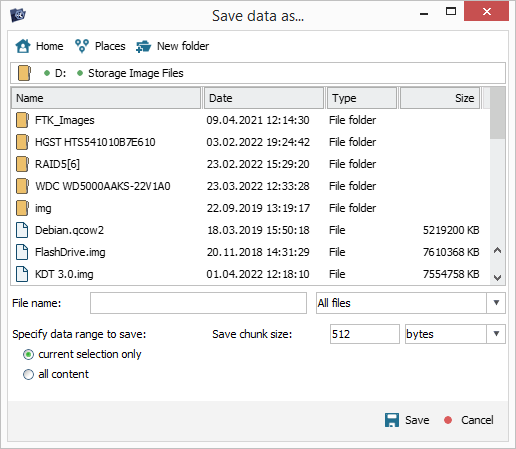
Save as…
This tool allows copying the data selected in the hexadecimal data pane or the entire content of the processed data source to a separate file. Other saving options include:
-
Split to fragments – creating several data chunks of the specified size from the data source and saving them to a separate file.
-
Split as "sparse" file – creating a new virtual disk file with the data selected in the hexadecimal data pane or the whole content of the processed data source using the space-saving "sparse file" technology or other supported formats.
-
-
-
Contextual line
This pane provides information about the position of the cursor in the hexadecimal/text data pane. The values displayed in it depend on the currently activated address mode (hexadecimal, decimal). The pane itself consists of the following elements:
-
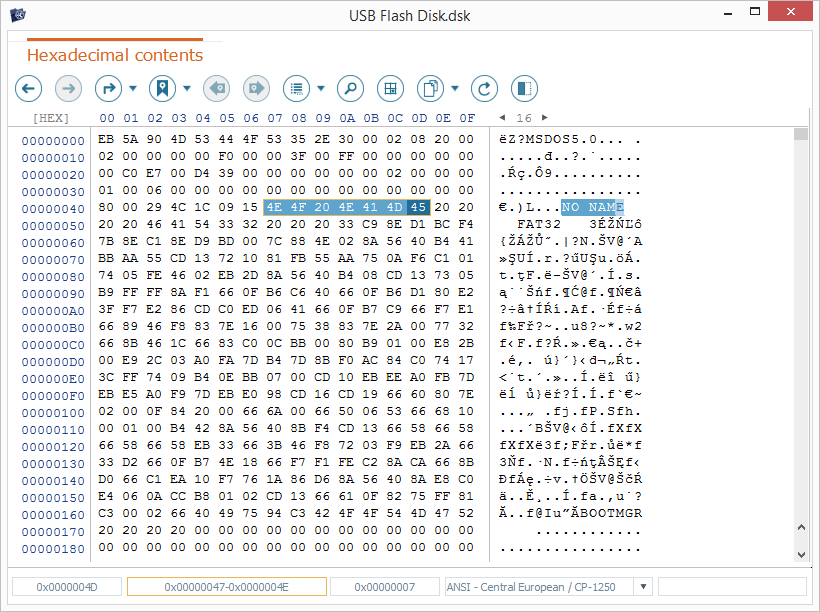
Current position
This field indicates the address of the current position of the cursor. A double click on the field opens the "Go to position" dialog for jumping to the specified position. This dialog can also be used to copy the address of the current position of the cursor to the clipboard.
-
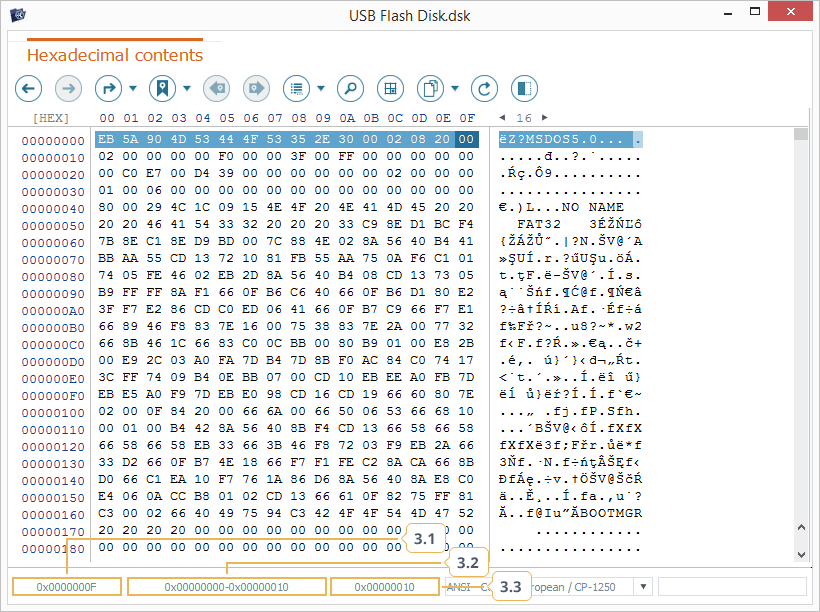
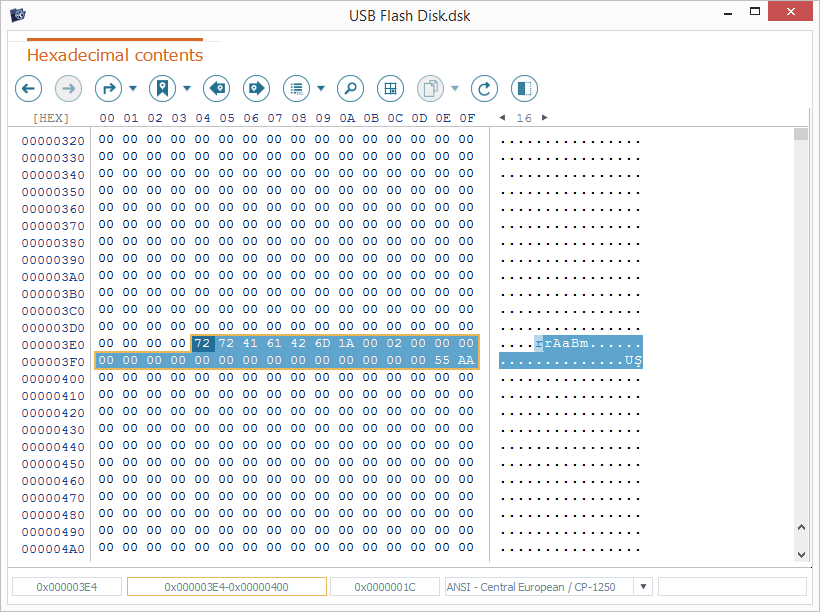
Selected bytes position
This field displays the position of the first and the last byte in the range selected in the hexadecimal/text data pane. A double click on it opens the "Define range to select" dialog for manual definition of the start and end positions for selection.
-
Selected bytes number
This field shows the number of bytes in the range selected in the hexadecimal/text data pane. A double click on it opens the "Define range to select" dialog for manual definition of the number of bytes for selection.
-
-
Encoding box

This pane displays the encoding used in the text data pane for bytes representation. The necessary encoding option can be chosen from the set in the opened drop-down list.
Exploring hexadecimal content
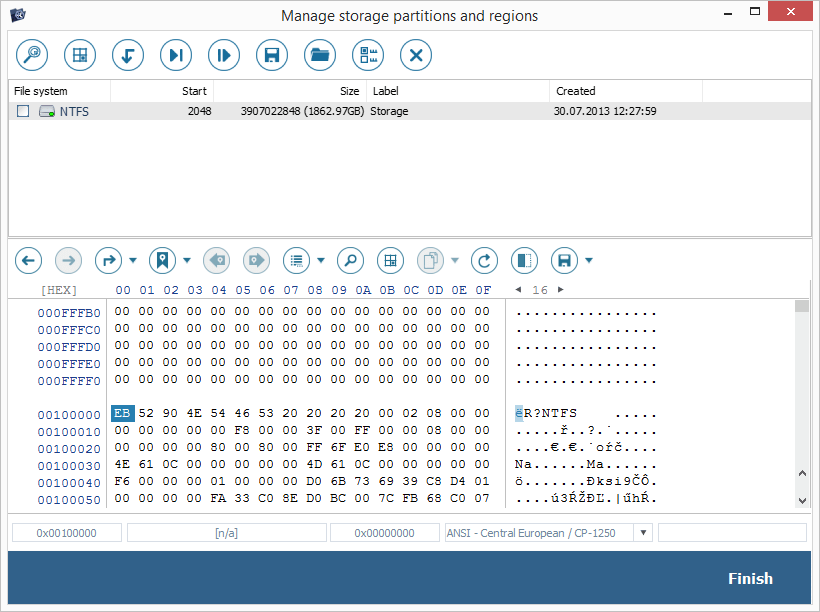
Hexadecimal Viewer is the primary mechanism provided by UFS Explorer for viewing the binary content of storages, partitions and files. It can be launched a separate element for the chosen source and is also embedded into other components as an auxiliary data analysis tool (e.g. Partition Manager, RAID Builder, Disk Imager).
The entire content of the opened/currently selected data source is displayed in the hexadecimal and text data panes. If its size doesn’t fit into the window’s layout, horizontal and vertical scroll bars can be used to make the rest of it visible.
The cursor in these panes is changed to a vertical line and allows setting the position to which the subsequent command will be applied. The cursor position is highlighted with the dark blue color, and its address is automatically indicated in the Current position field.

The cursor is also used as an anchor point for range selection. In this case, the position of the first and the last byte in the selected range is displayed in the Selected bytes position field, whereas its size in bytes is available in the Selected bytes number field.
When the cursor is in the Hexadecimal or Text data pane, its position is highlighted in the other pane with the light blue color. It is possible to switch quickly between them by pressing the Tab key or using the mouse.
The data in the cursor’s position is interpreted by the Inspector available in the Information pane. This pane is opened using the "Toggle inspector panel" tool from the toolbar and consists of the following sections:
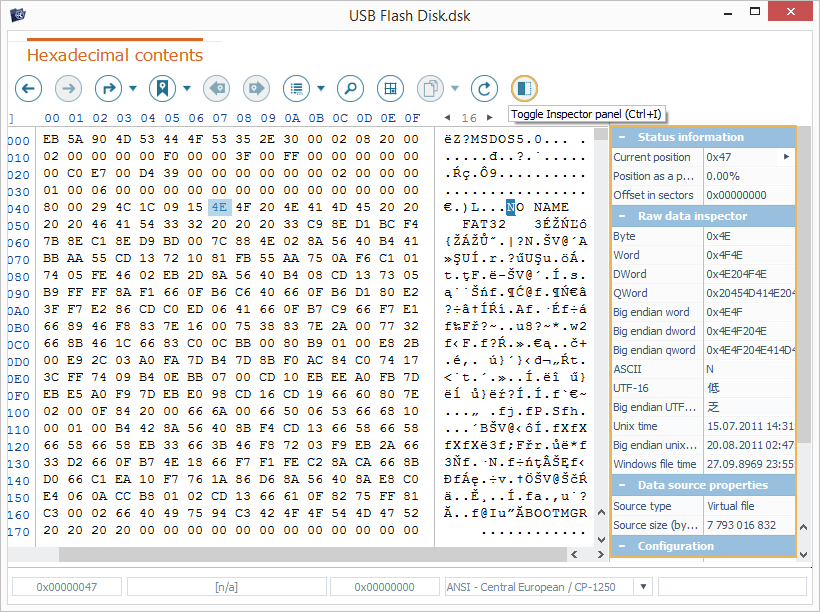
Status information
The "Status information" section provides the addresses for the current cursor’s position and bytes selection. The type of values in it depends on the active address mode (decimal, hexadecimal).
Current position – the address of the current cursor’s position. The "Change value" button next to it opens the "Go to position" dialog for jumping to another position.
Current block – the number of the data block in the current cursor’s position.
Selection start – the starting position of the selected bytes range. The "Change value" button next to it opens the "Define range to select" dialog for specifying a new range for data selection.
Selected bytes – the number of bytes in the selected area.
Position as percentage – the percentage value calculated for the address of the current cursor’s position in regard to the overall size of the processed data source.
Offset in sectors – the address of the current cursor’s position in sectors.
Structure information
The "Structure information" section shows the information about currently applied structure template, if available.
Type name – the name of the applied structure template.
Base position – the starting position of the applied structure template.
Structure fields – the structure fields from the structure template file defined by the user.
Raw data inspector
The "Raw data inspector" section displays the data selected in the hexadecimal/text data panes in different formats. To add or remove certain data types from the Inspector pane, choose the "Data inspector" option in the "Configuration" section and select "Configure" in the opened drop-down list. The default data types include:
Byte – the hexadecimal value for the current cursor’s position.
Word – the hexadecimal values of two sequential bytes, starting from the current cursor’s position in the little-endian order.
Dword – the hexadecimal values of four sequential bytes, starting from the current cursor’s position in the little-endian order.
Qword – the hexadecimal values of eight sequential bytes, starting from the current cursor’s position in the little-endian order.
Big-endian word – the hexadecimal values of two sequential bytes, starting from the current cursor’s position in the big-endian order.
Big-endian dword – the hexadecimal values of four sequential bytes, starting from the current cursor’s position in the big-endian order.
Big-endian qword – the hexadecimal values of eight sequential bytes, starting from the current cursor’s position in the big-endian order.
ASCII – the text value that corresponds to the one-byte hexadecimal value in the current cursor’s position.
UTF-16 – the text value that corresponds to the two-byte hexadecimal value in the current cursor’s position in the little-endian order.
Big-endian UTF-16 – the text value that corresponds to the two-byte hexadecimal value in the current cursor’s position in the big-endian order.
Unix time – the four-byte timestamp in the little-endian order for the data in Unix-like operating systems.
Long unix time – the eight-byte timestamp in the little-endian order for the data in Unix-like operating systems.
Big-endian unix time – the four-byte timestamp in the big-endian order for the data in Unix-like operating systems.
Windows file time – the eight-byte timestamp for the data in the Windows operating systems.
DOS file date – the two-byte timestamp for the data in the DOS operating system.
Data source properties
The "Data source properties" pane provides a brief summary of properties of the processed data source:
Source type – the type of processed data source.
Disk storage type – the type of disk storage (displayed for storages, partitions).
Source size – the total size of the processed data source in bytes.
Source ID – the identifier of the processed data source.
Block size – the size of the block in bytes for the processed storage. A new value can be specified using the "Change value" button next to it.
Number of blocks – the number of data blocks in the processed storage with a given block size.
Configuration
The "Configuration" pane delivers information about current settings of the Information pane and enables their adjustment:
Text encoding – the encoding used to display the text representation of the data. The property can be changed by selecting the necessary encoding from the opened drop-down list.
Separation to blocks – the way the content in the Hexadecimal/Text data pane is divided into blocks of a given size. You can use the "Change value" button to disable separation into blocks, to select separation with global addresses (the address of each block will start from the address of the previous one) or internal addresses (the address of each new block will start from zero).
Data inspector – the settings applied to the "Raw data inspector" section. You can hide it from the Information pane or set the types of data that will be displayed in it using check-boxes.
Structures – a property that defines whether the details for the applied structure template will be displayed in the Information pane.
Assign structures automatically – assigning the current structure template to all files of the same type (if enabled).
Content navigation
The most basic way to navigate the content of the processed data source is to move the cursor manually to the necessary byte or character using the mouse or the arrow keys from the keyboard. In addition to this, Hexadecimal Viewer makes it possible to jump instantly to the required address via the "Go to position" dialog. This dialog can be opened using the "Go to" tool from the toolbar, the Ctrl+G shortcut, a double click on the "Current position" field in the contextual line pane or via the "Current position" property from the Information pane.

In the opened window, you will need to enter the required offset into the "New position" field. The arrow-like button next to it can be used to view the navigation history.
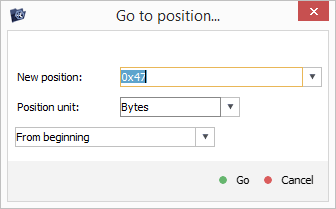
Also, it is possible to change the unit used for a "jump" to blocks of the specified size and set up its direction: move forward or backwards from the current position, from the beginning/end of the data source or from the manually specified offset.

After you click the "Go" button, the cursor in the hexadecimal/text data pane will be moved to the given position.
Once you change the cursor’s position, the "Previous location" tool becomes activated in the toolbar of Hexadecimal Viewer. It allows jumping back to the previous cursor’s position. You can use it or the Backspace key multiple times to step through the previous locations to the necessary one.
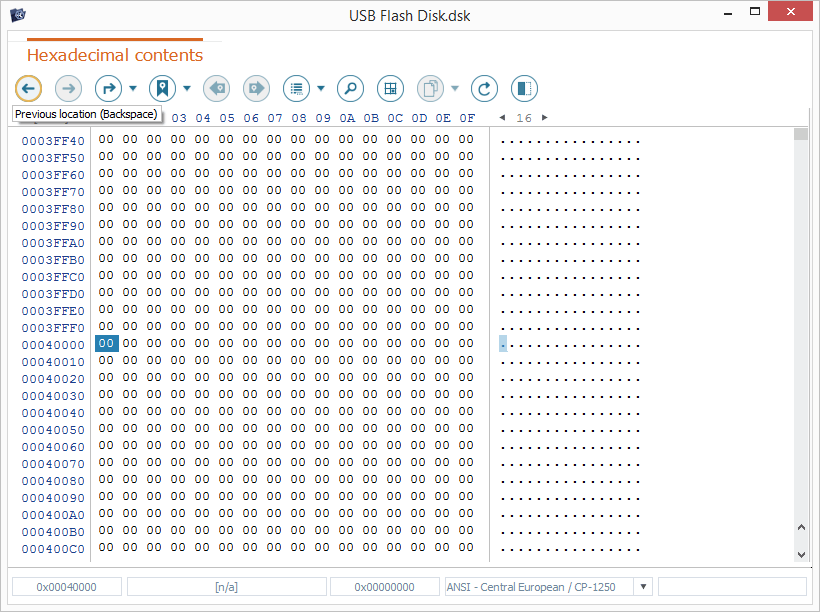
After you apply the "Previous location" tool, the "Next location" tool becomes enabled (Shift+Backspace) for reverting the backward steps taken.
Position bookmarks
Hexadecimal Viewer offers a simple way to mark important positions within the data source using bookmarks. To set a bookmark, move the cursor to the required position and apply the "Mark position" tool from the toolbar or use the Ctrl+D shortcut.
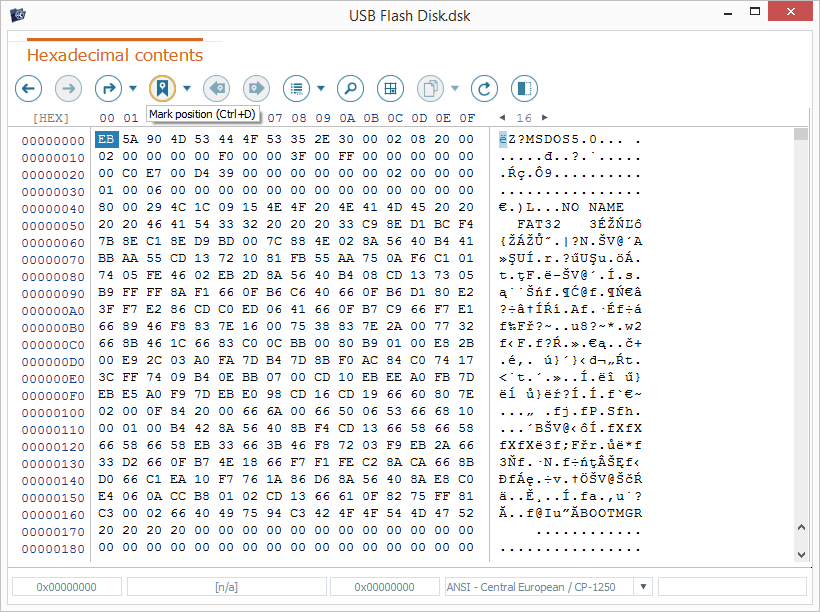
In the opened window, specify the name for your bookmark and hit "OK".

The given position will be saved to the current positions list in the Bookmarks pane. If a bookmark already exists for this position, it will be replaced with the new one.
The Bookmarks pane can be opened using the "All positions" option from the tool’s drop-down list or the Ctrl+Shift+P combination of keys. You can easily move to any bookmark in the list using a double click, the "Go to" button from the Bookmarks pane or the corresponding context menu option.
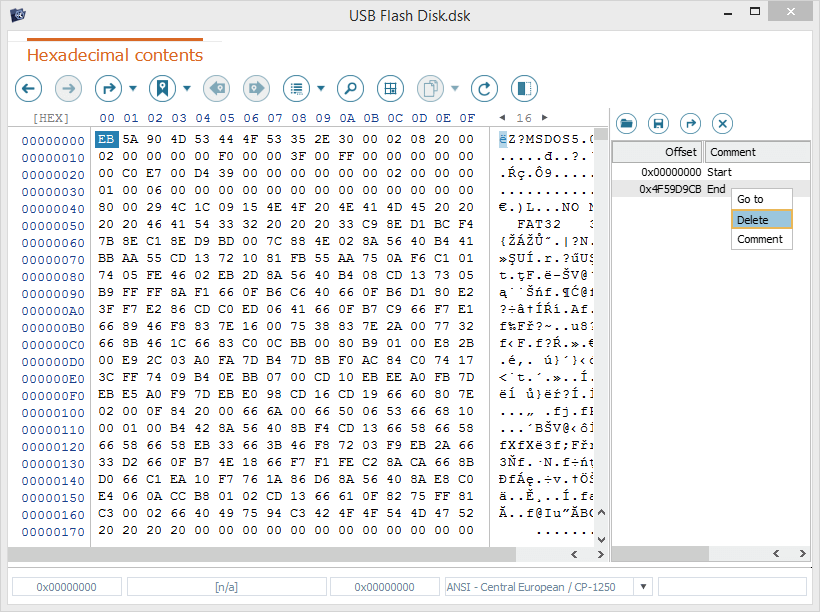
To remove a certain bookmark from the list, select it in the Bookmarks pane and use the "Delete" option in its context menu. To change its name, get the "Comment" option from the context menu.
The entire list of defined bookmarks can be exported as a *.hplst file for backup purposes using the "Save positions list to a file" button from the Bookmarks pane. You can import the created file later using the "Load saved positions from a file" button.
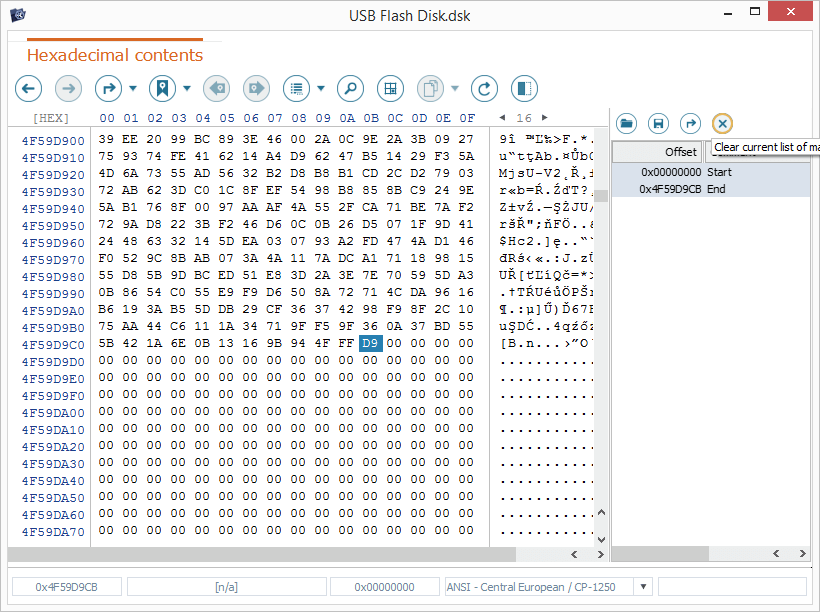
To destroy the whole current list of bookmarks, press the "Clear current list of marked positions" button.
Data search
Hexadecimal Viewer makes it easy to find any set of hexadecimal bytes or a text string within the given data source using the "Find data" instrument from the toolbar. This function can also be accessed with the Ctrl+F combination of keys.

In the opened dialog, specify the required search pattern in the "Search for" field.
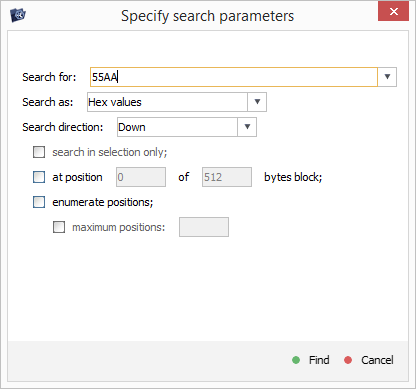
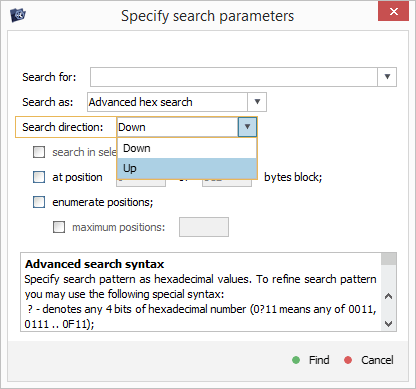
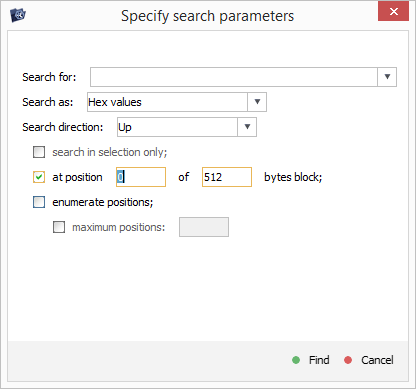
Depending on its type, set up the "Search as" parameter as "Text", "Hex values" or choose the "Advanced hex search" if you want to apply any regular expressions to enhance the search.
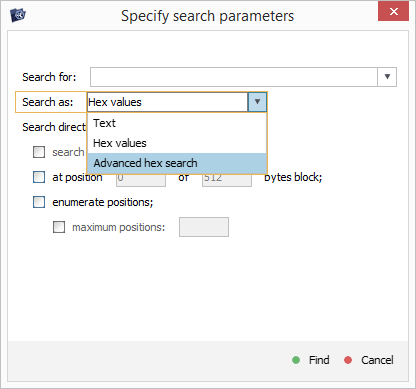
The "Search direction" parameter defines whether the next or previous occurrence of the search pattern will be located.
By default, the search is performed within the entire data source. To limit the search area, use the "Select range" tool from the main toolbar of Hexadecimal Viewer and activate the "Search in selection only" option.
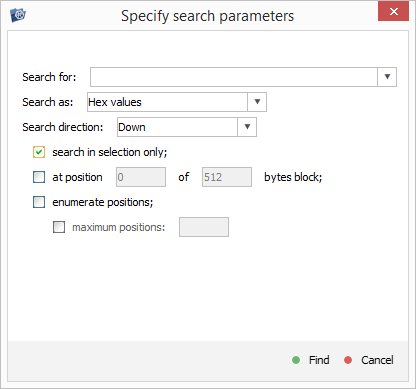
The tool also allows finding the given search pattern at a particular position in every block of the defined size. For this, enable the "At position" parameter and provide the position number and the block size. If the pattern is not found in the first block, the search will be continued in the next one.
By default, the software will look for the first instance of the specified search pattern in the chosen direction. If you need to find all occurrences, enable the "Enumerate positions" option, and the program will list all of them as position bookmarks. You may limit the number of displayed positions with the help of the "Maximum positions" options.

When the search pattern is specified as a text string, two additional parameters will be available:
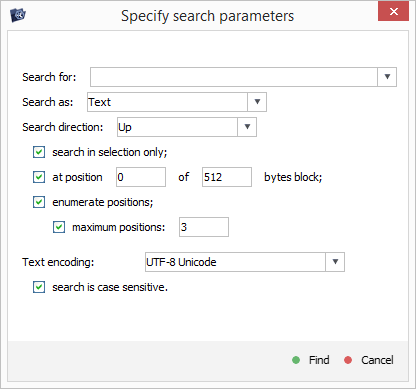
Text encoding – the encoding used for the string to be searched;
Search is case-sensitive – when enabled, the uppercase and lowercase characters will be treated as distinct.
When the "Advanced hex search" mode is activated, you may specify the search pattern by combining it with a regular expression defined using the following special syntax:
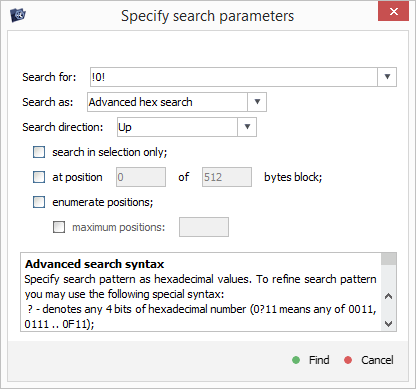
-
? – any 4 bits in a hexadecimal sequence (for example, 0?11 may mean 0011, 0111…0F11).
-
*N* – any "N" bytes (for example, *12* means any 12 bytes).
-
!B! – any value that is not equal to "B" (for example, !0! means "not equal to 0" or !ff! means "not FF").
-
{B1,B2...} – enumeration of valid bytes (for example, {00,?1,1f} means 0, any of 01…F1 or 1F).
-
{??,!B2!...} – a special case of "except" enumeration (for example, the byte matches the first value and doesn’t match the second one).
-
's' – an ASCII string (for example, 'str' will mean "73 74 72").
-
"s" – a Unicode string (for example, "str" will mean "73 00 74 00 72 00").
-
`s` – a UTF-8 string (the same as an ASCII string, but it encodes the "localized" symbols to UTF-8).
-
+ – used at the beginning of a string to specify that it is case-sensitive.
-
- – used at the beginning of a string to specify that it is not case-sensitive.
After you hit the "Find" button, Hexadecimal Viewer will show the search progress. If a match is found, the cursor will be set at the start of the found pattern.
Data selection
The basic method for selecting a range in the hexadecimal/text data pane is to press the left button of the mouse or the Shift key from the keyboard. After that, you can move the cursor in the necessary direction, and the current selection will be modified.
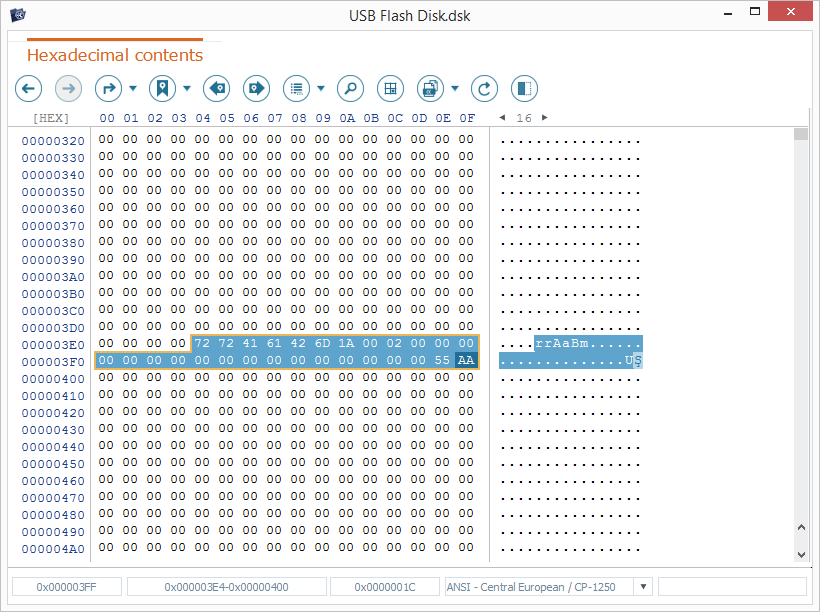
In addition to the use of a cursor, Hexadecimal Viewer allows selecting a set of continuous bytes in the processed data source using the "Select range" function. It can be launched from the main toolbar of Hexadecimal Viewer, with the help of the Ctrl+R combination, or from the "Selected bytes position"/ "Selected bytes number" fields in the contextual line.
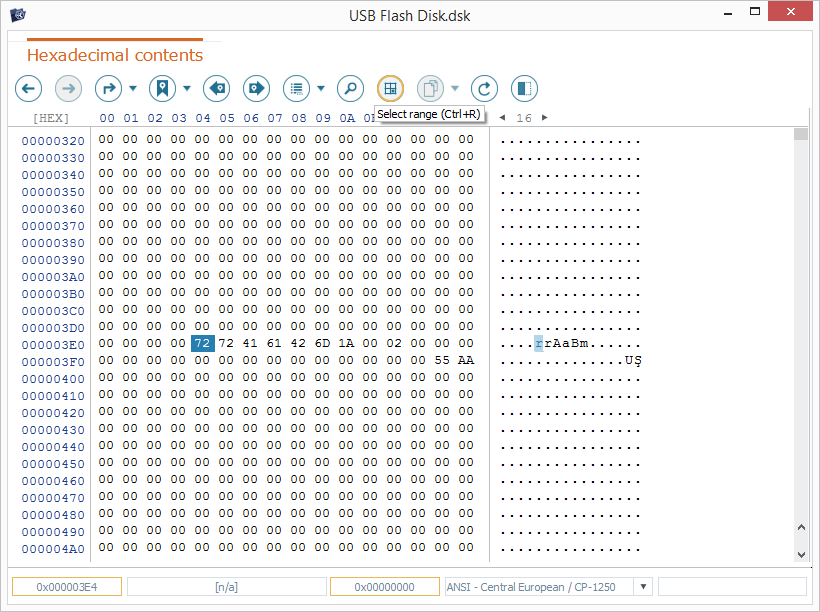
In the opened window, specify the address of the first byte for selection and the number of bytes. To specify these parameters, the current position of the cursor can be used as well.
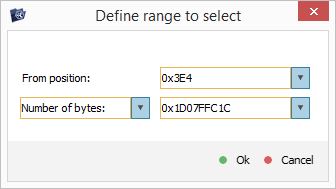
Alternatively, you may define the selection by defining the addresses of the first and the last byte for selection. To enable this mode, choose the corresponding option in the drop-down list.
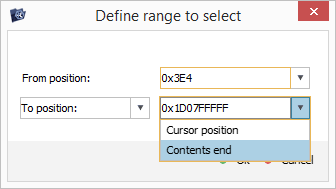
Press the "OK" button to make the new selection in accordance with these parameters. If available, the current selection will be dropped. The start address and the size/end of the selection will be displayed in the contextual line.
Data copying
Hexadecimal Viewer makes it possible to place the data range selected in the hexadecimal/text data pane to the clipboard using the "Copy" tool from the toolbar.
Depending on the chosen option, the selected data will be copied "as it is" or converted into one of the supported formats. To perform the operation, you will need to opt for one of the following variants:
Raw data – to copy raw unformatted data selected in the hexadecimal data pane.
Text – to copy the character sequence selected in the text data pane in the same encoding that has been set up for its display via the encoding box.
Unicode – to convert the selected character sequence into two-byte Unicode and copy it to the clipboard.
UTF-8 – to convert the selected character sequence into one-byte UTF-8 and copy it to the clipboard.
Hex text – to treat the bytes sequence selected in the hexadecimal data pane as textual data and copy it to the clipboard.
Position – to copy the address of the current position of the cursor.
Data saving
Hexadecimal Viewer offers several options for saving the data:
-
Saving the entire content of the data source to a file of the specified format.
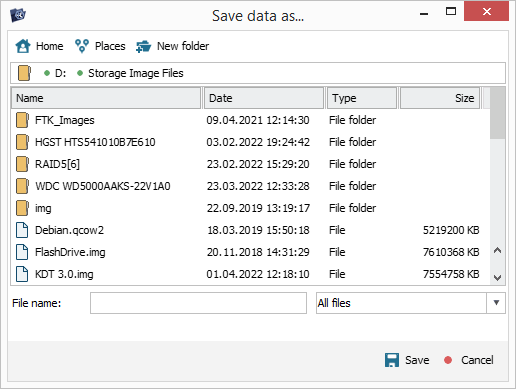
For this, choose the "Save as…" tool from the main toolbar.
In the opened dialog, navigate to the location to which the file will be saved. After that, enter the name and extension for this file. You may also opt to overwrite an existing file with the new one, but this function is not recommended as it may lead to data loss.
-
Saving the selected data range to a new file of the specified format.
To begin with, select the required data range using one of the preferred selection options. After that, get the "Save as…" tool from the main toolbar.
In the opened dialog, enable the "Current selection only" radio button and navigate to the location to which the file will be saved. Provide the name and extension for this file. You may also opt to overwrite an existing file with the new one, but this function is not recommended as it may result in data loss.

-
Saving the entire/selected content after dividing it into chunks.

In order to split the data source or the selected data range into chunks, choose the "Split to fragments" option of the "Save" tool from the main toolbar.
In the opened window, specify the size applied to each chunk and the employed data unit (byte, kilobyte, megabyte, gigabyte). Navigate to the location to which the file will be saved and provide the name and extension for the "chunked" file.
-
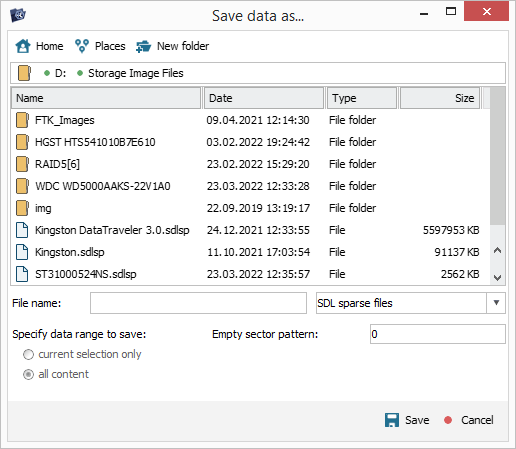
Saving the entire/selected content as a "sparse" disk image or a virtual disk file.
To create a virtual disk file from the data source or a data range selected on it, choose the "Save as sparse file" option of the "Save" tool from the main toolbar.
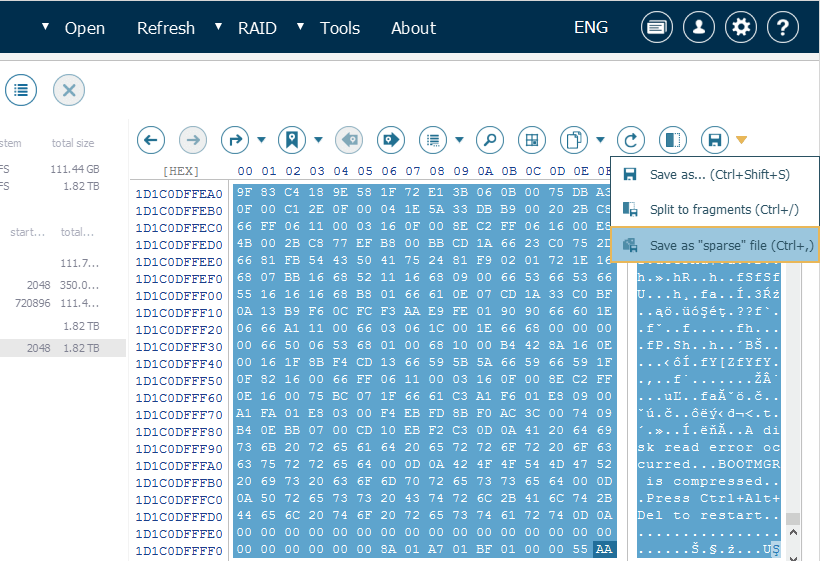
In the opened dialog, select the required format for your file in the drop-down menu. The "SDL sparse files" option allows employing the specialized space-saving technology: when a file that is partially empty, the actual "empty" blocks won’t occupy any storage space.