Controlled access to storage devices
UFS Explorer makes it possible to perform controlled access to a storage device and minimize the pressure on it that may be caused by the retrieval of the necessary data. Such an approach is particularly usable for failing digital media that contain multiple bad sectors.
Since defective sectors cannot be read out normally, their presence on the drive may lead to the rotational scoring of its platters and even eventual failure of the device. To prevent the total breakdown of such a storage during data recovery, you can reduce the number of references to it and perform less intensive access by using the following general procedure:
-
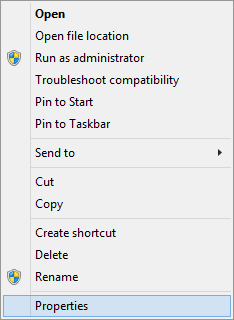
Deactivate disk polling before running UFS Explorer. This operation is executed by the system to find out whether the data on the drive is ready to be retrieved. However, it does provide any control over the connection timeout and may freeze when stumbled upon a defective block or area. To disable it, open the "Properties" of UFS Explorer via the context menu of the application.
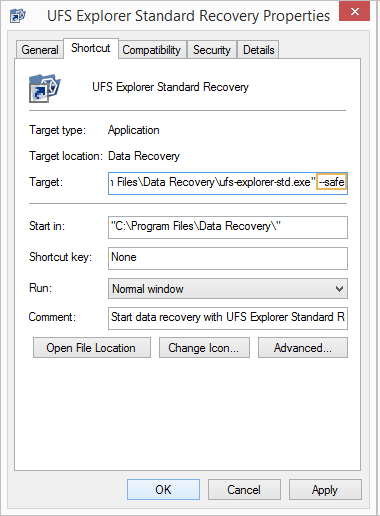
Switch to the "Shortcut" tab and paste the "--safe" key into the field next to the "Target" property. After that, hit "OK".
Alternatively, you may launch the program as usual and connect your drive after the software has been started. In this case, do not use the "Refresh" function from the main menu.
-
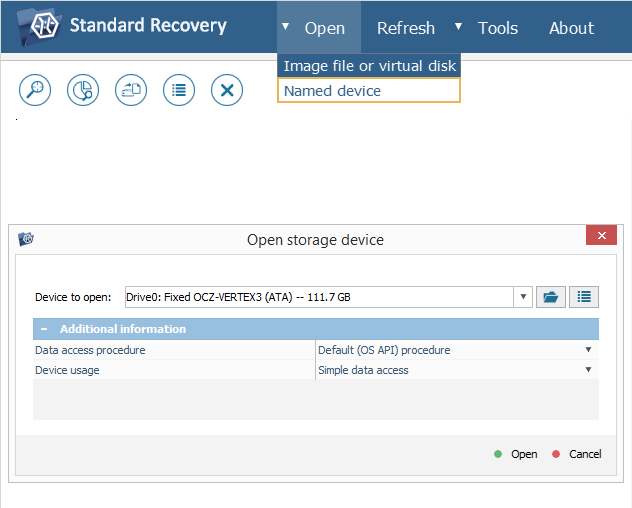
Launch the "Open storage device dialog" by choosing the "Named device" option from the "Open" item in the main menu. Employ it to open your drive in the program’s interface. Please refer to the Open storage device dialog section for more information about the use of this component.
-
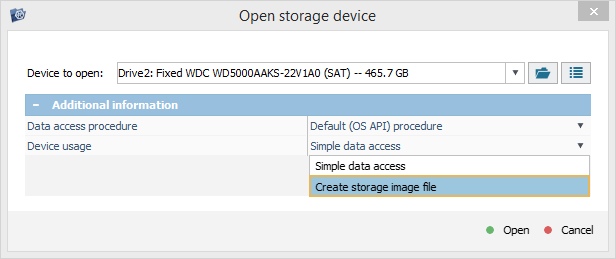
Select the "Create storage image file" in order to switch to the "Disk imager" dialog right away, without additional access to the drive.
-
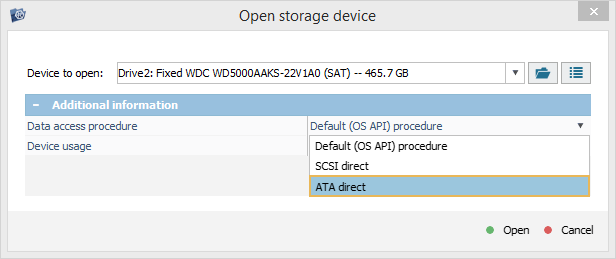
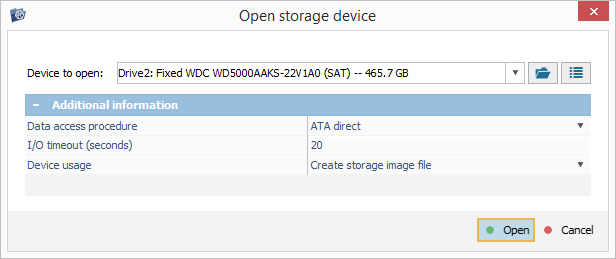
If possible, set up the "Data access procedure" as "ATA Direct" or "SCSI Direct". The direct mode enables control over reading errors and allows diminishing the risk of "hanging" of the polling. If a failure takes place during or after it, work with the same image can be continued by opening the drive again and using the available image file, without extra references to the data that has already been extracted.
-
After you press the "Open" button, the software will immediately redirect you to the Disk Imager. Please go to the Disk Imager section to learn how to use this instrument.
-
Choose the most optimal settings for the imaging procedure. For this, it is recommended to perform in-depth analysis of defects allocation within the storage. Please refer to the Disk Imager section for a detailed description of the available parameters.
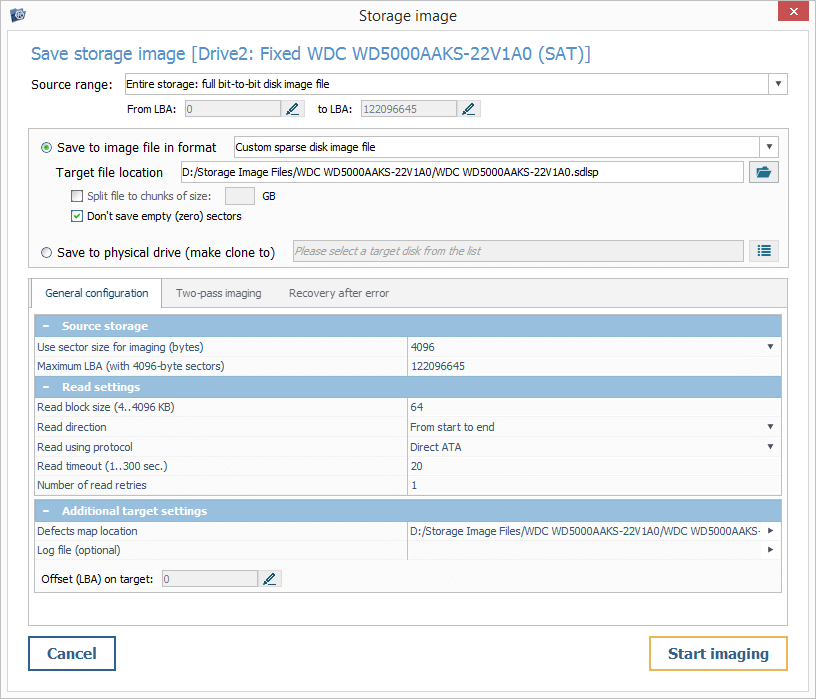
-
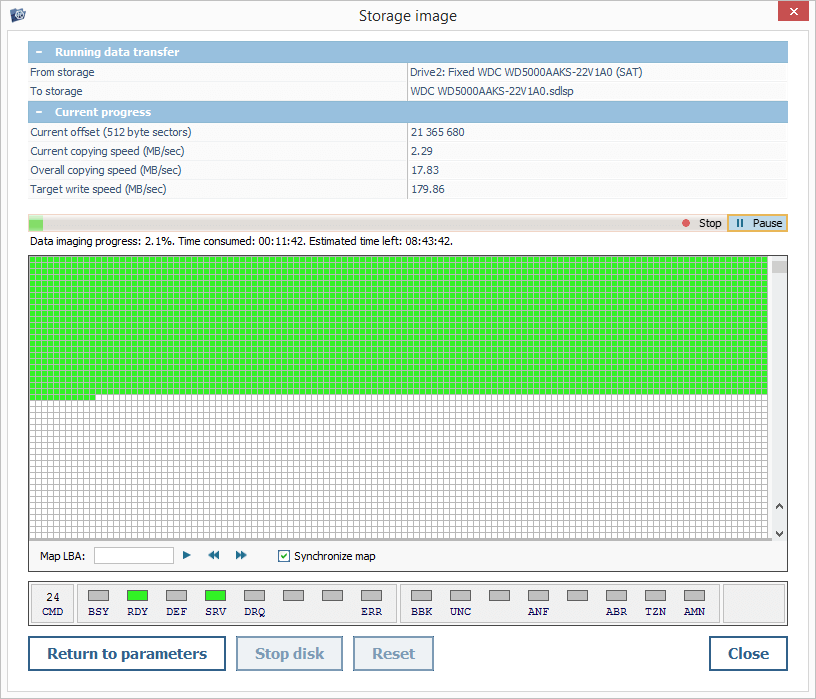
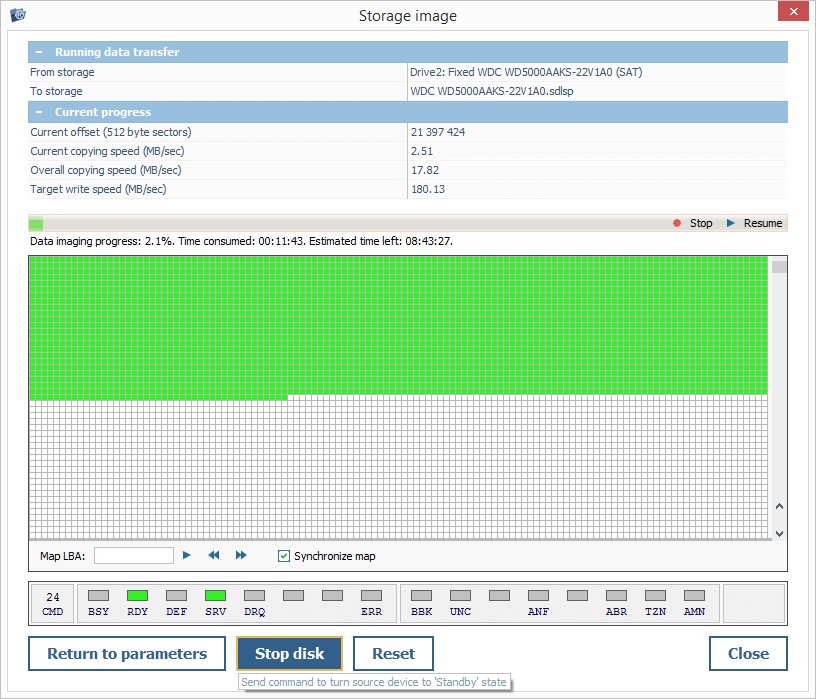
Run the imaging process by pressing the "Start imaging" button. If it lasts for a long time, make certain that your drive doesn’t overheat. To reduce its working temperature, you should pause the procedure once in a while using the corresponding option and press the "Stop disk" button. This will turn off the spindle motorof the drive and park its heads.
-
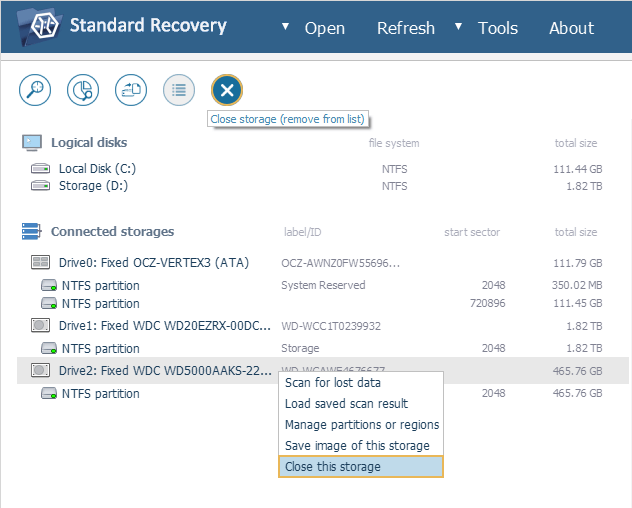
After the completion of imaging, if possible, disable the drive using the "Stop disk" function and close the Disk Imager. If this storage is still opened in the software, close it with the help of the "Close this storage" option in its context menu or the corresponding button from the main toolbar.
-
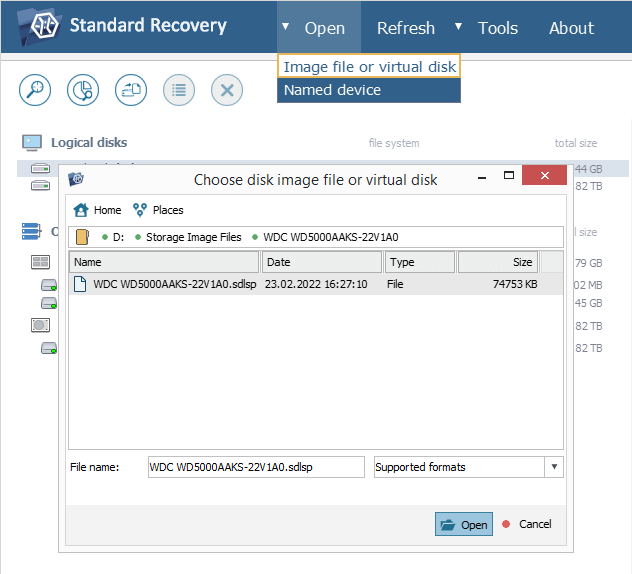
Open the created disk image file using the "Image file or virtual disk" option in the "Open" item in the main menu and perform all the data recovery operations on it instead of the physical storage device.