Running a scan
In order to start searching for lost data with the help of UFS Explorer, you need to initiate the scanning of the storage selected in the storages navigation pane and then define parameters for the procedure. Yet, please note that if you are working with any type of complex storage, the scan won’t give any results when run on individual components instead of the whole unit. Some specific storages may also require additional transformation steps, for example, an encrypted volume has to be decrypted beforehand to enable a correct scan.
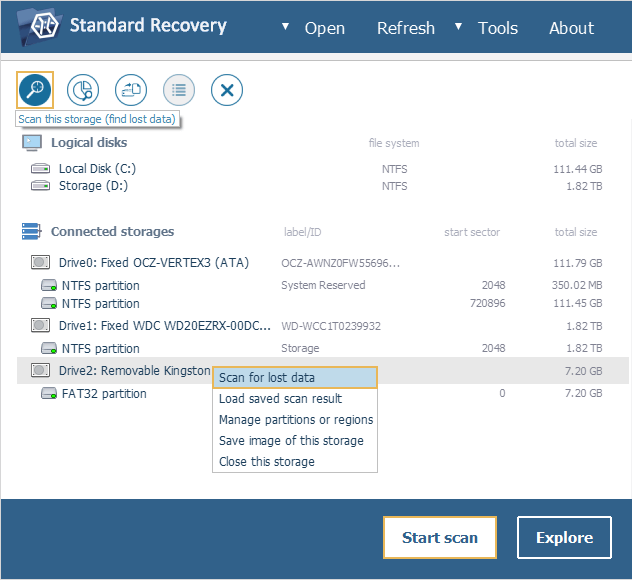
A scan can be started off the using the "Scan this storage" tool from the main toolbar, the "Scan for lost data" option in the storage context menu or the "Scan" button located in the buttons area at the bottom of the main screen. It is also possible to launch it from the Explorer element opened for a partition using the "Scan this file system for lost data" tool from the main toolbar of Explorer.
Any of the manipulations described above will open the scan parameters dialog for the chosen storage. The software will automatically pick out the optimal defaults. You may keep them or modify certain parameters according to your requirements.
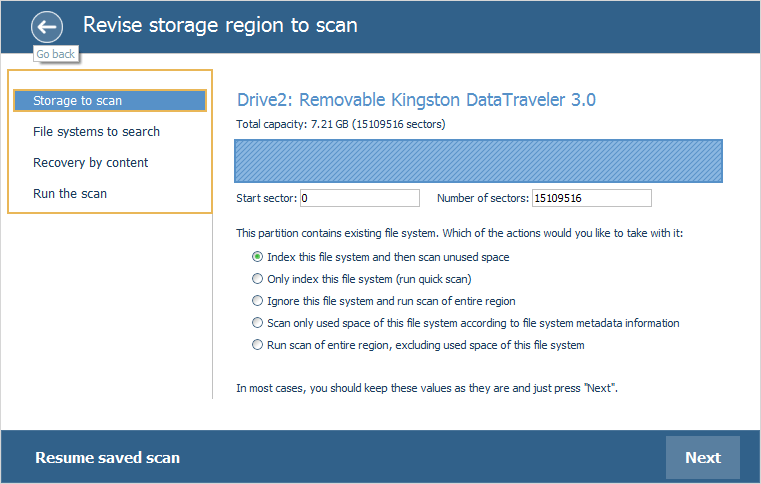
The current step of adjusting the procedure is indicated in the "Configuration steps" pane positioned to the left. You may navigate between different steps using the "Next" button at the bottom of the window and the "Go back" arrow-like button located at the top.
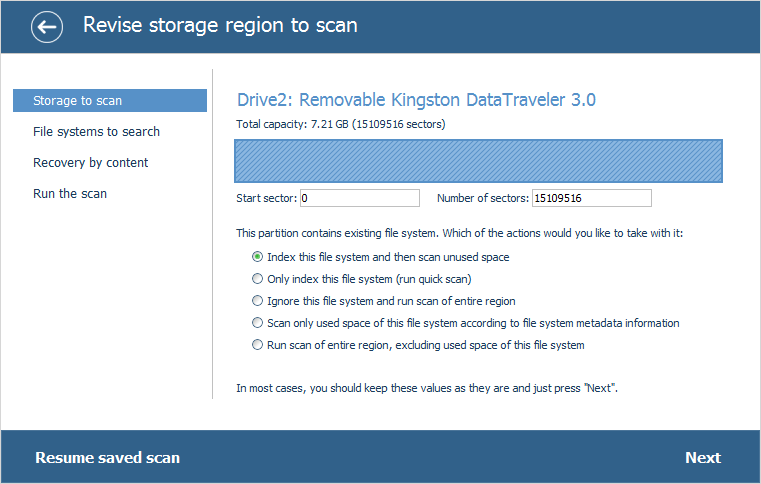
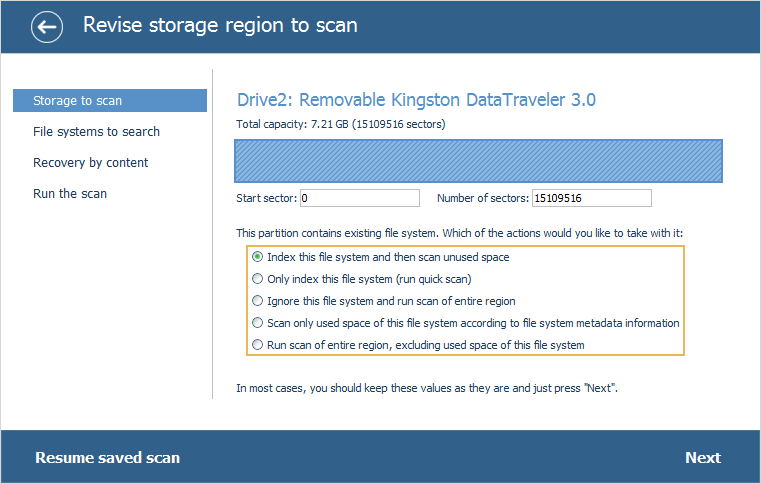
The first "Storage to scan" step presents parameters related to the source storage that will be analyzed for the presence of lost data.
The information about the storage is automatically filled out by the software and includes its name, overall capacity and size in sectors.

The range of sectors on the drive for scanning can be defined automatically by the program, for instance, when scanning is launched for a partition, or specified manually, if you want to scan only a part of the chosen storage by entering the values for the start sector and the number of sectors after it. The visualization bar above the mentioned parameters presents the proportion of the scanned storage space relative to the total capacity of the storage.
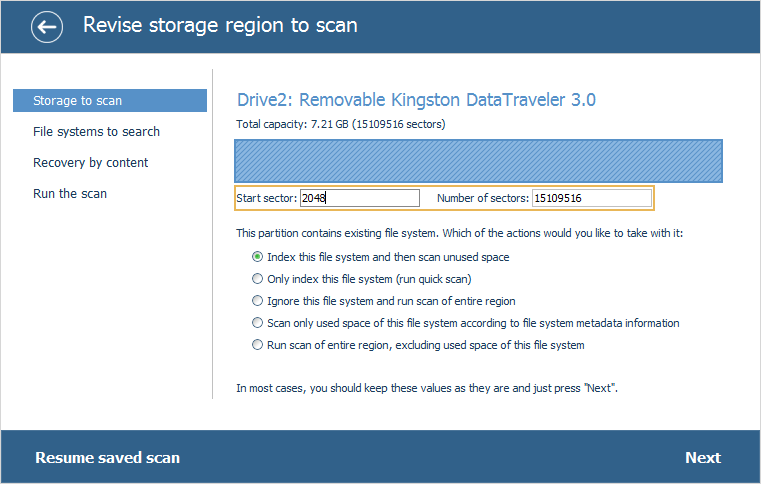
When a scan is configured for a partition and a valid file system has been detected on it, you may define the way it will be processed by UFS Explorer. The program may simply index its structure, index it and then analyze the remaining unused storage space, entirely ignore the file system and scan the chosen region of the storage, explore only the space occupied by the file system (according to its metadata) or omit the space during the scan.
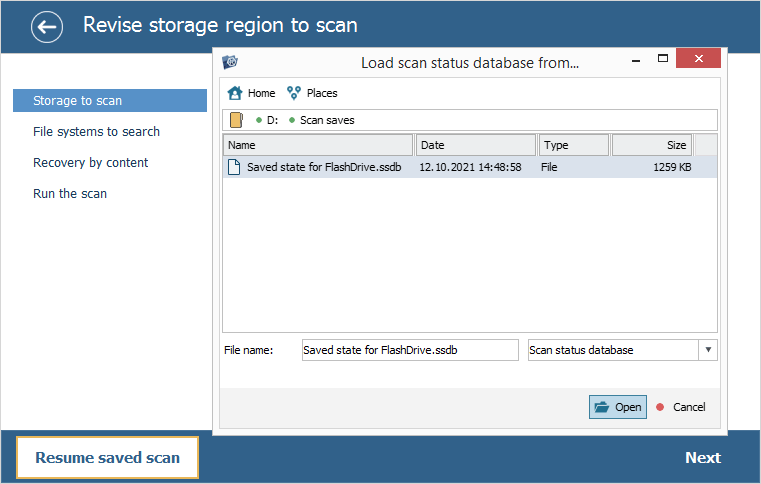
The "Resume saved scan" button found at the bottom allows resuming the scan from the spot when it was saved to an *.ssdb file. Simply navigate to the location of the file and hit "Open". The process will begin right away, with the progress it had when it was terminated.
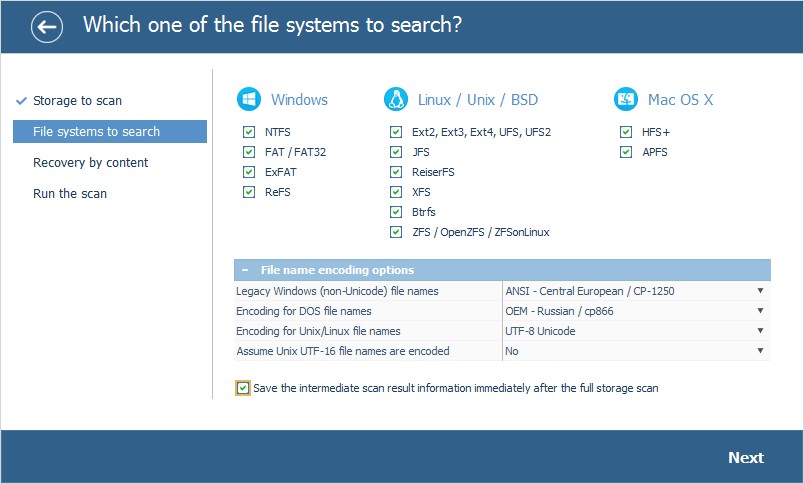
The second "File systems to search" step consists in the choice of file systems the application will look for during a scan. In case you know exactly which type of file system was implemented on the storage, you may deselect the excess variants.
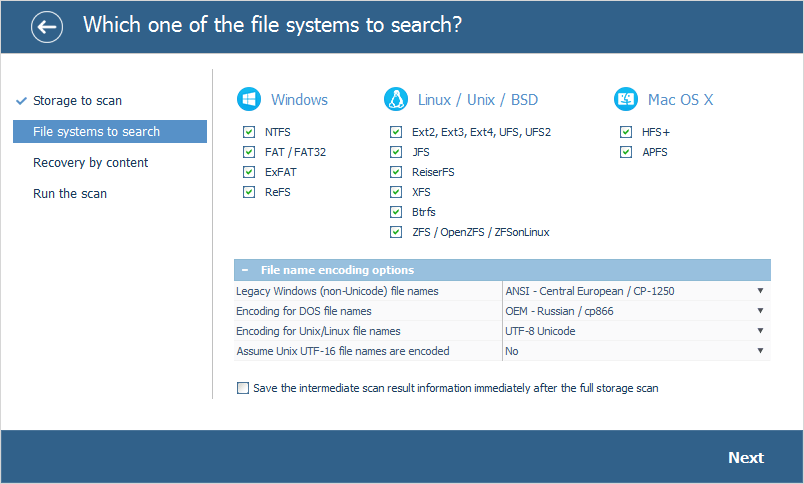
If necessary, you may also configure the "File name encoding options" to enable proper representation of file names in the software for legacy (non-Unicode) Windows, DOS and Unix/Linux. The most suitable encoding can be picked out from the drop-down lists opened with a single click on the respective field.
The "Assume Unix UTF-16 file names are encoded" option allows changing the Unicode UTF-16 encoding into the one which is typical for your file system. If the file system uses UTF-16 Unicode (for example, Linux JFS), its file names can be saved in UTF-16. If the file system uses any other encoding, choose "Yes" for the correct representation of file names.

The checkbox found under the "File name encoding options" section can be used to enable/disable saving of the scan result database to a *.vfs file immediately after the scanning procedure is completed.
The "Recovery by content" step makes it possible to activate the method of "raw recovery" (IntelliRAW), using which the software will search for the data that has not been found with the help of a regular file system scan.
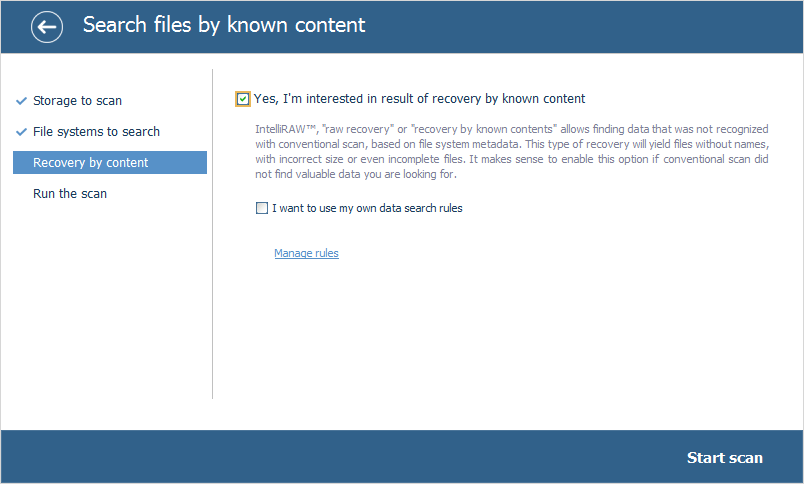
At this step, you may also extend the list of embedded IntelliRAW rules by loading your own previously specified custom files. They may be needed if you work with rare or proprietary file formats. For this, place a checkmark next to the "I want to use my own data search rules" and press the "Manage rules" or "Import legacy rules" button. The procedure of creating custom IntelliRAW rules is described in a dedicated section.

After you press the "Start scan" button, a scanning procedure will begin with the defined parameters.
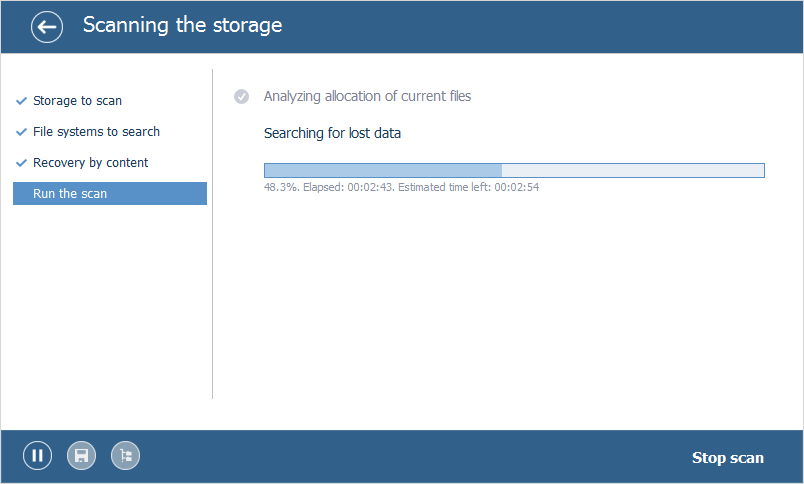
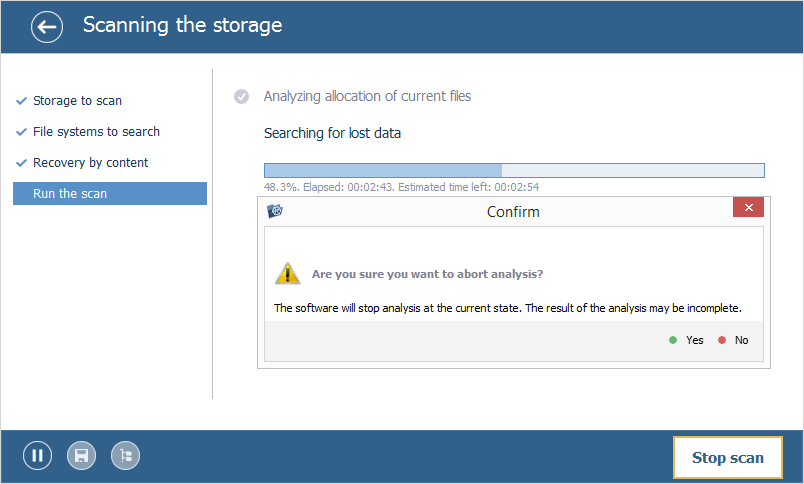
Its progression can be monitored using the progress bar and the scan status indication at the top of it.
The software also provides the information about the percentage of the operation that has been completed and the amount of elapsed time.
The process can be controlled with the help of the elements found in the buttons area at the bottom.
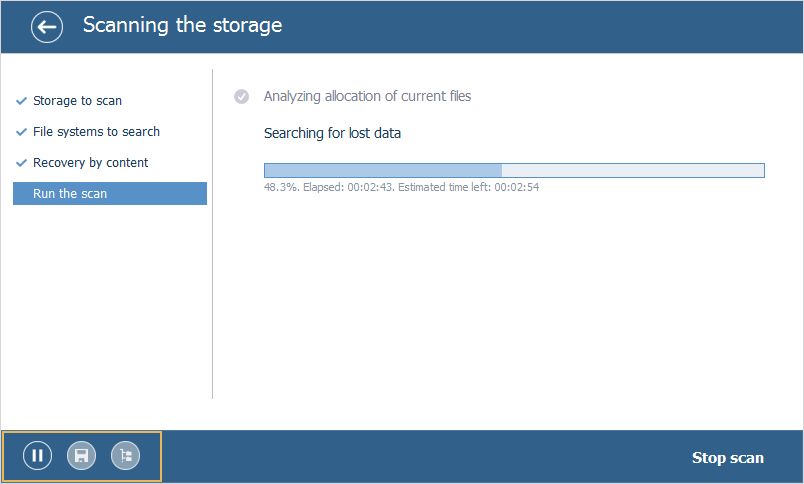
The "Pause/Resume scan" button can be used to suspend the ongoing scanning operation and then continue it later from the same spot;


The "Save current state" button allows creating an *.ssdb file with the results of an unfinished scanning procedure to resume it later from the same spot after the restart of the program.

The "Revise found data" button can be pressed to check the intermediate results of a scan, and if necessary, return to the procedure after that using the "Go back" button.

The "Stop scan" button terminates the scan without saving its progress. In this case, the results of the operation can be incomplete. That is why it is recommended to wait until the program finishes off and shows the obtained results.