DeepSpar DDI *Only Network RAID
Overview
DeepSpar Disk Imager (DDI) is an imaging device specialized in handling drives that have various read instabilities, such as defective blocks. More information about this product can be found directly on the website of its manufacturer.
UFS Explorer Network RAID offers native support for DeepSpar Disk Imager. The software is able to interact with the DDI board via LAN and perform operations on the drives attached to it as if they were regular storage devices connected directly to the local computer. The DDI system, in its turn, immediately clones the blocks requested from the unstable source drive to the intact destination one, from which they are then transferred to UFS Explorer for further analysis. The blocks that have already been cloned are accessed right away from the destination drive.
The user can control the parameters of the DDI hardware directly from the program’s interface via the embedded DeepSpar DDI Terminal.
The work with bitmaps acquired by DDI is also supported in case of the network connection to the DDI board and when a clone drive created by the DDI system is attached directly to the computer. Thus, the program knows which sectors on the drive were copied successfully or which of them caused errors, and can rely on this information during data recovery procedures.
Control over the imaging via DDI using the built-in terminal
UFS Explorer Network RAID provides means that enable remote control over the cloning process carried out by the DDI system.
In order to make use of them, install the hardware component of DDI in the respective slot of the remote computer (referred to as the DDI computer) and connect both the source and the destination drive. Then this computer has to be started using the bootable USB flash drive supplied with the board. Run the DDI utility on it by entering "DDI" in the command prompt. If you need detailed instructions on how to set up the device and initiate work in the DDI software, please refer to the DDI documentation.
Further preparation steps are performed on the host computer that has to be connected to the DDI computer via LAN (the DDI Network add-on is required).
Launch the DeepSpar Recovery Environment (DRE) on the host computer. Create and set up a new project in the software or open the already existing one. After that, you may close DRE and switch to UFS Explorer.
Run the embedded "DeepSpar DDI Terminal" via the "Tools" menu.
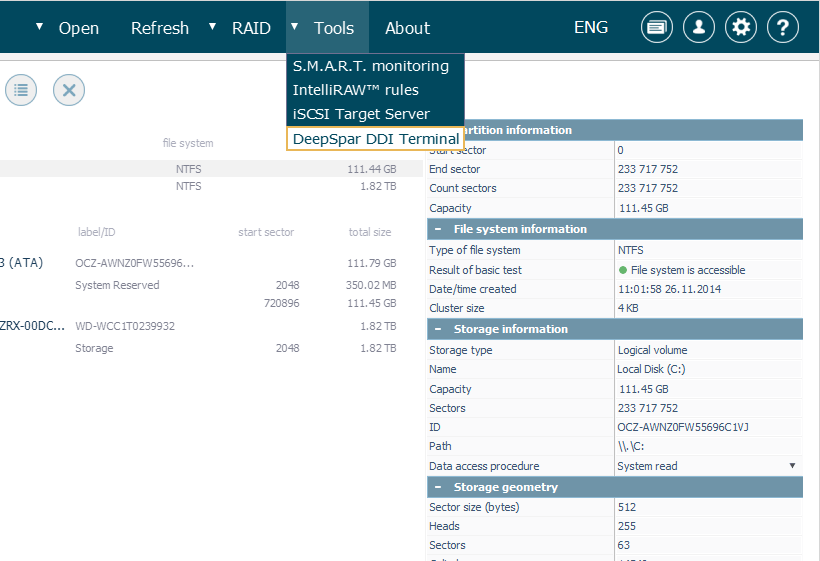
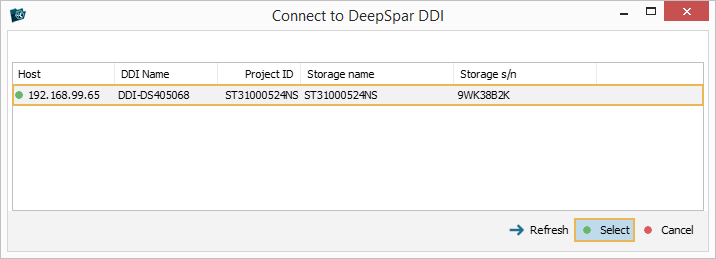
In the opened window, choose the required DDI device by its name, IP or the project ID. If the project has been configured correctly in DRE, your DDI should be displayed with the "green" status. Select it in the list and then hit the "Select" button.
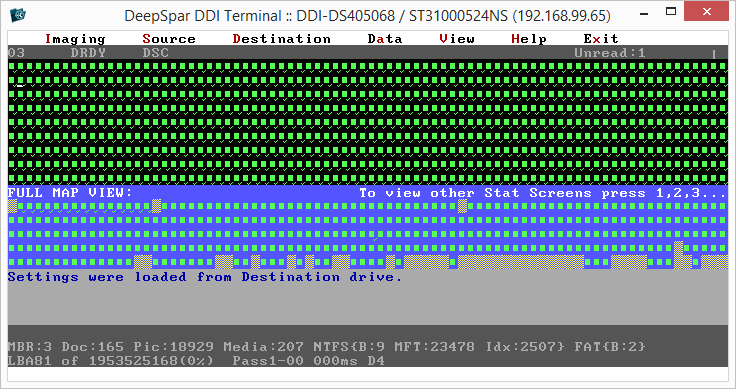
The launched terminal can be used for configuring the DDI system, just like in the proprietary software included into the DDI package.
Network Access to DeepSpar DDI and further operations
To start processing a DDI drive in UFS Explorer, you will need to connect to the DDI board via LAN and open this drive in the program’s interface. After that, it can be treated by UFS Explorer like any ordinary storage medium: imaged, scanned, used as a component of a virtual RAID set, etc.
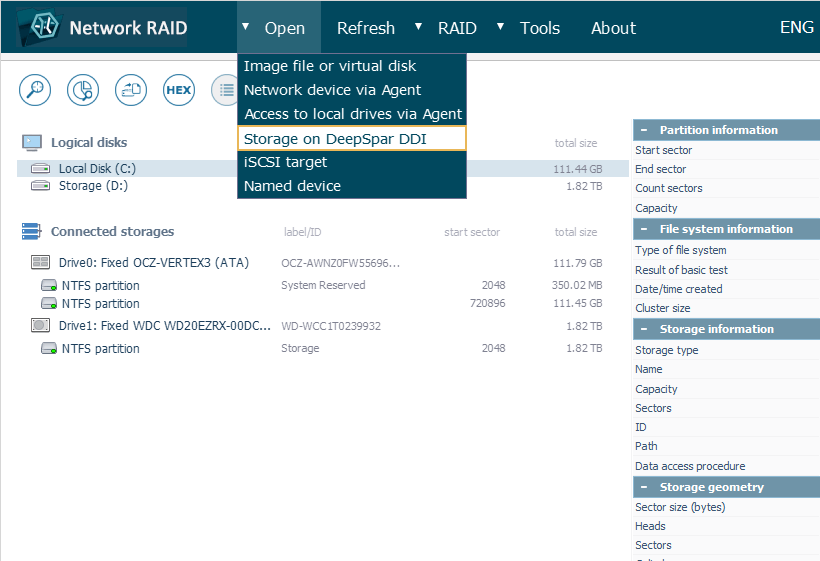
To mount the DDI drive in the storages navigation pane, go to the "Open" menu and opt for the "Storage on DeepSpar DDI" item.
The software will automatically find all DDI devices available in the network segment. Choose the necessary one by its name, IP or the project ID.
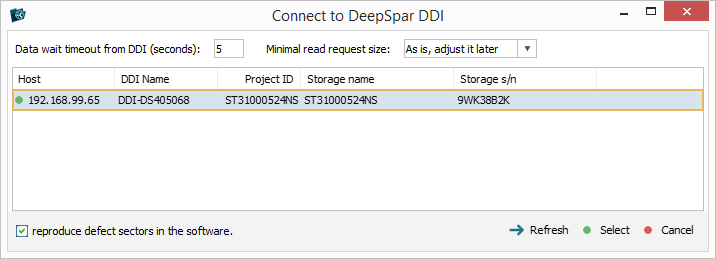
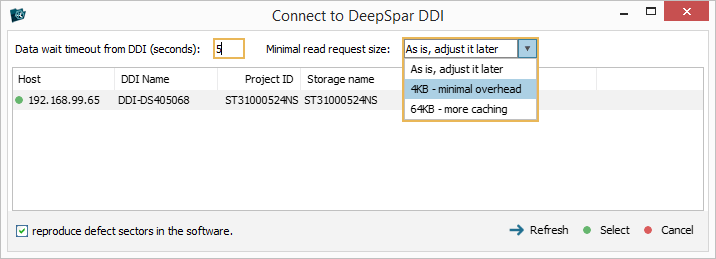
If required, you may adjust the read timeout and block size parameters right away.
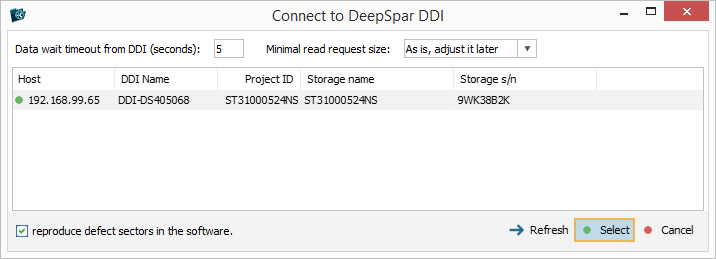
After that, connect to the device by clicking "Select".
If you have several DDI boards, repeat the procedure for each of them to open all the DDI drives.
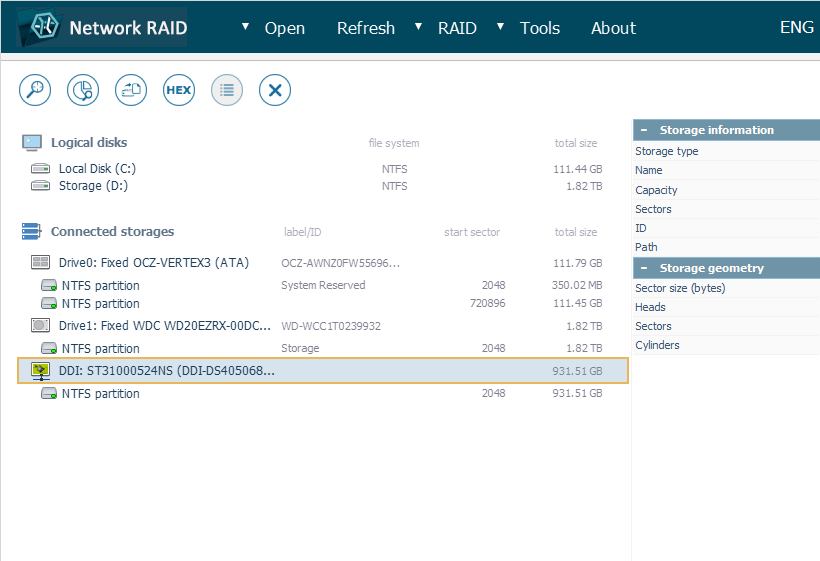
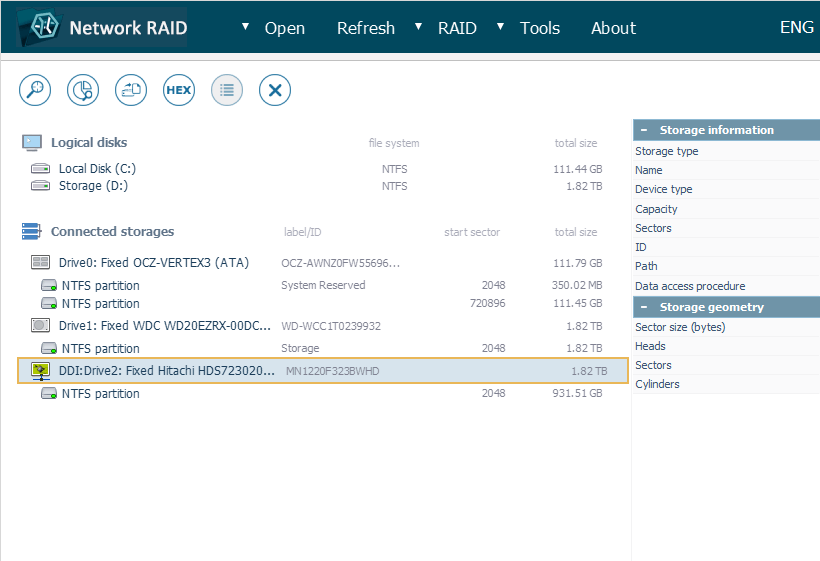
The selected DDI drive will get listed in the storages navigation pane with a special icon.
In addition to the basic set of options, its context menu will include two special items:
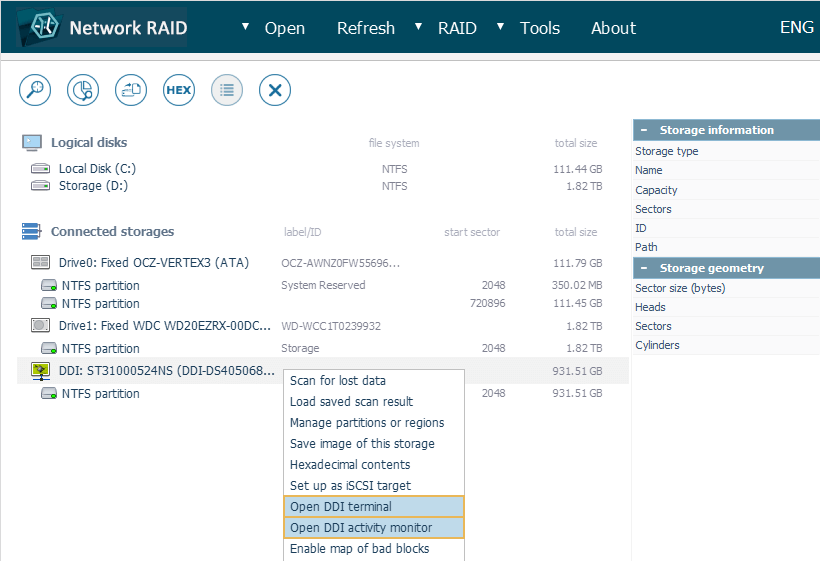
The "Open DDI Terminal" option can be used to invoke the embedded DeepSpar DDI Terminal for the given DDI device;
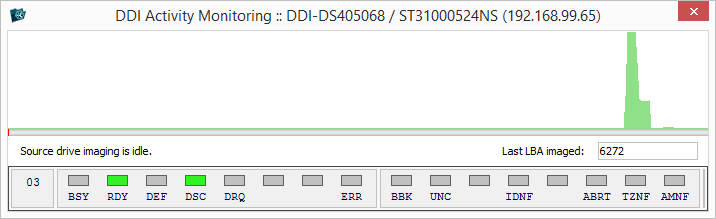
The "Open DDI activity monitor" item allows launching the DDI Activity Monitor tool that makes it possible to keep track of the status and operations performed by DDI.
The subsequent work with the DDI drive can be performed using one of the following approaches:
- Cloning the drive sector by sector via Disk Imager and then using the obtained clone for data recovery. The procedure is carried out by the DDI device and controlled via UFS Explorer;
- Performing the cloning process concurrently with data recovery operations. DDI will clone only those blocks that are requested by UFS Explorer. If further access to those blocks is required, they will be read out from the clone instead of the source drive.
Creating an image of a drive connected via DDI
In order to start creating an image of a drive connected via DeepSpar Disk Imager, find it in the storages navigation pane by the special DDI icon, open its context menu and launch Disk Imager for it using the "Save image of this storage" option.

This will open a special dialog of Disk Imager for conducting the imaging process on an external system.
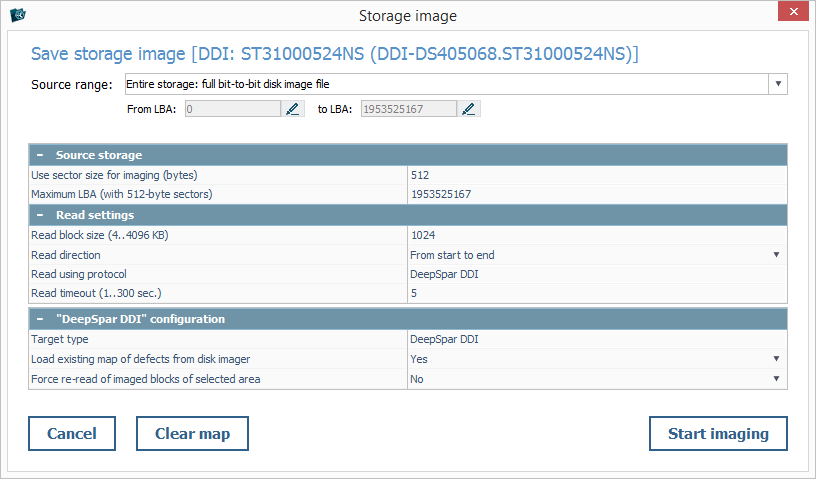
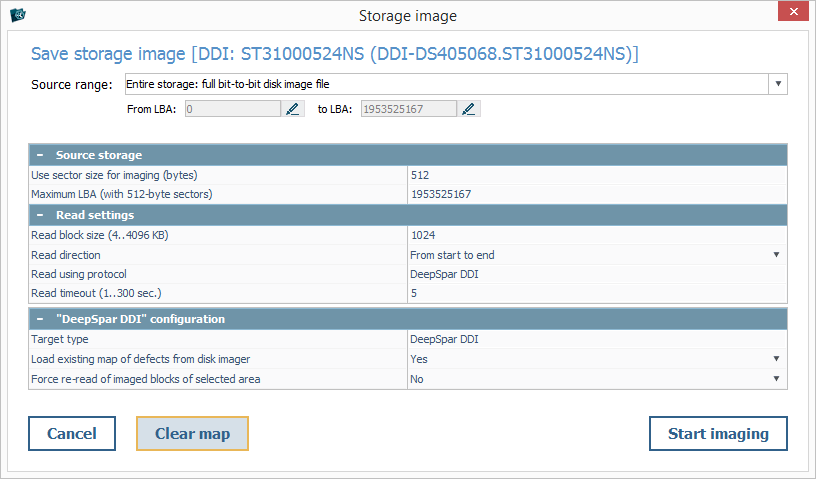
Such a dialog, when opened for DDI, contains an additional "DeepSpar DDI configuration" section.
You can use this section to enable/disable the employment of the existing DDI bitmap during the procedure (if available).
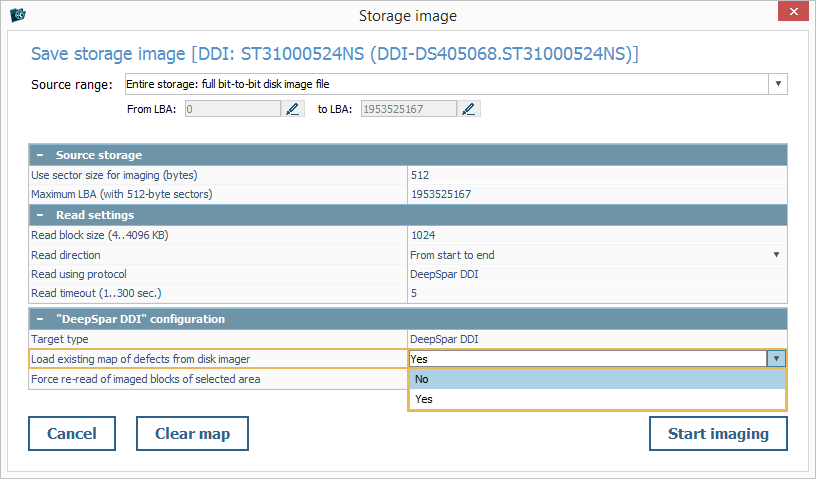
Also, you may tell the software to re-read the blocks that have already been read by DDI and copied to the clone.

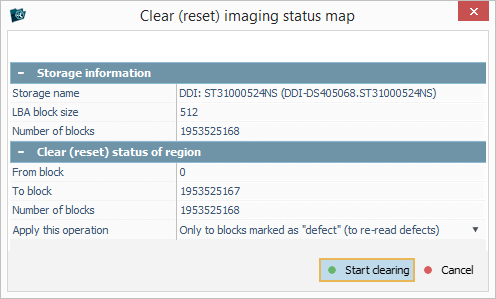
The "Clear map" button in the left-hand corner allows resetting the status of reading stated in the DDI bitmap for blocks within a particular region of the drive.
For instance, you may cancel the status of blocks that were marked as unreadable in order to process them one more time.
After you press the "Start imaging" button, you'll be offered two variants of the imaging process:
- "Asynchronously, by the Disk Imager" – the procedure is performed under full control of DDI;

- "Synchronously, using this dialog" – the process of saving a disk image is carried out under shared control of UFS Explorer.
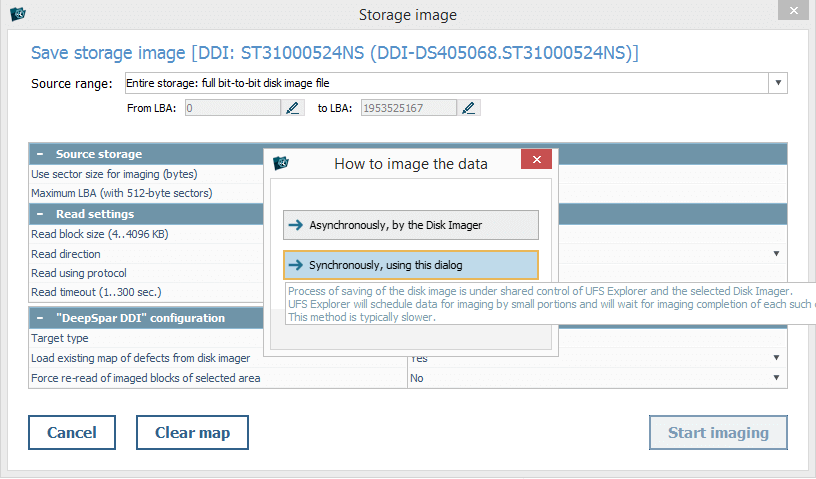
If the second option is selected, the DDI will begin to image the drive, whereas the progress and the results of the process will be displayed in UFS Explorer.

Work with a clone drive created by DDI
UFS Explorer is capable of working with the clone drives that have already been created by DeepSpar Disk Imager and then were connected directly to the computer on which the software is launched.
Such a drive contains the data copied from the defective source drive along with a bitmap of its blocks.
It is detected by the software like a regular drive, without additional operations, and has an icon that is similar to the drives attached via the DDI board.
The blocks bitmap written by DDI at the end of the clone is recognized and can be interpreted by the program automatically.
This storage can be further analyzed by means of the application, similarly to an ordinary local drive.