How can I recover data from RAID 0 and JBOD?
Non-redundant architectures, like JBOD or RAID 0, are highly popular among computer users who need to increase the capacity of their storage systems at an affordable rate. Such arrays are easy to implement and do not involve any overhead – the storage space of multiple disks is combined and can be utilized as a single logical unit. Yet, the lack of redundancy blocks and other drawbacks make them quite risky in terms of data safety. Apart from disk failures, there are numerous logical issues, such as corruption, software crashes or human errors, that commonly result in the loss of certain files or even a complete data disaster.
The basics of striping and spanning
Although the RAID 0 and JBOD configurations are similar in that neither of them offers fault-tolerance, disks constituting the array are put together with the help of different storage techniques that have a major impact on the possibility of data recovery:
-
Striping
Within a RAID 0 volume data is split into tiny blocks and written evenly across all the components of a set. Since parts of every individual file are located on different disks, the failure of a drive results in impossibility to recover the content of the file to the full extent. The only exception is small files with the size equal to the size of a single block, for instance, 64 KB. When there are more than two drives in a set, the size of such files may be up to the one calculated by the following formula: (N-1)*block_size (here N is the number of disks in the array). One more thing to mention in this context is that even in the case of relatively successful recovery, the original file names and the folder structure will be missing anyway and the portion of files may appear to be damaged – when at least one fragment of a file was located on the failed drive.
-
Spanning
Spanning employed in JBOD is a simple concatenation of multiple physical disks that appear as a single logical volume without any separators. In view of this, disks constituting JBOD may be filled up sequentially from the first to the last one – under such circumstances, the failure of a single disk may leave the information on the remaining ones unaffected.
Yet, in practice, the file system that is applied on a spanned disk does not always allocate blocks in a sequential manner. The thing is that some file systems tend to fragment files into chunks to fill smaller patches of free space available on the drive, so that sometimes even in a JBOD storage files can be highly fragmented and scattered between different drives. Thus, the possibility of data recovery in this case depends on the algorithms employed by the corresponding file system and the intensity of writing – these are the primary factors that influence the consistency of data placement.
Another critical factor is the possibility to read out the file system metadata, which is usually located on the first disk in the sequence.
Hint: Please find more information on file systems and their types in the article about the basics of file systems . And to get a general idea of the possibility of successful file recovery in the case of a particular file system, please refer to the article describing the chances for data recovery.
In general, if one of the components in such a system is not functioning properly, complete data recovery is not possible until it gets repaired. However, please do not try repairing it yourself unless you’re a qualified tech specialist. Under such circumstances, it is recommended to contact a qualified service center, as DIY repair attempts are very unlikely to bring any success, but may aggravate the data loss case or even lead to the total destruction of data beyond restoration.
How to recover data from a non-redundant storage
If the problem is not associated with the failure of a member disk, a suitable data recovery tool will easily cope with data loss from RAID 0 or JBOD. SysDev Laboratories offers UFS Explorer and Recovery Explorer as reliable software instruments that work with complex storage systems of different levels and types, including the non-RAID drive architectures – RAID 0 and JBOD.
The software is capable of performing automatic reconstruction of spanned or striped volumes for further operations by reading out the initial parameters of the storage from its metadata. However, in case of serious corruption of this information, the automatic assembly of such a storage might be impossible, but the user can always assemble the array manually from its disks or the substituting disk images. Either way, the software will emulate the work of the controller and mount the storage in the virtual mode, which guarantees full protection of the real one from any modifications.
The first steps of the recovery procedure are the same for both RAID 0 and JBOD:
Prepare a computer that will serve as a host for data recovery – it is preferable to use one running on an incompatible operating system to prevent overwriting of the storage configuration. Additionally, please make sure that it has enough USB/SATA ports for you to be able to attach all disks of your complex storage. Install UFS Explorer RAID onto this PC.
Find a storage large enough to save the recovered data. This may be any internal, external or network location. But please don’t use any of the source disks for this purpose as this may provoke data overwriting and once overwritten, the data becomes irrecoverable.
Attach all the drives constituting your storage to the computer following their accurate order. The optimal interface to employ is the internal SATA connectors, but in case of lack thereof you may also choose USB to SATA adapters or external enclosures. Yet, indirect types of connection usually slow down the process.
Note: Please find detailed instructions on how to plug the disk into the motherboard of the computer or how to сonnect the drive externally using a USB to SATA adapter in the corresponding articles.
To proceed, please, choose the type of storage you’re working with:
Data recovery from RAID 0
To restore files from RAID 0 using UFS Explorer RAID Recovery, you will need to perform the following steps:
-
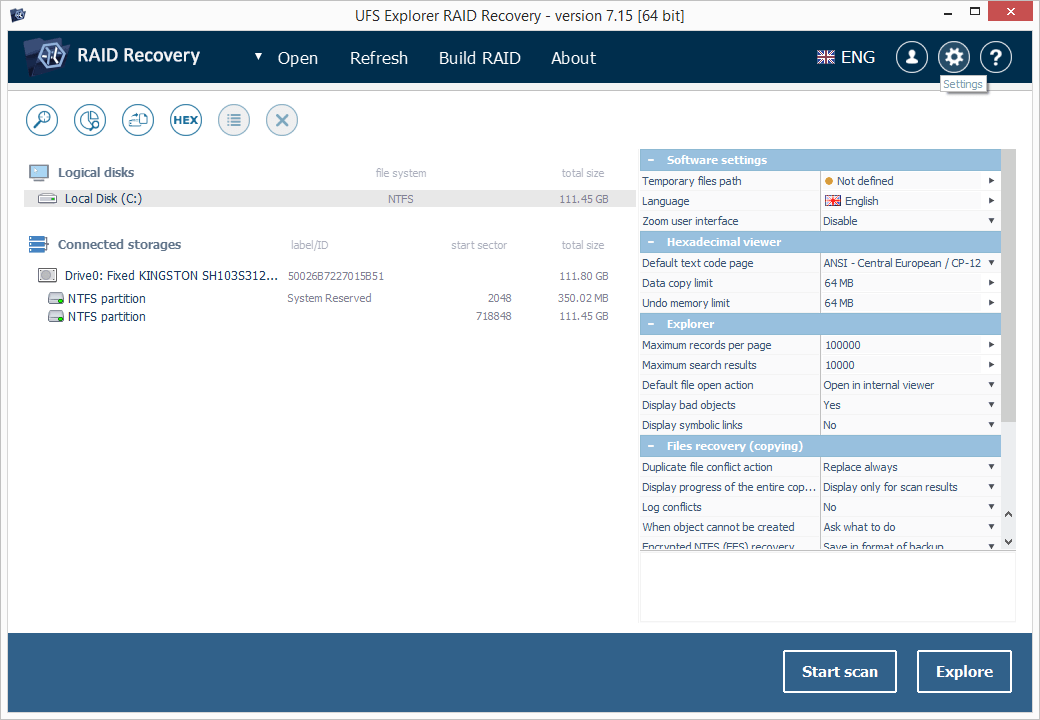
Launch UFS Explorer RAID Recovery. If needed, adjust the software settings in the corresponding pane.

Note: If you are going to work with disk images instead of the original devices, open the respective disk image files using the "Image file or virtual disk" option from the "Open" item in the main menu.
-
Scroll down the list of connected storages in the left pane of the main screen. If the metadata is present on the disks and wasn’t heavily damaged, your striped volume will be assembled automatically and displayed among other storages. You can identify it by the special icon, label or the number of drives. If so, please proceed straight to Step 3.
-
2.1 If your storage hasn’t been reconstructed by the program and you can’t find it in the list, you can build it manually from the connected disks or their images.
-
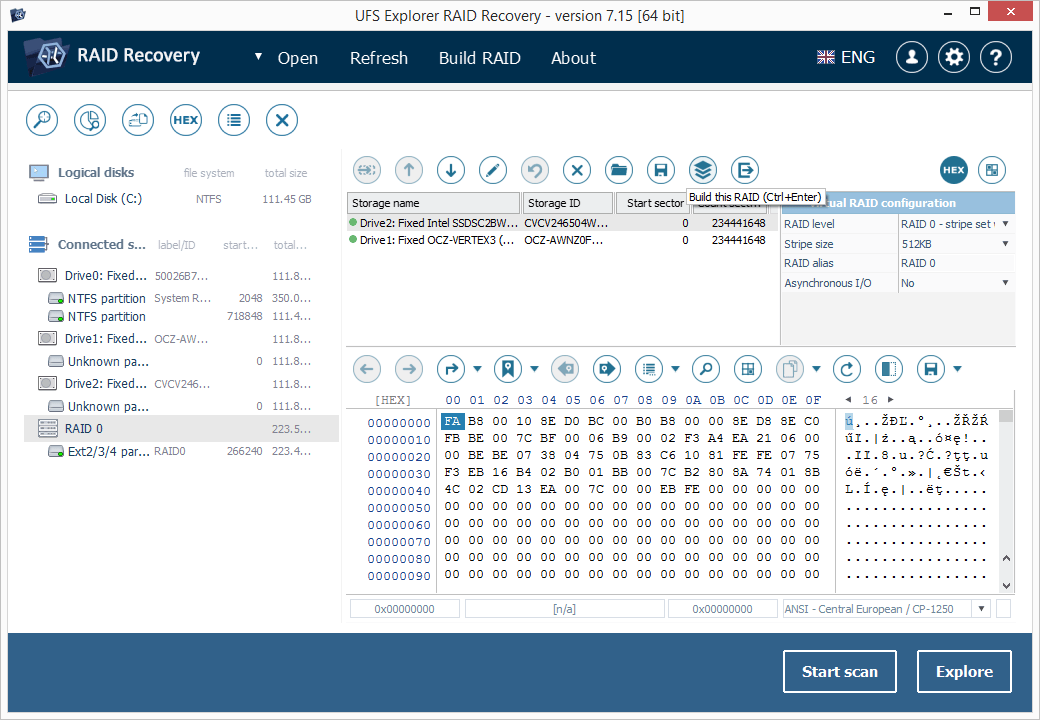
2.2 For this click the "Build RAID" option in the main menu and add member drives (partitions) to it by double-clicking them or utilizing the corresponding option in the context menu of each component.

-
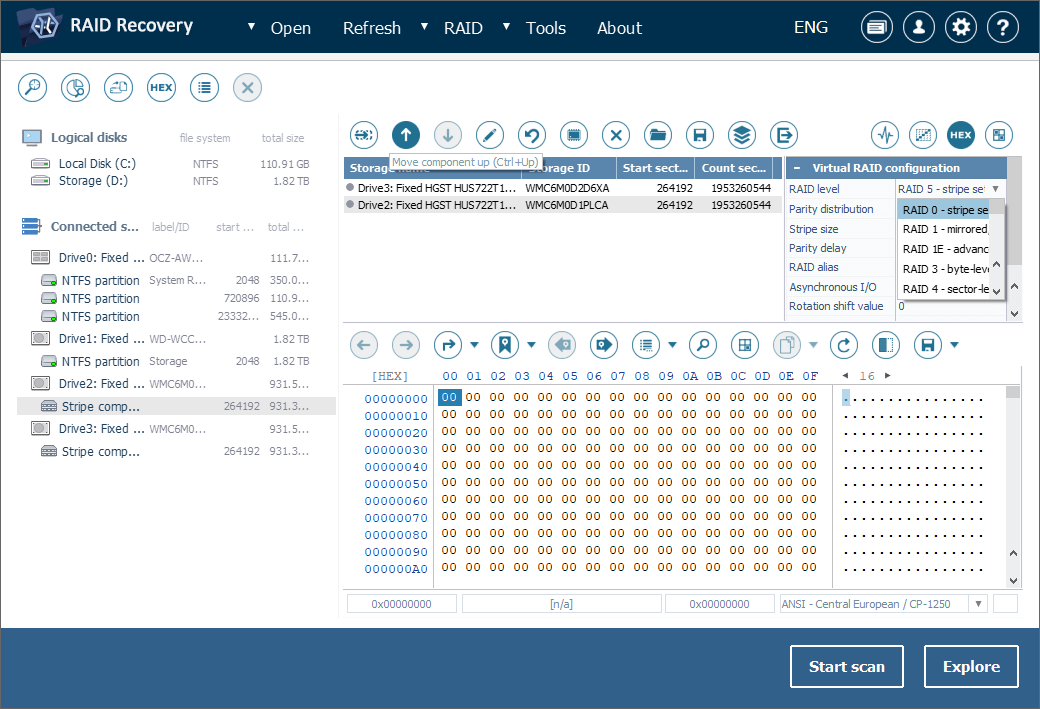
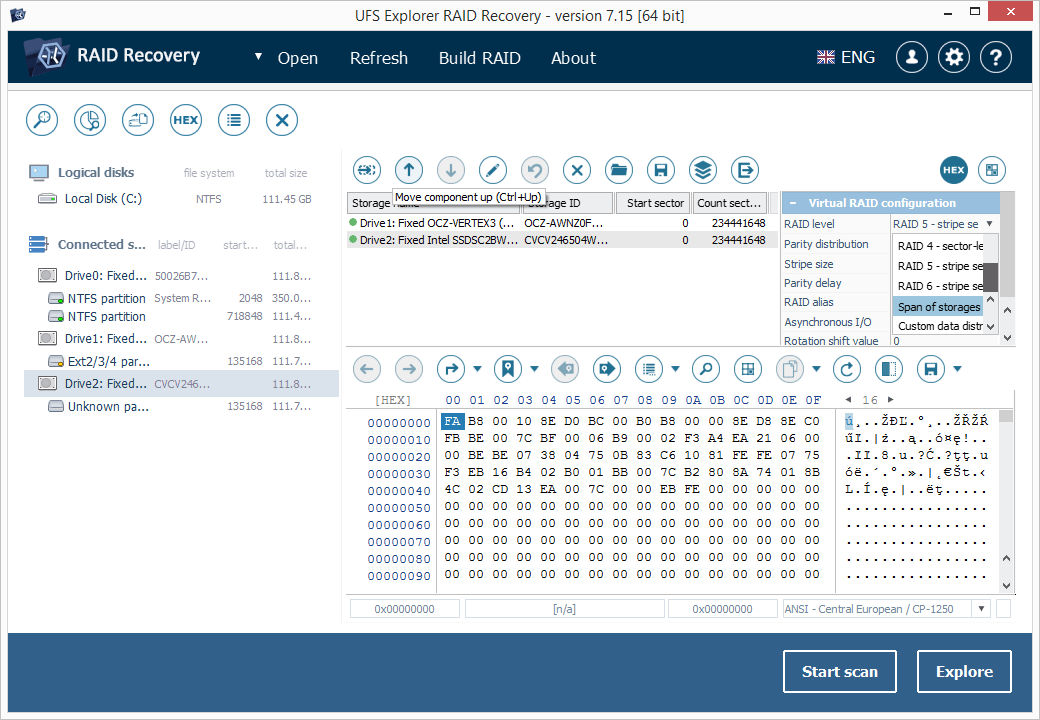
2.3 Set the order of the drives with the help of the arrow-like buttons from the toolbar. Then choose RAID 0 and specify the correct size of the stripe in the configuration sheet next to the components list.
-
2.4 Once you have finished, press "Build this RAID".
Note: If you have doubts concerning the order of disks or the stripe size, you may make several reconstruction attempts to figure out the right setup. For this select "Edit RAID configuration" in the storage context menu, make the changes you need in the opened window of RAID builder and re-assemble the storage.
-
-
Open the volume mounted under the assembled storage and examine its file system. If it looks intact, the storage was built correctly and you can scan it for lost data. To do that, use the respective button or the storage context menu option.
-
Specify the necessary scan parameters or go ahead with the default ones and press "Start scan". Wait for the procedure to be completed.
Hint: More details and explanations on how to configure the scan can be found in the guide on scanning a drive with UFS Explorer.
-
Explore the received result of a scan: you may sort the files by name, date, type, employ quick or advanced search and preview images, texts, documents, etc.
Hint: Take a look at the article Evaluation and saving the results of data recovery in case you need step-by-step instructions on how to work with the obtained folders and files.
-
Click "Define permanent selection" and choose the items you want to copy by selecting them with checkmarks.
-
Press "Save selection" and define the destination folder for the chosen items.
Data recovery from JBOD
To recover data from JBOD with the help of UFS Explorer RAID Recovery, you will need to complete the following:
-
Open UFS Explorer RAID Recovery. If necessary, modify its settings in the respective pane.
Note: If you are going to work with disk images instead of the original devices, open the respective disk image files using the "Image file or virtual disk" option from the "Open" item in the main menu.
-
Browse through the tree of connected storages found in the left pane of the main window. If the software has managed to reconstruct the volume in an automatic manner, you will see it among other storages in the list. You can recognize it by the special icon, label or the number of disks. In such an event, move straight to Step 3.
-
2.1 In case your storage is not in the list, it means that its automatic reconstruction couldn’t be performed, but you can assemble it by hand from the connected drives or opened disk images.
-
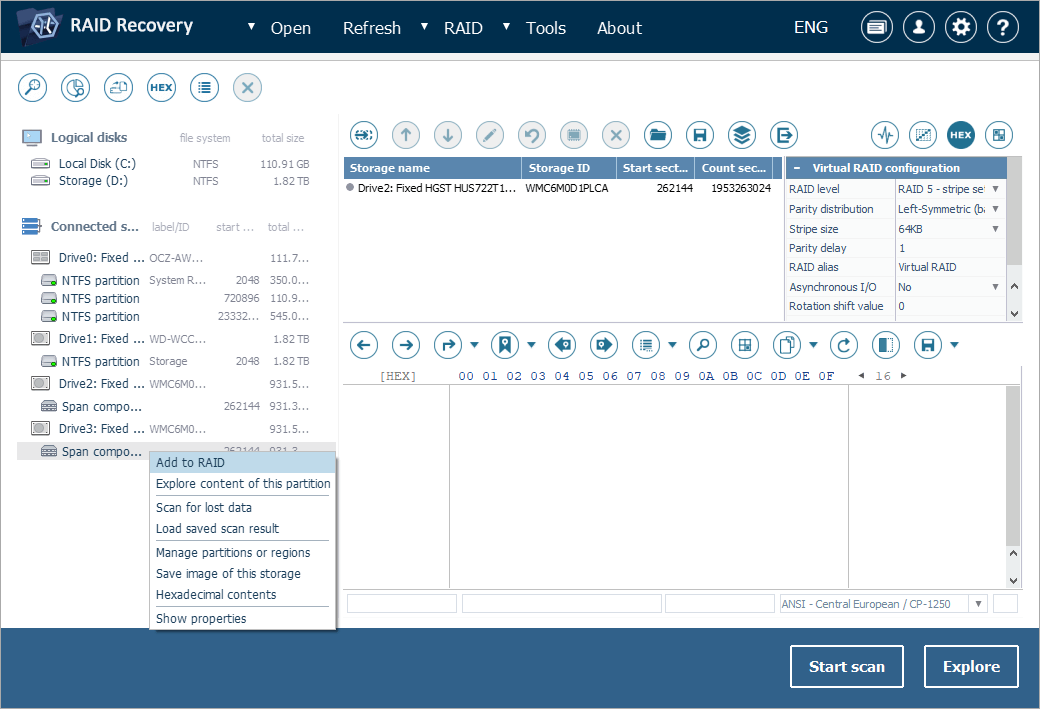
2.2 Create a new virtual RAID by clicking "Build RAID" in the main menu. Add the components of your span by double-clicking them or using the corresponding option in the context menu.
-
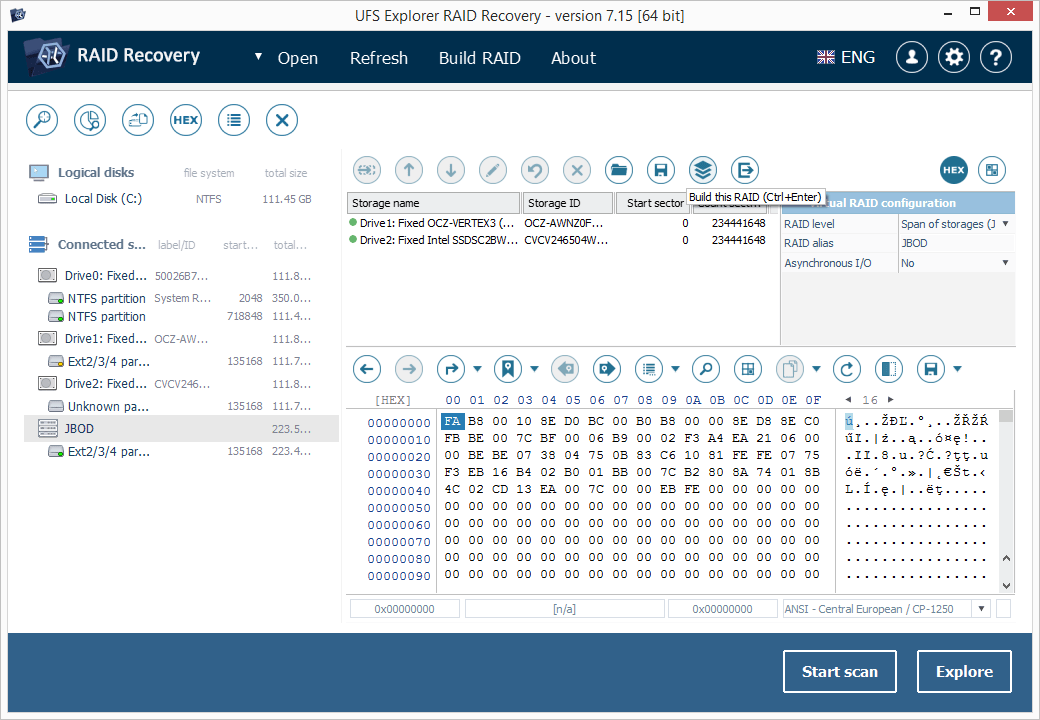
2.3 Set the order of the drives with the help of the arrow-like buttons. As a rule, the first member disk will contain an intact volume while the content of the following ones will be identified as damaged. Select "Span of storages" in the parameters sheet.
-
2.4 Once you have finished, press "Build this RAID".
Note: If you are not exactly sure concerning the drives order in your JBOD, make several reconstruction attempts to guess the correct one. For this choose "Edit RAID configuration" in the storage context menu, adjust the sequence and assemble the volume again.
-
-
Select the volume located on the assembled JBOD and explore its file system. If the files seem undamaged, the storage was assembled correctly and can be scanned for the lost data. To begin the process, press the respective button or use the storage context menu option.
-
Provide the desired scan settings or proceed with the default parameters. Click "Start scan" and wait until the procedure is finished.
Hint: For a detailed guide on how to configure the scan, please see the article scanning a drive with UFS Explorer.
-
Inspect the obtained results: you may sort the files by name, date, type, employ quick or advanced search and preview images, texts, documents, etc.
Hint: You can find detailed instructions on the Evaluation and saving the results of data recovery in the dedicated article.
-
Press "Define permanent selection" and decide on the items you want to save. Select them with checkmarks.
-
Click "Save selection" and set the destination location for the rescued items.
Last update: June 12, 2024