Data recovery using another computer
If the computer has trouble starting up or when there is a high probability that lost or deleted files will be overwritten, it is recommended to recover them with the help of another computer capable of hosting both the problem drive and a data recovery tool. And for this, the data storage medium in question (HDD or SSD) should be taken out from the cabinet and connected as an additional drive to the host PC. If, due to the configuration of the machine or any other factors (for instance, active warranty or lack of knowledge), disassembling the original PC is impossible or undesirable, it is highly recommended to opt for using UFS Explorer Backup and Emergency Recovery CD.
Warning: Don't use the drive before the needed files are recovered to avoid their accidental overwriting.
How to recover data from an internal drive using an auxiliary computer
Provided that the critical files have not been overwritten yet, the right data recovery instrument run from another PC will be able to return missing information. For this purpose, SysDev Laboratories offers UFS Explorer and Recovery Explorer. These effective software solutions serve for a variety of data recovery needs of both home users and technical experts, including ones related to restoring files from internal HDD and SSD drives with any file system of Windows, macOS, Linux or UNIX/BSD. Several software editions are available to cover various storage technologies utilized by different devices. The programs perform an in-depth examination of the storage in a safe read-only mode to rescue the missing data and allow copying it to any safe local or network location.
Hint: For detailed information about the supported file systems and additional storage technologies please refer to the product specifications and the storage technologies page.
In order to carry out the procedure with the help of UFS Explorer Standard Recovery, follow these steps:
-
Find an additional computer you can use for data recovery. Download and install the program onto it, ensuring that the version of the program corresponds to the operating system it is running.
Hint: If you have any difficulties with the installation of the utility, please refer to the installation manual for UFS Explorer Standard Recovery.
-
Prepare a storage to place the recovered data. This may be an internal drive of the host PC, a network folder or any portable device (for example, a USB flash drive or an external SSD or HDD).
-
Switch the failed computer off, unscrew the tower and remove the hard disk drive. Handle the drive carefully and keep it horizontally on a flat surface during the work.
-
Power the host PC off and connect the extracted device to it using the fastest available interface. It is advisable to use any SATA port found on the motherboard, but you may also sacrifice performance and choose a USB to SATA adapter or a disk enclosure.
Hint: Please refer to the video tutorials on how to plug the drive into the motherboard of the computer or how to connect it externally using a USB to SATA adapter for detailed instructions.
-
Start the host computer and run UFS Explorer Standard Recovery. If needed, change the software parameters in the corresponding pane.
Warning: When you boot the computer, the operating system may prompt formatting or repairing the connected drive. Please do not perform these operations as doing otherwise will cause serious difficulties or even permanent data loss.
-
Find your hard drive among the connected devices in the left pane, select it and initiate its scan for lost data with the help of the "Start scan" button at the bottom of the window, the corresponding tool at the top of the list of storages or a similar option in the storage context menu.
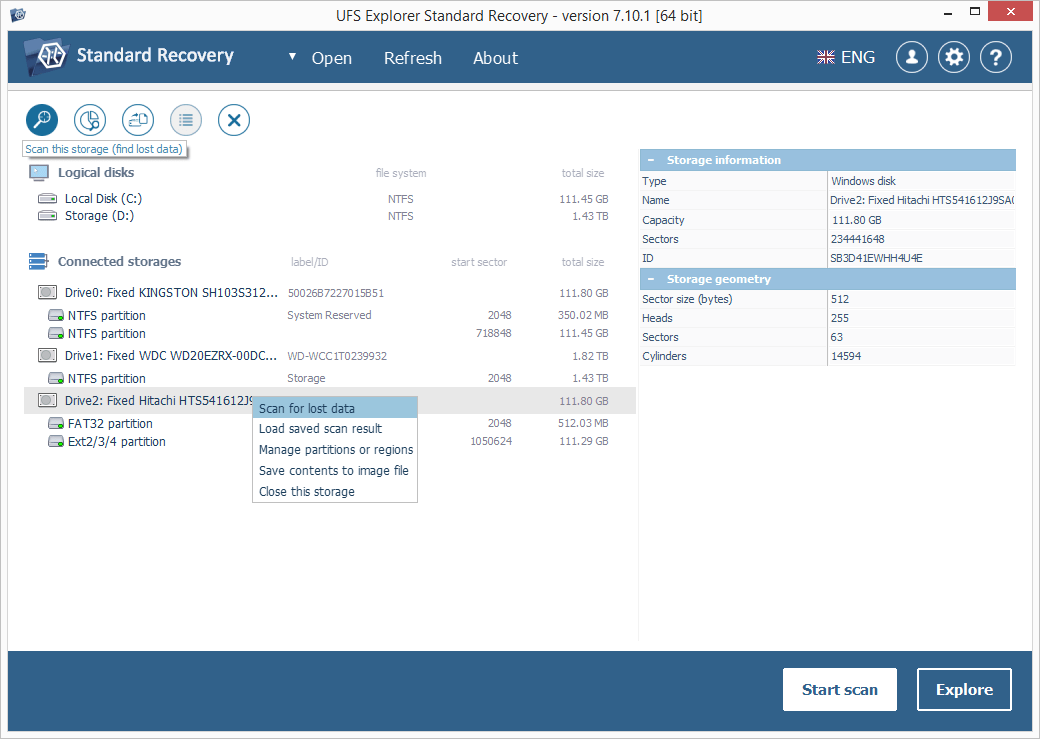
Note: If your drive is missing in the list of devices, try using the "Refresh" function from the software top bar or reattaching it. If nothing helps, you are likely to have a physically flawed drive/enclosure that should be handled only by a data recovery specialist.
-
Set the needed scan parameters. If you know which file system type you are working with, deselect the rest of the types. After that, click "Start scan" and wait for the process to be completed.
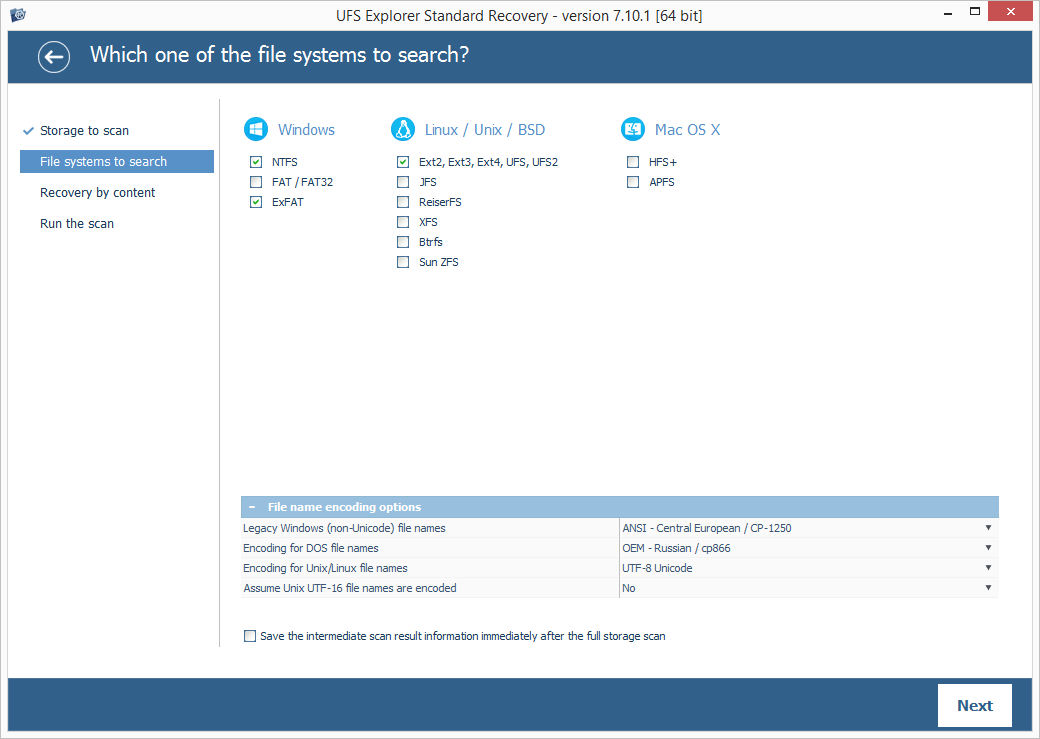
Hint: More information about configuring the scan can be found in the instruction on scanning a drive with UFS Explorer.
-
Look into the file system reconstructed by the program. If the "Set up displaying of file status" tool is enabled, all files will appear with circular icons that refer to their state. A green icon shows that a file is intact and has a valid header; a red icon is used when a file is "bad" (zeroed); a gray icon may signify that a file has been damaged or its integrity wasn’t verified because of the format’s specifics. The deleted folders and files after their recovery can be easily distinguished from the rest of the data by the red color of their names.
You may also sort the files by name, date, size, employ quick or advanced search and preview images, videos, audio files or PDF documents. After that, click "Define selection" and determine the items to be saved by putting checkmarks next to them.
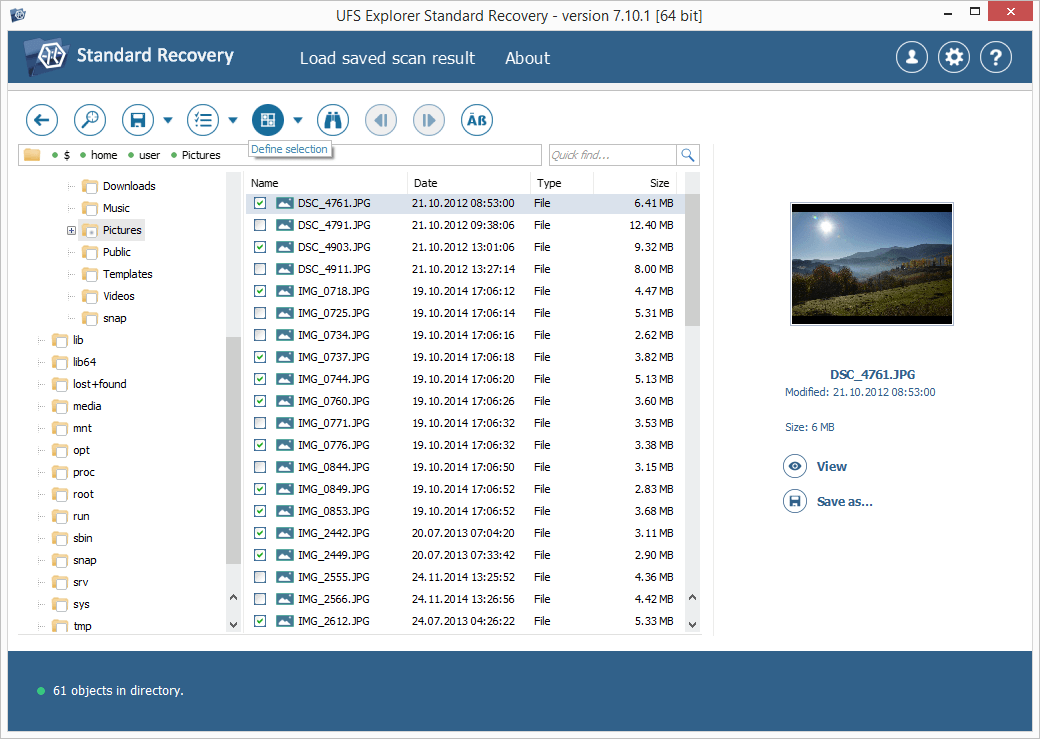
Hint: Check the article Evaluation and saving the results of data recovery for more explanations on how to work with the found folders and files.
-
Choose a destination folder for the recovered data in the pop-up window. Mind that it should be located on a storage other than the drive you are retrieving your files from to prevent irreversible data loss.
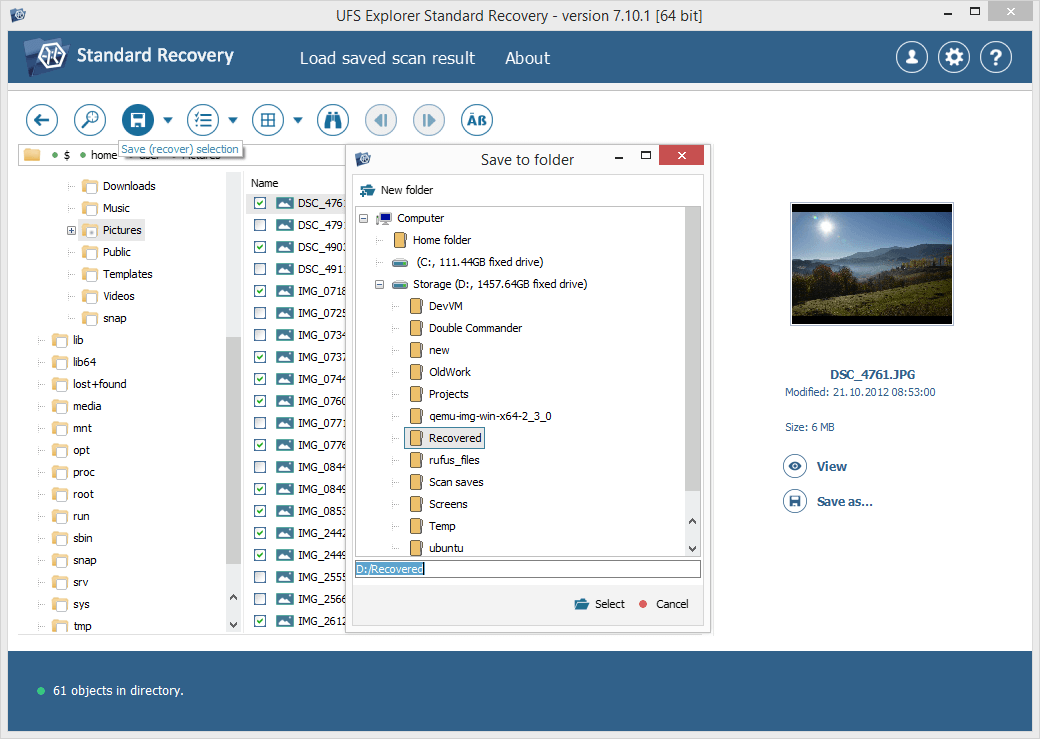
Hint: If you are going to save the recovered data to a network storage, please check the provided guide.
Last update: June 19, 2024