How can one recover files from nested RAID?
Standard RAID levels can be easily combined in one system to obtain additional benefits, like enhanced performance, redundancy or even both. This technology is referred to as nested or hybrid RAID and gets widely deployed by users whose requirements cannot be covered by any of the conventional layouts. Still, even a nested RAID implementation may appear to be helpless in the face of logical issues that result in the impossibility to access mission-critical files or even a total data disaster.
Specifics of a nested RAID
While basic RAID configurations employ either striping, mirroring or parity to create a storage, nested RAID arrays use two of the mentioned methods simultaneously. In other words, the nesting technique implies creating a RAID made of other RAID sets as components: several portions of physical disks are organized into RAID units of the same type and the resulting logical drives are joined on the higher level into another type of RAID.
The most common nested RAID layouts are RAID 01, RAID 10, RAID 03 (RAID 53), RAID 30, RAID 05, RAID 50, RAID 15, RAID 51 and RAID 60. The lowest level of the system is denoted by the first digit in the name, and the second digit represents the highest level.
Recovery of data lost from such an array is possible, however, for this, one should first reconstruct each of its levels. The procedure itself is performed from the bottom to the top: first, the arrays constituting the lowest level (indicated by the first digit) are to be built, and then the obtained RAID volumes should be assembled into another RAID, the type of which is designated by the second digit.
The number of intact disks that will be adequate for data recovery depends on the applied combination of algorithms. In fact, the fault-tolerance capabilities of such a RAID correspond to the ones of the standard RAID types. The only difference is that the components of the top RAID are themselves represented by disk arrays. For instance, if we take RAID 60, each of the RAID 6 sets it comprises may lack up to two member disks thanks to double parity, but the top RAID 0 configuration has no parity and cannot be built even without a single RAID 6 element.
In this context, there are several more factors that should be taken into account:
If the number of broken disks in RAID is larger than the one tolerated by the chosen configuration, data recovery is possible only after they are fixed. However, you should mind that such a storage must be repaired only by a qualified specialist from a reliable data recovery center. Please do not attempt to fix it yourself, as these efforts can make things even worse;
In case any of the drives shows signs of forthcoming failure, it is advisable to make its disk image and work with it instead of the physical device;
Replacing the drive and rebuilding the array may lead to even more acute data loss, and it’s highly recommended that you restrain from performing these operations before all the necessary data is restored or copied to another storage;
Like with any other storage, data overwriting that may be caused by the operation of full format, the user’s actions, the regular system activity or the TRIM command on SSDs make the lost files unrecoverable. That is why you should stop using the affected storage as soon as you notice a problem;
Encryption of a nested RAID volume in the majority of instances doesn’t obstruct the procedure, provided that the critical encryption metadata wasn’t destroyed and the user has the correct password or decryption key.
How to recover data from a nested RAID
As long as the array remains operable (even if it is degraded), suitable data recovery software will be able to restore the files that went missing due to a logical mishap. SysDev Laboratories offers UFS Explorer and Recovery Explorer as effective instruments that allow handling RAID units of various complexity, including nested or hybrid patterns, like RAID 01, RAID 10, RAID 50, RAID 50E, RAID 60 and many others.
If the RAID metadata is not seriously flawed, the program will read out the parameters of the array and reconstruct the initial configuration in an automated manner. Otherwise and as an alternative, the user can assemble the storage manually from its component disks or their images. Either way, the array is built in the virtual mode, without writing anything to the source disks.
To recover files from a nested RAID using UFS Explorer RAID Recovery, you will need to perform the following steps:
-
Pick out a computer that will serve as a host one during data recovery and install UFS Explorer onto it. It is advisable to opt for a computer that is running an incompatible operating system to exclude the possibility of implicit overwriting of the RAID configuration. For instance, for Linux MD RAID you should take a PC running Windows. Additionally, please check if this computer lets you attach all the disks of your RAID, i.e. has enough USB or motherboard SATA ports.
-
Prepare a storage to be used for saving the recovered data. For this purpose, you can use an internal disk of the host PC, any kind of external storage medium or a network location. However, please mind that you should never save the recovered files and folders to any of the drives the source RAID is made of as it can result in full or partial overwriting of data, and overwritten data is unrecoverable.
-
Connect all the available disks to the host computer. If it is possible, utilize the SATA ports on the motherboard, as they will provide the highest data reading speed. Otherwise, employ USB to SATA adapters or external enclosures.
Hint: To find guides on how to plug the disk into the motherboard of a PC or ⦁ how to сonnect the drive externally using a USB to SATA adapter, please refer to the corresponding articles.
-
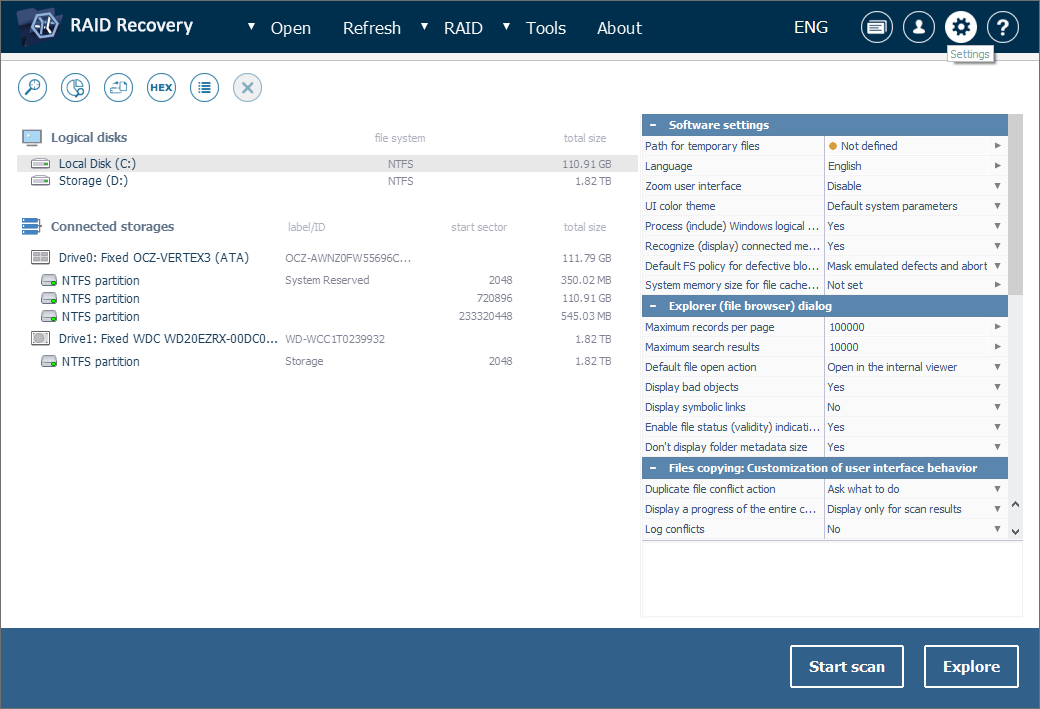
Launch UFS Explorer RAID Recovery. If needed, adjust its settings in the respective pane.
Note: To work with disk images instead of the physical disks, open the disk image files using the "Image file or virtual disk" option from the "Open" item in the main menu.
-
Check the list of connected storages in the left pane of the main screen. Provided that the RAID metadata hasn't been seriously affected, the set will be built on the spot and displayed in the list. You can identify it by the special icon, level, number of disks or a logical volume mounted on it (in case it wasn’t deleted). If so, you can proceed directly to Step 6.
-
5.1 If the program has not reconstructed the nested RAID configuration automatically, the arrays of the lowest level are to be assembled manually from their member disks (or disk images) and then combined into the array of the highest level. You can do it directly in the software interface with the help of its in-built instrument called RAID Builder. RAID 10 will be used here as an example, but the procedure is analogous for the rest of nested configurations.
-
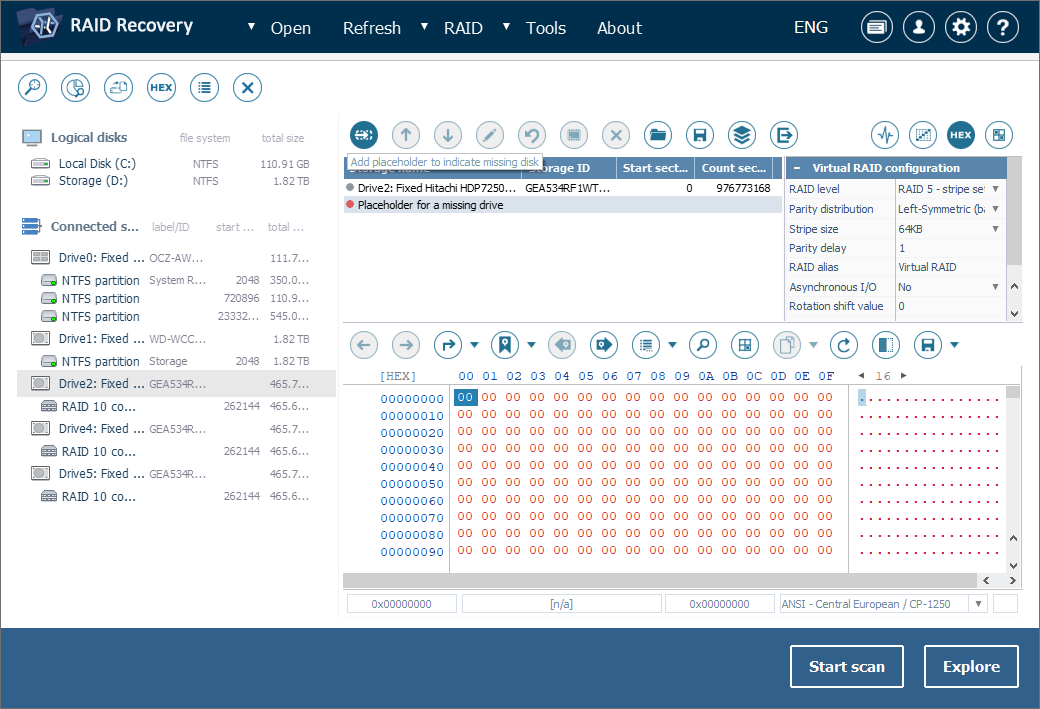
5.2 To start assembling an array, press the "Build RAID" button and add each drive or partition constituting the first RAID of the lowest level to the new virtual RAID. For this you may double-click the required drive in the list of detected storages or right-click it and use the respective option in its context menu.
Note: For more specific instructions as to building standard RAID you may refer to Systems with redundancy and Systems without redundancy.

-
5.3 If the array is in the degraded mode, insert a placeholder (or placeholders) to indicate the missing disk (or disks).
-
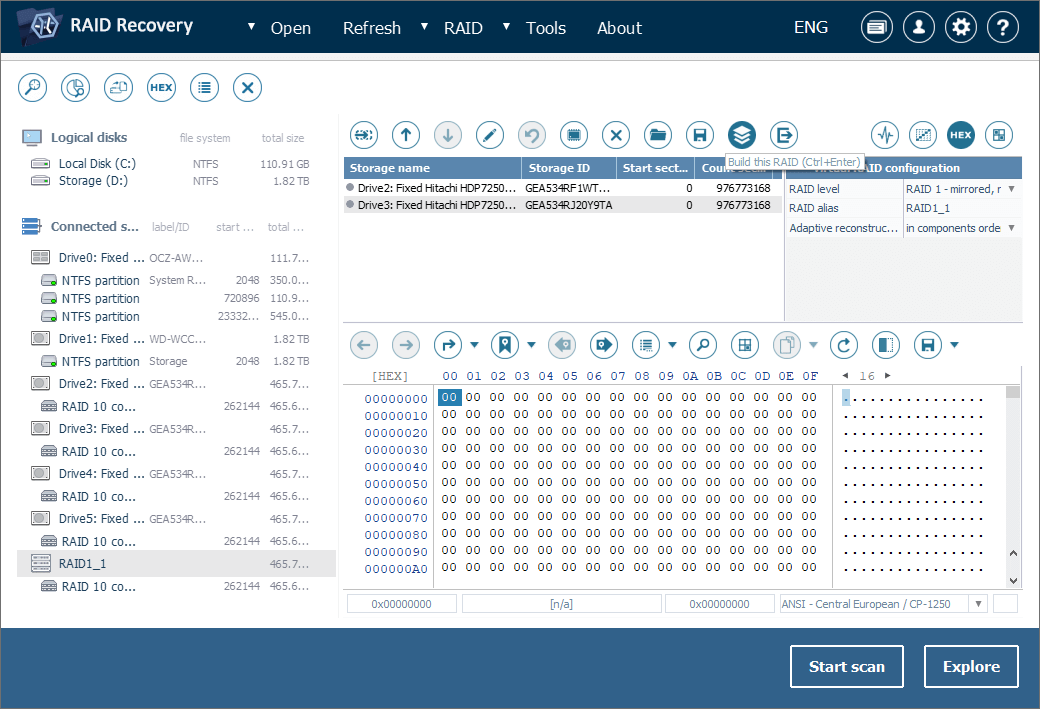
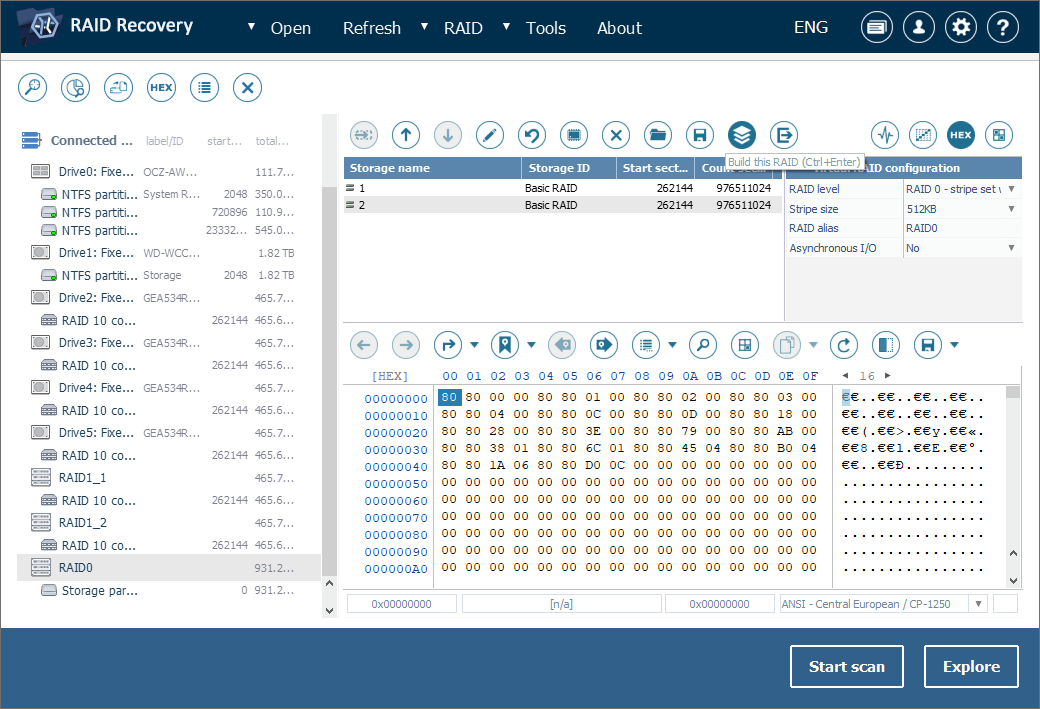
5.4 Establish the correct order of disks using the arrow-like buttons from the top toolbar and then set the valid RAID parameters, like level, parity distribution, stripe size, etc. in the configuration sheet on the right of the components list. Press "Build this RAID" upon completion.
-
5.5 Repeat the same procedure for each RAID unit comprising the lowest level.
-
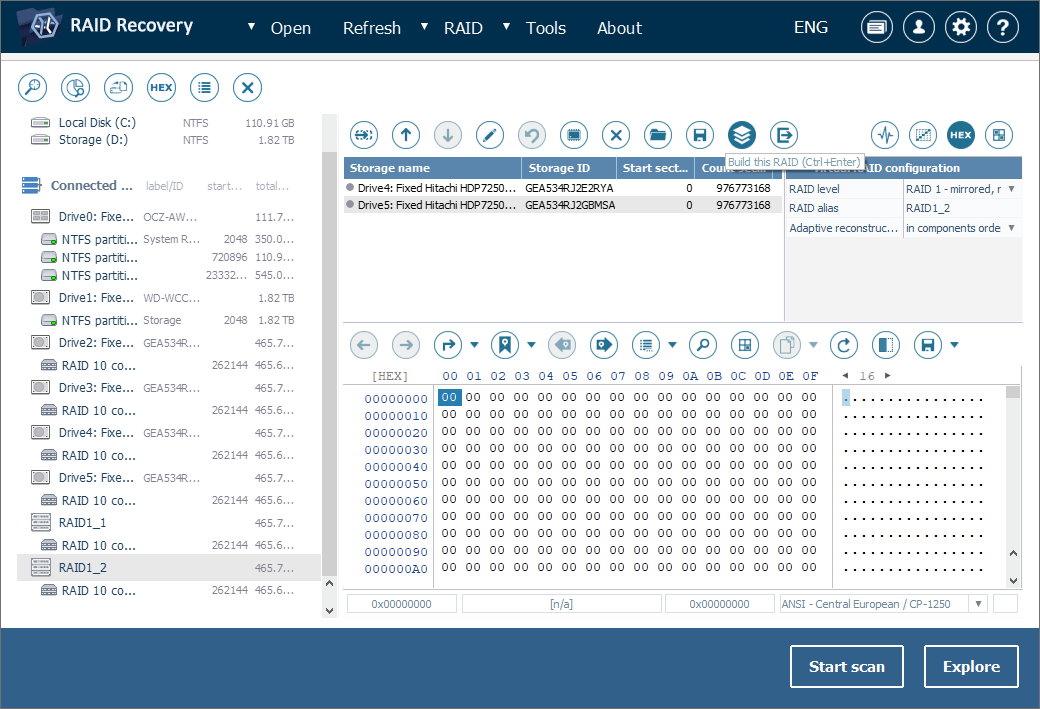
5.6 Having finished with assembling the arrays of the lowest level, open RAID Builder again and compile them into the set of the highest level by adding their mounted volumes to RAID Builder and then hitting the "Build this RAID" button.
Note: If you don’t know the exact RAID layout, you may try guessing it through multiple reconstruction attempts. Select "Edit RAID configuration" in the storage context menu to open RAID Builder for the array, make the adjustments and build the storage with new parameters.
-
-
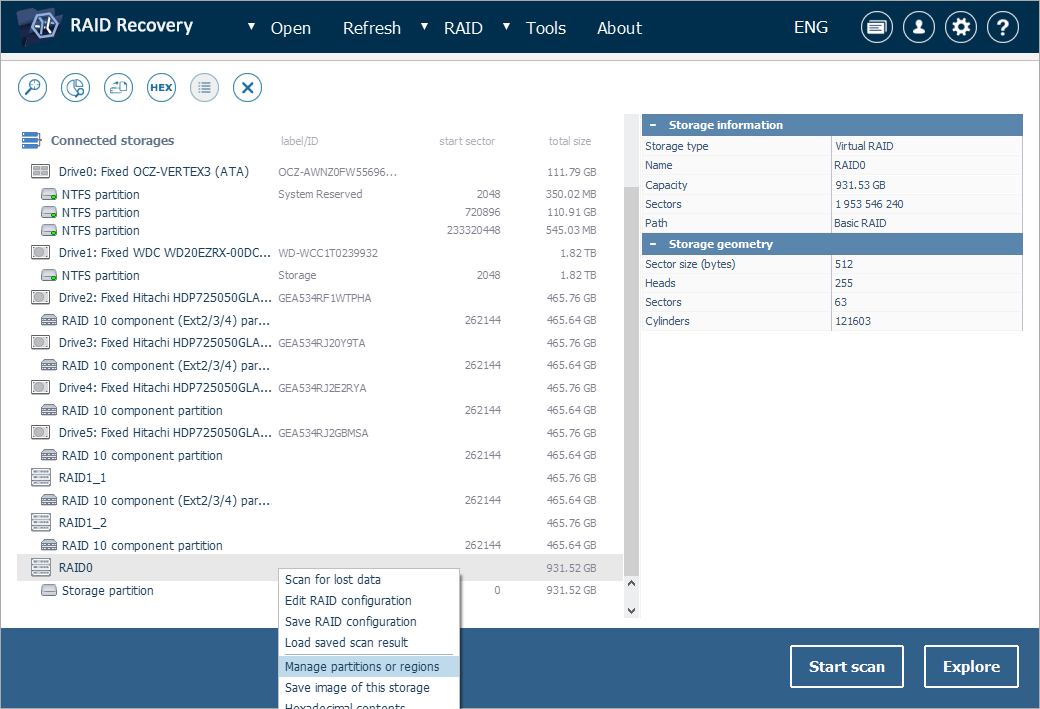
If the assembled RAID doesn’t contain any accessible partitions, you will need to perform partition search. For this select "Manage partitions or regions" in the partition context menu.
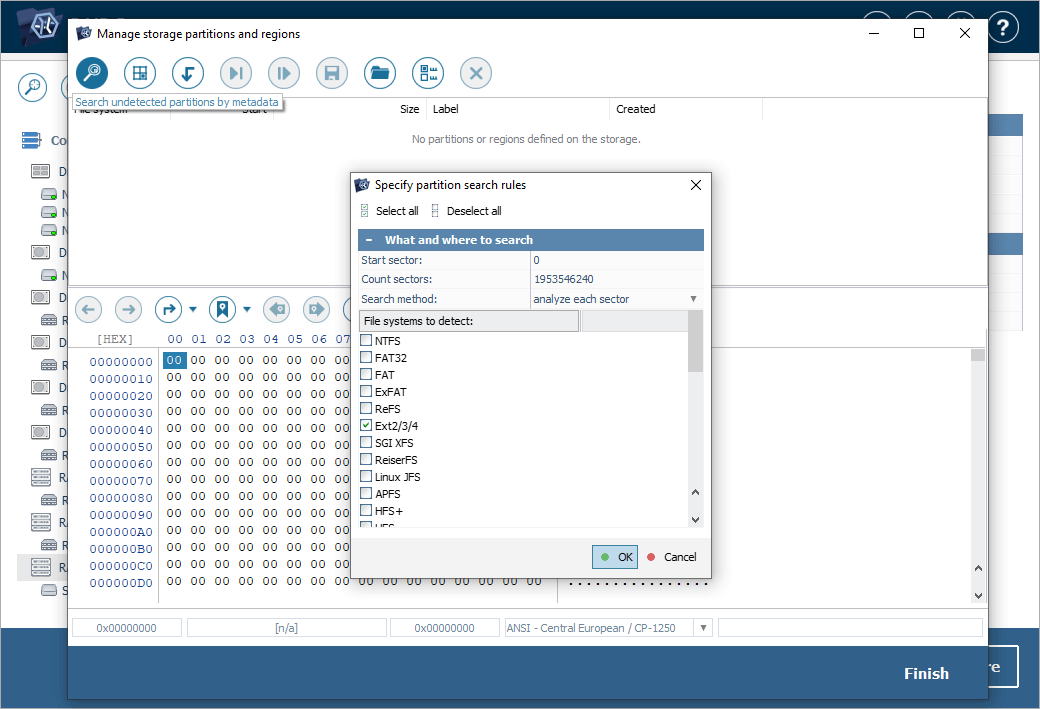
Choose the "Search undetected partitions by metadata" tool. In the opened window tick the file system type you suppose is applied on the storage and press "OK".
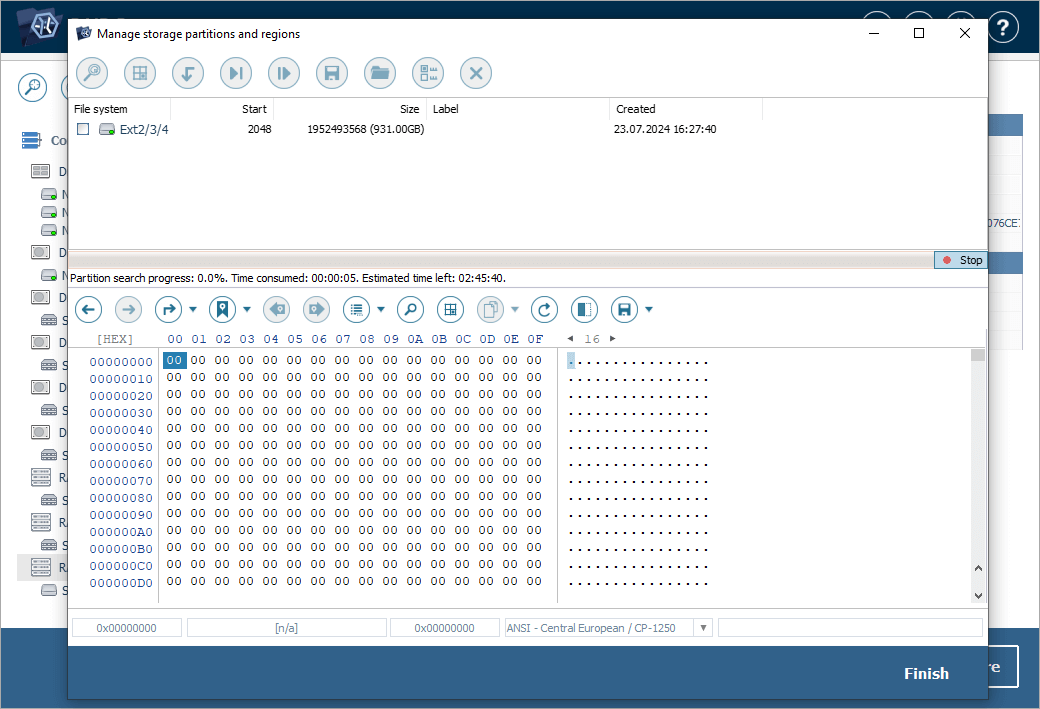
As soon as the needed partition is found, you can stop the search and press "Finish".
-
Select the mounted partition and examine its file system. Open several images or text files: if they seem intact, the array has been reconstructed correctly.
And to recover the missing files, return to the main window of the program and launch scanning for lost data with the help of the "Start scan" button below or the corresponding option in the storage context menu or in the toolbar above the detected storages list.
-
Provide the needed scan settings or keep the default ones and press "Start scan". Wait until the process is finished.
Hint: See a detailed guide about scanning a drive with UFS Explorer for more information about scan settings.
-
Browse the received results: you may sort files by names, dates, types, employ quick or advanced search or preview images, texts, documents, etc.
Hint: Refer to the article Evaluation and saving the results of data recovery in case you need detailed instructions on how to work with the scan results.
-
Click "Define permanent selection" and choose the items you want to copy.
-
Press "Save selection" and provide the destination storage for the selected items. Make sure you’re not saving them to any of the drives of the arrays they have been restored from.
Last update: June 13, 2024