
User manual: UFS Explorer Standard Access
1. The basics
1.1 Overview
UFS Explorer Standard Access is designed to provide fast and easy access to blocked data located on an inaccessible storage attached to the local computer or stored inside a virtual machine. Along with numerous physical devices formatted in Windows, macOS, Linux or FreeBSD, this program works with virtual disks enabling direct access to their files without the need to run or configure a virtual system. Access to data on complex RAID devices is also possible via the optional RAID Builder plug-in.
With abundance of tools and functions organized into one efficient software, this utility will become irreplaceable assistant to both home users and professionals.
1.2 Specifications and requirements
Supported host operating systems:
- Microsoft Windows ®: starting from Windows ® XP with Service Pack 3 and later.
Minimal configuration:
- Any of the supported operating systems
- At least 20 MB of free space on the disk for software executable files
- At least 1 GB of RAM
Recommended configuration:
- 64-bit edition of any of the supported operating systems
- Over 1 GB of free space on the disk for the program and temporary files
- At least 2 GB RAM and 4 logical cores CPU
- Default web browser
Supported host computer architectures:
- Intel Architecture, 32-bit (IA-32, x86).
Supported file systems
- Windows: NTFS, FAT/FAT32, ExFAT, original ReFS and modern ReFS3;
- Linux: SGI XFS, Linux JFS (JFS2), Ext2-Ext4, ReiserFS, Btrfs;
- macOS: HFS+, APFS;
- Unix/BSD UFS/UFS2, Solaris/Mac big-endian UFS/UFS2, Adaptec UFS, Sun ZFS, Novell NWFS, Novell Storage Services, DTFS, HTFS, VxFS, AIX JFS1/J2FS;
- VMware: VMFS (3, 5, 6);
RAID support:
- Standard RAID assembly via RAID Access Plugin – RAID Builder;
- Custom RAID in Runtime VIM format via RAID Access Plugin – VIM Import.
1.3 Features
- Direct access to data stored in an incompatible supplementary OS
- Opening files located on an inaccessible external storage
- Access to the content of a virtual machine skipping its start and configuration procedures
- Support of various file systems of Windows, macOS, Linux and BSD
- Easy copying of all data at once
- Useful functional extensions
- Safe "Read-only" mode
Installation
2.1 Setup
The software download page is located at: ufsexplorer.com/ufs-explorer-standard-access. This page also contains references to the information about software updates, technical details, including program specifications.
To install a new copy of the software or update the software from a previous version you should follow the steps of fresh software installation. If you are updating the software from an older major software version (e.g. from 4.x to 5.x or 3.x to 5.x), it's recommended to uninstall the older software version before installing the latest one. Other UFS Explorer products can be installed together with UFS Explorer Standard Access.
You can install the software on Windows XP with Service Pack 3 and all later versions of the Windows operating system. It is also possible to run the software on older versions of Windows starting from Windows NT 4 with Service Pack 6 while software installation on Windows 95/98/МЕ is not supported at all. To install the software simply download the executable file of the software installer and run it.
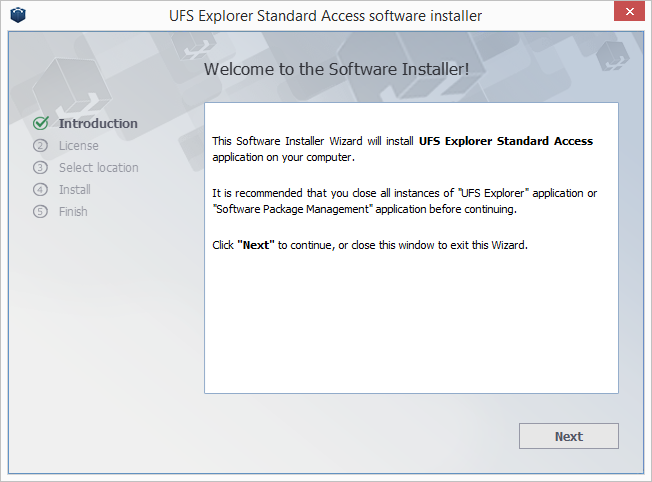
Having started the installation process, you will be prompted to choose the language of the user interface which will be used as the language of both the software installer and user manual. If the software is updated from a previous version, the installer will automatically pick previous language preferences. After that, the installer will show you the End User License Agreement (EULA) for acceptance. You will be able to continue the installation procedure only after EULA is accepted. At the next step, the software will prompt for the target folder to which the application will be installed. In case of a software update from a previous version, the folder of the previous software version will be set as the installation folder by default.
Then the installer will prompt for the name of the "Start" menu product group (the default one is "UFS Explorer"). At this stage the installer finishes collecting necessary information and starts the installation process. After it is completed, you will be able to run the software from the final window of the software installation wizard. You may also start the software using its shortcut in the "Start" menu ('All programs', then the software group (the default one is "UFS Explorer") and then "UFS Explorer Standard Access".
2.2 Activation
Activation of the program means purchasing a license for the full software version and its registration. For more information concerning the difference between the trial/evaluation version and the full one, go to the 4.2 Licensing information section. You can choose between two license types, depending on the purpose of the software employment: Personal and Business licenses are available, each having special conditions of the product usage. Having purchased a license, you will get a sequence of symbols, which will be sent to the e-mail address provided in the purchase form.
After that, you should run the application (if it hasn't been started yet) and choose the "License" option of the main menu.
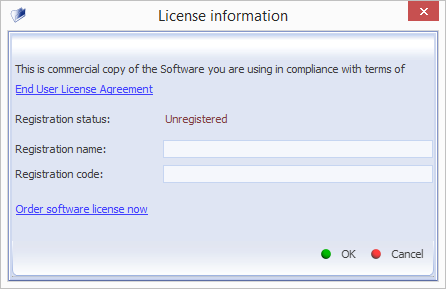
Paste the obtained sequence of symbols in the field "Registration Code" and fill in the field "Registration Name" which is to coincide with the name specified as a buyer in the payment document.
When the valid data is supplied, the software should switch to the "Registered" mode and immediately remove the trial limitations.
If you have problems with software activation:
- make sure you are using the correct software version and edition;
- make sure that the operating system platform is valid for registration;
- make sure the registration code is copied as described above.
2.3 Updates
The program itself may notify you about the availability of an updated version, which will be downloaded and installed after you press the "Install" button. You may also go to sysdevlabs.com/store, download the upgraded installation package of the needed software and simply run it as described in the Setup section. You will not need to enter the registration code again, if you have one, as the application remembers it. In case your software version is up-to-date, the installation manager will show the corresponding message.
2.4 Uninstallation
In case the software is no longer needed and you are willing to uninstall it, use the standard "Uninstall" feature under "Programs and Components" of Windows Control Panel. The software name for removal is "UFS Explorer Standard Access".
3. Use of UFS Explorer Standard Access
3.1 Introduction
As already mentioned in sections 1.1 Overview and 1.3 Features, UFS Explorer Standard Access is an effective tool for cases when access to non-damaged data of a physical storage, disk image or a virtual disk is difficult or impossible due to file systems incompatibility or other issues. The software enables fast and easy access to blocked data of macOS, Linux or FreeBSD working on a PC concurrently with the Windows operating system, external storages formatted with any of the supported file systems as well as a virtual disks without the start and configuration of a virtual machine.
Working as a "guide" from one file system to another UFS Explorer Standard Access in no way alters the information on the source storage. The software operates in a read-only mode therefore ensures safety of your data.
3.2 Software settings
Right after its launch, the program is ready for use with the most optimal default settings. However, the user can modify these settings for more efficient software utilization in the "About/Settings" tab opened with the "Settings" button in the main menu at the top of the use interface.
Each value can be changed by pressing the "Change value" button next to it. All the defined settings will be stored in the corresponding user profile folder in a special ",ufsxaci,hbin" file. The software will not save any data to the operating system registry or configuration files (except uninstallation information, if applicable).
3.2.1 Temporary files path
This setting defines the target folder for the "View" tool of Explorer. The software will save all temporary files to this folder. More information can be found in the description of Explorer. The changes will be applied immediately.
3.2.2 Language
This setting allows changing the language of the user interface. For the change to take effect, the software should be restarted.
3.2.3 Explorer
Settings include maximum number of objects available on single "page" of Explorer and maximum number of search results returned by single search operation. Lower values will save memory and increase speed, higher values will allow to operate more objects. The recommended settings are available in hint section (select field header to see). The changes will be applied to all subsequent related operations.
3.3 Operations
On startup the main window of the program is displayed, which includes the main menu (found near the top), the storages navigation tree (a pane on the left side of the interface) and the workspace (main program area positioned to the right). By default, the workspace will show the "About/Settings" tab.
To get access to the content of a storage, activate the required disk partition in the storages navigation tree or choose the "Open file system" option in its context menu. The software will display the "Explorer" tab for the chosen file system in the workspace. Using explorer-style navigation you may navigate to a specific folder, find and select the required files using the "Define selection" tool and save them using the "Save current selection" tool from the "Explorer" tab toolbar or using the "Save this object to..." context menu option for each of the files.
Any file can be also "opened" after its activation with a keyboard or mouse. This will either copy the file to the folder located at the "Temporary files path" and opened with the default associated program installed on your computer or opened in the internal viewer in a new tab depending on the preferences specified in the software settings.
3.3.1 Storages navigation
The storages navigation tree consists of the top-level container "This computer" below which all the opened storages are listed. The storages will also include disk images and complex storages (RAID).
Storages operations
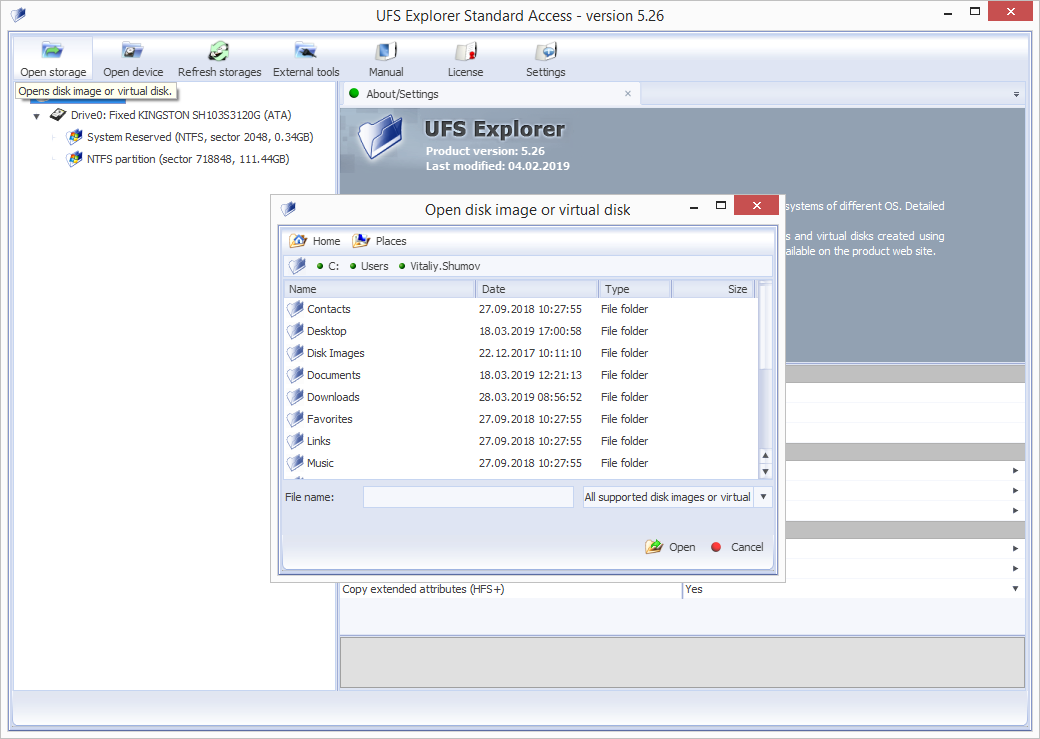
The "Open storage" item of the main and the context menu item of "This computer" allows opening any supported disk image or virtual disk. More information about supported formats is available in the software specifications.
The "Open device" item of the main menu allows opening a physical storage by specifying its OS-specific device name. In Microsoft Windows, you may open volume by supplying volume mount point (e.g. "E:"). To access physical drives, you must run the software as local Administrator.
The storages opened in UFS Explorer can be closed with the help of the "Close storage" option from the storage context menu.
The "Refresh" item from the main menu resets the tree of attached storages: the list of attached storages gets updated and will include all detected storages, even the ones which have been previously closed (except for closed disk images). This operation does not apply to the tabs which have already been opened in UFS Explorer: a storage is closed after the last tab related to this storage is closed.
Disk partitions
A single physical disk may be divided into several partitions. The purpose of this subdivision is data isolation (from other data or OS), installation of different operating systems on the same physical drive, etc.
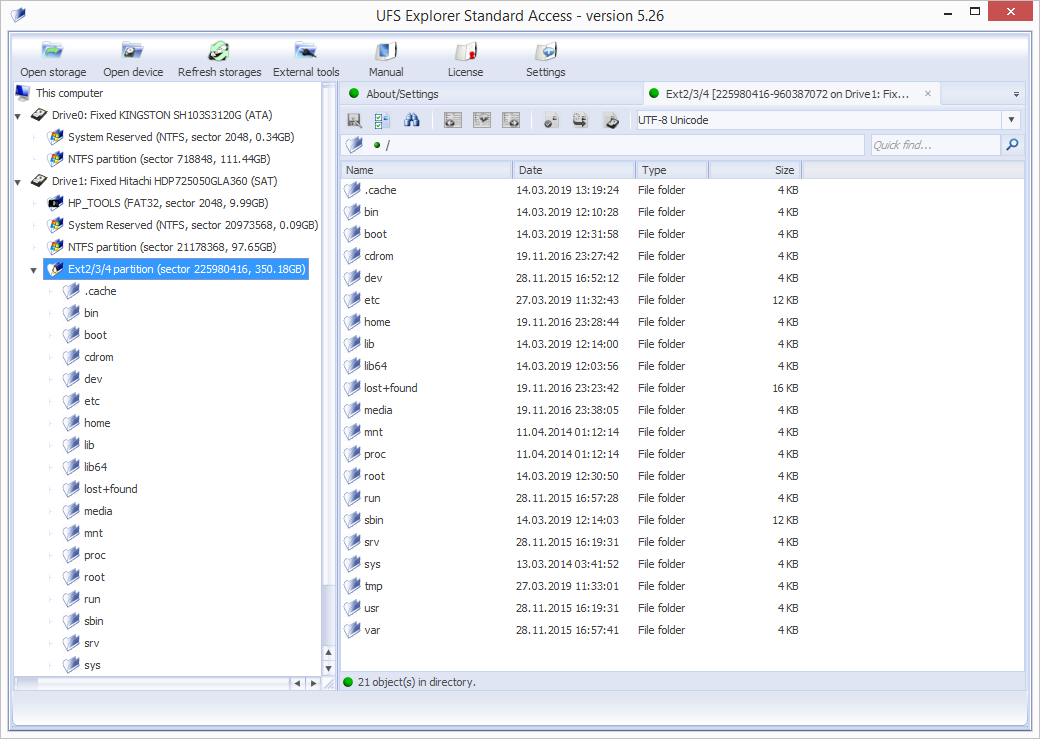
The software will show all disk partitions under the corresponding "drive" element (including those with unknown or unsupported file systems). The name of a partition is the combination of its parameters: file system type, offset, size (in GB).
The file system icon will indicate its condition: a green icon means that the file system can be accessed, the yellow one may indicate problems, the red one means there are problems while the gray one means that the file system cannot be recognized. The software does not display any information about the mount point of a file system. For example, the C: drive may be displayed simply as an NTFS-formatted partition of a certain size. A file system can be identified by the disk it belongs to, its size or files/folders content. After the activation of a partition the software opens an "Explorer" tab for its file system.
3.3.2 Using Explorer
The "Explorer" tab for the file system can be opened by double-click on a disk partition or with the help of the "Open file system" storage context menu option.
Files and folders in Explorer are represented as sorted lists containing the file/folder name, type, size and modification date. You may re-sort the list by clicking on the column header.
To simplify navigation Explorer contains a quick navigation panel with the support of navigation by navigation history, navigation to parent folders or by typing a full path.
The left pane of the "Explorer" tab contains a tree of folders.
When a folder is activated, the software navigates to this folder. When a file is activated, depending on the preferences specified in the software settings, the program will either open it in the internal viewer or will copy it into the folder for temporary files and open using the associated installed application.
You can save files and folders to a specific "local" folder by selecting them and choosing the context menu option "Save this object to...".
You may select several objects in Explorer for copying by holding the "Shift" or "Ctrl" keys when selecting an object in the list.
If you need a more complex rule for copying files, use a "bulk copy" operation.
Explorer pages
If the number of files and folders exceeds the maximum number specified in the software settings, Explorer will use "Pages" to show all files. In the toolbar it activates the buttons for "Previous" and "Next" pages navigation and the button for navigation to a page by a given number.
To copy all data from such a folder you may either use a "bulk copy" operation or apply a copy operation for the parent folder.
Bulk copying
The option is activated by the "Define selection" button of the Explorer toolbar. This turns both the list of files and the tree of folders to the "checkbox mode" so that you could select files and folders for copying.
The copying rule is defined as:
- a file or folder that was selected with a checkbox will be copied;
- if a checkbox was removed from the file, it will not be copied;
- if a folder is selected, it will be copied together with its content, except the deselected files and folders.
Having selected all required files/folders, press "Save current selection" to start the copying operation. The selection can be canceled with the help of the "Cancel selection" button.
Search for files and folders
The function is available as the "Quick find" field: just specify a sub-string of the file name in the search field. You may also use advanced search: the "Find files and folders" tool in the "Explorer" tab toolbar, the "Find files and folders" folder context menu or the "Ctrl+F" keys combination.
Quick search uses a string as a part of the file name and uses case sensitivity settings of the current file system.
For advanced search, you may specify a full mask for the file name (including the "wildcard" symbols * and ?). You may also define a rule for the file size and for inclusion of files and folders to the search result.
The search operation will start on a new "Search result" tab and runs over all sub-folders of the selected folder until all sub-folders are processed or the maximum number of found objects is reached.
New search will start on the same tab if the previous search operation is completed and the "Open on new tab" option is not specified.
You may navigate from the "Search results" tab to the "Explorer" tab by opening the folder containing the selected object. The software will not copy files/folders from the search results tab.
Data size
Before starting copying files and folders, it's recommended to evaluate whether the size of selected data matches the amount of free space available on the target storage. You may use the "Evaluate data volume" tool from the folder or objects group context menu.
Folders tree panel
The panel contains the information about the currently opened partition, file system and folder for fast navigation. If a folder is chosen in the left panel, it will be opened in Explorer; this feature can be used for fast navigation through different folders.
The folder context menu contains all the tools available in Explorer for the folder record. If Explorer is in the "bulk copy" mode, you may select/deselect folders from the tree by double-clicking them.
3.3.3 Hexadecimal contents
UFS Explorer Standard Access provides the possibility to have a deeper look at the structure of the files to be copied by viewing the hexadecimal content of any file as well as to perform its manual analysis with the help of various tools for advanced hex search, selection of a certain data range, copying raw data and binding data structures.
To open Hexadecimal Viewer for a file, open Explorer and find the file the content of which you want to see. Double-click this file and choose the "Hexadecimal contents" option in the upper left corner.
4. Legal information
4.1 Copyright
UFS Explorer products are licensed, not sold. This means that the Software Legal Owner (SysDev Laboratories LLC) only grants you some rights for the software use. Please read the End User License Agreement for more information about software licensing.
The End User License Agreement is a Public Offer Agreement. Any use of the software (including copying, installation, exploitation, etc.) means you have accepted the Public Offer Agreement. From the moment of acceptance, the Agreement comes into legal force in most countries worldwide.
Only SysDev Laboratories LLC, the software Author and authorized resellers are authorized to issue Registration Codes for applications that are property of SysDev Laboratories LLC. Unauthorized use of a Registration Code is violation of the Ukrainian and international Copyright Laws.
Any publication of a Registration Code by a License Owner or unauthorized license transfer result in termination of the End User License Agreement.
The End User License Agreement is a Public Offer Contract that has legal force in Ukraine and other countries. By installing and using the software you accept this Public Offer. The violation of EULA can be considered as a crime in these countries.
4.2 Licensing information
UFS Explorer Standard Access is sold on the basis of the following licenses:
- Trial/Evaluation License – the Software can be used by a single person for evaluation purposes only. A License Owner shall agree to the "trial limitations" of the Software.
- Personal License – the Software can be used by a single individual for non-profit purposes. A License Owner is not authorized to provide any "for-profit" services using the Software.
- Business License - the License is applicable for the Software usage in corporate environment on up to 10 (ten) computers possessed by a License Owner for technical support and/or for commercial purposes. The Software cannot be installed to computers of third parties (e.g. customers of a License Owner).
The Personal and Business licenses require the payment of the license fee. After the purchase of a Software License SysDev Laboratories authorizes it by issuing a Software Registration Code. This code is used to unlock the program functions (remove the "trial limitations") and identify a License Owner as an authorized owner of the Software.
A Personal License Registration Code is issued to Person's First and Last name; it authorizes the use of the application only by this Person.
A Business License Registration Code is issued to either Company's name or Person's (entrepreneur) name and authorizes the Person/Company to use the application according to terms and conditions of EULA.
4.3 Contacts
Company details
Central Office:
Limited Liability Company SysDev Laboratories
Code of legal entity: 35951055
28-V Druzhby Narodiv Blvd,
Kyiv, 01103, Ukraine
E-mail: info@sysdevlabs.com
To contact our support team, please fill in the contact form.
5. Glossary
This section describes the main terms and notions needed for understanding the peculiarities of work with the software.
5.1 RAID
RAID (Redundant Array of Independent Disks) is a special technology for data storage organization in which several separate disks are combined to constitute a single system. In such a system, in contrast to traditional linear storages, the data is distributed across the drives in a way typical for a certain RAID level. Each level has its advantages and disadvantages, but the main idea of any RAID is a balance between maximum performance, increased reliability and full capacity of useful storage space.
An operating system detects RAID as a single drive giving it its own mount point and treating all its disks as one storage. A RAID controller is responsible for correct operation of the system, which can be either hardware- or software-based.
Most commonly used RAID levels include:
- JBOD, which is not exactly RAID, as it doesn't feature redundancy or increased fault-tolerance. Generally, this is Just a Bunch of Disks (not necessarily of the same size) combined to consequently store data as the disks are filled one after another. This technique is also called disk spanning.
- RAID 0 is based on data striping without redundancy. Each disk in the system is divided into separate segments – stripes. In the process of writing, the data is cut into pieces equal to the stripe size and takes the disk stripes simultaneously: while one data part is still being written, the system starts inputting the next one. In general, RAID0 is the fastest configuration in terms of input/output, but the least fault tolerant one. If any disk of such a system happens to fail, the data of the whole system becomes unreadable.
- RAID 1 applies the mirroring method. During the operation of writing, the system creates an exact copy of the data on another drive. If one disk fails, the other one remains readable. This method has the highest level of reliability and the most expansive disk capacity, though. Disks work in pair only: the system stops working completely without all drives being in operation. RAID1 is a perfect choice for situations when backing up data is of vital importance.
- RAID 3 is the first RAID level to employ parity. In combination with data striping like in RAID0, this system has a separate dedicated disk that stores parity for other disks. Due to its byte-level writing and a separate disk on which parity is calculated and written, RAID3 is not able to boast high speed. Such a scheme ensures system security, yet, at the expense of slow operation. For this reason, RAID3 is not very popular. In case of failure, data is retrieved with the help the intact disks and parity.
- RAID 4 uses the same model as RAID3 (i.e. striping with dedicated parity) with one difference: while RAID3 operates at a byte level, this one handles data at a sector level. As a result, this resolves the writing issue to some extent. Nevertheless, RAID5, a faster and more reliable configuration, has replaced RAID4. Like RAID3, this level is recovered with the help of the remaining disks plus the disk with parity.
- RAID 5 employs the principles of basic data striping similar to RAID0 and redundancy of RAID3, but is considered to be a more progressive technology than its predecessors. In RAID5 parity information is not stored on a separate disk but rather distributed among all data disks according to special rotation schemes. This method has speeded up writing, as the system doesn't have to wait until the parity is calculated on a separate disk. If any of the drives fails, the data will be retrieved from the remaining drives and with the help of parity.
- RAID 6 is a further step on the way to higher reliability. This method implies two layers of parity distributed across all disks according to special order and rotation schemes. Compared to other levels, RAID6 allows for data recovery in case of two missing drives. This scheme is the most reliable one but the least cost-efficient, as one additional drive is used for storing parity.
6. Keyboard shortcuts
The following keyboard shortcuts work in the "Hexadecimal contents" window.
Backspace
Shift+=
Shift+A
Shift+C
Shift+G
Shift+K
Shift+P
Shift+R
Shift+S
Shift+T
Shift+U
Shift+V