Scanning a drive with UFS Explorer to recover deleted or lost files
If files that have been previously saved to the computer’s hard disk drive or any external digital media can no longer be found using standard techniques of the operating system, their data may be still available on the storage until some other information occupies that very storage space. Normally, it is possible to get them back by means of scanning the problem storage device or its image with a data recovery utility. Yet, the procedure should be initiated without delay since any writing operations performed either by the system or by the user may result in their irreversible destruction. Also, there are some other situations when overwriting or wiping of the data usually takes place:
-
files removed from solid state drives get erased by the TRIM command called immediately after deletion;
-
the tools specialized in "shredding" or "secure deletion" write zeros or some other patterns of data over the files, making them non-recoverable;
-
in contrast to quick formatting, the full (low-level) operation wipes everything on the given storage, leaving no chances to restore the data in the absence of a backup;
-
a file that wasn’t written to the drive right away (when the so-called "delayed writing" occurs), may not eventually make its way from the temporary memory due to software issues or improper disconnection of the device. Such "pending" information can in no way be retrieved as in fact it has never existed on that storage.
In other cases, UFS Explorer will comprehensively analyze the logical structure of the drive and locate the missing data, you just need to run a scan and copy the recovered files to any safe storage. Please follow the given general algorithm in order to launch the scanning process. Other peculiarities of the procedure may depend on the edition of the software, type of the storage device and the deployed storage technology.
-
Download and install UFS Explorer onto the partition other than the one containing the items you are going to restore. Ensure that the version of the application matches the operating system platform on which it will be run. If the files were lost from a system disk of a PC or Mac, it is highly recommended to use another computer for the installation of data recovery software or a Live CD as further explained in the corresponding tutorial.
Hint: If you have any difficulties with the installation of the utility, please refer to the installation manual for UFS Explorer.
-
Open the program and, if necessary, change its settings in the respective pane.
-
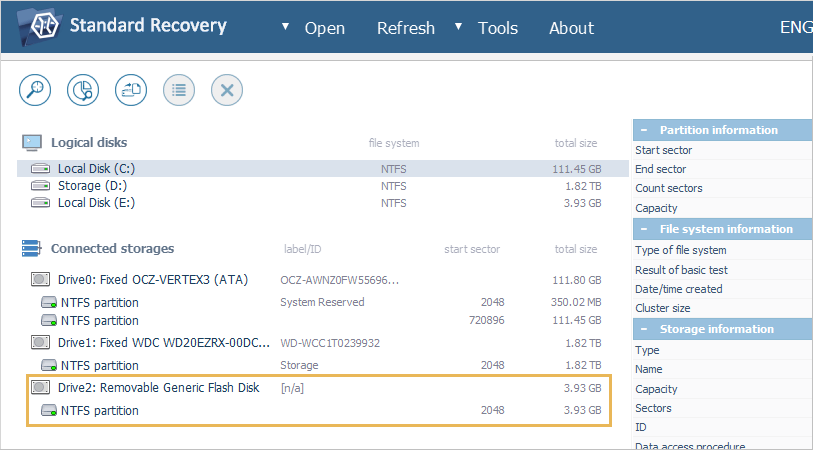
Attach the storage device which needs to be scanned to the computer. You may use any type of direct connection valid for your device, yet, the choice of the fastest one may significantly accelerate scanning. If there is a power switch, turn it on. After that, the storage unit should appear among the connected storages.
-
Select the storage device or a partition on it from the list in the left pane of the interface and start off the scanning procedure using the "Start scan" button or the "Scan for lost data" option in the storage context menu.

-
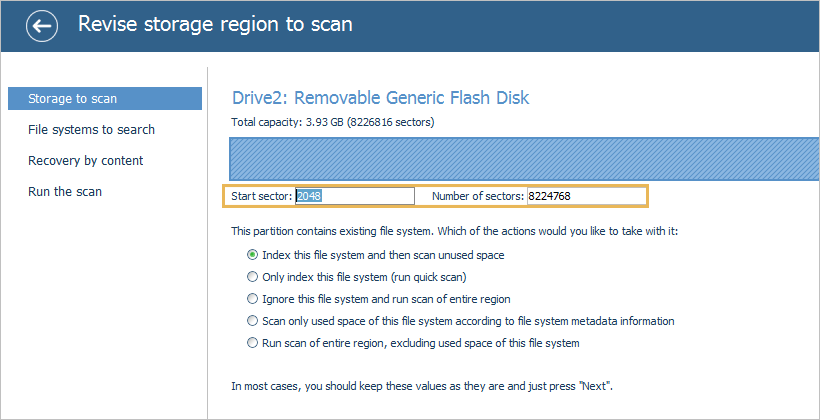
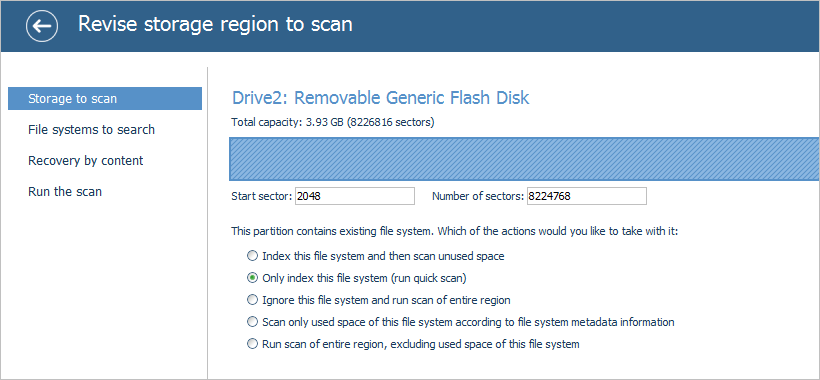
The software automatically picks out the optimal parameters for a scan. You may keep the default ones and proceed to the next step or adjust them in accordance with your needs:
-
It is possible to specify the range of sectors on the disk that will be scanned – the starting sector and the number of sectors after it;
-
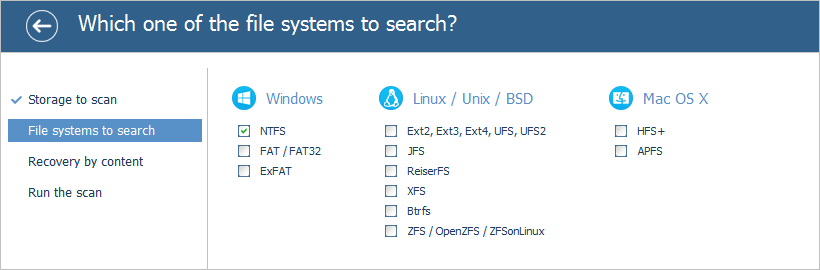
If a disk partition rather than the whole storage is scanned, and it holds a valid file system, you may decide on how it will be handled by the software: the program may perform its indexing, index it and then examine the remaining unused storage space, ignore the file system and simply scan the chosen region on storage, explore only the space occupied by the file system (according to its metadata) or exclude that space from the scan.
-
In case the type of file system on the storage was recognized by the software, or you know for sure which one was implemented, you may unselect the excess options.
-
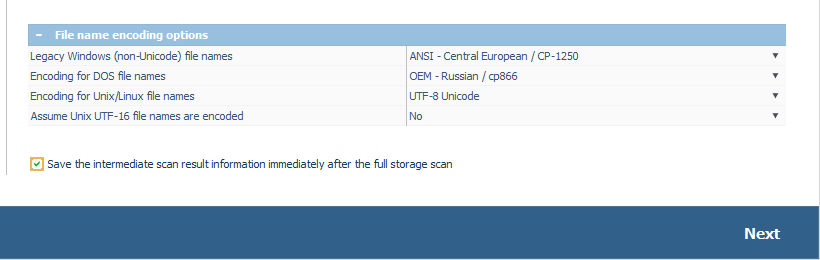
If necessary, you may change the standard file name encoding into the one typical for your file system which will enable a proper representation of file names in the software.

-
Also, if you want to preserve the scan result for later reference, you may enable the checkbox below the encoding options, and the database will be automatically saved to a *.ssdb file as soon as the procedure is completed.
-
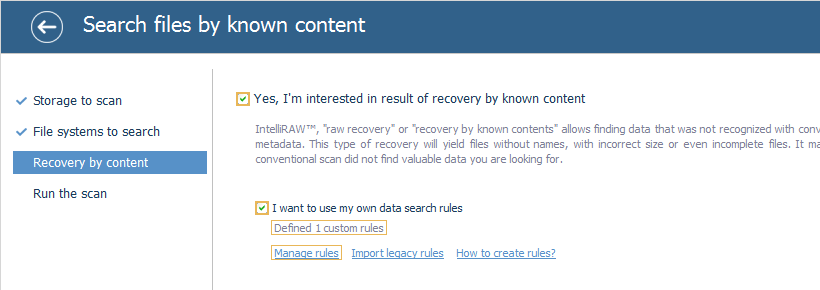
Enable/disable IntelliRAW or the method of "raw recovery" to search for the data that has not been found with the help of a regular scan. At this step, you may also extend the list of embedded IntelliRAW rules by specifying custom ones defined as described in How to create custom search rules for raw recovery – this may be needed in rare cases when working with very uncommon or proprietary file formats.
-
-
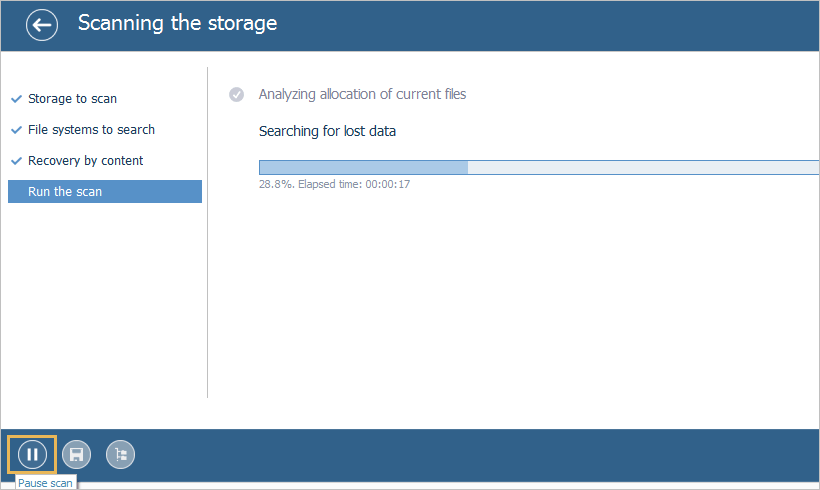
Hit the "Start scan" button and wait for the program to complete scanning. You may pause the process anytime and review the intermediate results.
-
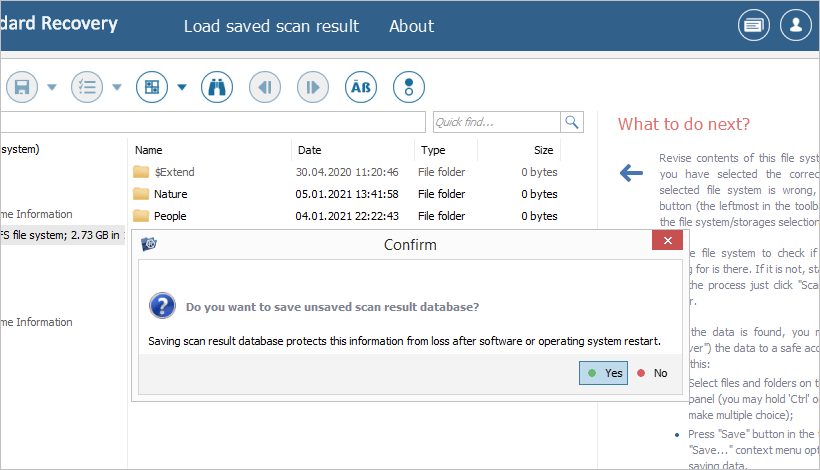
If required, you may save the "scan result database" manually right after the procedure. This file will have the information about the structures found on storage and can be opened to avoid a repeated scanning operation in case the storage is to be processed once again after the software is restarted. More details about the usage of such a database is provided in Saving the intermediate scan result to a file and its further use.
-
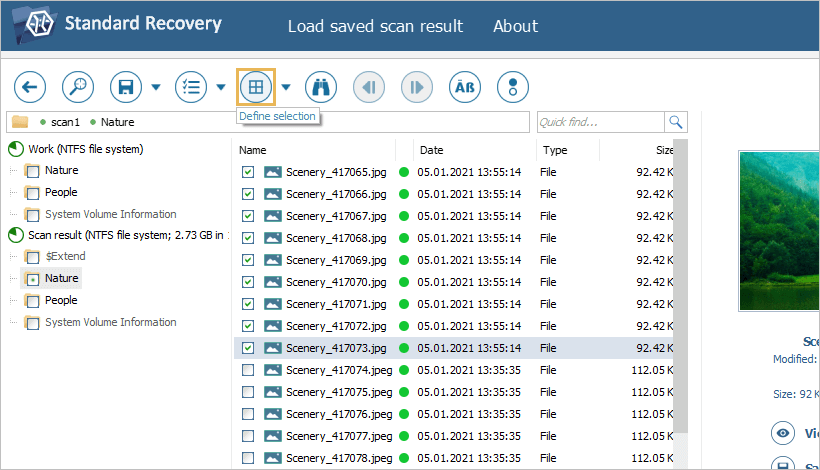
Browse the files and folders found by the program in the process of scanning and choose the items you want to save. You may sort them by name, date, type, use the quick and advanced search options as well as preview them in the internal viewer. For detailed instructions, please refer to Evaluation and saving the results of data recovery.
-
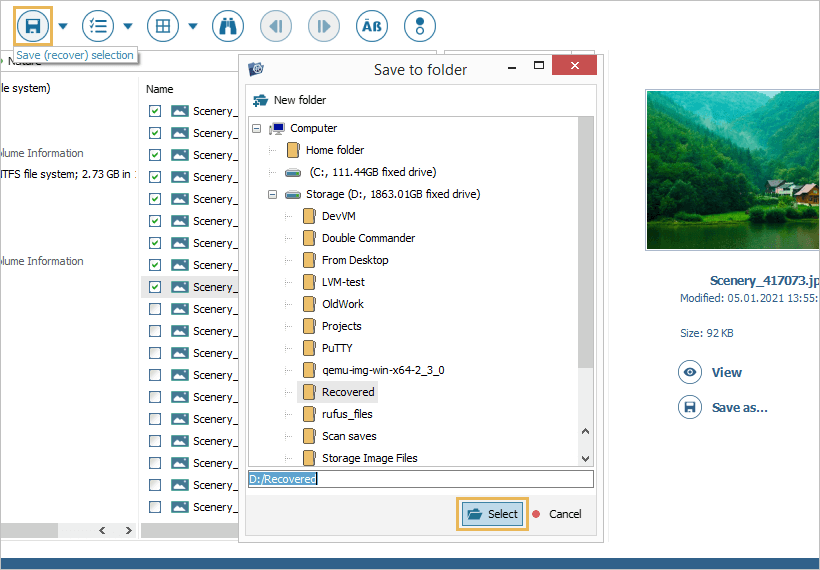
Copy the selected data to a secondary partition, external storage or a network folder. Please mind that storage (partition) you scanned to recover the files must not serve as a target location.
Last update: April 15, 2022