The process of data recovery on QNAP NAS
QNAP NAS is an excellent solution for storing large amounts of data in a safe centralized location, with the ability to access it from any internet-connected gadget. Yet, despite the numerous benefits it provides, such a unit is not resilient to crashes and other issues that may provoke the loss of valuable files. Here you can get some helpful recommendations in relation to data recovery on these appliances of various configurations. The general overview of QNAP NAS, its data organization specificities and common data loss problems can also be found in the corresponding articles.
Data retrieval from the Network Recycle Bin
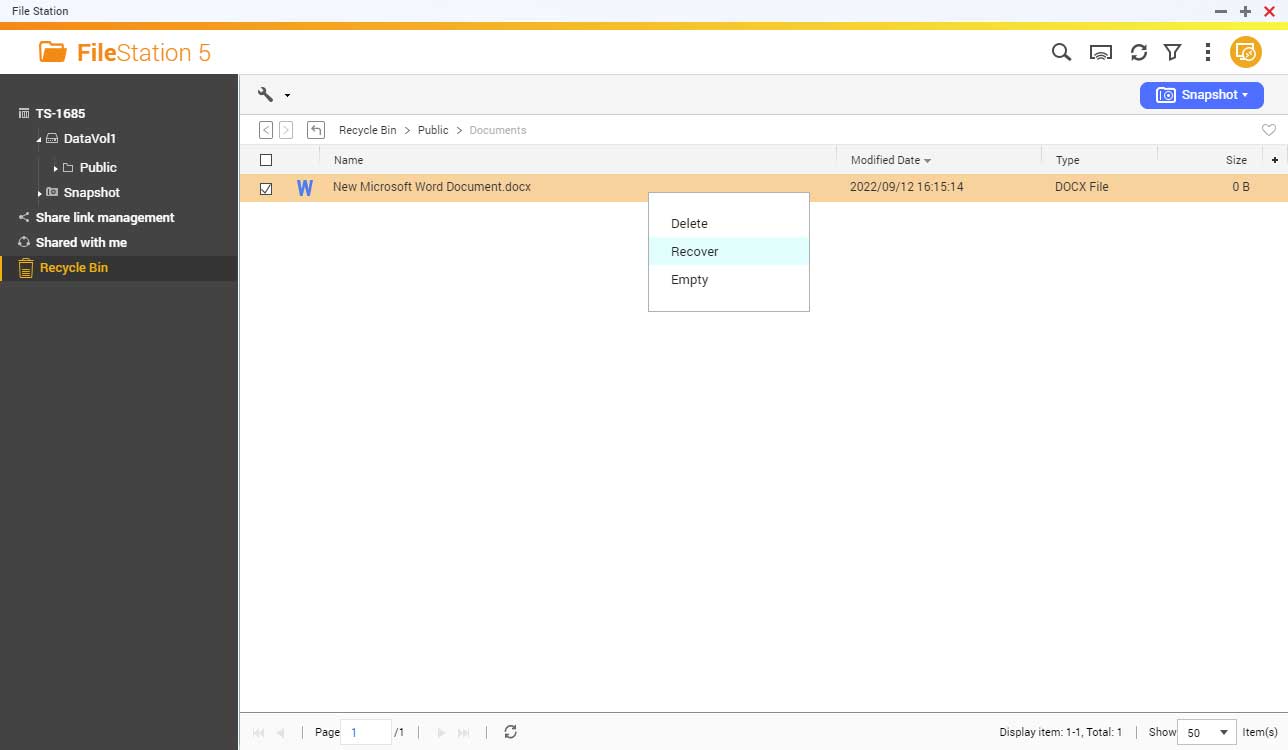
Before starting any preparations for QNAP NAS recovery, it may be useful to ensure that the procedure is indeed required in your case. For example, when the appliance is in a working order and you simply cannot find the necessary files in their original shared folder, it wouldn’t hurt to check whether the Network Recycle Bin option has been activated for this location. If so, it will contain a dedicated subfolder called @Recycle from which the data can be restored.
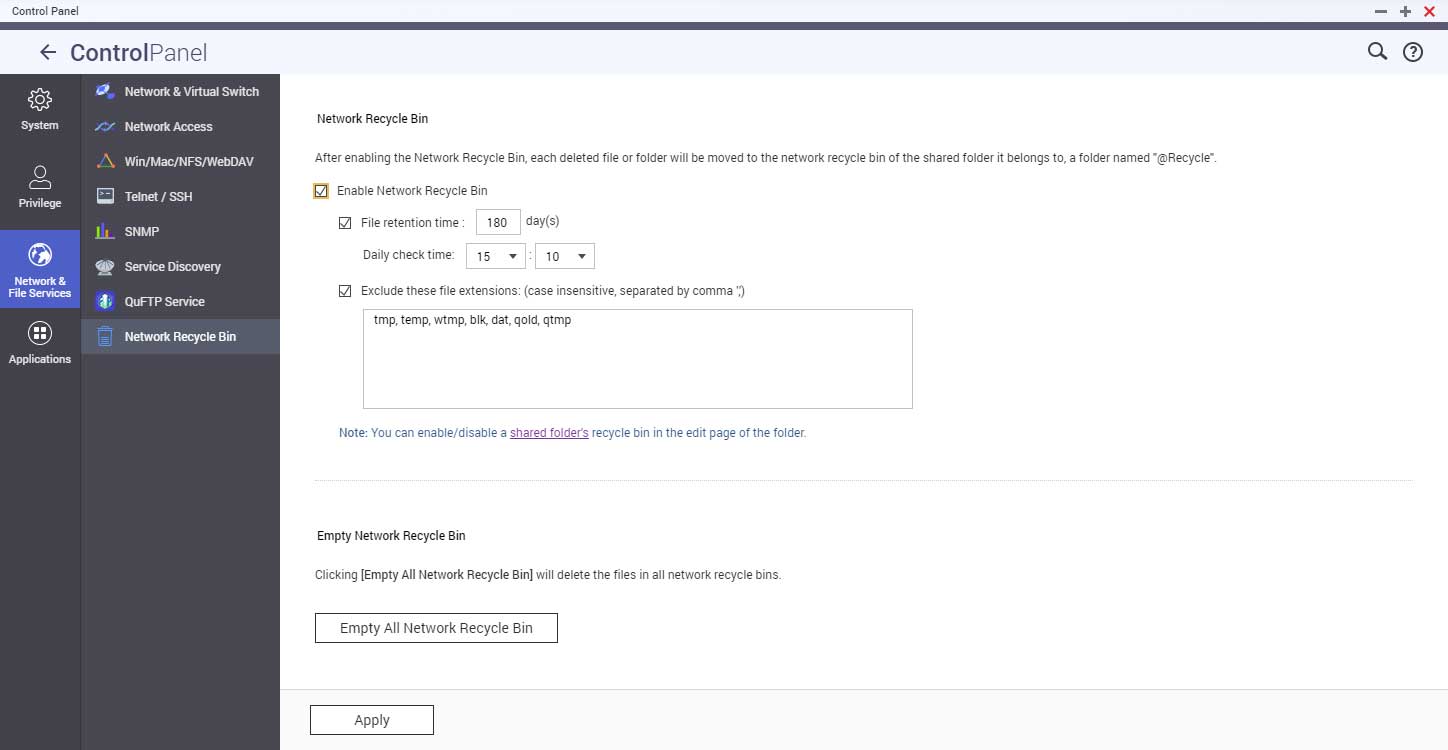
You may look for it manually or open the Control Panel, go to the Network & File Services category and then choose Network Recycle Bin. The "Enable Network Recycle Bin" option should be selected.
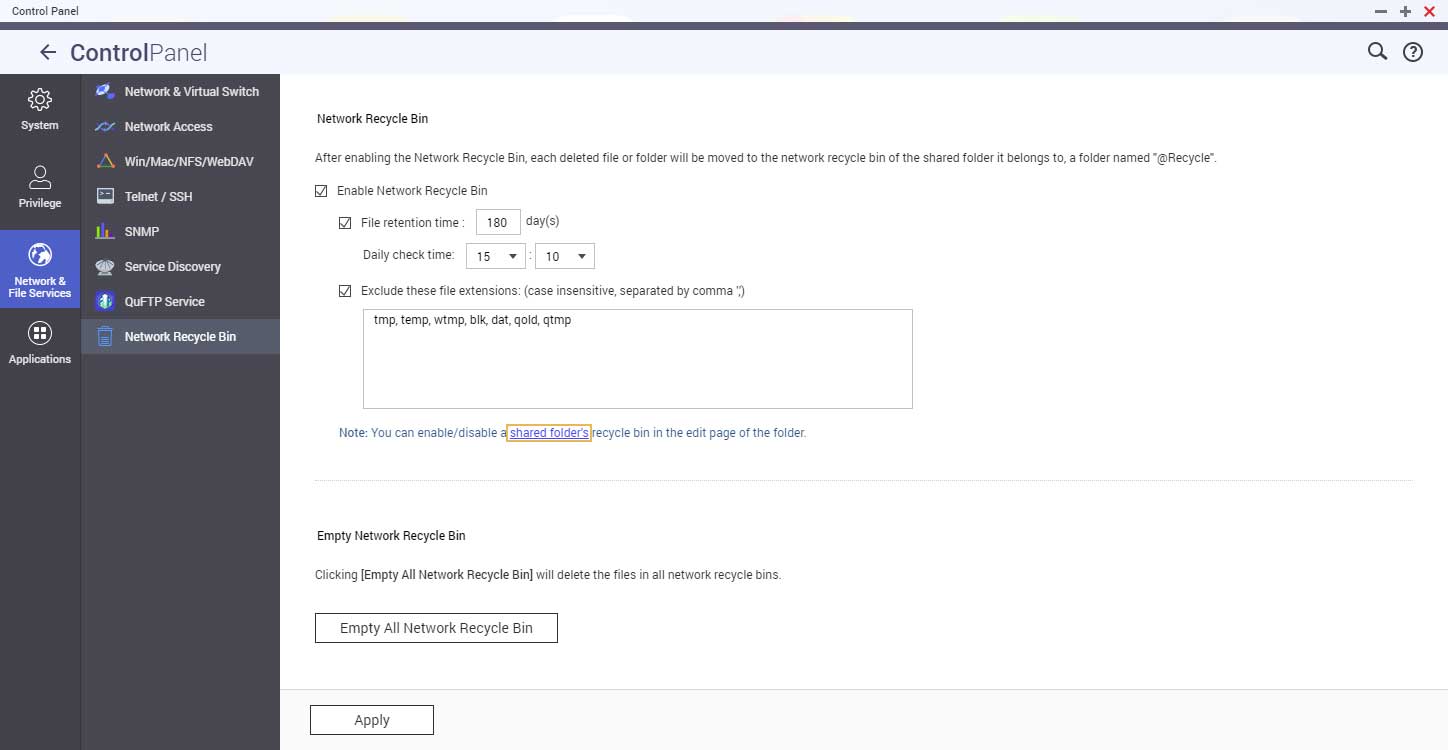
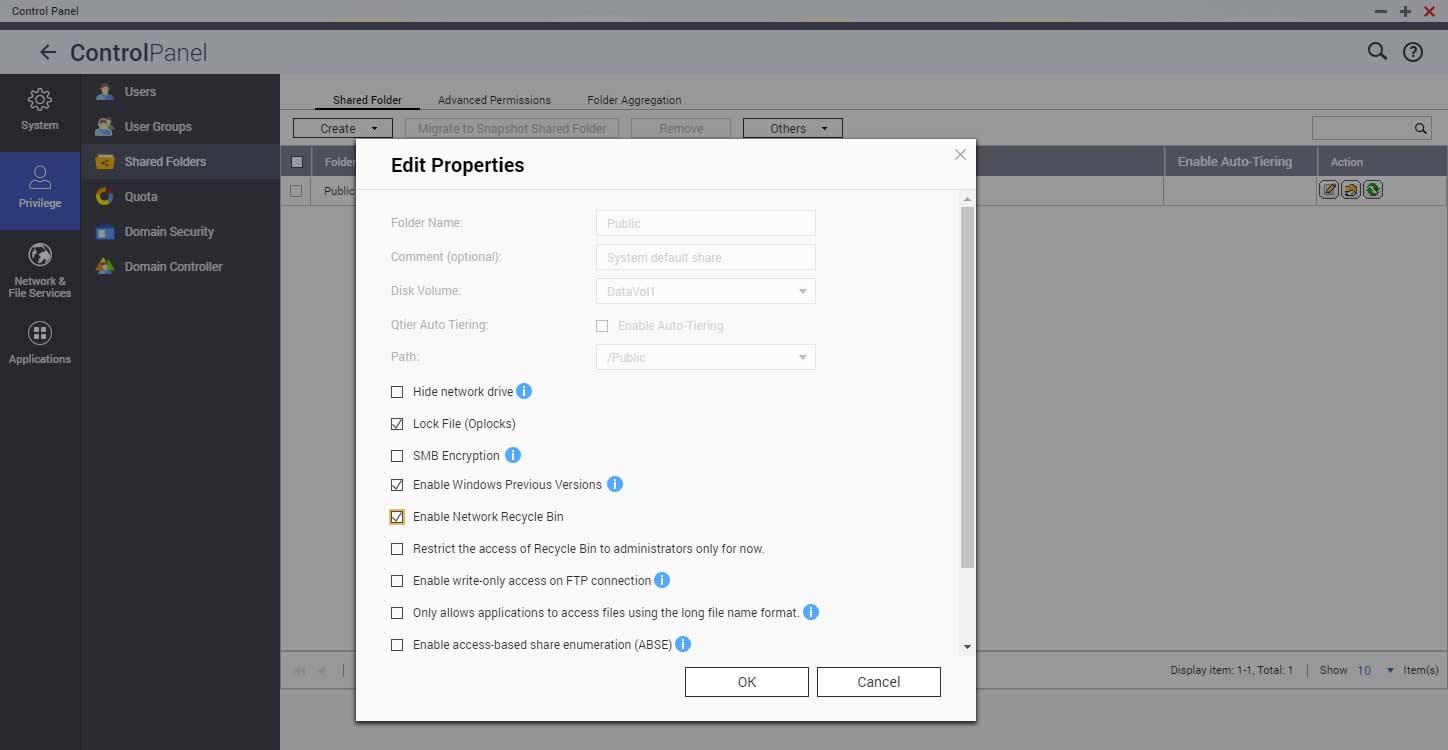
After that, follow the Shared folder link, find the required folder name in the list and open its settings using the Edit properties button. The "Enable Network Recycle Bin" option must be checked there as well.

Preparations for the recovery procedure
When the files cannot be retrieved from the Network Recycle Bin for whatever reasons, first off, you will need to get everything ready to be able to restore them using data recovery software. The most essential items include:
-
A host PC. A computer with a full-fledged OS will serve as a host for the data recovery utility and for the QNAP NAS component drives. It should be possible to connect all the media to it, and its resources are supposed to be adequate for running the program of your choice. In general, a Windows-based PC is preferred, since this OS doesn’t work with Ext or ZFS, so it won’t make any unexpected modifications to the file system structures, which is theoretically possible under Linux.
-
A sufficient number of connectors and power sources. The host PC has to provide enough slots to attach all the drives at once. The best option is to install them into the SATA ports on the mainboard, as this type of connection enables the highest data transfer rates. As an alternative, you may employ a PCIe expansion card to extend the connectivity capabilities of the motherboard. Please mind that 3.5-inch hard drives need to obtain power from the computer’s internal PSU or from an additional external power source. If these methods are unsuitable, you may consider using USB to SATA adapters or external enclosures. When combined with 3.5-inch hard drives, they also need to be powered properly, for instance, via an AC/DC adapter connected to a wall socket. Also, please pick out USB 3.0 and higher variants, as they are much faster. Besides, USB 2.0 adapters and enclosures may not support drives over 2 TB. In case of connectors shortage, some drives can be substituted by their bit-to-bit images, provided that a sufficient amount of free space is available.
-
Appropriate conditions for handling the drives. Mechanical hard drives have delicate mechanisms that are very pone to damage. The primary factors that can cause it include rough treatment and electrostatic discharge. It is important to be very careful when installing such devices, use a flat clean surface, ensure adequate cooling and avoid stacking them on top of each other. The most basic precaution against ESD is to touch a grounded metal object while performing any manipulations with the drive. More solid protection can be achieved if you put on an anti-static wrist strap.
-
A capacious target storage. Get an additional storage device to which you can copy the recovered data. Depending on its amount, you may use the internal drives of the host PC, external devices or another network storage. The most important rule to observe is that nothing should be saved back to the NAS drives until data recovery is completed in full.
Prior to removing the NAS drives, you will have to turn the device off. This can be done from the menu in its web interface or by pressing the power button. Release the button right after you hear a single beep, otherwise, an unsafe shutdown will be performed that may lead to undesirable consequences. After the LED lights on the enclosure go out, you may unplug the power cable.
To disconnect the drives, open the corresponding bay and pull the medium out. After that, remove it from the tray. Some QNAP models have trays with a key lock to prevent accidental ejection. As a rule, the key is the same for all QNAP appliances. If an expansion enclosure was a part of the configuration, the drives must likewise be taken out from it and connected to the computer.
When all the drives are extracted, you should make a note of the order in which they were arranged. This information may be required during data recovery and will come in handy if you decide to return the drives to the NAS and keep using the same configuration. Following this, the drives can be attached to the host PC. Reconstruction is possible only when all of them are intact or the number of failed ones doesn’t exceed the maximum permitted on the given RAID level.
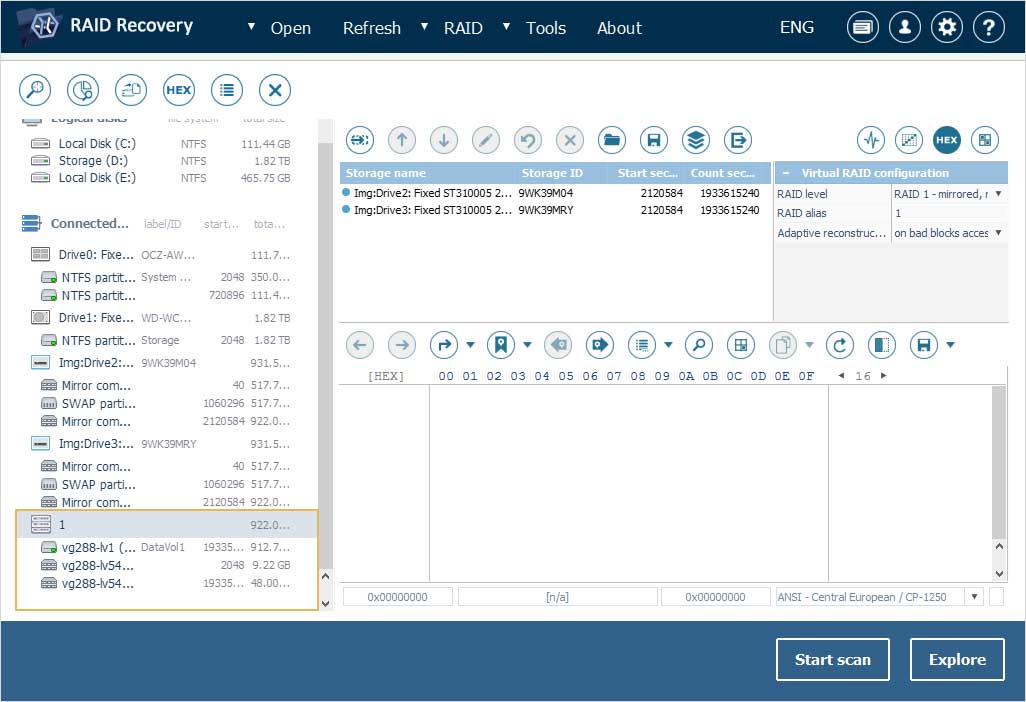
To enable any access to the content, the array has to be reassembled in the interface of a data recovery application. UFS Explorer of the RAID, Network RAID and Professional editions features all the functionality necessary for smooth work with various configurations available in QNAP appliances. As long as the RAID metadata on the member drives hasn’t been severely corrupted, the software can interpret it and perform virtual RAID reconstruction. The resulting RAID set will appear in the main program’s window, at the end of the list of connected storages, marked with a special complex storage icon.
If the RAID is not available among the listed storages, this may signify heavily damaged or overwritten metadata. Such arrays can be assembled manually using the convenient means provided by UFS Explorer.
Hint: The detailed instructions on RAID assembly can be found in Data recovery on RAID.
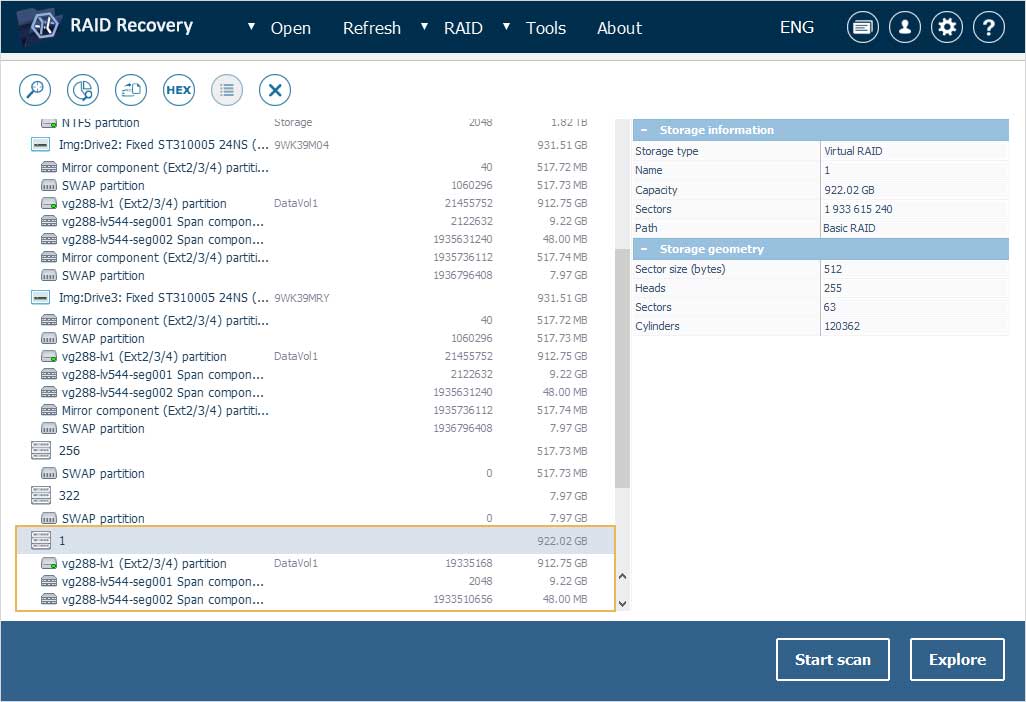
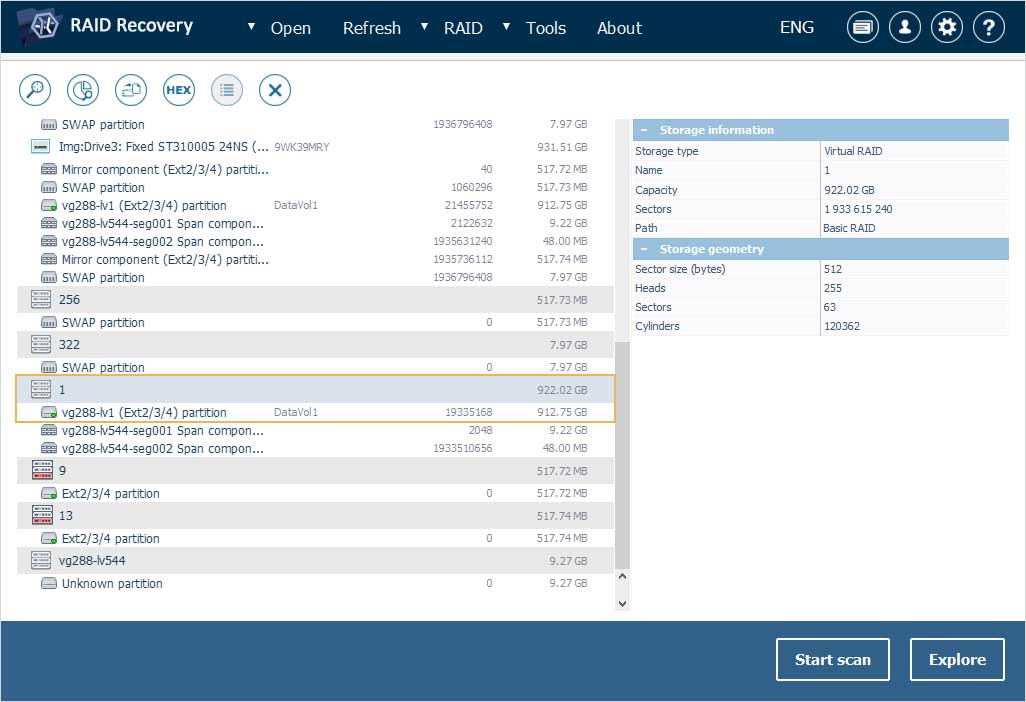
As a rule, it is possible to see multiple RAID sets, but most of them have the size up to several gigabytes and store service information. The RAID containing user data is normally the largest. There may be multiple partitions on it, but only the largest of them is the actual data volume. Further recovery steps will be determined by the type of this volume.
Recovery from static and thick volumes
In our first illustrative example, the drives of a two-bay QNAP NAS unit were set up as a RAID 1 under QTS. A single static volume named DataVol1 was created on it, which occupies the whole storage space. Some files were deleted from the default Public folder. We are going to restore them with the help of UFS Explorer RAID Recovery.
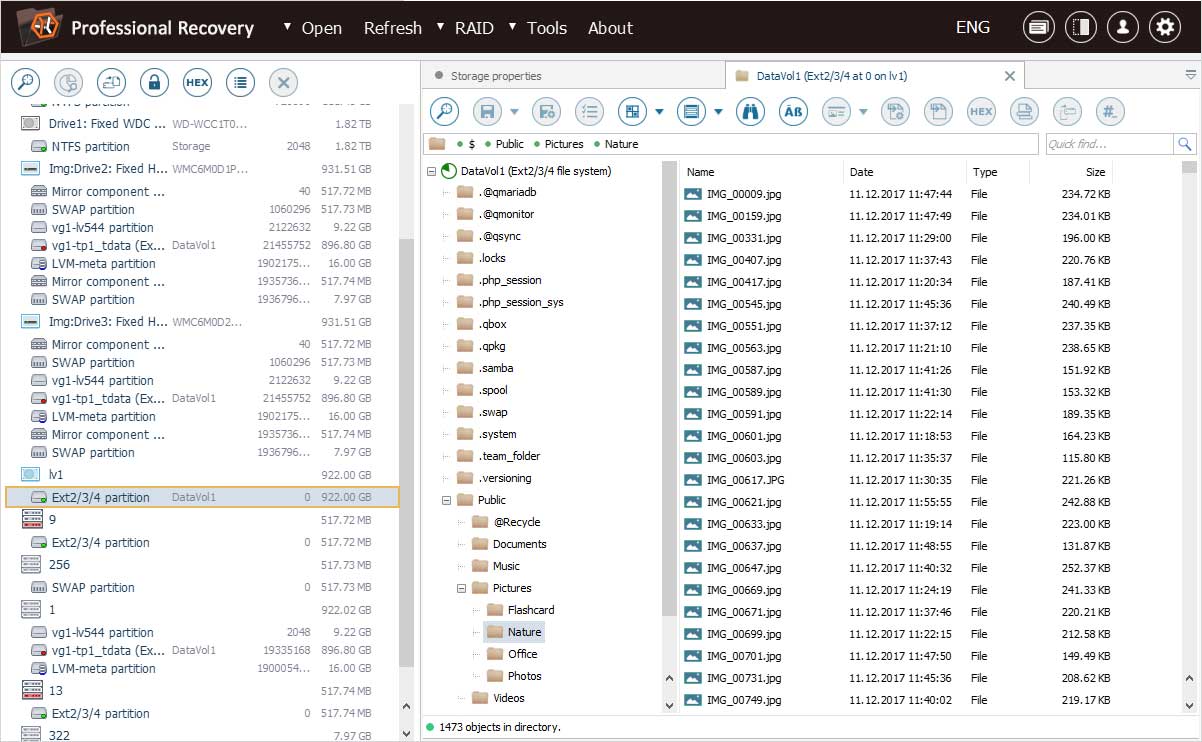
In order to start data retrieval, we simply find the largest RAID 1 storage and a partition on it formatted with the Ext file system.
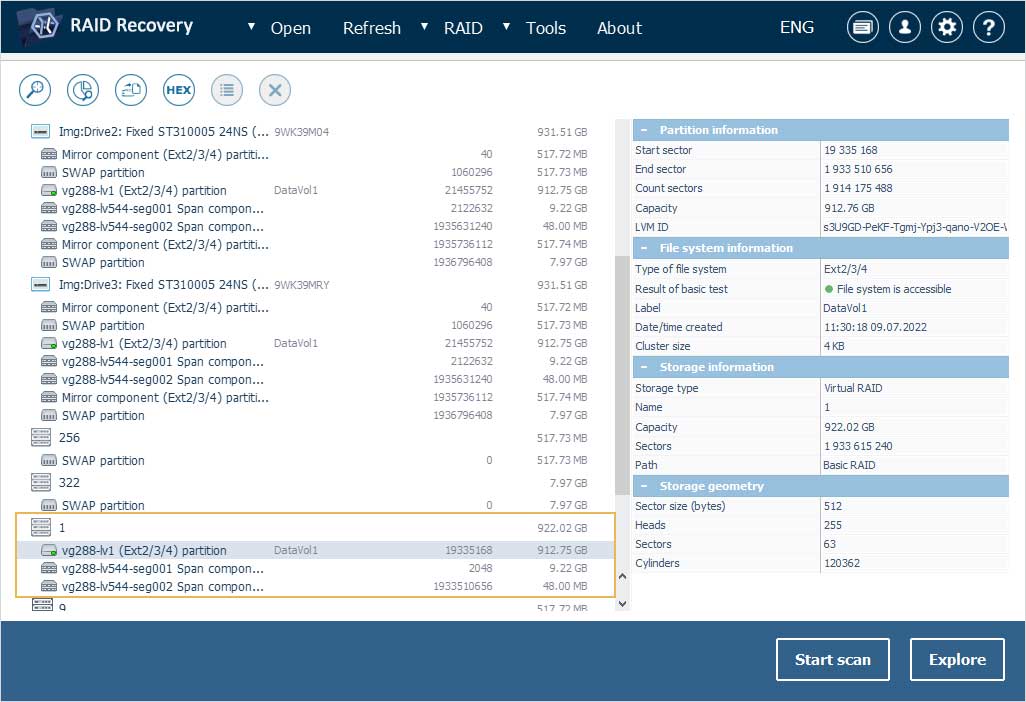
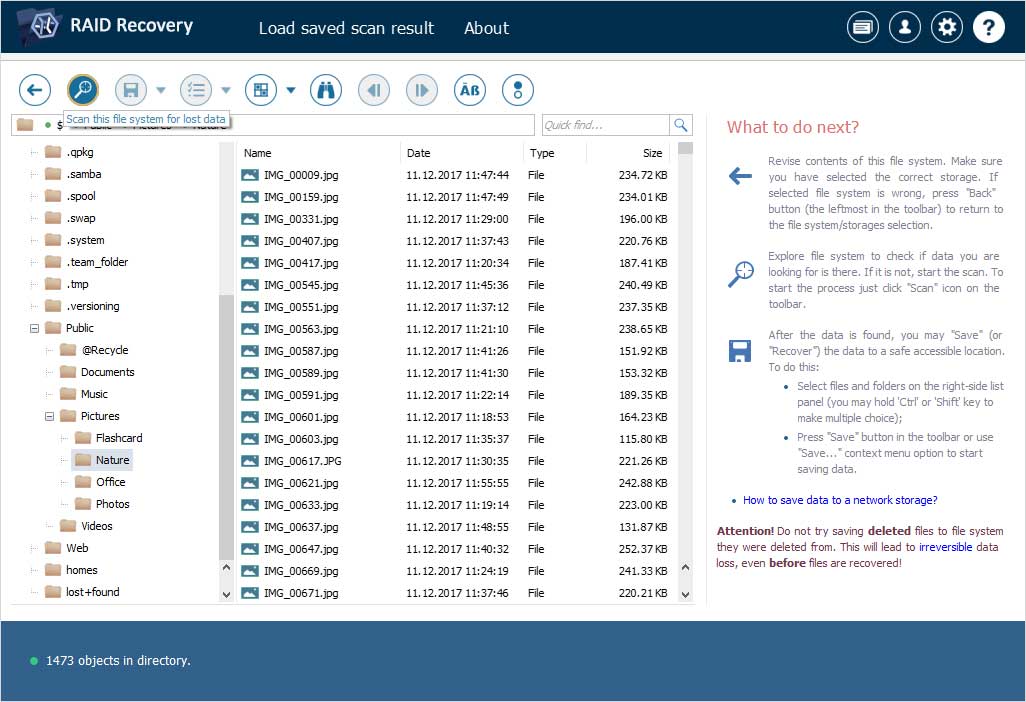
After that, we open our data partition (vg288-lv1 Ex2/Ext3/Ext4) and look for our Public shared folder among various system catalogs whose names start mainly with "." or "@". Our folder is present, and we can access its current content, but the deleted files are missing.

In order to regain them, we initiate a storage scan using the "Scan this file system for lost data" tool and wait for its completion.
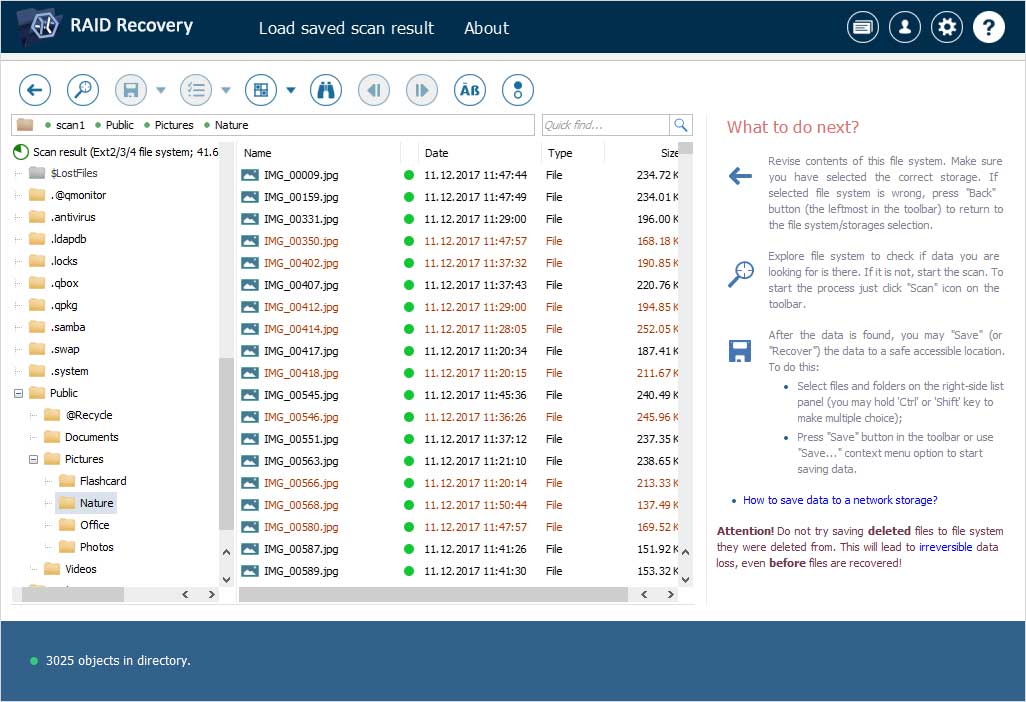
When the scan is finished, we find the undeleted files in their initial location.
Recovery from thin volumes
Thin volumes are created with the help of LVM and its thin provisioning technique, and this adds certain complexity to their recovery. Therefore, they can be handled solely by the Professional edition of UFS Explorer.
In our second example, we have another QNAP NAS based on RAID 1. It contains a storage pool with a single thin volume named DataVol1.
Like in the previous case, we find our data partition on the largest RAID 1 set. However, as the volume is thinly provisioned, the blocks in it are just references to blocks in the storage pool, so its content cannot be accessed right away.
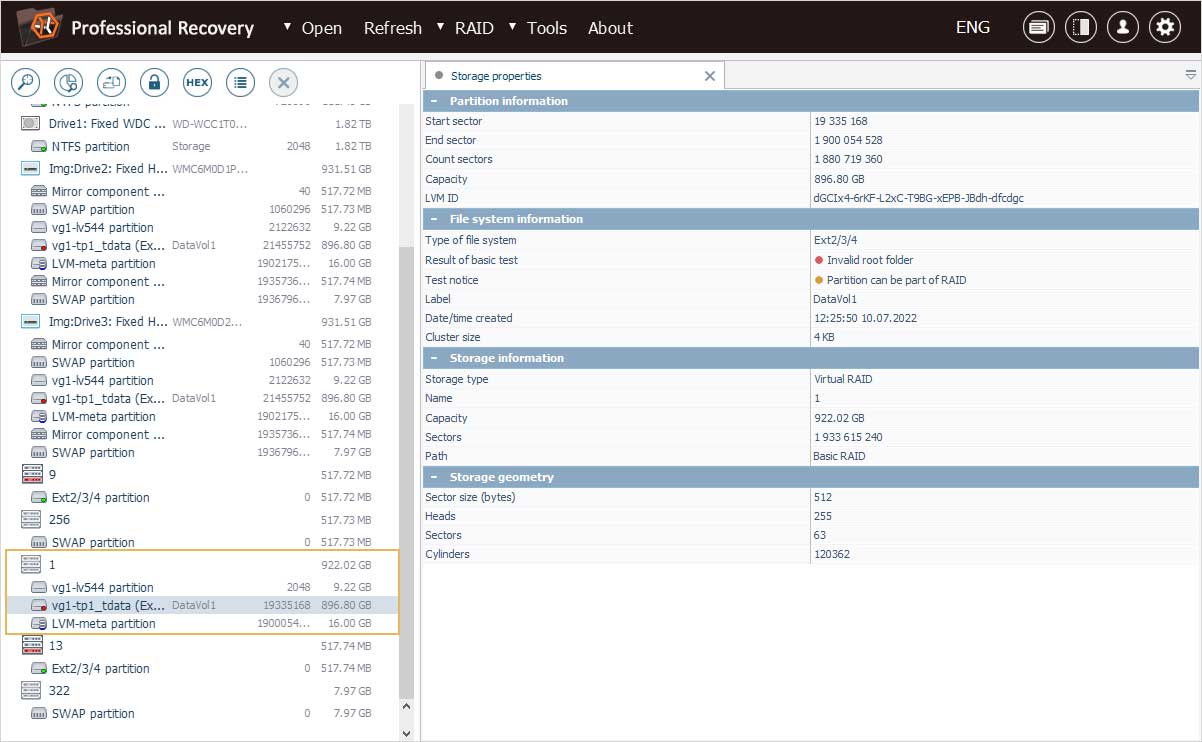
The information describing the addressing of data blocks is stored separately in a dedicated LVM-Meta partition. The correct interpretation of the data is possible only when these records are applied.

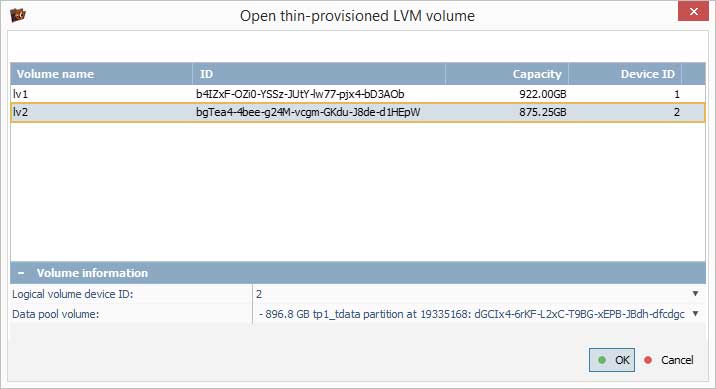
In order to perform the translation, we select this metadata partition and choose the "Open thin-provisioned LVM volume" option in its context menu.
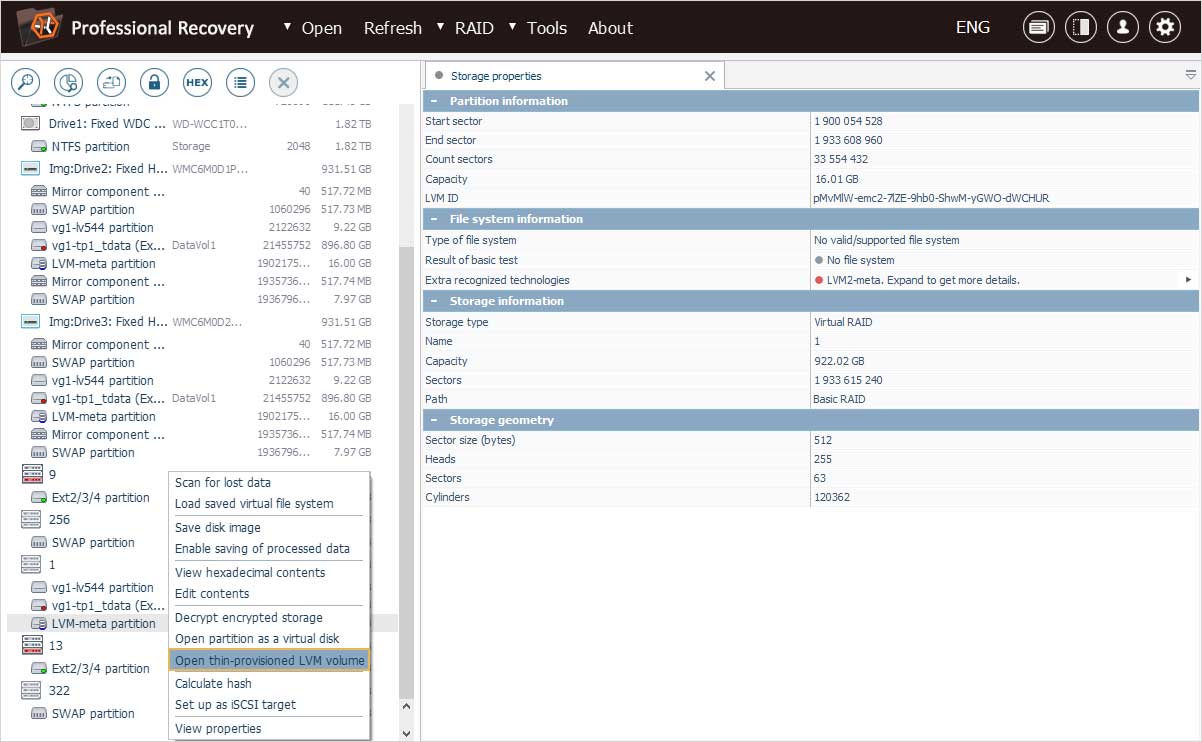
In our case, there is a single thin volume, so we simply hit "OK".

After the metadata is loaded, a new virtual volume is mounted in the program. This is our DataVol1. The data within it, including our Public folder, is accessible, so we can perform further data recovery operations.
In the third example, we have RAID 1 holding a storage pool as well. Yet, two thin volumes named DataVol1 and DataVol2 were created on it. The files we need were deleted from the second volume.
To bring the data back, we perform the very same steps as in the previous example. However, when applying the metadata, we need to specify that the second volume should be transformed. The data pool associated with it will be picked out automatically.
Recovery from encrypted volumes
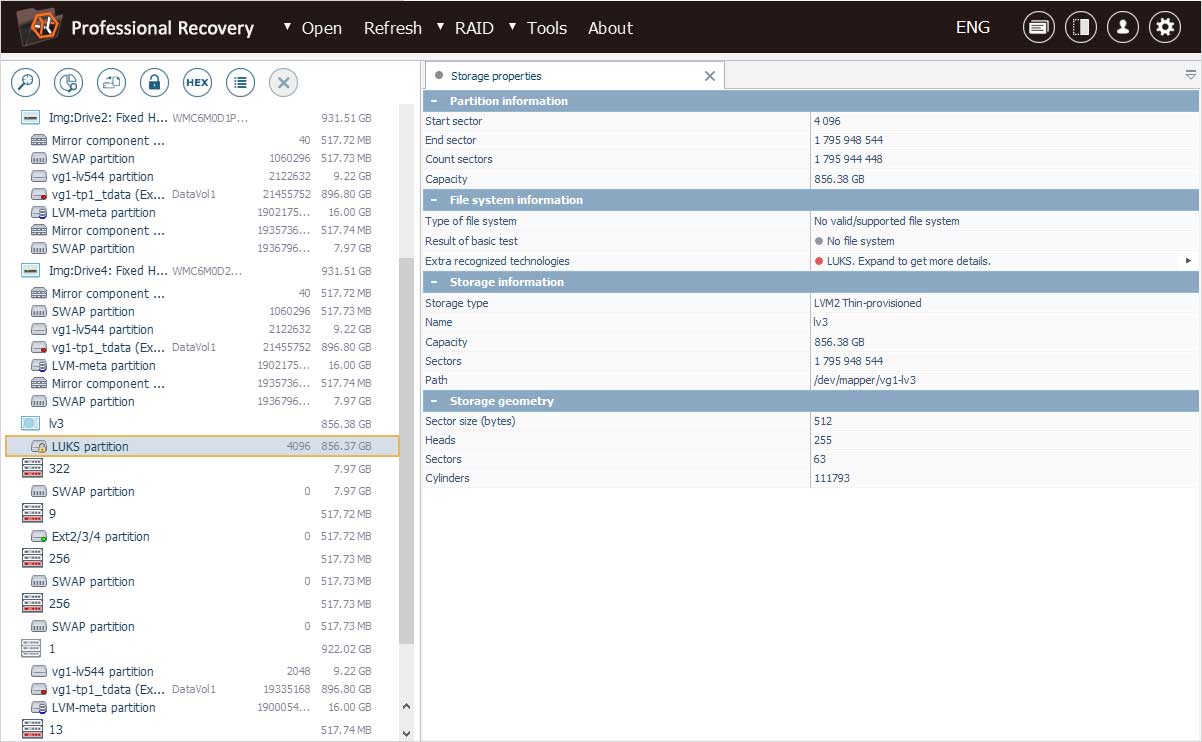
In our fourth sample case, one of the thin volumes, DataVol3, was encrypted upon creation. The password for its decryption is available though.
After we load the LVM metadata for this volume, a new virtual storage appears in the list. Yet, it cannot be opened because it is locked by encryption.
The Professional edition of UFS Explorer is capable of deciphering such volumes, on condition that the correct password can be provided.
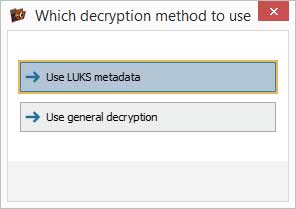
To decrypt our DataVol3, we select the locked volume, marked with a padlock icon, and get the "Decrypt encrypted storage" option from its context menu.
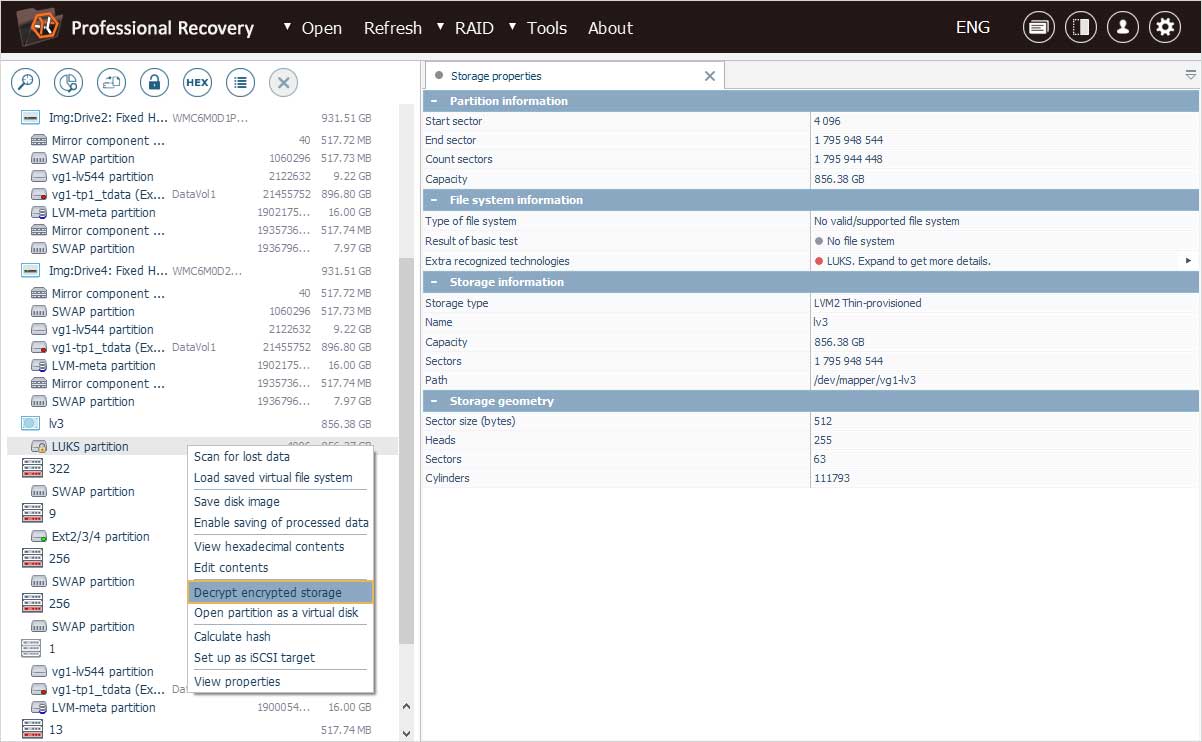
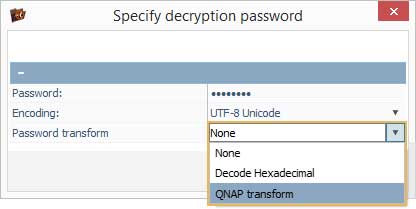
In the opened dialog, we opt for "LUKS metadata" and specify the decryption password in the corresponding field. After that, we need to choose "QNAP transform" for correct application of the password.
After we press "OK", the volume gets deciphered and becomes available for access.
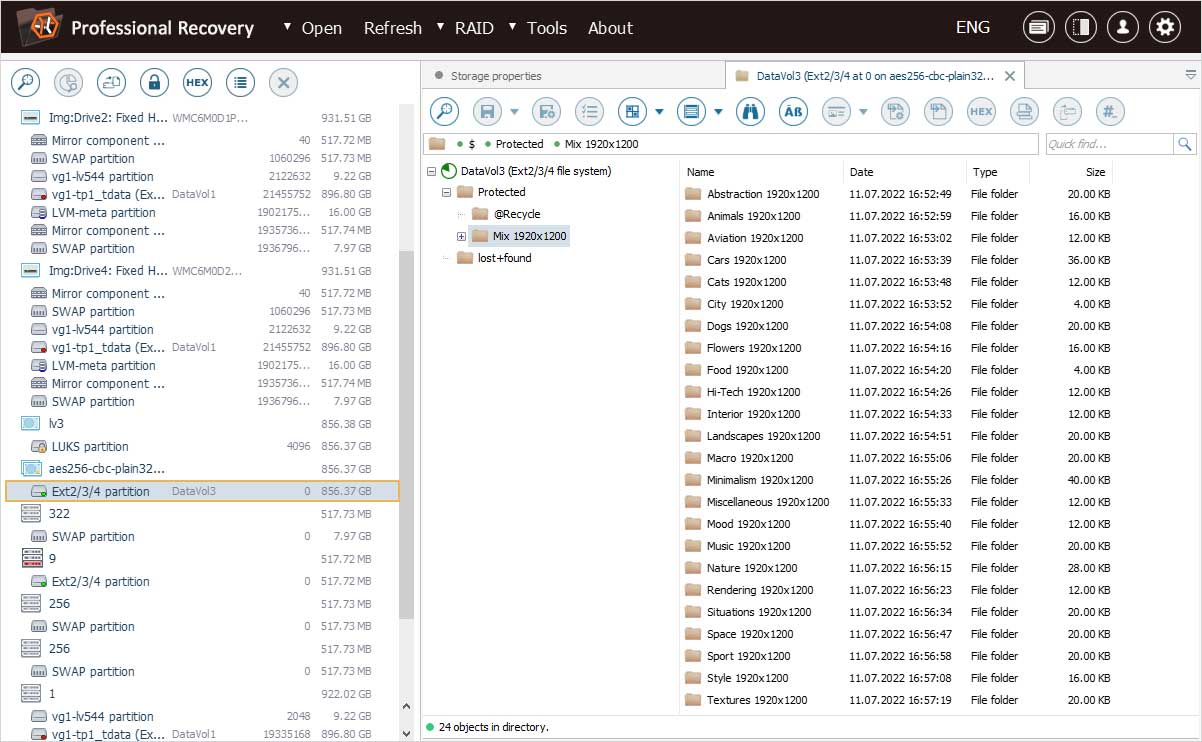
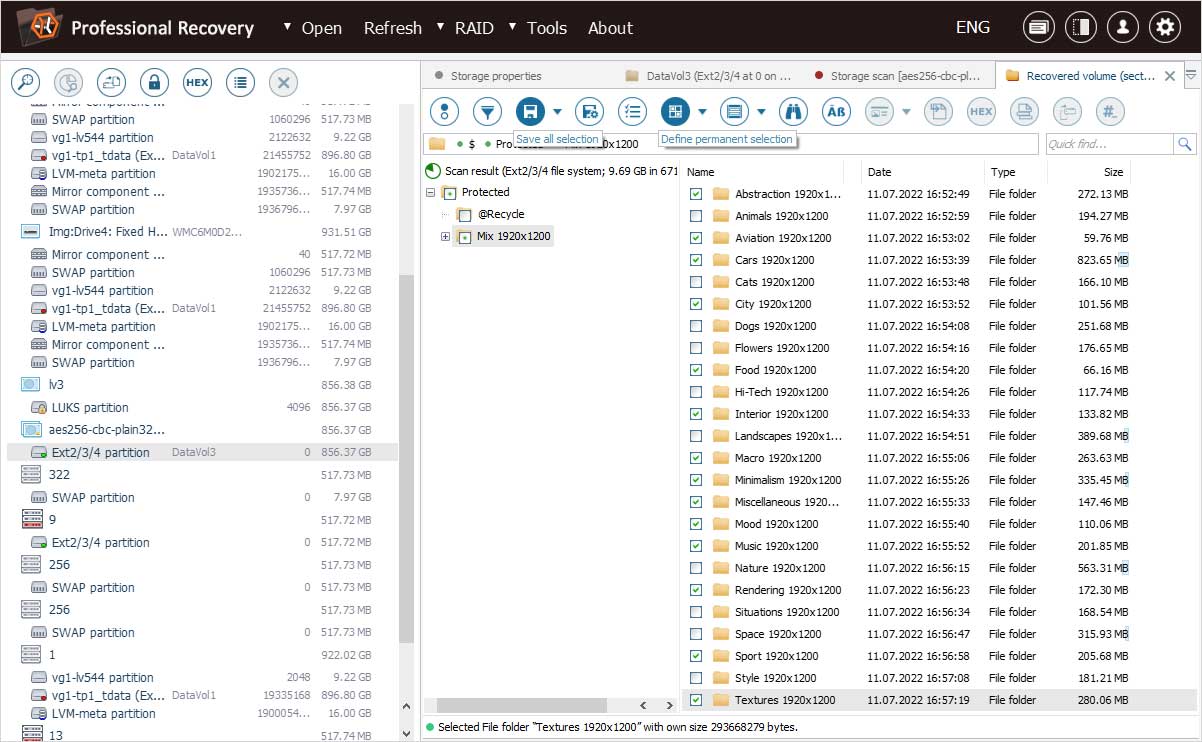
To obtain the lost folders and files, we have to initiate a storage scan. More information about configuring the procedure can be found in the instruction on scanning a drive with UFS Explorer.
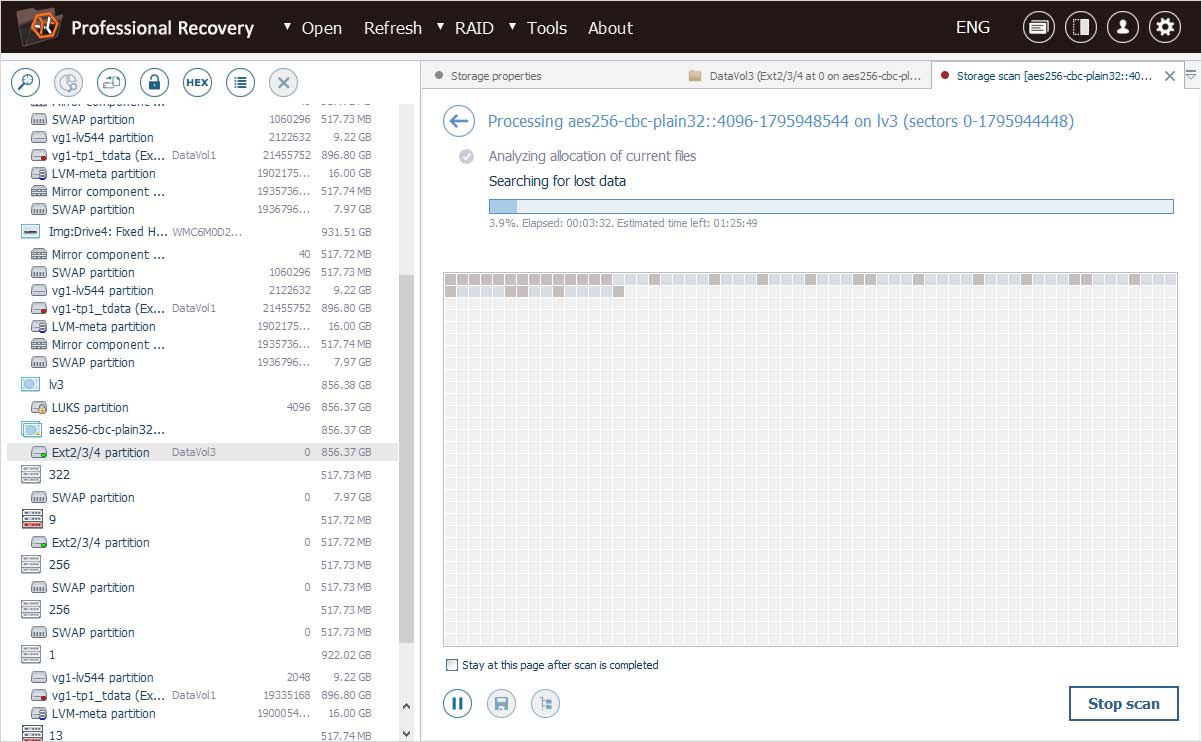
After the scan, the software presents its result for examination. The information available in Evaluation and saving the results of data recovery facilitates the processing of the obtained data.
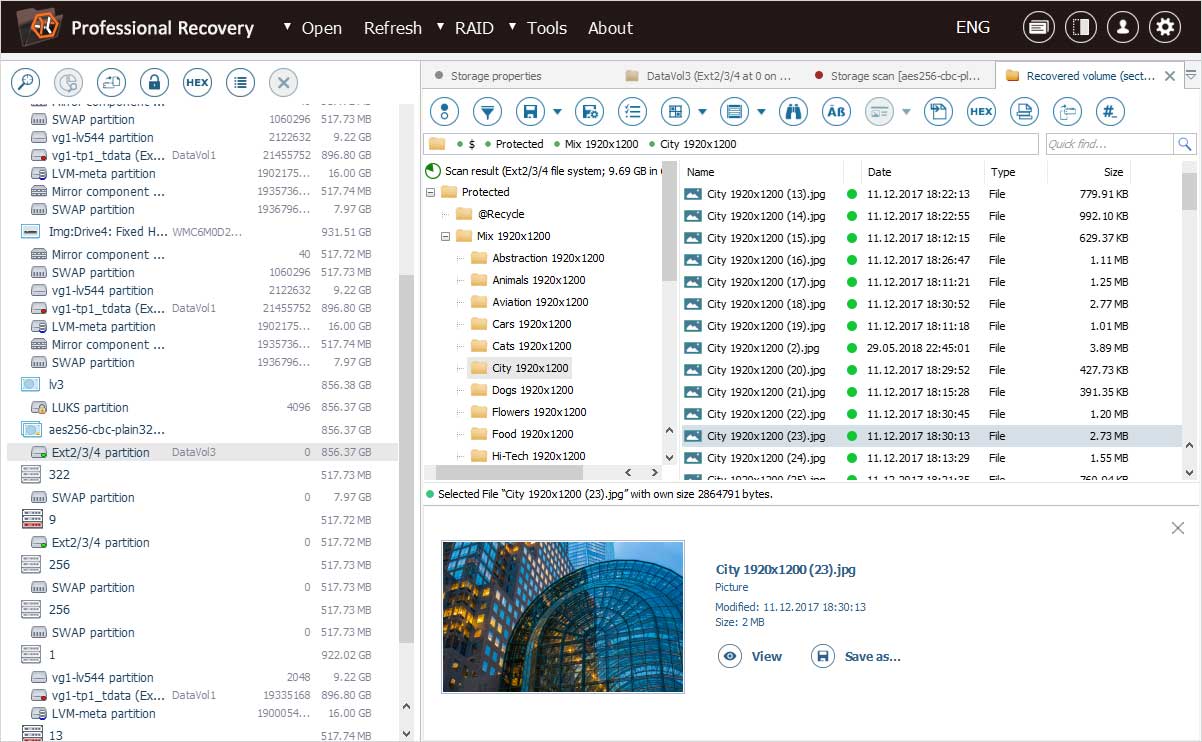
When the files and folders are found, they can be selected and saved to the target storage. In case you need to save the recovered data to another network storage, please check the provided guide.
For more detailed information about QNAP NAS units, their data organization principles and common data loss issues, please refer to the respective article.
Last update: September 27, 2022