How to connect SATA drives to a PC using an external enclosure
External enclosures provide an easy and safe way to access internal SATA drives, without the need to install them onto the computer’s motherboard. All it takes is placing the storage device into the casing and then attaching it via some standard interface, for instance, a USB socket. After that, you will be able to read out the data from it or perform further data recovery operations. This guide will describe the process of connection in more detail and will help you to choose an enclosure that it suited to your drive.
Hint: Please rely on the article on Identification of a hard drive’s interface type to aid you in determining whether your hard drive features SATA or some other type of connector.
Things to consider when choosing an enclosure for SATA connection
An external drive enclosure is a device that basically comprises an adapter translating between the SATA standard used by the medium and an outer interface available on the computer, like USB or FireWire. The adapter is integrated into a drive casing, which can be made of sheet metal, plastic, or aluminum. It covers the drive to protect it from damage. Some enclosures may have mechanical mounting inside for additional security of the drive, while others may be just opened to slide the storage in. Most enclosures can house a single drive, but there are also models for multiple items. Certain high-end devices may even incorporate their own cooling fans and other features.
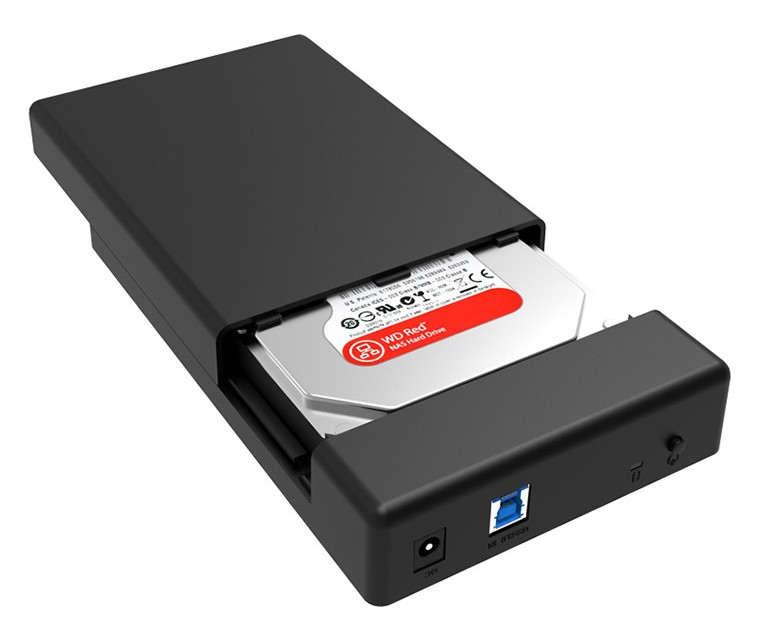
Pic. 1. Single-drive external enclosure.
But before investing into any enclosure, the first thing you should do is to determine what kind of drive you have and ensure that they will be compatible. 3.5-inch SATA drives are mainly used in desktop computers, whereas laptops usually contain smaller 2.5-inch drives. You need to get an enclosure that corresponds to the size of your drive. Also, take into account that 2.5-inch enclosures obtain power directly from the port they’re plugged into. In contrast, 3.5-inch drives require more current, thus, 3.5-inch enclosures must be supplied with an AC/DC power adapter that gets connected to an electric socket.
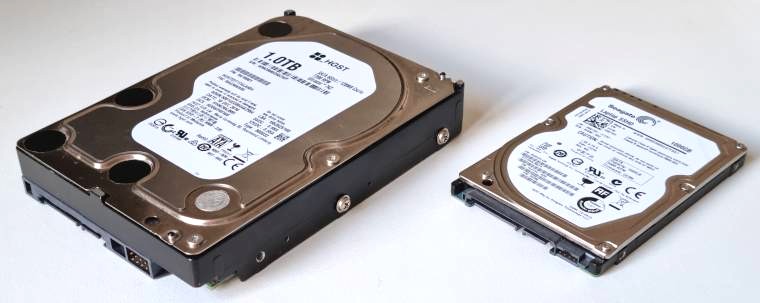
Pic. 2. 2.5-inch and 3.5-inch hard drives.
Next, you should decide what type of interface you are going to use to attach the enclosure to the computer. Most of them offer USB or FireWire connections, since they are the most commonplace. Some may feature more rare options, like eSATA or Thunderbolt. The traditional USB type-A connectors also come in different variants. USB 2.0 are cheaper, but provide low transfer rates, maximum 480 Mb/s. USB 3.0 and higher deliver very fast performance, over 4.8 Gbit/s when connected to the corresponding USB port. USB type-C connectors are also gradually turning into the standard, but they are mostly found on the latest machines. A single enclosure may have several types of connectors, which makes it more universal, but, at the same time, more expensive.
However, it must be mentioned that such enclosures have limitations regarding the capacity of storages they can handle. Many of them do not support drives over 2 TB. A larger drive can still be connected, but it will be recognized as a one of 2 TB, while the remaining storage space will be inaccessible. To be able to work with them correctly, an enclosure must have the support for 48-bit or higher logical block addressing.
What should be prepared for the procedure?
Besides a proper drive enclosure, you have to prepare some other equipment that can be either included into the package or has to be purchased separately.
To begin with, you need a cable that will connect the enclosure to the PC. Typically, it’s a USB or FireWire cable, but the actual type depends on the enclosure you employ. Some enclosures may use a USB Y-cable to obtain power from two USB ports at a time.
Secondly, though a USB cable provides both connectivity and power to the drive, this amount of current is not sufficient for standard 3.5-inch SATA hard drives. They require an additional power source. This can be an AC/DC power adapter plugged into a wall socket.
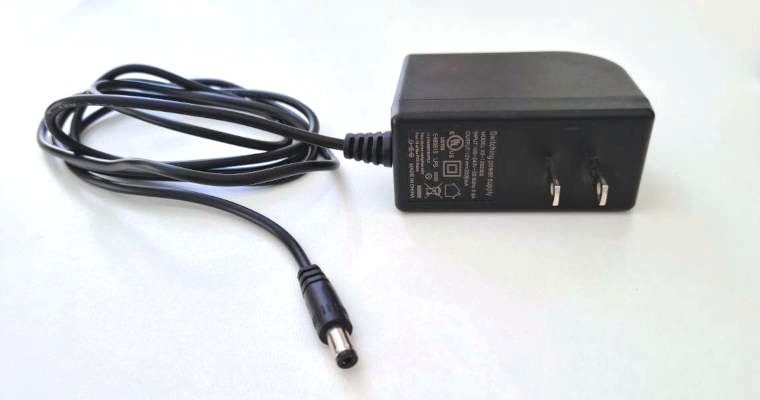
Pic. 3. AC/DC adapter.
Also, if the kit includes mounting screws, you will need a Phillips screwdriver.
Connecting SATA drives via an external enclosure step by step
External enclosures usually ship with some instructions on how to install the drive, as they come in a variety of designs. Yet, if such an instruction is missing, you may rely on the following general algorithm.
-
Prepare your SATA drive.
Remove any extra brackets, screws or cables from the drive, if you haven’t done this yet.
-
Open up the casing of your external enclosure.
If you have a tool-less model, simply slide off the cover. If it is locked with Phillips screws, remove them using a screwdriver and leave in a safe place.
-
Mount your SATA drive into the enclosure.
Depending on the model, you may need to slide the drive into the matching connector or place it into the casing and then secure by the provided screws or fasteners. There is usually a single combined SATA connector that enables data transmission and powers the drive. Mind the drive’s orientation – the connector and the ports on the drive should be lined up correctly, and join with minimum effort. Be cautious and do not force the connection, as you may easily damage the elements. Yet, some types of enclosures require plugging the connector into the drive manually and only then insert the drive into the casing.
-
Close your external enclosure.
After the connection is accomplished, you may close the enclosure with the drive inside. If necessary, replace the screws that hold it together or seal it with fasteners.
-
Power up the external enclosure.
Connect the AC/DC adapter to an electric outlet. After that, plug the cord coming out of it into the power input on the external drive enclosure. Yet, if you have a 2.5-inch drive, you may simply skip this step, since the device is USB-powered.
-
Plug your external enclosure into the computer.
Attach one end of the USB (FireWire, Thunderbolt, etc.) cable to the corresponding port on the external enclosure, and the other end – to the computer. Some connectors can be inserted only in way, so avoid forcing them.
-
Check the drive.
If your enclosure contains a power button or switch, turn it on. The drive should be recognized automatically by the operating system as a "plug and play" device. It should also find and install the required drivers. If not, you can use Disk Management to check whether the drive has been detected.
To learn more about interface type identification as well as other possible installation methods, please, refer to the article devoted to Identification of a hard drive’s interface type and means for its connection to a computer.
Last update: November 15, 2022