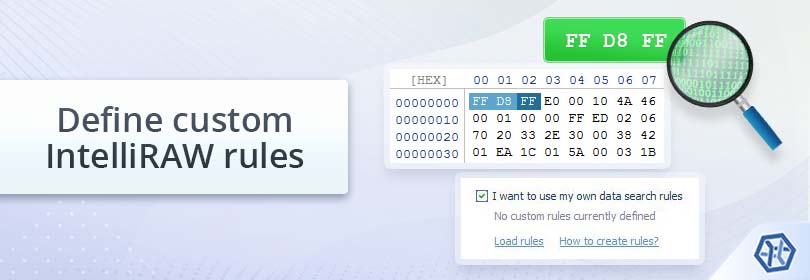
How to create custom search rules for raw recovery
In the majority of cases, UFS Explorer performs thorough analysis of the file system structures and interprets this information to locate and recover the missing data. Yet, under certain circumstances, crucial service records may get severely damaged or even overwritten, like during formatting, initialization or other manipulations with the storage. This obstacle often makes it impossible to bring the files back using the mentioned approach. To solve the problem or to expand the obtained result, one can enable IntelliRAW or the method of "raw recovery". Read on to learn its essence and be able to create your own search rules for the program to rely on..
What is raw data recovery and how does it work?
The terms "raw recovery", "recovery by known content" or "IntelliRAW" refer in fact to the same technique. It encompasses the search for predefined templates or the so-called file signatures (also "magic numbers"). These binary sequences occur mostly at the beginning of the file and uniquely characterize each particular type. When the files are not fragmented, UFS Explorer can use the respective signature to identify them within a given data range and retrieve their content, even in the absence of the file system’s metadata.
The software already contains a basic set of IntelliRAW rules with signatures for common file types, like documents, images, multimedia, archives, etc. Apart from the raw recovery itself, they are used to enhance the quality of a scan for certain file systems, control the state of the restored items and to assign a proper extension to files of non-readable formats, like *.chk.
Yet, in some situations, one might need to extend the available list with custom rules, for instance, when rare or proprietary files have been lost. Such a possibility is presented in all editions of UFS Explorer. The software allows creating a template for any lacking type and configure it manually. At the same time, the function should be used thoughtfully: in case of an inaccurate template, the scan may slow down considerably and produce false results.
The procedure of setting up a custom file type consists of three separate stages: determining text or binary signatures that are distinctive for the given format, defining a rule based on which they will be detected by the program and applying it upon the specification of parameters for the storage scan. If the files of this type are quite commonplace, it is advised to contact our team so that the rule for it could be included into the embedded set. This can accelerate their processing by the software and potentially allows getting more detailed information about them (descriptive file name, dates of creation and last modification, etc.).
Discovery of a file’s signature
To acquire a signature for the file format of your choice, you will need to prepare some samples, preferably ones that are not closely related – for instance, videos recorded by different cameras. When the files are similar, it might be difficult to tell the difference between the true file signatures and coincidental data patterns that contain service information.
With the files at hand, you may complete the following steps:
-
Decide on the means you will use for examining the hexadecimal content of files for the presence of file signatures. It is possible to perform hex analysis in UFS Explorer or employ any other alternative tool of your preference.
-
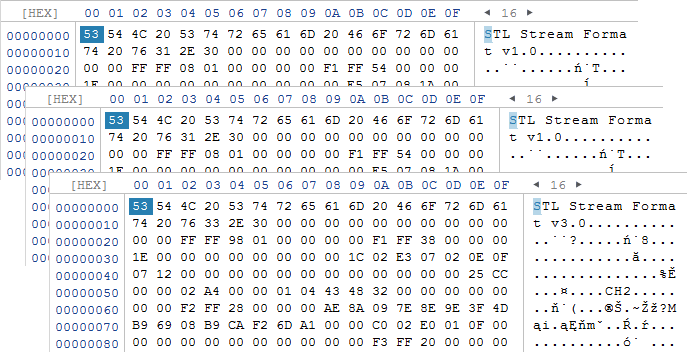
Open the hexadecimal representations of several sample files of the needed format. As an illustrative example, we have SSF-files – this is a vendor-specific type of CCTV recordings.
-
Explore the content of each opened file and determine whether the format is binary or text-based. Look for identical patterns in them, especially at the very beginning and at the end. For more accurate results, there should be at least 32 unique bits.
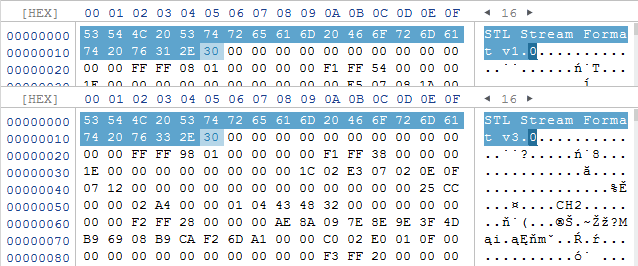
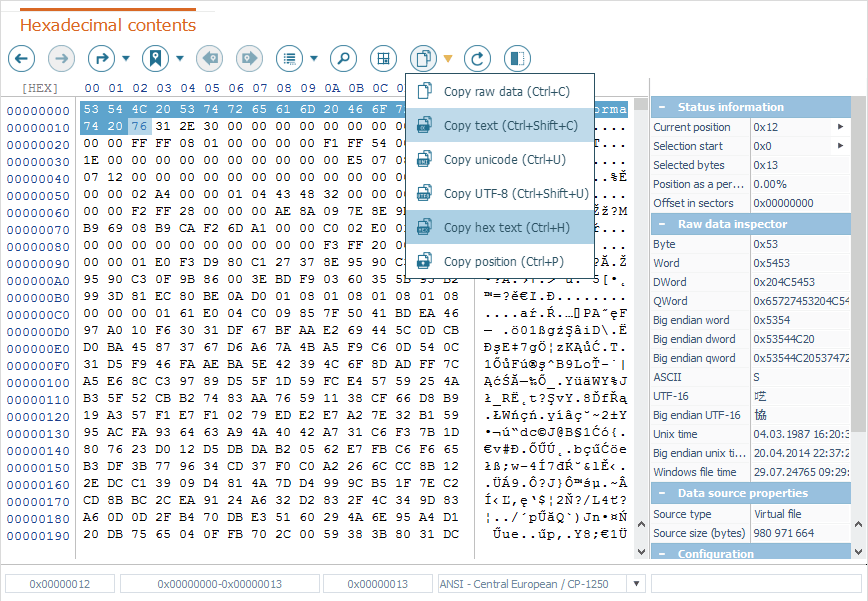
Our samples are binary, and we can see that each of the files starts with common sequences: STL Stream Format v1.0 (53 54 4C 20 53 74 72 65 61 6D 20 46 6F 72 6D 61 74 20 76 31 2E 30) and STL Stream Format v3.0 (53 54 4C 20 53 74 72 65 61 6D 20 46 6F 72 6D 61 74 20 76 33 2E 30). Thus, the rule for our custom type can be defined as 'STL Stream Format v1.0' or 'Stream Format v3.0'.
-
Select the signature found closer to the start of your sample files and copy it to the clipboard using the tool for copying raw (hexadecimal) data. If your signature is not binary, employ the tool for copying text data instead. Paste and save this sequence to any safe location in order to be able to use it later.
Note the position of your signature indicated in the "Selection start" field. In our case, it is 0x0, but your signature may not be necessarily located at the very beginning.
-
If you’ve spotted a signature at the end of your sample files, perform the copying operation for this signature as well.
Creating a search rule based on the identified signatures
Now that you've obtained the needed file signatures, you can define a custom search rule that will be used by UFS Explorer for their recognition.
Starting from version 9.4, the software offers a graphical in-built editor that makes it possible to create, view and edit such rules directly in the program. It can also be used to load a custom file type from the existing *.xml file of any supported third-party format.
Those who didn’t update their products may download a special free utility called IntelliRAW rules editor and follow the instruction for creating custom search rules in older versions of UFS Explorer (up to version 9.3). Newer software remains compatible with old rules (*.urrs file format). Yet, they can be managed only in IntelliRAW rules editor and are not supported by the internal editor.
If you use a contemporary version of the program, proceed as follows:
-
Run UFS Explorer and, if necessary, change its settings in the corresponding pane.
-
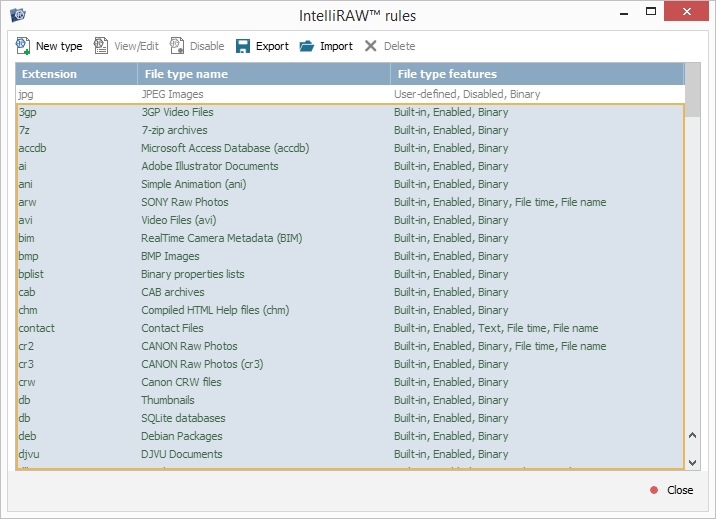
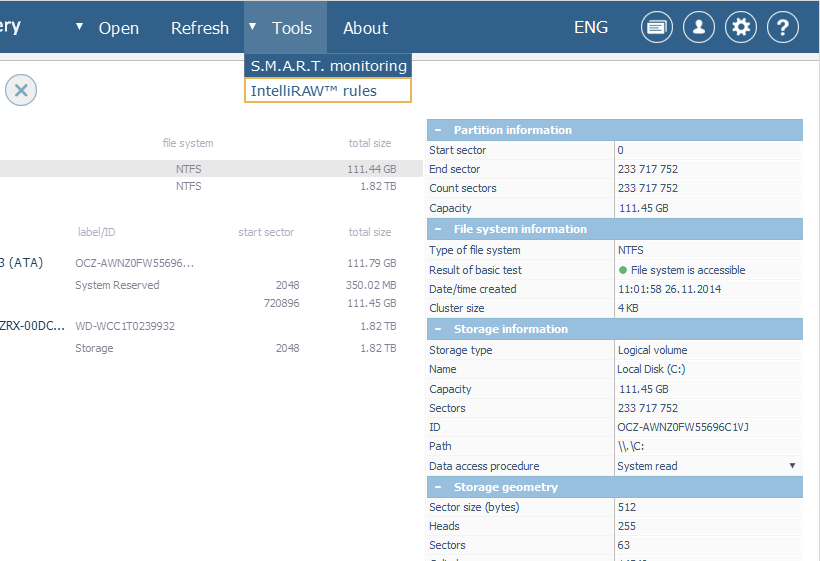
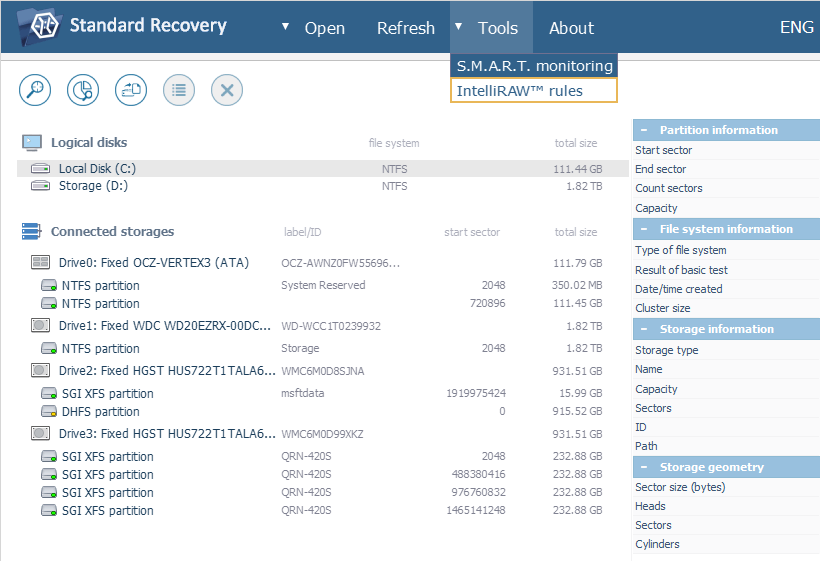
Open the "Tools" item from the main menu and choose the "IntelliRAW rules" option to launch the embedded editor.
-
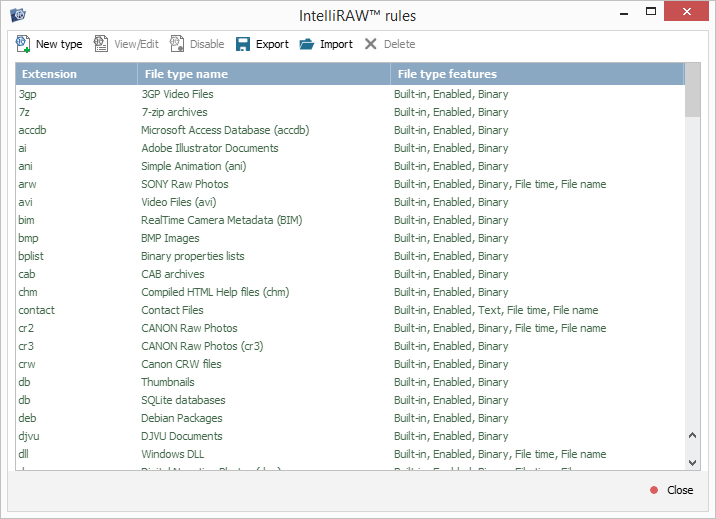
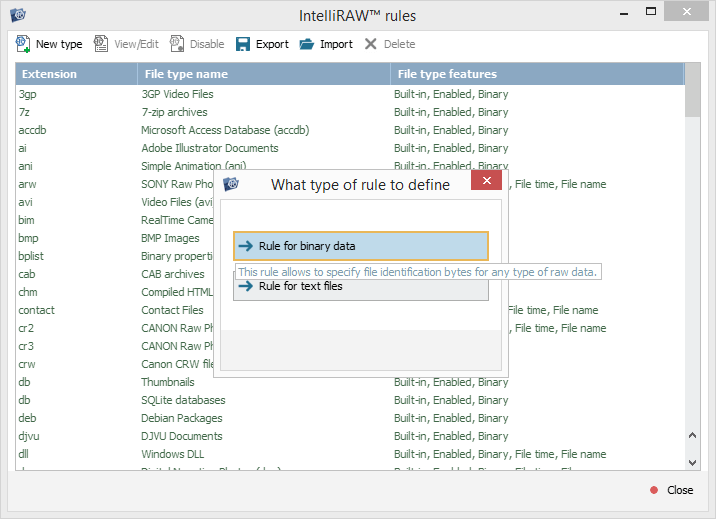
In the opened dialog, you will see the list of file types that are enabled in the software by default. Please note that the pre-defined rules cannot be viewed or modified.
-
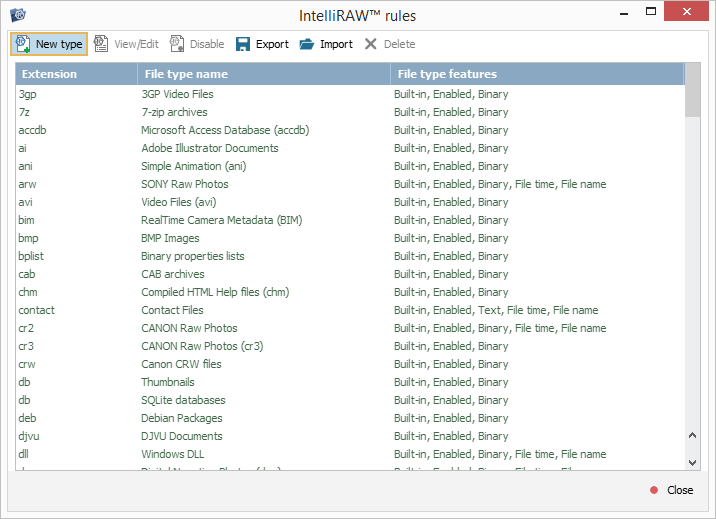
To create your own file type, press the "New type" button from the toolbar at the top.
-
Choose the type of rule you are going to define, depending on the format of your signatures (hexadecimal sequences or text strings).

-
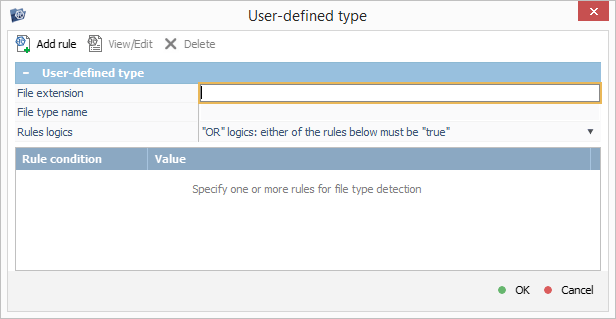
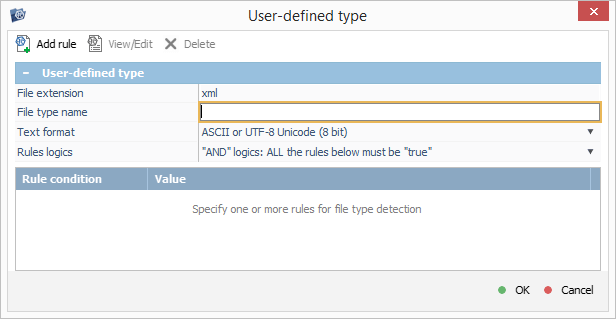
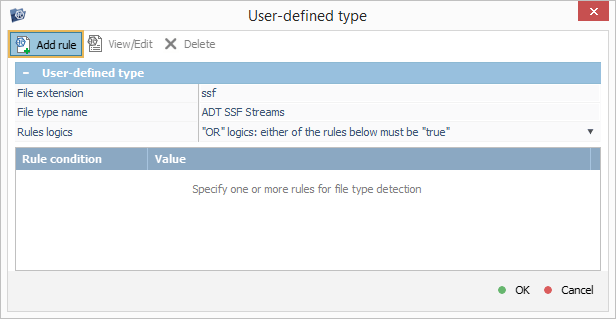
Specify a file extension that will be used for the found files of the given format.
-
Provide a name for your custom file type in the respective field. This name will also be assigned to the container for these files in the results of raw recovery.
-
If you use a text-based signature, you may choose the required encoding via the drop-down list next to the "Text format" property.

-
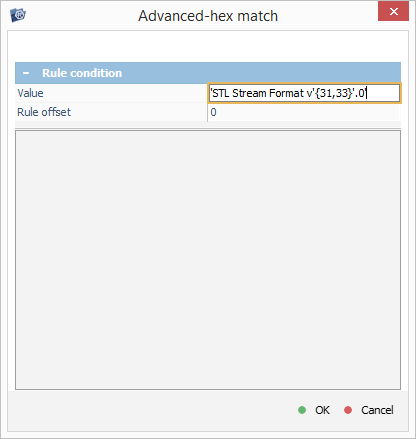
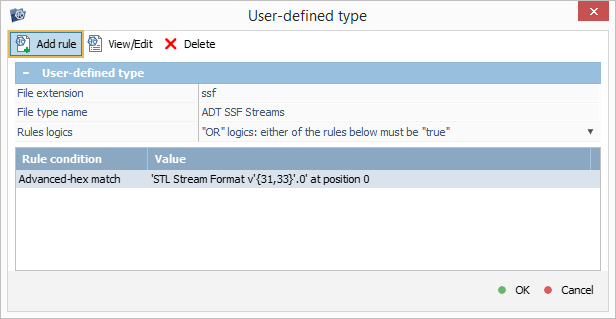
Press the "Add rule" button found at the top and insert the first signature obtained at the previous stage into the field next to the "Value" property.
These rules also support a special syntax available for the advanced hex search tool in the Hexadecimal Viewer component of UFS Explorer. Based on this syntax, we can combine our two signatures in a single rule defined as 'STL Stream Format v'{31,33}'.0'.
-
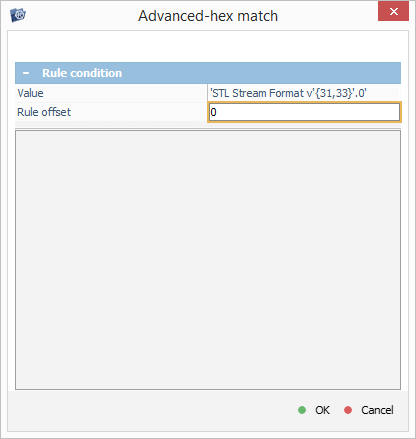
In case of a hexadecimal signature, provide its position in the "Rule offset" field.
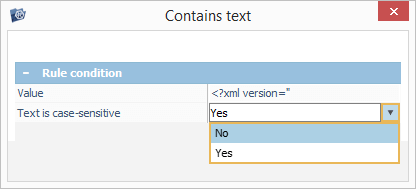
In case of a text-based one, you may enable case-sensitivity to distinguish between uppercase and lowercase characters.
-
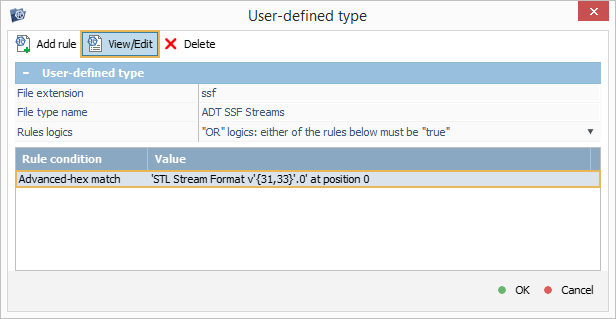
Once you press "OK", the specified rule will get listed in the bottom pane. It can be edited anytime using the "View/Edit" button.
-
If you have another signature, press the "Add rule" button again and repeat the previous steps.
-
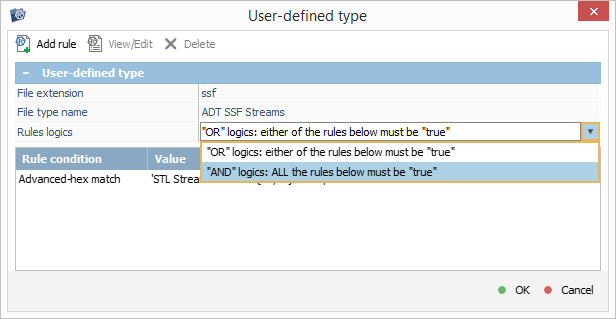
Define the conditions that must be true for a match to take place: use the "Rules logic" property to establish whether all of the signatures or at least one of them must be present in the content of a file.
-
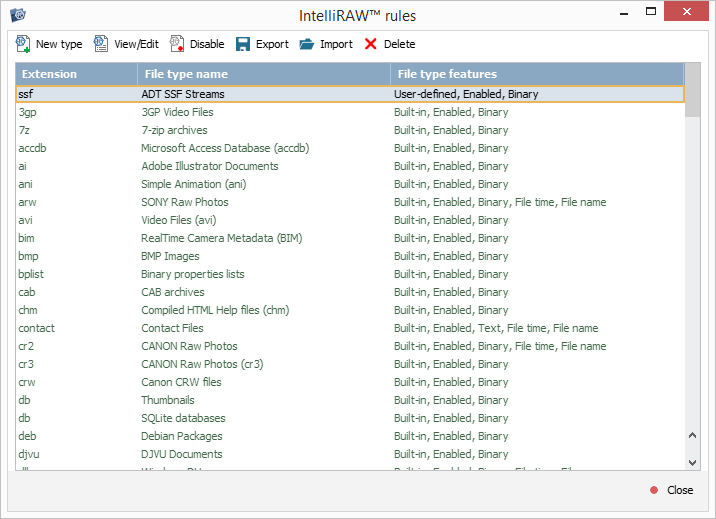
Hit "OK", and the created custom file type will be added to the available set of IntelliRAW rules. It will be indicated with a different color and have "User-defined" property.
-
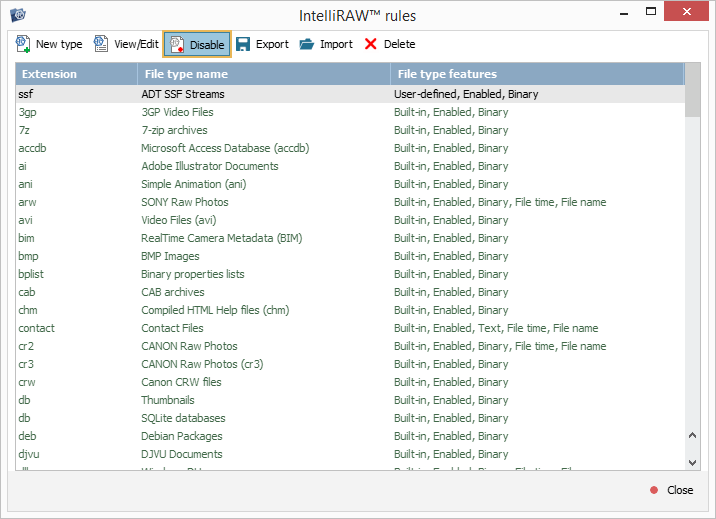
New rules get enabled by default immediately after their creation. You may deactivate your rule by selecting it in the list and pressing the "Disable" button from the toolbar at the top and use the "Enable" button later for its activation.
After that, the editor can be closed. The defined custom file type will remain in the program after its restart. You may also refer to this component later if you want to edit, disable or delete it.
Implementation of the custom rules during a scan
To look for your own custom file type when scanning a storage with UFS Explorer, follow the given procedure:
-
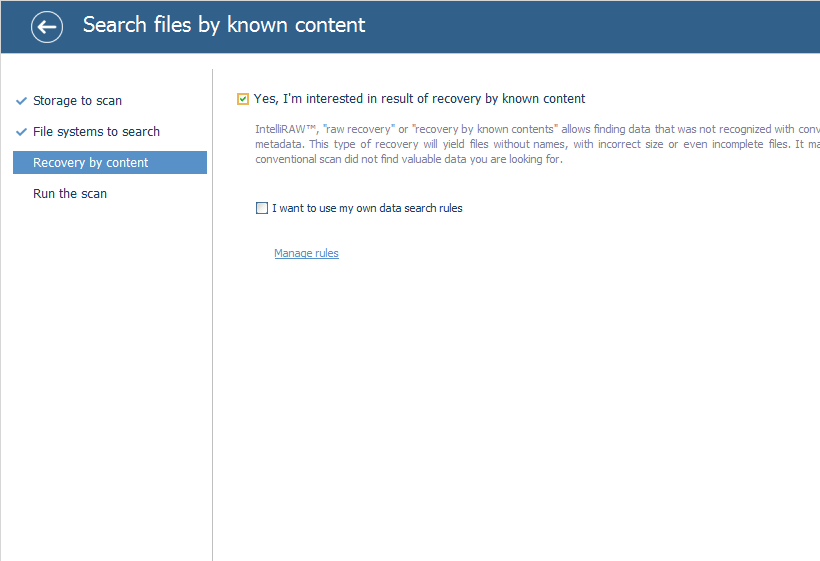
At the stage of setting up a scan, enable the "Yes, I’m interested in the result of recovery by known content" option.
-
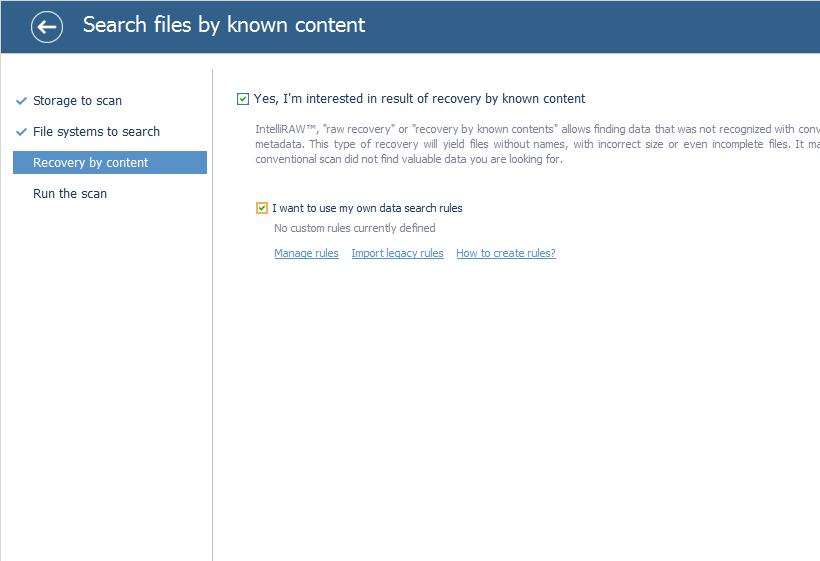
Right after that, another option that allows using your own data search rules will emerge. Tick it off as well.
-
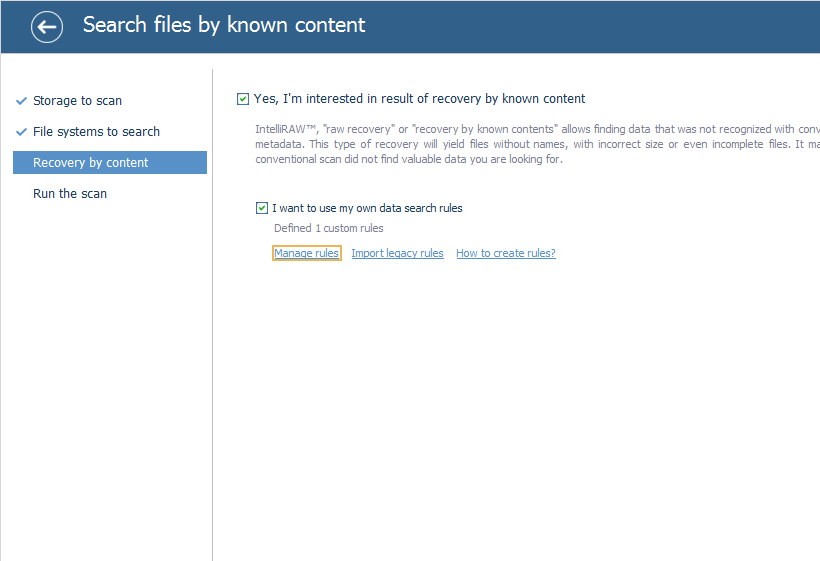
The software will display the number of custom rules that are currently defined. If you need to make any adjustments to them, use the "Manage rules" option. If not, proceed to the scan right away.
UFS Explorer will use your rule and provide the files found with its help in the $Custom folder. The files will be automatically assigned new names, as this information is not available with raw recovery. Also, you should be aware that this method has its flaws and provides poor results in case of extensive file fragmentation.
Export/import of the created rules
Starting from version 9.5, UFS Explorer provides the means for saving selected custom search rules as *.xml files that can be used for backup purposes or for further import into the software launched on another computer.
-
In order to create such a file, open the embedded editor using the "IntelliRAW rules" item from the program’s main menu.
-
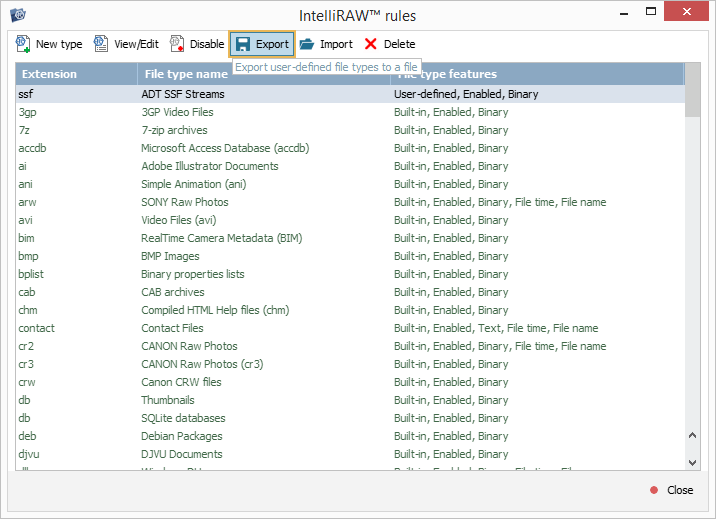
After that, get the "Export" tool from the toolbar at the top.
-
In the opened window, select all the custom file types you want to export.
-
Finally, press the "Export" button.

-
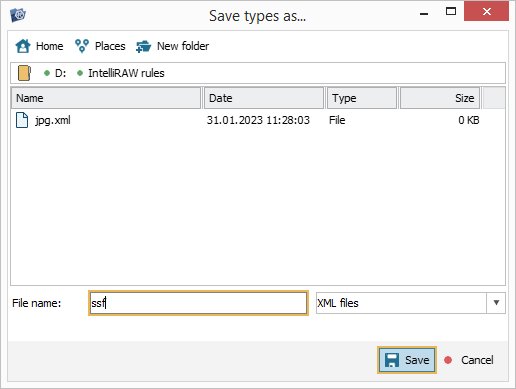
Choose the location and define the name for the *.xml file to be created.
-
Click the "Save" button, and the file will be saved to the specified folder. All the rule values in it will be presented as standard base64 characters that do not conflict with the XML parsing. The file itself is encoded using the UTF-8 encoding and can be edited in a text processor. If the value is XML-safe and cannot be wrongfully interpreted as markup, it can be defined as plain text or an advanced hex string without the base64 prefix.
Analogously, custom search rules can be imported from the existing compatible *.xml file using the embedded editor.
-
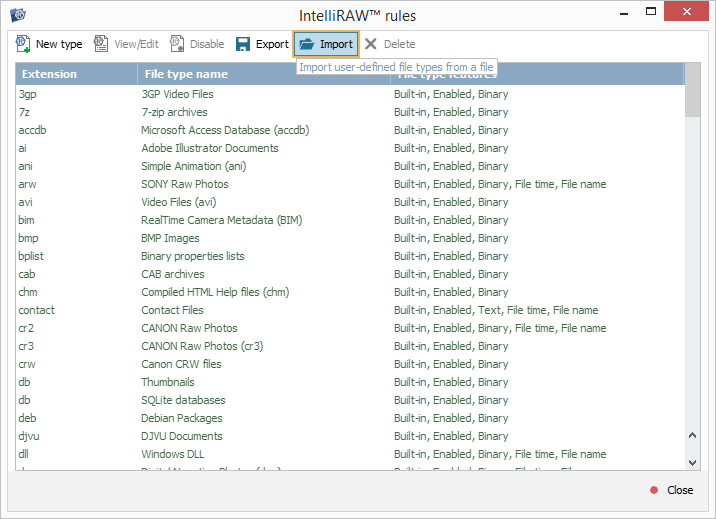
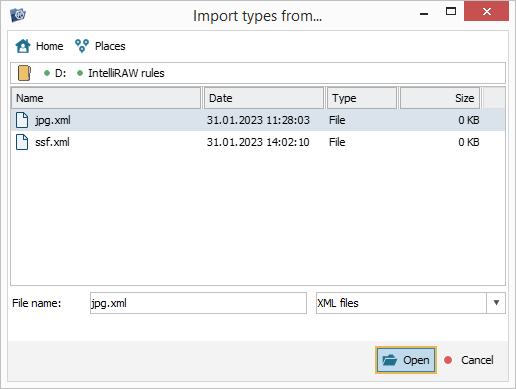
For this, pick out the "Import" tool from its toolbar.
-
In the opened dialog, navigate to the folder where the file is stored, select it and hit the "Open" button.
-
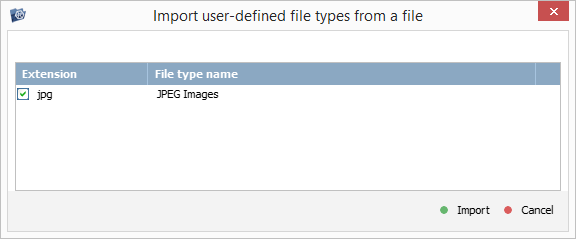
If it contains definitions for multiple custom file types, tick off the ones to be imported.
-
After you hit the "Import" button, the selected rules will be added to the current set as if they were just specified manually.

Import of legacy rules
Though older search rules created for UFS Explorer up to version 9.3 cannot be managed in the contemporary software, it is still possible to employ them in the process of data recovery. For this, you need to perform slightly different steps:
-
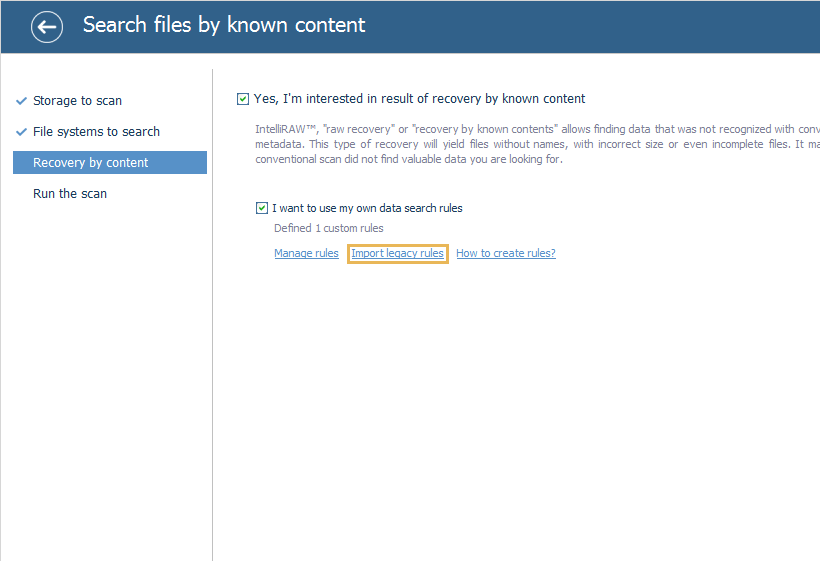
When configuring a scan, put a checkmark next to "Yes, I’m interested in the result of recovery by known content" and then tick off "I want to use my own search rules".

-
After that, you will see a number of options. Choose "Import legacy rules" to load the *.urrs file.
-
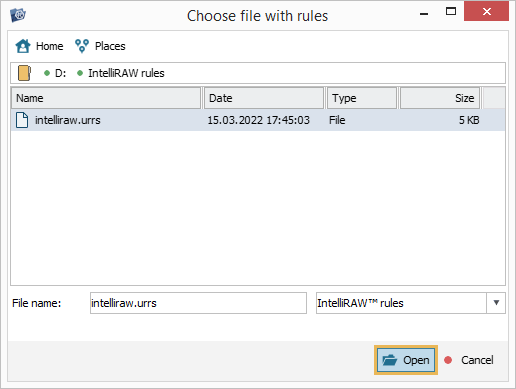
In the opened window, find the file in its folder and select it.
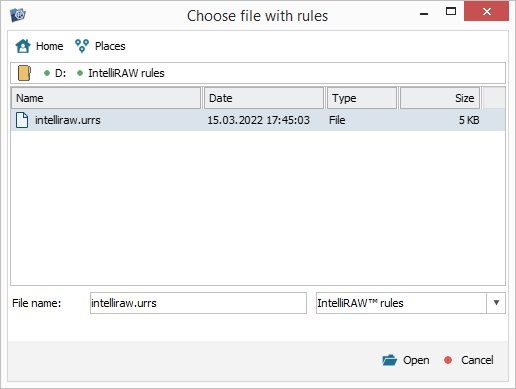
-
After you click "Open", the rules defined in the file will be added to the current IntelliRAW rules set. The software will use them during the procedure along with the rest of search rules.
Setting up custom search rules in a video-guide
The following video-guide will give you a more complete picture of this process and its nuances:
Last update: February 16, 2023