How should I recover data from the computer's system partition?
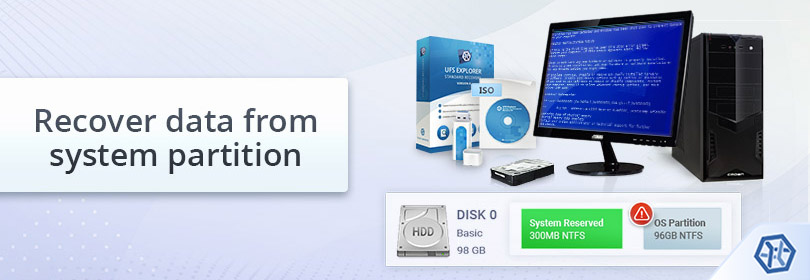
Normally, a hard drive of a PC or laptop is divided into several logical partitions for the sake of better performance and increased safety. If one partition gets corrupted, data on other ones remains intact. Traditionally, the operating system and program files are isolated from user data and stored on an independent partition referred to as a system partition ("Local Disk C:" in Windows, for example).
Still, some computer systems may rely on a drive with a single partition in which the OS, application software and user files are not separated (for example, Macintosh HD in macOS). Either way, a partition holding the operating system is continuously exposed to writing operations that ensure the operating system booting and normal functioning, but result in an extremely high possibility of overwriting the lost data. Therefore, if the missing files you need to restore were stored in the system partition, it is strongly recommended to avoid running the OS even for the purpose of data recovery and use another computer or a Live CD to minimize the risks. Otherwise, you can recover lost or deleted files like from a non-system partition.
How to recover data from the system partition using another computer
SysDev Laboratories offers UFS Explorer and Recovery Explorer as reliable software tools which have proved to be effective in a variety of data loss scenarios, including ones involving system drives of Windows, macOS, Linux or UNIX/BSD. Different software editions are provided to cover a wide range of specific storage technologies which may be utilized in some system disks. The applications thoroughly analyze the storage in a safe read-only mode to extract the missing files and allow copying them to any safe local or network location.
Hint: For detailed information about the supported file systems and additional storage technologies please refer to the product specifications and the storage technologies page.
In order to recover data from the system partition of Windows, Linux, macOS, UNIX or BSD using another computer with the installed UFS Explorer Standard Recovery program, please do the following:
-
Prepare an auxiliary computer which can be used for data recovery. Download and install the version of the program which corresponds to the operating system the auxiliary PC is running.
Hint: If you have any difficulties with the installation of the utility, please refer to the installation manual for UFS Explorer Standard Recovery.
-
Find a storage to copy the recovered data to. This may be the internal drive of the host PC (i.e. the one you’re going to use to recover data from the affected computer), a portable data storage medium attached to it (for example, USB memory drive, memory card, external SSD or HDD) or a network location.
-
Shut down the computer you need to restore files from, unplug it, unscrew its tower (case) and take out the hard disk drive.
Note: If the files were deleted from the system startup drive in macOS 10.13 High Sierra and later and despite the recommendations you are not willing to take the disk out, to allow the program to read this storage, you have to disable System Integrity Protection as demonstrated in Unblocking access to macOS drives. Also, please consider that data recovery is not possible for computers that rely on custom Apple Silicon (M1 and later) or T2 security chips.
-
Now shut down the host computer and connect the drive you’ve taken out from the affected PC in the previous step using the fastest interface at your disposal. It is highly recommended that you use a SATA port on the motherboard, but you may choose to trade off the performance and employ a USB to SATA adapter or a disk enclosure.
Hint: If you don't know how you can plug the disk into the motherboard of the computer or сonnect the drive externally using a USB to SATA/IDE adapter, please rely on the video tutorials.
-
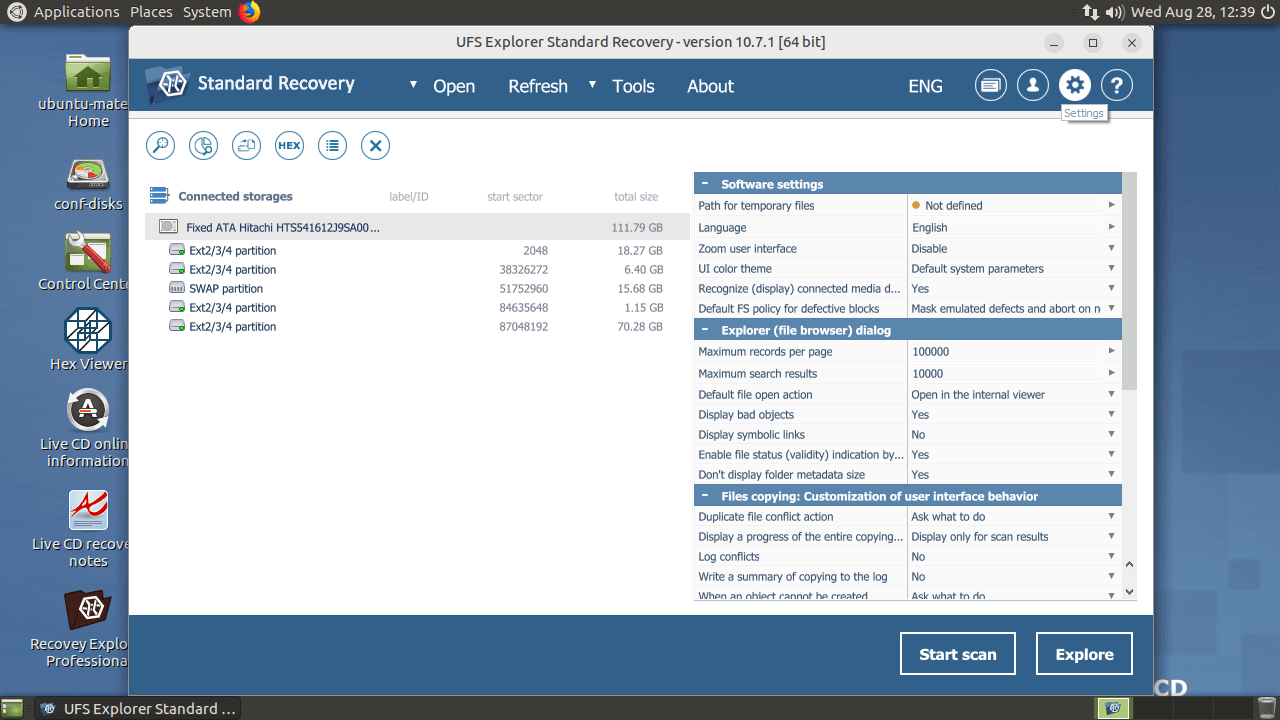
After that, boot the host computer and launch UFS Explorer Standard Recovery. Alter the software parameters in the corresponding pane, if needed.
Warning: When you start the computer, the operating system may prompt formatting or repairing the connected drive. Please do NOT perform these operations. Doing so may aggravate your situation or even cause irreversible data loss.
-
Select your hard drive in the list of connected storages in the left pane and scan it for lost data using the corresponding button or the option from the storage context menu.

If your drive is missing among the detected devices in the interface of the software, try reconnecting it to the host computer, using another cable/adapter/enclosure or connecting it directly to the motherboard (if it has not been attached in such a way before) to exclude the possibility of faulty connection. If this does not help, you are likely to have a physically damaged drive/enclosure that should be handled only by a data recovery specialist.
-
Define the preferred parameters of the scan. If you know for sure which file system type you are dealing with, deselect the remaining ones. After that, press "Start scan" and wait for the completion of the procedure.
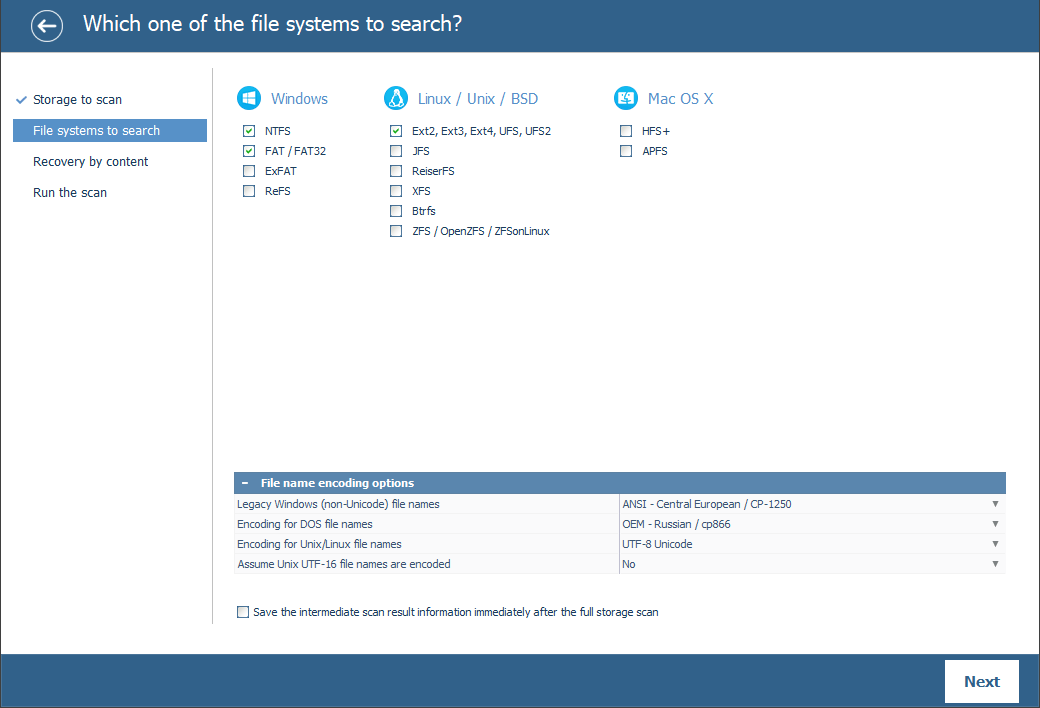
Hint: More information about configuring the scan can be found in the instruction on scanning a drive with UFS Explorer.
-
Examine the file system reconstructed by the software: you may sort the found files by name, date, type, put to use quick or advanced search and preview images, videos, audio files or PDF documents. After that, press "Define selection" and specify the items to be copied by placing checkmarks next to them.
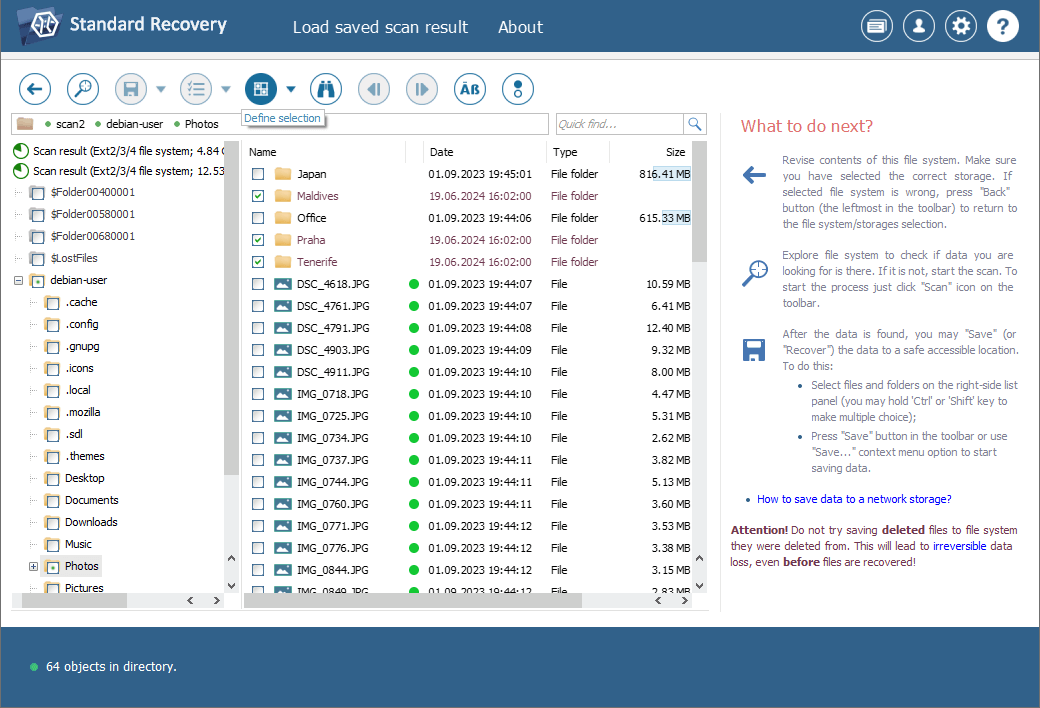
Hint: The information provided in Evaluation and saving the results of data recovery may facilitate your work with the obtained folders and files.
-
Select a destination folder to save the recovered data. Please make sure that this folder is NOT located on the drive you are restoring information from, as this can result in irrevocable data overwriting.
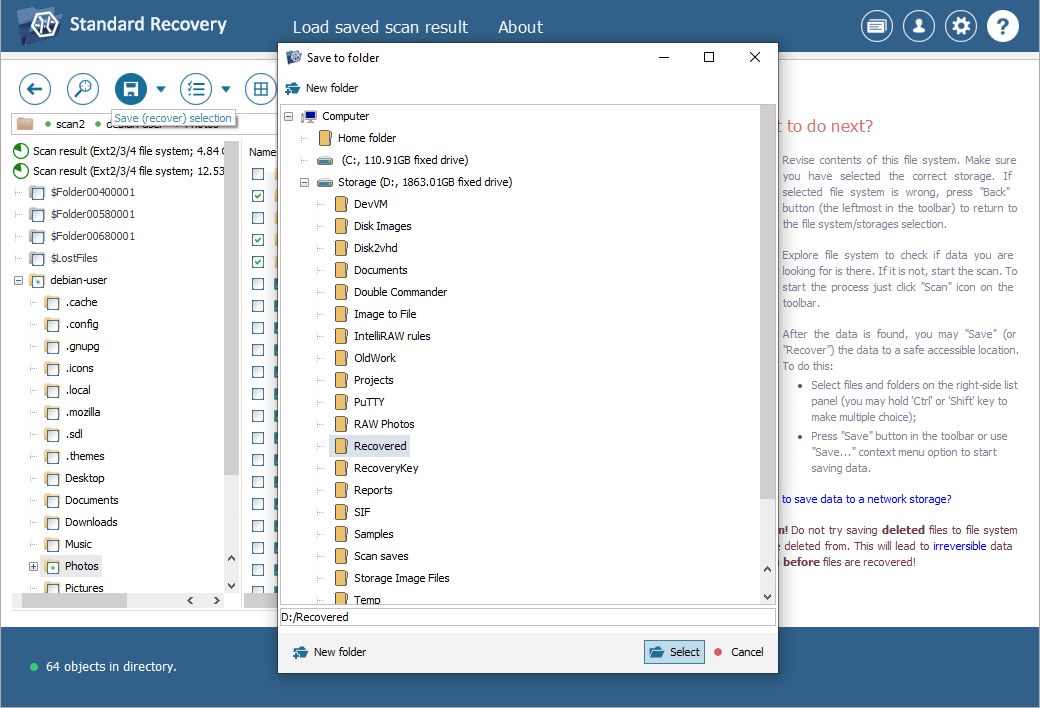
Hint: If you are going to save the recovered data to a network storage, please check the provided instruction.
How to recover data from the system partition using a Live CD
In some situations disassembling the computer in order to remove its drive is troublesome due to the technological peculiarities of the machine, or unwanted owing to the warranty or lack of skills required for manipulating hardware components. In this case, one may use UFS Explorer Backup and Emergency Recovery CD – a bootable environment with the live Ubuntu Linux operating system and all the latest releases of UFS Explorer and Recovery Explorer software products, which can be easily burnt to a USB flash drive as described in the respective guide.
Note: Please consider that data recovery is not possible for Mac computers that rely on custom Apple Silicon (M1 and later) or T2 security chips. More details can be found in Unblocking access to macOS drives.
In order to recover lost data with the help of UFS Explorer Backup and Emergency Recovery CD, please proceed as follows:
-
Download the ISO file of the product to any other computer.
-
Burn this ISO image to a CD/DVD or make a bootable USB stick utilizing a specialized software application of your choice, for example, any of the programs mentioned in the Creating a bootable (live) USB drive article.
-
Connect the bootable medium to the problem computer. Also, prepare another storage to copy the recovered files to (a portable device or a network location).
-
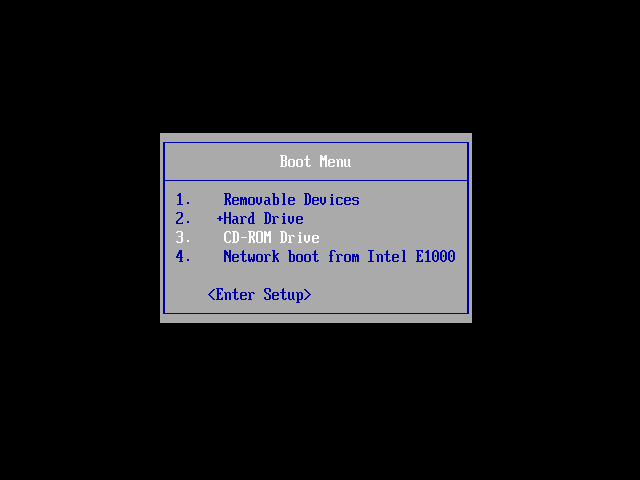
Restart this computer and enter the Boot menu by pressing F11 or F12 (Esc for older systems) on the start screen and select the connected CD/DVD-ROM or USB flash drive.
-
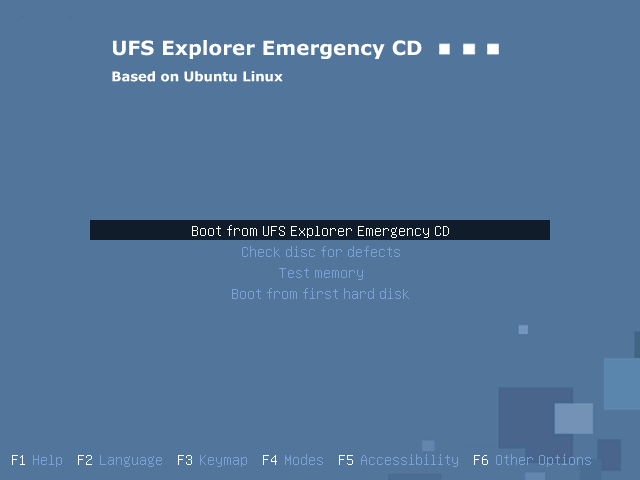
Press Enter to run the Ubuntu Linux operating system.
-
Launch the needed data recovery program, for instance, UFS Explorer Standard Recovery, from the desktop and change its settings in the corresponding pane.
Note: To use the software on a live CD, a Linux version of the license is required.
-
Perform the steps 6-9 from the previous section of this article.
Last update: June 03, 2024