How to recover data from a volume encrypted with BitLocker
The BitLocker encryption technology of Microsoft Windows is known to provide solid protection of sensitive information against theft or unauthorized access. Yet, no matter how convenient and reliable it is, this feature may also create difficulties, even for valid users. When data disappears from a BitLocker partition due to any unexpected issue or negligent operations, it can be restored only when a set of conditions are met that allow decrypting the storage. Fortunately, in most scenarios, BitLocker data recovery is possible with appropriate software. The following instructions will help you to safely get the missing files back using different editions of UFS Explorer. However, it must be pointed out that BitLocker employs strong encryption standards and doesn’t have any identified security backdoors. Hence, UFS Explorer will be able to perform decryption solely for authorized users who possess a proper password or BitLocker recovery key.
General specifics of BitLocker
BitLocker is a native full-disk encryption mechanism of Microsoft Windows. Since its first appearance in Windows Vista, BitLocker has been available in each version of the OS (though only in particular editions). It employs the Advanced Encryption Standard (AES) algorithm to cipher every bit of data within a certain partition or the entire drive. One can choose standard BitLocker to protect the computer’s internal hard drive or BitLocker To Go for removable digital media, like USB sticks, memory cards or external hard drives.
BitLocker encryption may be activated by default on a Windows-based device when the latter meets certain prerequisites, such as support for Modern Standby and HSTI compliance. In this case, protection comes into effect when a user signs into their Microsoft or Azure Active Directory account, without requiring them to create a password. The Recovery Key is also automatically saved to the linked online account. On other devices, users can enable BitLocker themselves through the Control Panel or the Settings app. When doing so, they have an opportunity to set up their preferred method of authentication and choose how to save a Recovery Key.
However, the implementation of BitLocker may vary depending on the device where it is applied. It can be roughly divided into two types: software-managed and hardware-assisted encryption.
Hardware-assisted BitLocker encryption
Hardware-assisted encryption implies the use of a Trusted Platform Module (TPM) for increased protection. This specialized component on the computer's motherboard generates and manages the information utilized during the encryption/decryption procedures, impeding potential intrusion to the system while it is offline. TPM can be employed by itself for automatic unlocking of the drive at startup, or in combination with other protection options: a PIN or a Startup key.
However, it should be noted that TPM is a key carrier with multiple physical security mechanisms. These keys are tied to specific hardware and never get exposed to the operating system or any external applications. Thus, hardware-assisted encryption cannot be deciphered programmatically and is not supported by UFS Explorer.
Software-managed BitLocker encryption
In the absence of a TPM or when this component is disabled, BitLocker encryption is managed entirely through the operating system. This suggests that decryption is possible without any additional hardware. Thereby, this type of encryption can be unlocked in the interface of UFS Explorer. It can be implemented on the basis of:
- a password;
- a BitLocker recovery key;
- a Startup key stored on an external USB device.
When BitLocker is turned on, the data on the encrypted volume is rendered unreadable. To make it readable again, the user needs to authenticate themselves by providing the correct password, BitLocker recovery key or Startup key that unlocks the storage.
A password is a character sequence entered upon the OS start or access to the external device protected by BitLocker. It is assigned once by the user during the initial setup of BitLocker.
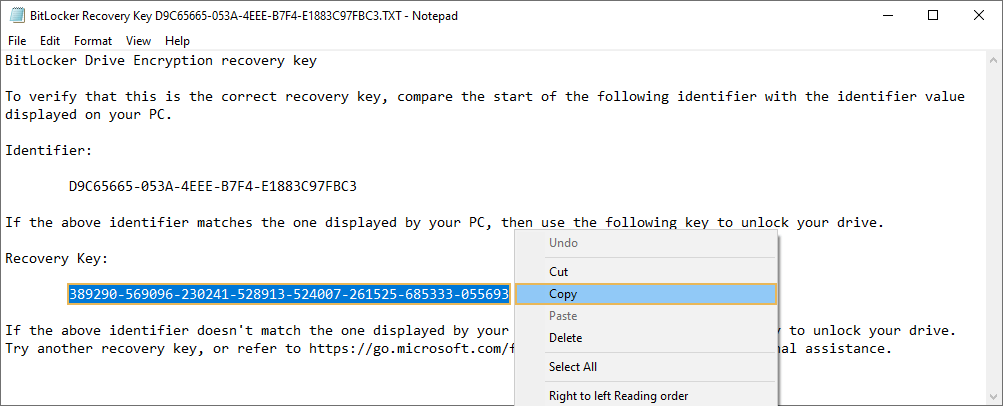
A BitLocker recovery key (aka Microsoft or Windows recovery key) is a unique 48-digit key that is generated automatically by the system when BitLocker is first switched on for the given storage. It can be used to decipher the data without the password in the event of its loss or when there is no password as such – for example, on newer machines where encryption is enabled by default. The key itself has the following format: 458496-748026-55221-116398-289491-332432-267599-589681.
A Startup key is a hidden *.bek file on a USB device that is merely an analogue of the BitLocker recovery key. It enables automatic decryption of the boot partition without requiring the user to enter a password.
Both the password and the 48-digit key are stored within the BitLocker metadata on the protected volume. The input credentials are processed and checked for compliance with the respective metadata entries. In case of a match, the storage can be unlocked. However, if this metadata gets corrupted due to severe damage to a storage, it is no longer possible to decrypt it, even with the correct password and the key. Its content will remain encoded and, thus, completely unusable. Therefore, unlike common data extraction, the procedure that involves BitLocker requires the BitLocker metadata blocks to be intact and the correct password or BitLocker recovery key for decryption.
The simplest way to decrypt the storage is to enter the BitLocker password into UFS Explorer, when prompted. However, if you’ve forgotten the password or do not have it, there is still another option to unlock the encrypted drive – to retrieve the Windows recovery key.
Depending on the method chosen to save this 48-digit key, you can search for it in the following locations:
-
Microsoft account
If your Windows recovery key is stored online within your Microsoft account, log into it, navigate to the BitLocker Recovery Keys section and see if your key is listed there next to the respective Device Name.
-
Computer file
The 48-digit key may be saved as a *.txt file on a different drive or a network location. It is called "BitLocker Recovery key" followed by an arbitrary combination of numbers and letters. You can search for the key file by entering "BitLocker Recovery Key" into the search bar and check the results.
-
USB flash drive
Find the thumb drive to which the *.bek file was saved and connect it to the computer. The Startup key won’t be visible right away. In order to see it, open Windows Explorer and choose the View tab. After that, under "Hidden files and folders", enable the "Show hidden files, folders, and drives" option. The name of the file will look like a random sequence of characters and numbers.
-
Printout
In case you have printed out your Microsoft recovery key, check the spot where you usually keep the documents related to your computer.
-
Azure Active Directory account
If you used the Active Directory account, sign into the Microsoft Azure portal and choose the Azure Active Directory blade. Search for your device by entering its name or serial number into the search box. Select the device to open its record and choose the "Show Recovery Key" option to get the key.
The BitLocker recovery key is unique for each encrypted storage. To ensure that the particular BitLocker recovery key is correct, you can compare the start of the BitLocker recovery key identifier with the "Key ID" value displayed for the drive.
As regards the *.bek file, it is created only once when setting up BitLocker on the system boot partition with a Startup key. If you’ve lost this USB stick but know the decryption password or Recovery key for the encrypted storage, you may attempt to recreate the file on a new USB device. Having unlocked the drive, go to the Control Panel, navigate to System and Security and then select BitLocker Drive Encryption. After that, on the already unlocked drive, choose the "Back up your recovery key" option and follow the prompts to upload the *.BEK file onto a new flash drive.
BitLocker recovery using a password or recovery key
UFS Explorer serves as an effective solution for recovering data from BitLocker-protected volumes. The software range comprises four distinct editions: Standard, RAID, Network RAID and Professional, and each of them is equipped with the support for this encryption technology. All programs are also flexible in that they allow using different decryption methods provided by BitLocker, including passwords, recovery keys or Startup key files (*.bek).
While the core procedure for decryption and data recovery remains the same across different editions, the precise actions may vary slightly depending on the software edition and the method you choose for decryption.
In UFS Explorer of the Standard, RAID or Network RAID editions
In case you have the correct password or BitLocker recovery key, you may take the following steps to restore the data from your BitLocker volume by means of the Standard, RAID, or Network RAID edition of UFS Explorer. Yet, please mind that these software editions make it possible to decrypt only existing BitLocker volumes. If such a volume has been formatted or lost, its search can be carried out via UFS Explorer Professional Recovery.
-
Plug your storage medium encrypted with BitLocker into the PC.
Connect your encrypted external device to the USB port. If you are working with an encrypted partition of an internal drive, simply skip this step.
Hint: If you need to attach an internal hard drive from another computer, you can plug the disk into the motherboard of your PC or сonnect the drive externally using a USB to SATA adapter.
-
Install UFS Explorer of the Standard, RAID or Network RAID edition and open the software.
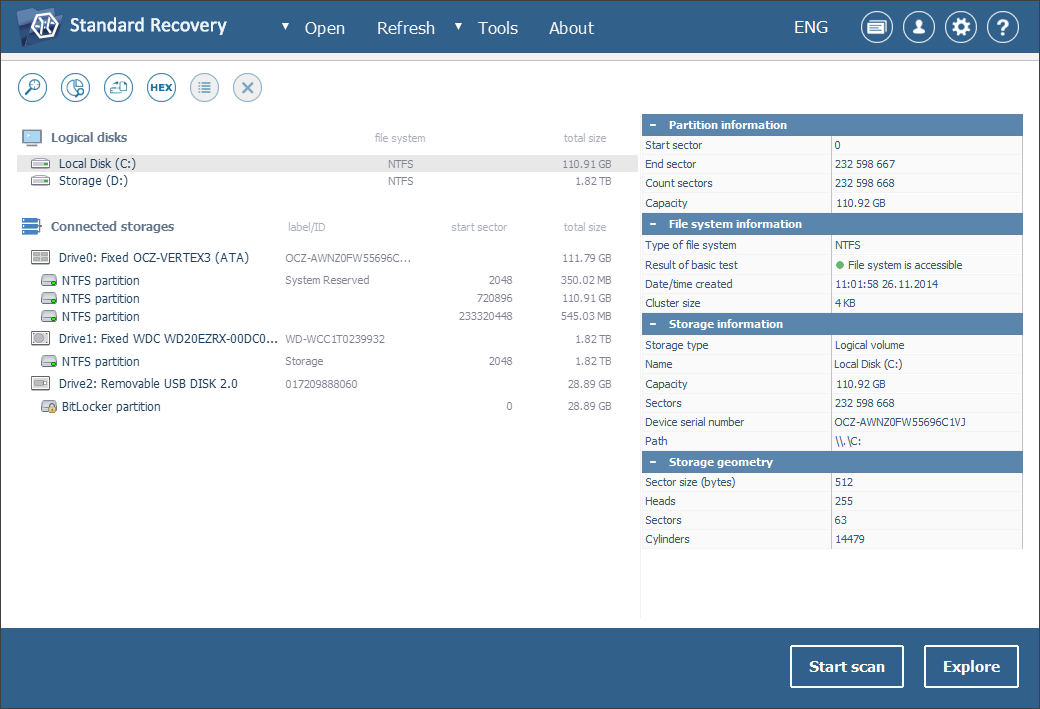
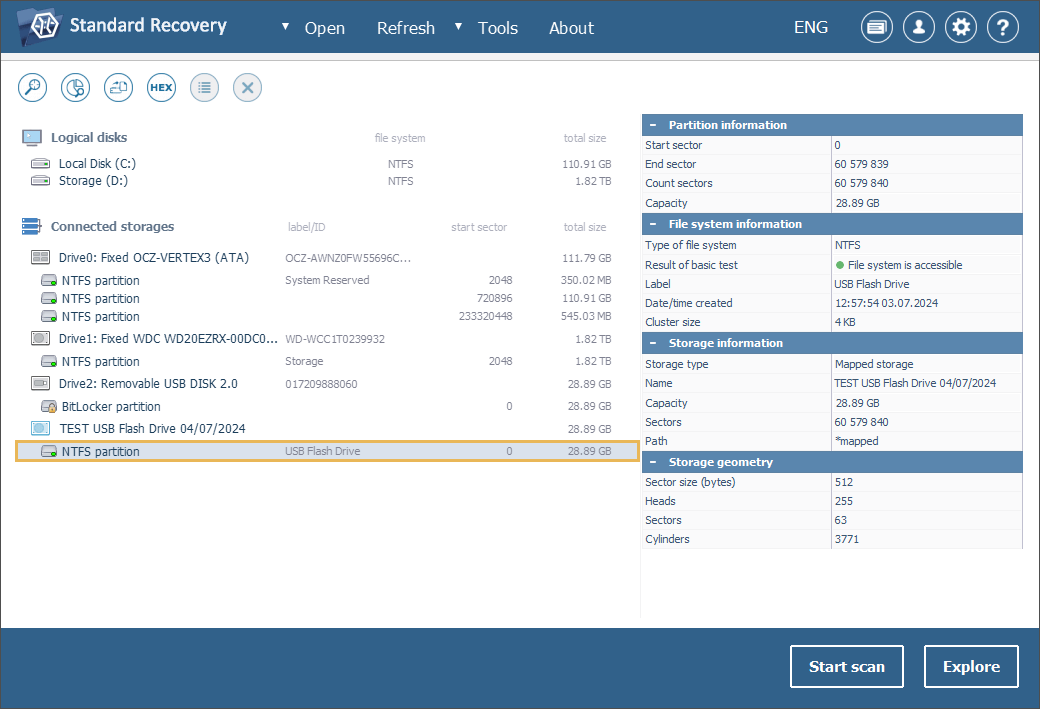
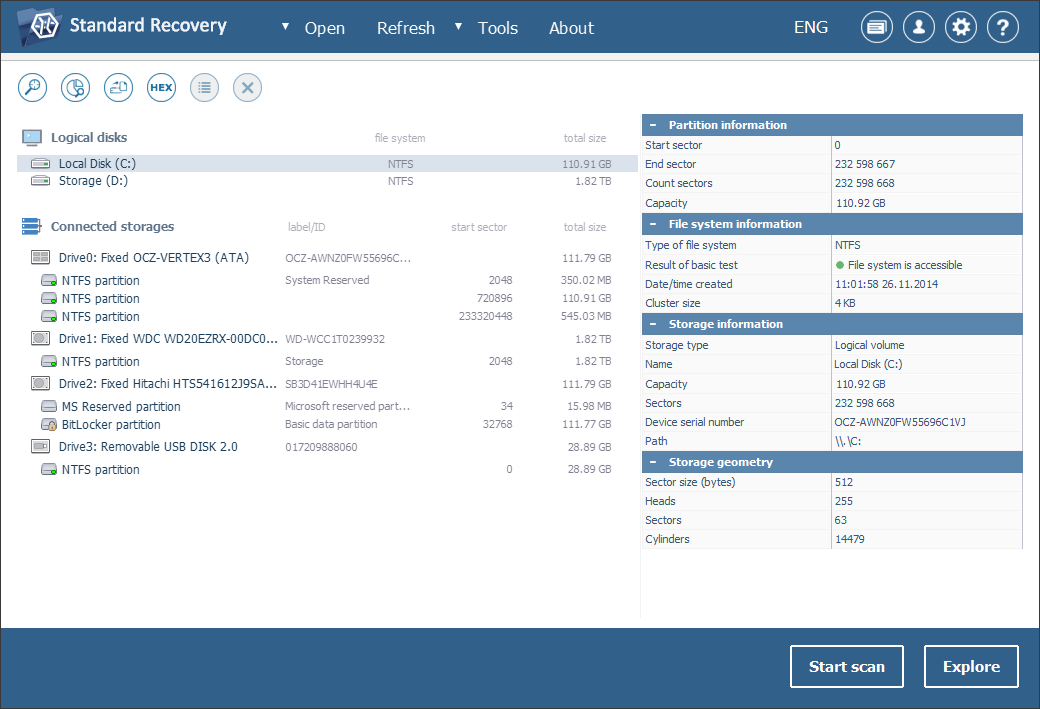
The application will automatically detect all the attached drives. They will be presented in the tree of connected storages in the left pane. The logical volumes available on each device will be listed under it.
Hint: If you have any difficulties with the installation of the utility, please refer to the installation manual for the employed edition of UFS Explorer.
-
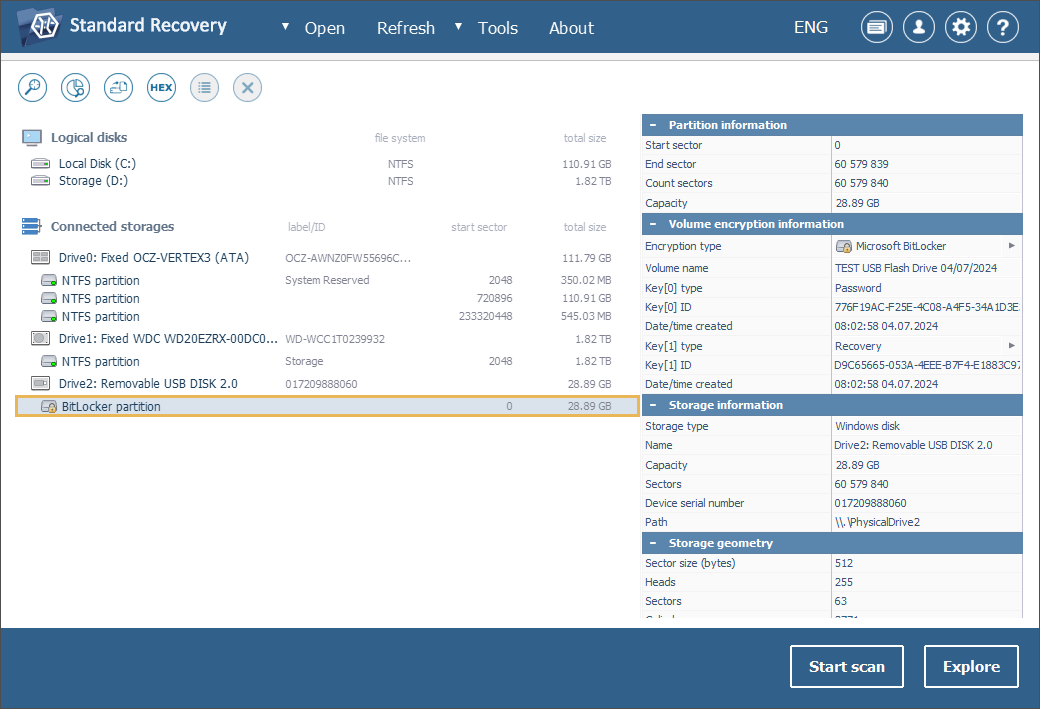
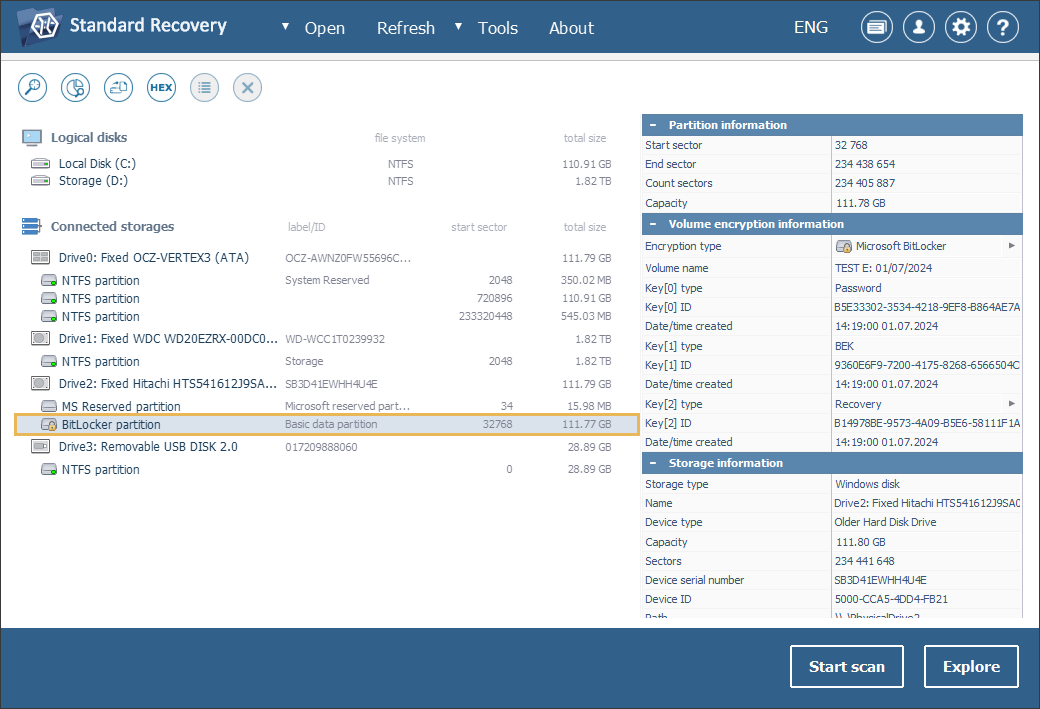
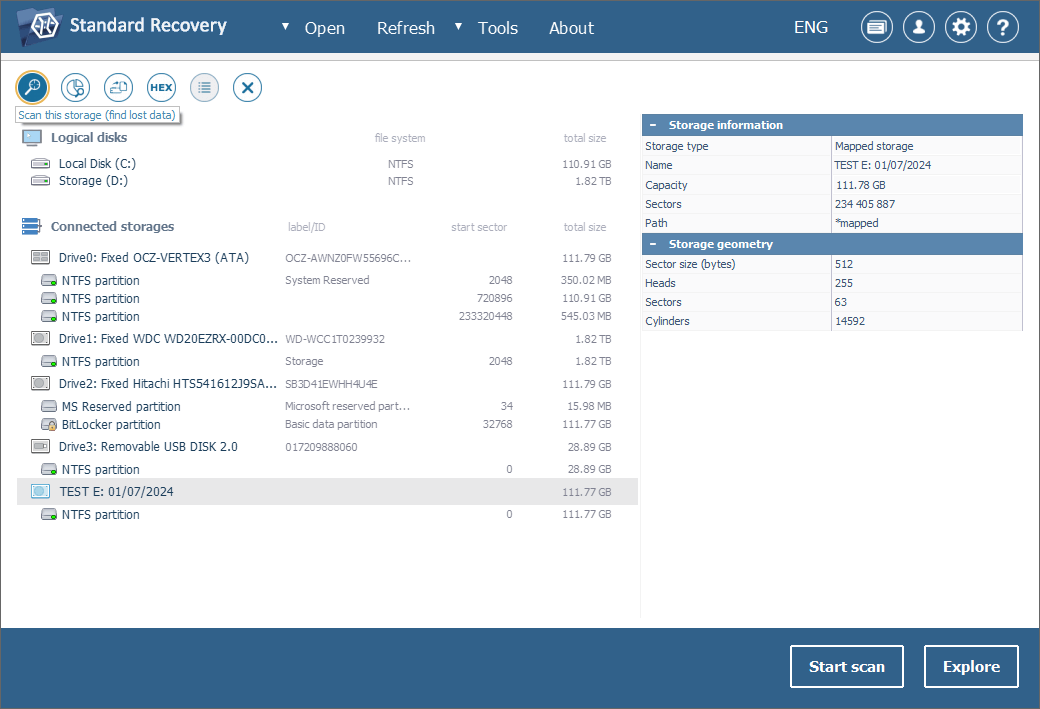
Look for the necessary BitLocker volume in the list.
Scroll down the list of storages to find the required encrypted volume: you can recognize it by a yellow padlock icon.
-
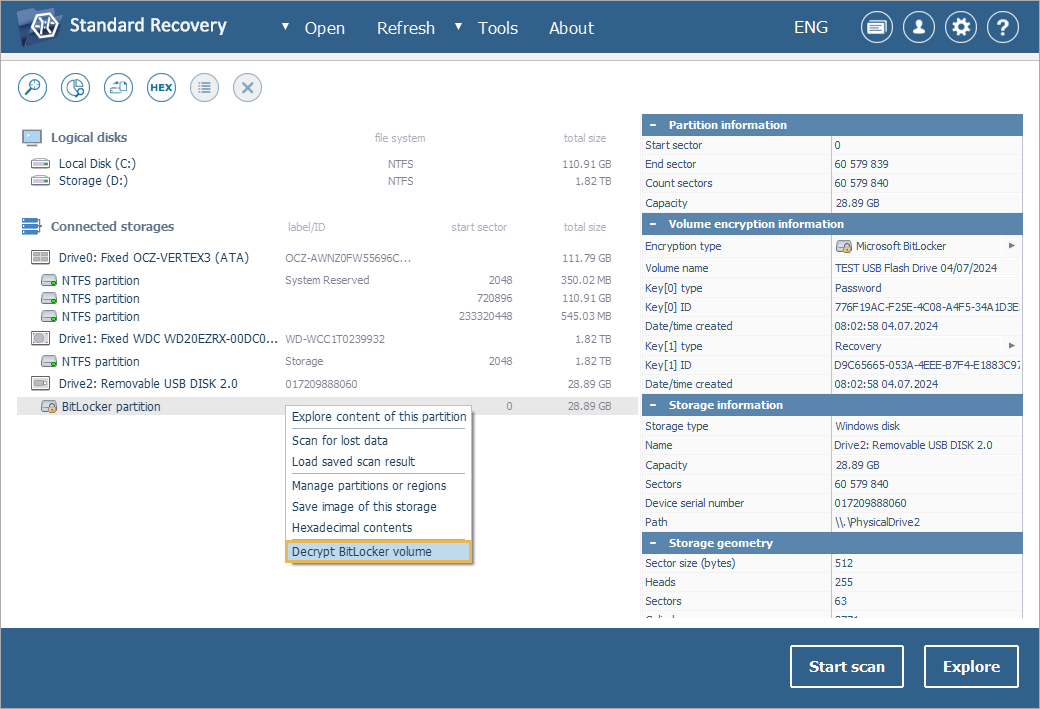
Decrypt the storage using the means integrated into the program.
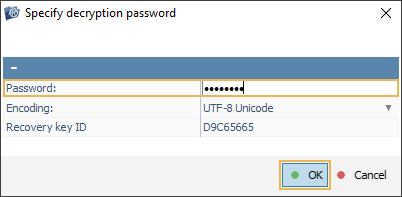
Though its file system may be detected as accessible, the volume has to be deciphered to enable further operations. For this, open its context menu and choose "Decrypt BitLocker volume". If a menu with an unlocking method appears, then opt for "Use Recovery Key or user password". In the pop-up window, enter the correct password or paste a 48-digit BitLocker recovery key, together with all the dashes.
-
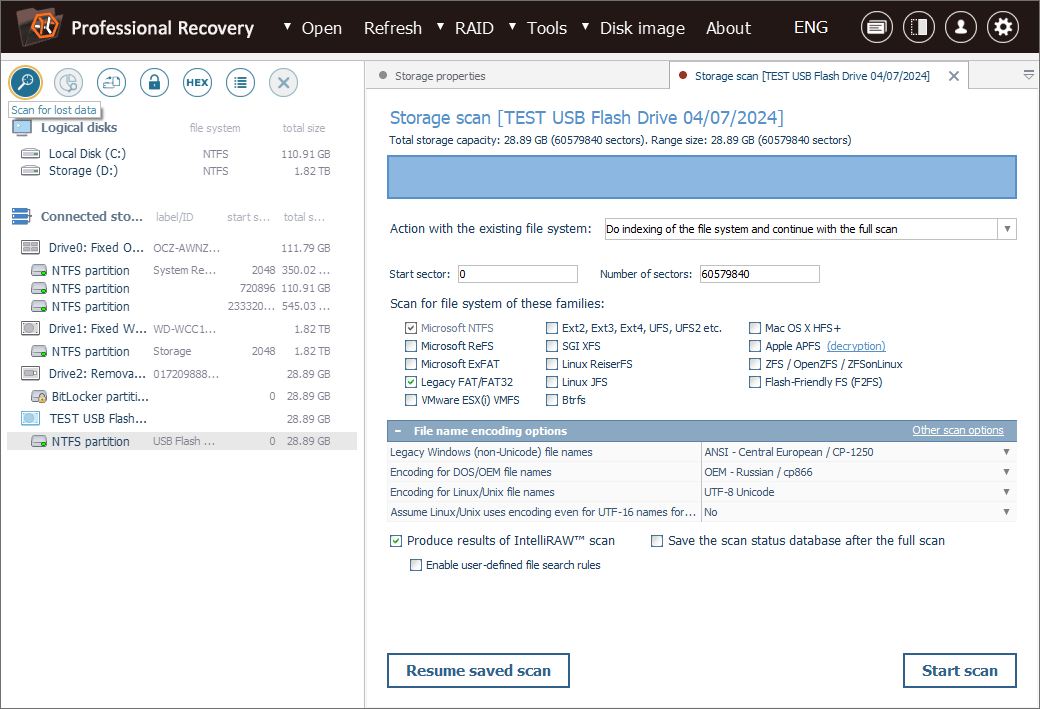
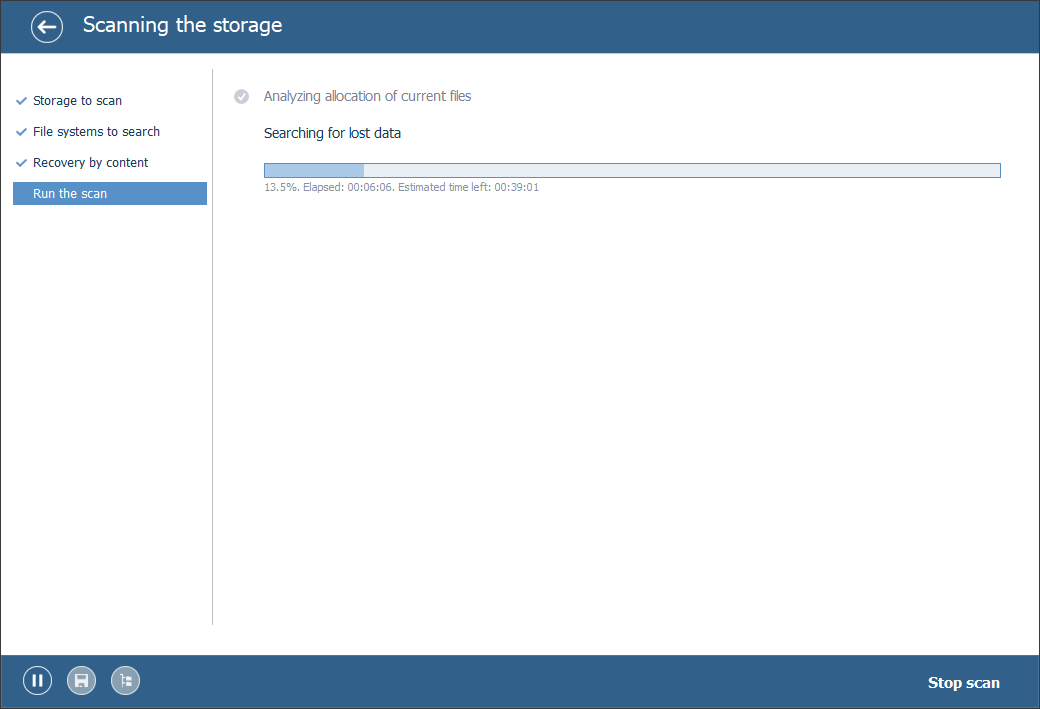
Scan the decrypted volume to regain the missing data.
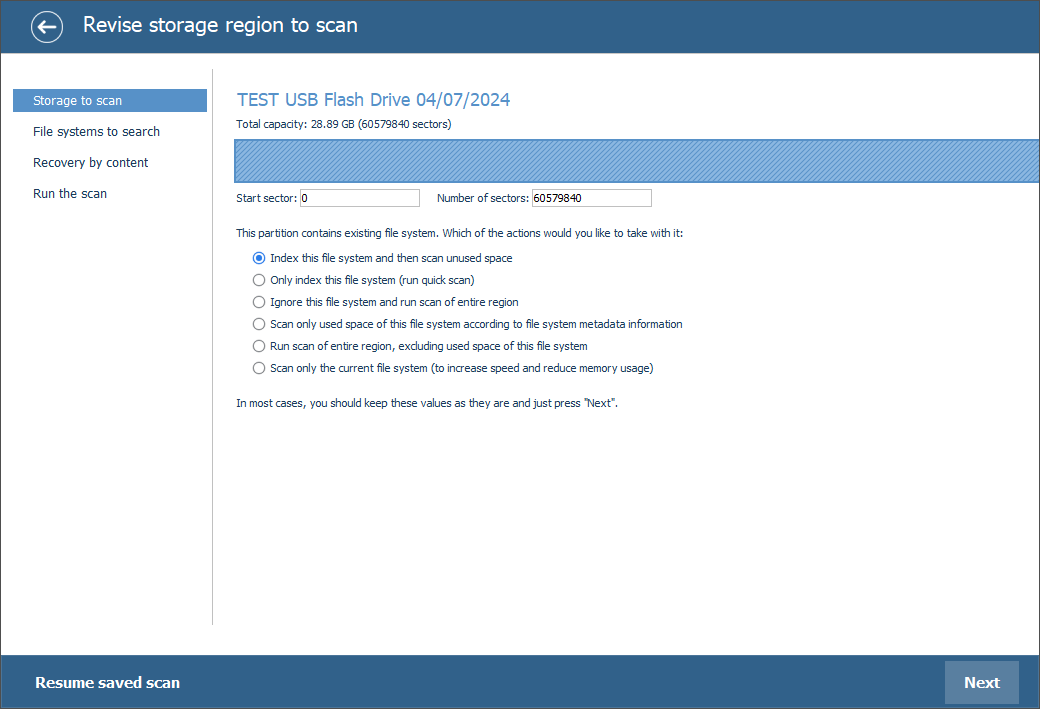
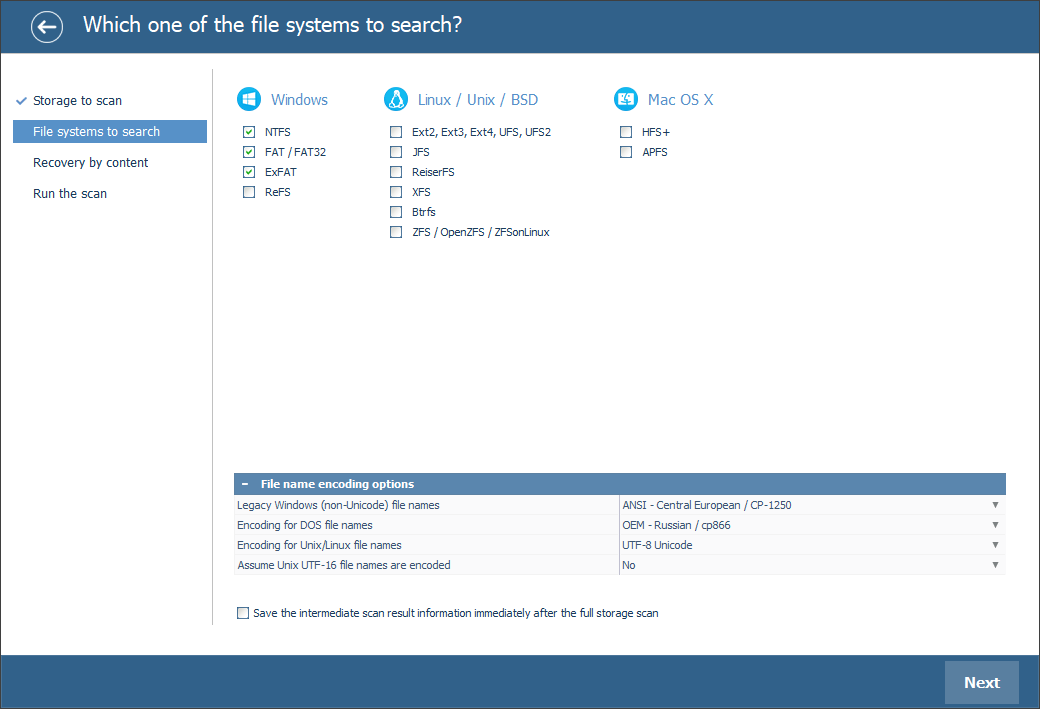
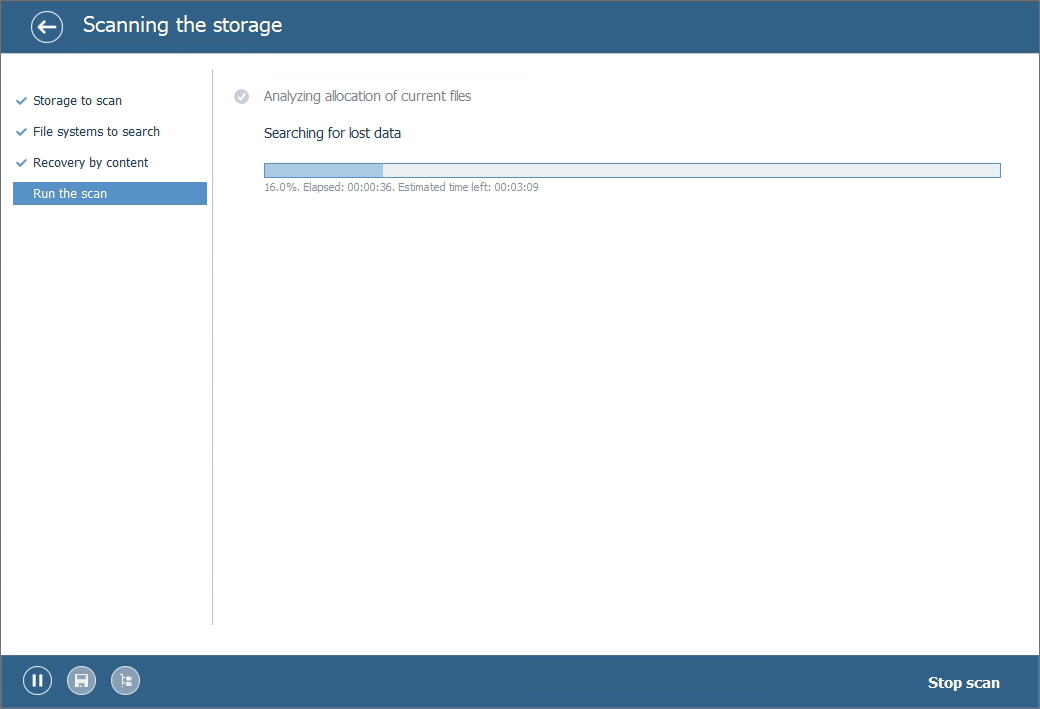
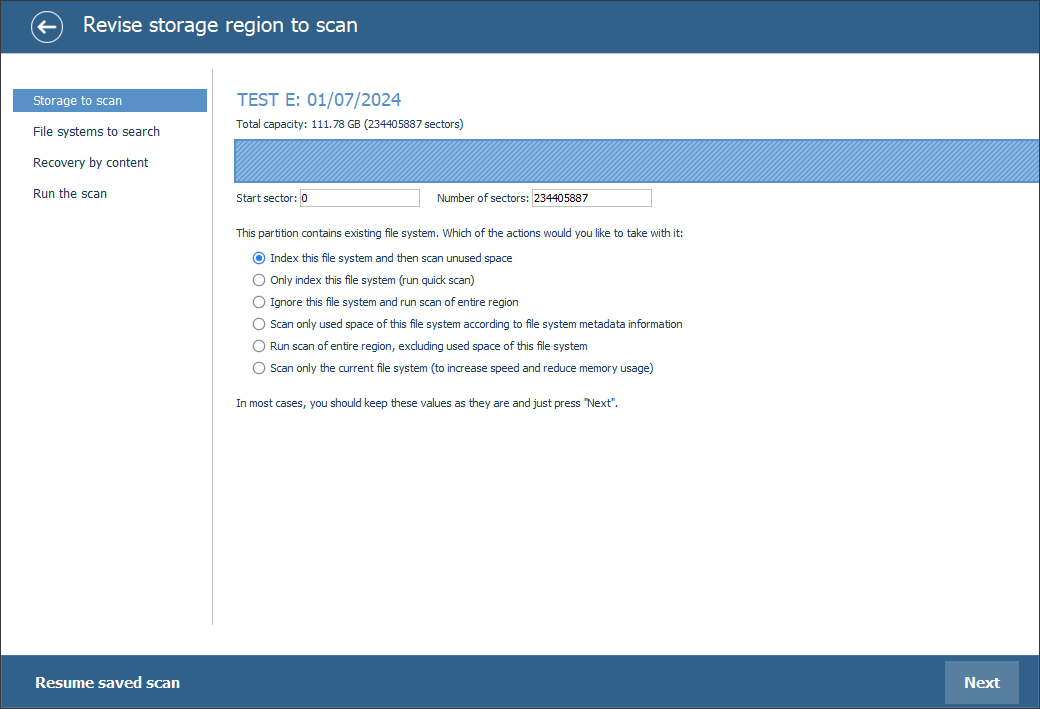
The content of the unlocked volume will become available for access. Yet, if you need to obtain the lost folders and files, you will have to initiate a storage scan. For this, find the "Scan this storage" tool in the toolbar, unselect all the irrelevant file systems or keep the default scan parameters and hit "Start scan".


Hint: More information about configuring the scan can be found in the instruction on scanning a drive with UFS Explorer.
-
Decide on the necessary recovered elements and copy them.
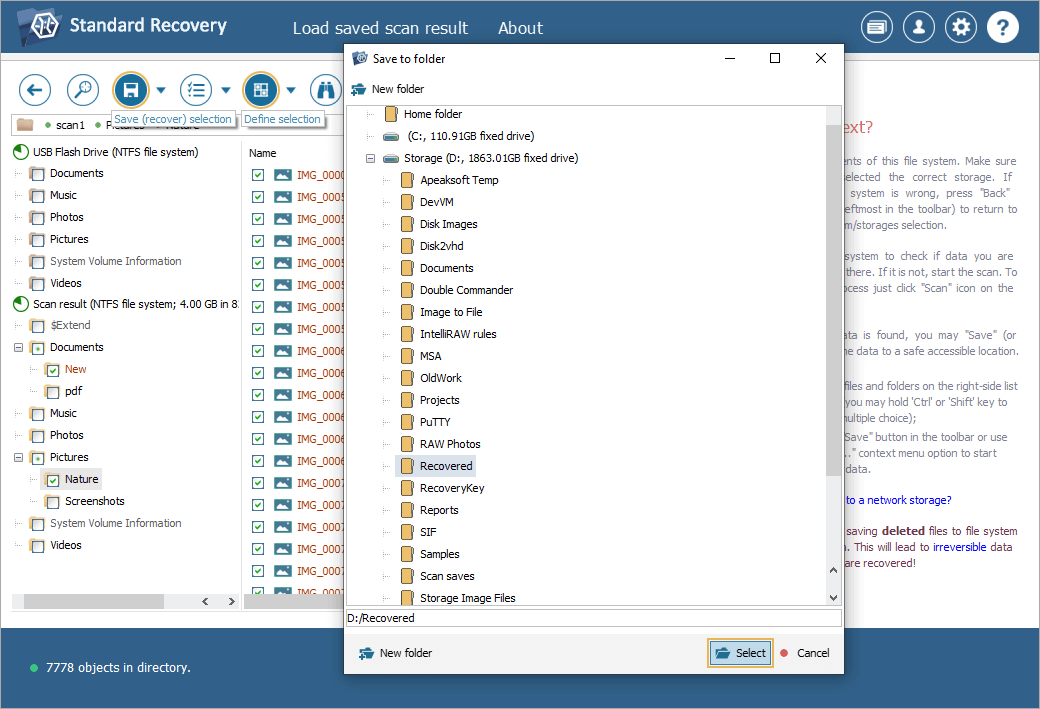
After the scanning procedure is completed, you can glance through the reconstructed file system and find the required folders/files. After that, click "Define selection", choose the ones you want to save and place checkmarks right next to them. Next, hit "Save selection" and provide a safe destination storage for the restored items.
Hint: The information provided in Evaluation and saving the results of data recovery may facilitate your work with the obtained folders and files.
In UFS Explorer Professional Recovery
Another alternative way to recover data from a BitLocker-encrypted volume using a password or recovery key is with the help of the Professional edition of UFS Explorer. In this case, please be guided by the following instruction:
-
Connect your device encrypted with BitLocker to the computer.
Plug the encrypted removable medium into the USB port or skip this step, if you are working with an encrypted partition of an internal drive.
Hint: If you need to attach an internal hard drive from another computer, you can plug the disk into the motherboard of your PC or сonnect the drive externally using a USB to SATA adapter.
-
Install and run UFS Explorer Professional Recovery.
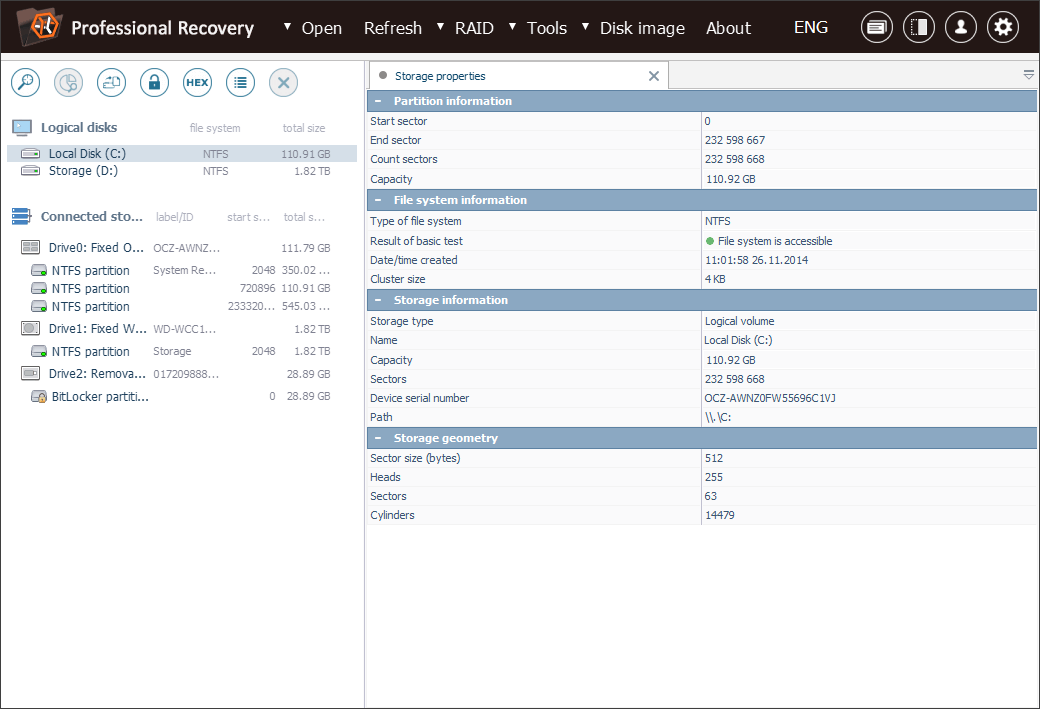
The software will detect all the attached drives automatically, displaying them in the tree of connected storages in the left pane. Each device will have its logical volumes listed below.
Hint: If you have any difficulties with the installation of the utility, please refer to the installation manual for UFS Explorer Professional Recovery.
-
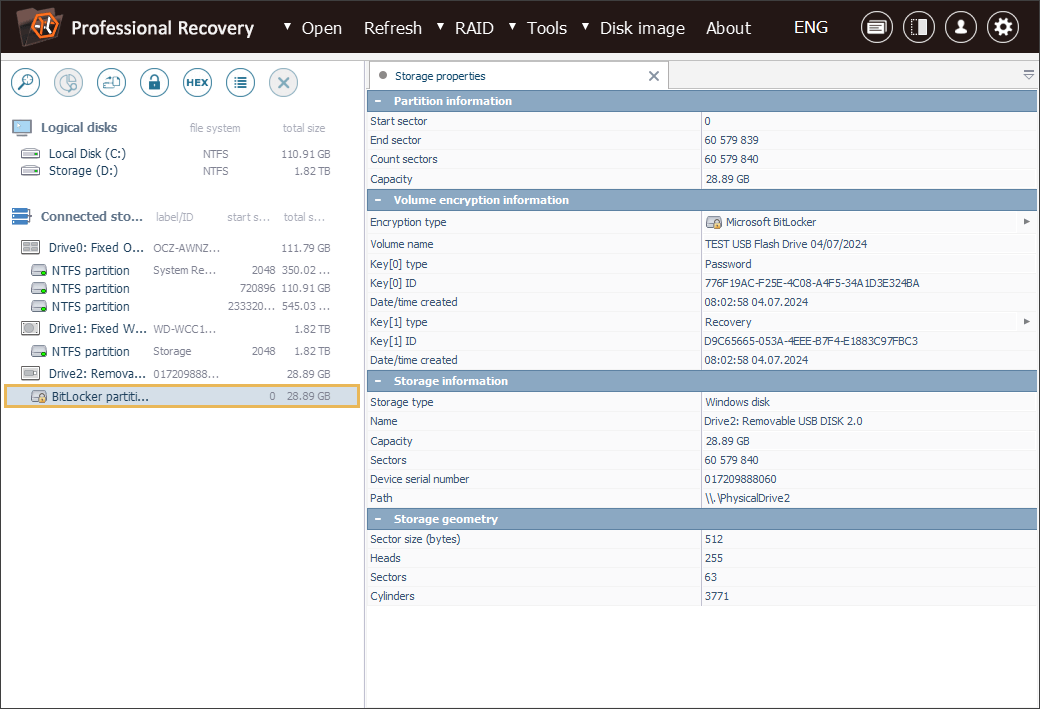
Select the needed encrypted volume in the list of connected storages.
Navigate through the list to find the necessary encrypted volume: it can be identified by a yellow padlock icon.
-
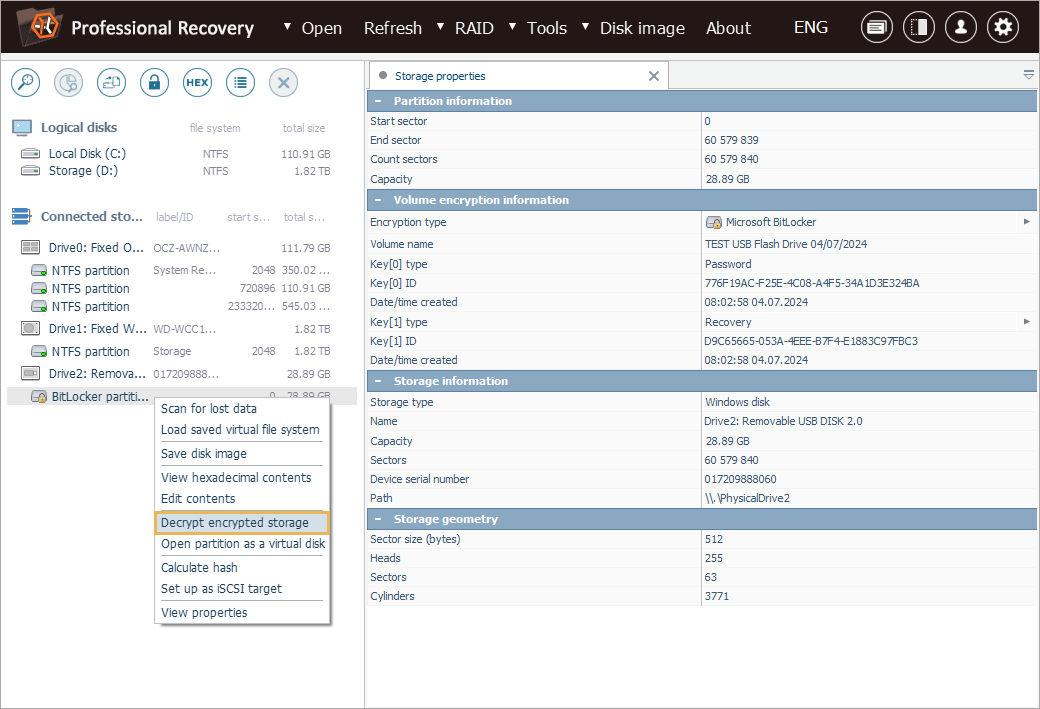
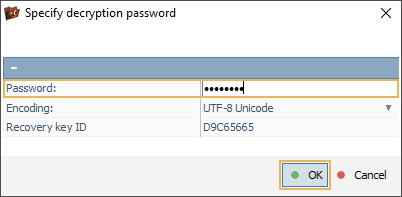
Decipher the storage using the decryption tool provided in the program.
Even if its file system is recognized as accessible, the volume needs to be decrypted for further operations. Open its context menu and choose the "Decrypt encrypted storage" item. If a dialog box with a decryption method appears, then select the "Use Recovery Key or user password" option. Enter the right password or provide a 48-digit BitLocker recovery key, including all the dashes.
-
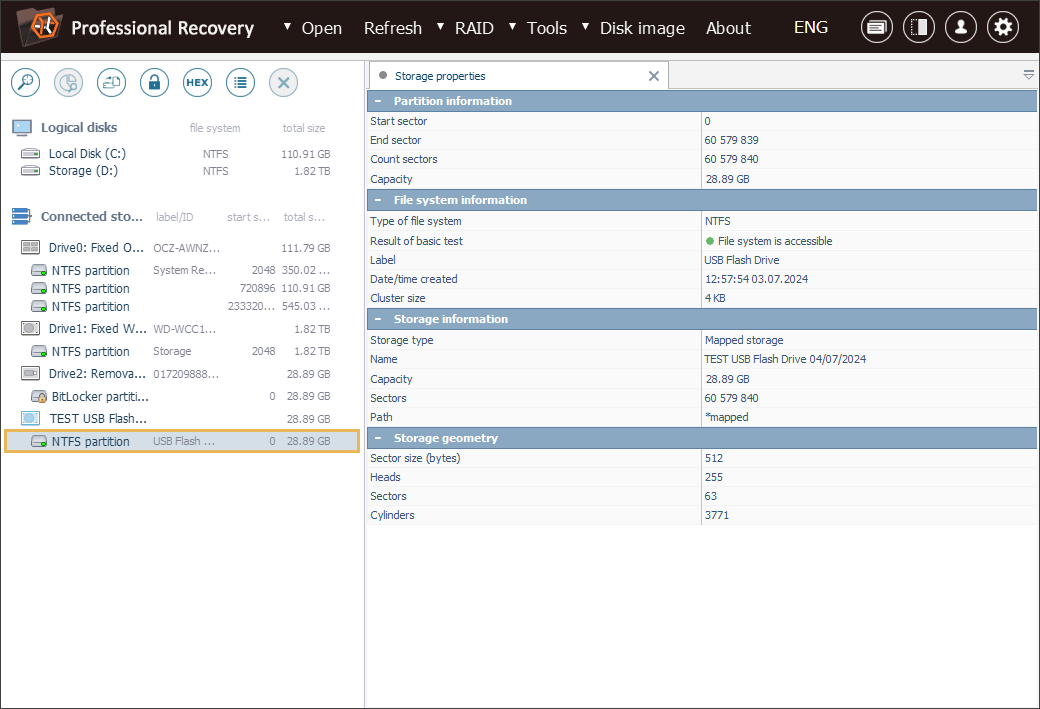
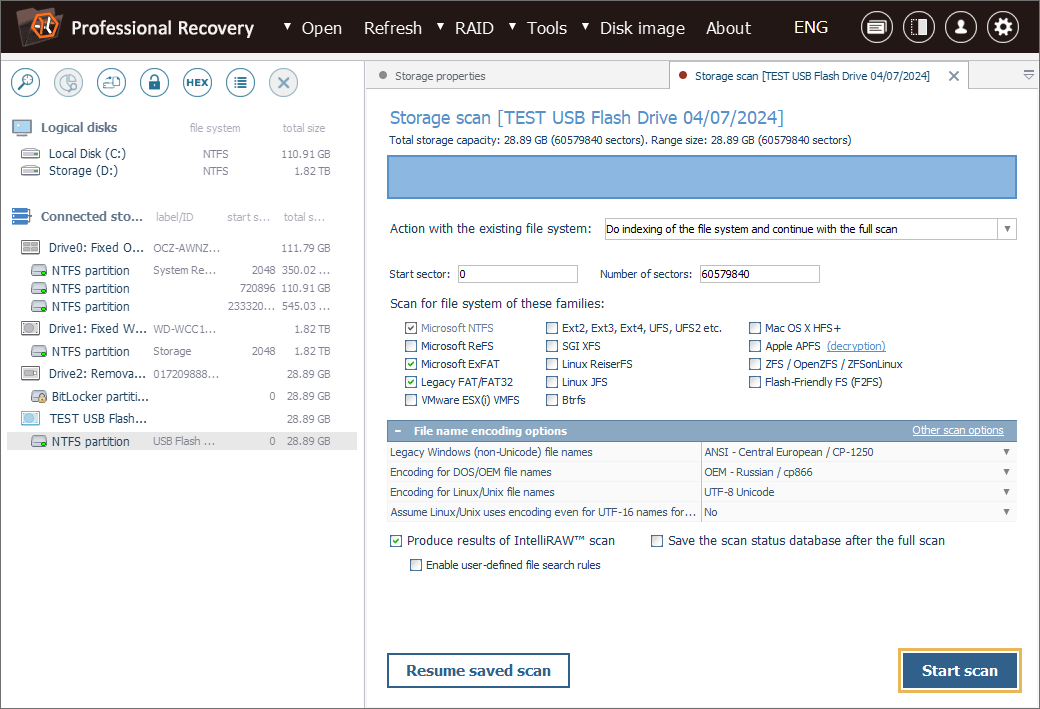
Scan the storage to extract the lost data.
After the volume is decrypted, the intact data it contains gets available for access. To find the deleted or lost files, you will need to run the storage scan. For this, choose the respective tool from the toolbar, deselect all extra file systems or leave the scan parameters as they are and press "Start scan".
Hint: More information about configuring the scan can be found in the instruction on scanning a drive with UFS Explorer.
-
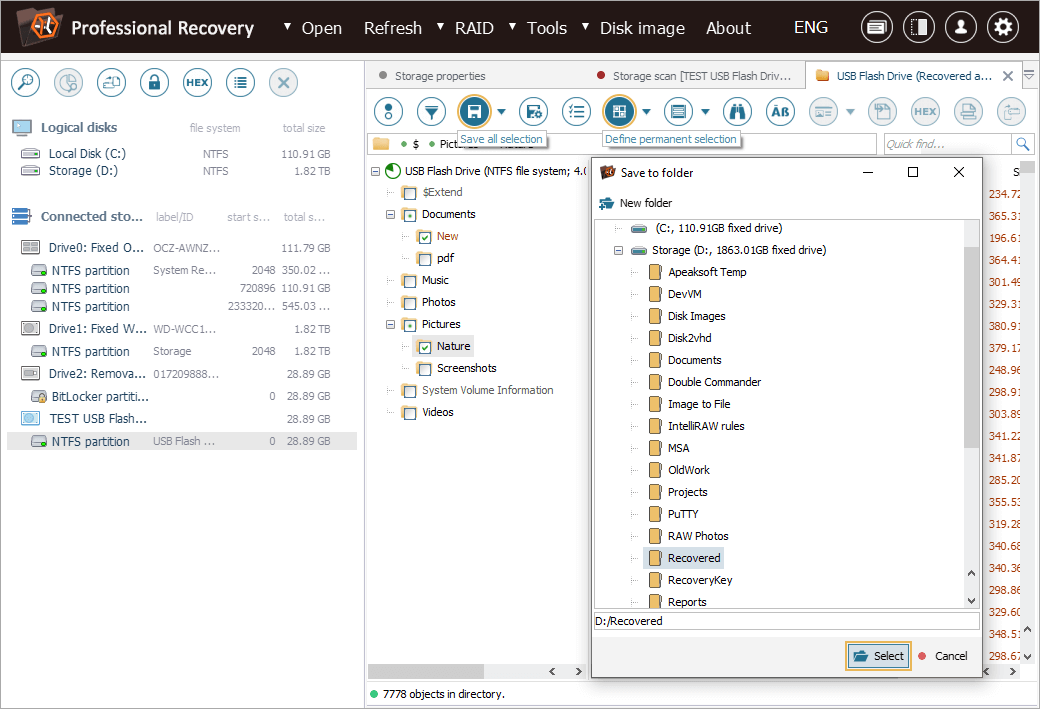
Pick out and save the needed restored files or folders.
When the process is completed, you can browse through the reconstructed file system to find the necessary items. To choose the ones to be copied, click "Define selection", put check marks right next to them and press "Save selection". After that, define a safe destination folder for the recovered data in the pop-up window.
Hint: The information provided in Evaluation and saving the results of data recovery may facilitate your work with the obtained folders and files.
BitLocker recovery using a Startup key (USB flash drive with a *.bek file)
In case you have a USB flash drive containing the BitLocker startup key, data recovery from your encrypted volume will involve slightly different steps, since you will need to utilize the *.bek file stored on it to unlock the storage during the procedure.
Here's what you should do to apply the Startup key for data recovery in UFS Explorer:
-
Attach both the BitLocker-encrypted drive and the corresponding Startup key to the computer.
Use the fastest available method to connect your encrypted device, unless it is already installed internally in the current PC. Then insert the USB flash drive storing the BitLocker startup key into the computer’s USB port.
Hint: If you need to attach an internal hard drive from another computer, you can plug the disk into the motherboard of your PC or connect the drive externally using a USB to SATA adapter.
-
Install UFS Explorer of the preferred edition and launch the program.
The software will recognize the connected drives automatically and display them in the tree of connected storages on the left. The logical volumes available on each device will appear beneath them.
Hint: If you have any difficulties with the installation of the utility, please refer to the installation manual for the employed edition of UFS Explorer.
-
Search for the required BitLocker volume in the list.
Examine the list of storages to find the necessary encrypted volume, easily identified by a yellow padlock icon.
-
Decrypt the storage using the Startup key.
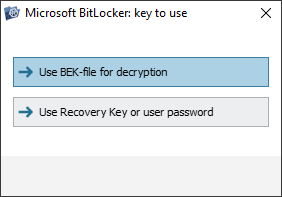
Right-click on the storage in the list and choose "Decrypt BitLocker volume" from its context menu (or "Decrypt encrypted storage" in UFS Explorer Professional Recovery). In the dialog box, select the "Use BEK-file for decryption" option.

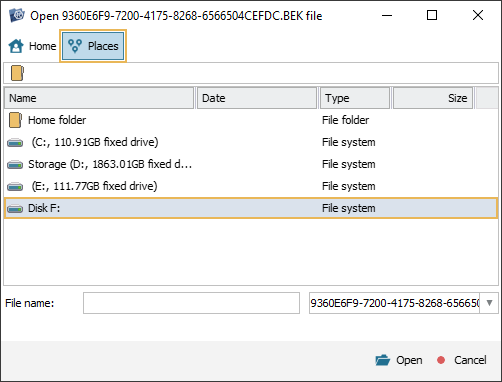
After that, you can navigate to the location on the USB flash drive where the *.bek file stored. In order to open the drive’s content, go to "Places" first and then pick the corresponding logical drive letter.
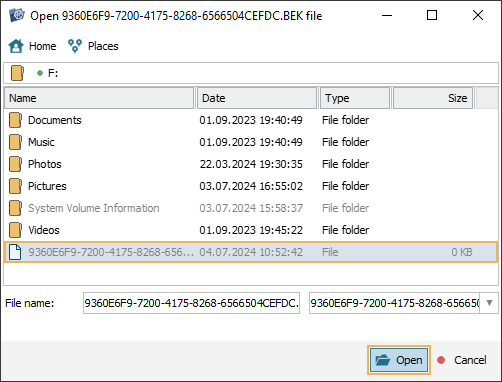
Once you find the *.bek file, select it and hit the "Open" button.
-
Scan the decrypted volume to recover the lost data.
The content of the deciphered volume will now be accessible. However, if you need to retrieve the missing folders and files, you will have to start a storage scan. For this, get the "Scan this storage" tool from the toolbar, deselect all the irrelevant file systems or keep the default scan parameters and click "Start scan".

Hint: More information about configuring the scan can be found in the instruction on scanning a drive with UFS Explorer.
-
Select the necessary recovered items and save them.
After the scan is complete, you can browse through the reconstructed file system to find the required folders/files. Then click "Define selection", choose the items you want to copy and place checkmarks next to them. Next, click "Save selection" and specify a safe destination storage for the restored folders and files.

Hint: The information provided in Evaluation and saving the results of data recovery may facilitate your work with the obtained folders and files.
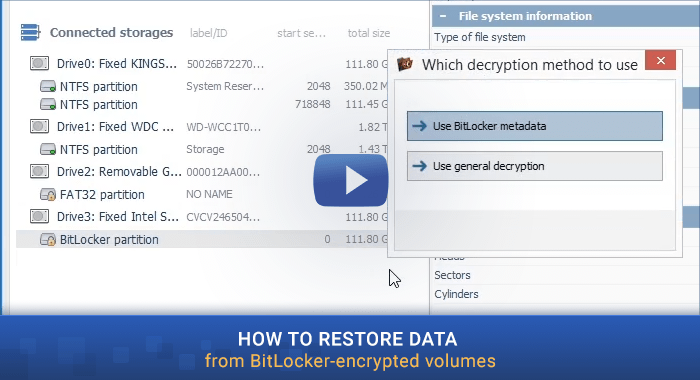
BitLocker recovery in a video-guide
The overall process is illustrated in the following video-guide:
Last update: December 18, 2024