Data recovery with UFS Explorer Backup and Emergency Recovery CD
When the operating system won’t start or there is a high risk to overwrite the information stored on the hard drive in the process of data recovery, one can eject this drive from the problem computer, attach it to another working system and recover data from it like from an average removable device. However, there are situations, when such manipulations with the machine are undesirable due to the warranty or impossible owing to its technological specificity, absence of a secondary computer to use for the procedure or lack of technical skills required to disassemble the appliance, while on the other hand, the computer’s hardware hasn’t been damaged and is still working properly. Under these circumstances, one might consider restoring the lost files with the help of a live OS – a self-contained operating system which runs directly from a portable storage device, like a USB flash drive (in rare cases from a DVD-ROM), and doesn't require installation.
Hint: In case of damage or malfunction of computer’s hardware whose signs are described in the article about data recovery from a computer with a failed OS, please, follow the procedure of data recovery using another computer instead of employing a live OS.
How to recover data using a bootable USB drive
With the above-mentioned cases in mind, SysDev Laboratories has developed UFS Explorer Backup and Emergency Recovery CD – a bootable environment which includes the live Ubuntu Linux operating system with a set of preinstalled data recovery applications that can be easily mounted to a USB stick (or burnt to a DVD). Among the integrated utilities one can find all the latest releases of UFS Explorer and Recovery Explorer software products and choose the one which supports the storage technologies employed by the affected drive. The programs will thoroughly analyze the content of the storage to retrieve the lacking data and enable its further copying to any external storage or a network location.
Hint: For detailed information about the file systems and storage technologies a particular program supports please refer to the product specifications and the storage technologies page.
The product is presented as an ISO image that should bemounted to a USB flash drive (or burnt to a DVD) using any specialized software. After that, the computer can be started from the created bootable device without the need to run the original operating system.
In order to get the necessary data back with the help of UFS Explorer Standard Recovery running from UFS Explorer Backup and Emergency Recovery CD, please follow these steps:
-
Download the ISO file of UFS Explorer Backup and Emergency Recovery CD to any functioning computer.
-
Create a bootable USB flash drive with the downloaded ISO image using specialized third-party software as described in the dedicated instruction or burn it to a DVD.
-
Attach the bootable device you’ve created to the computer that incorporates the affected internal drive. In addition, prepare a target storage to which you are going to save the recovered files (an external device or a network location). Please remember that you can choose any storage medium except for the one you are restoring data from as saving recovered data to it may cause permanent data loss.
-
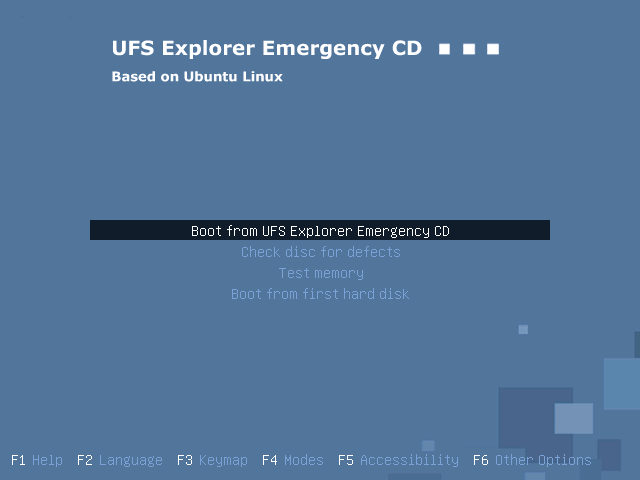
Restart the computer, enter the Boot menu (press F11, F12 or Esc for older systems on the start screen) and choose the connected USB stick (CD-ROM, DVD-ROM).

-
Press Enter and the Ubuntu Linux operating system will start loading.
-
You may try accessing your drive using standard means of Ubuntu: go to Places to open Computer, select and mount your partition under Devices in the left panel and copy the needed files to a safe location. If the data cannot be accessed this way, the file system may be corrupted or cannot be recognized in Linux.
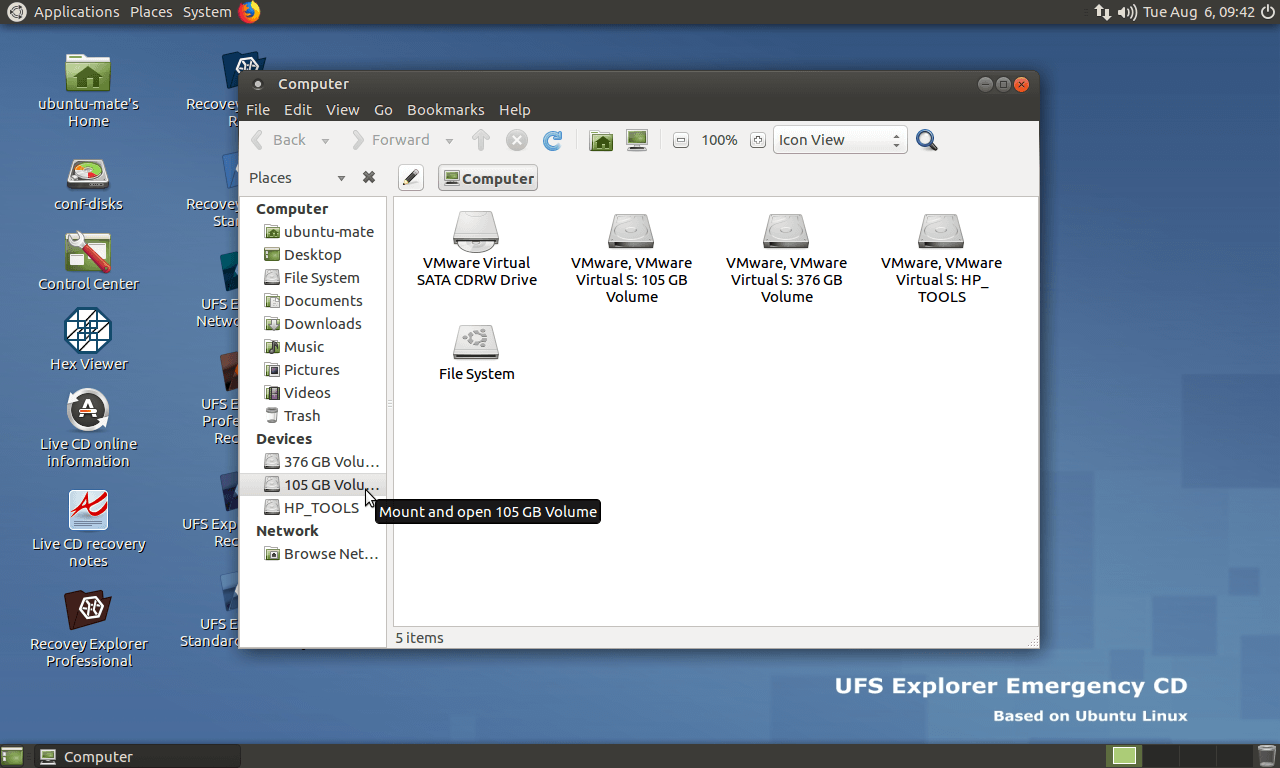
Warning: Mounting and accessing the drive directly in the operating system may lead to data overwriting. If the lost data is of crucial importance or you are not sure you can do this properly, please, skip this step and proceed to the next one.
-
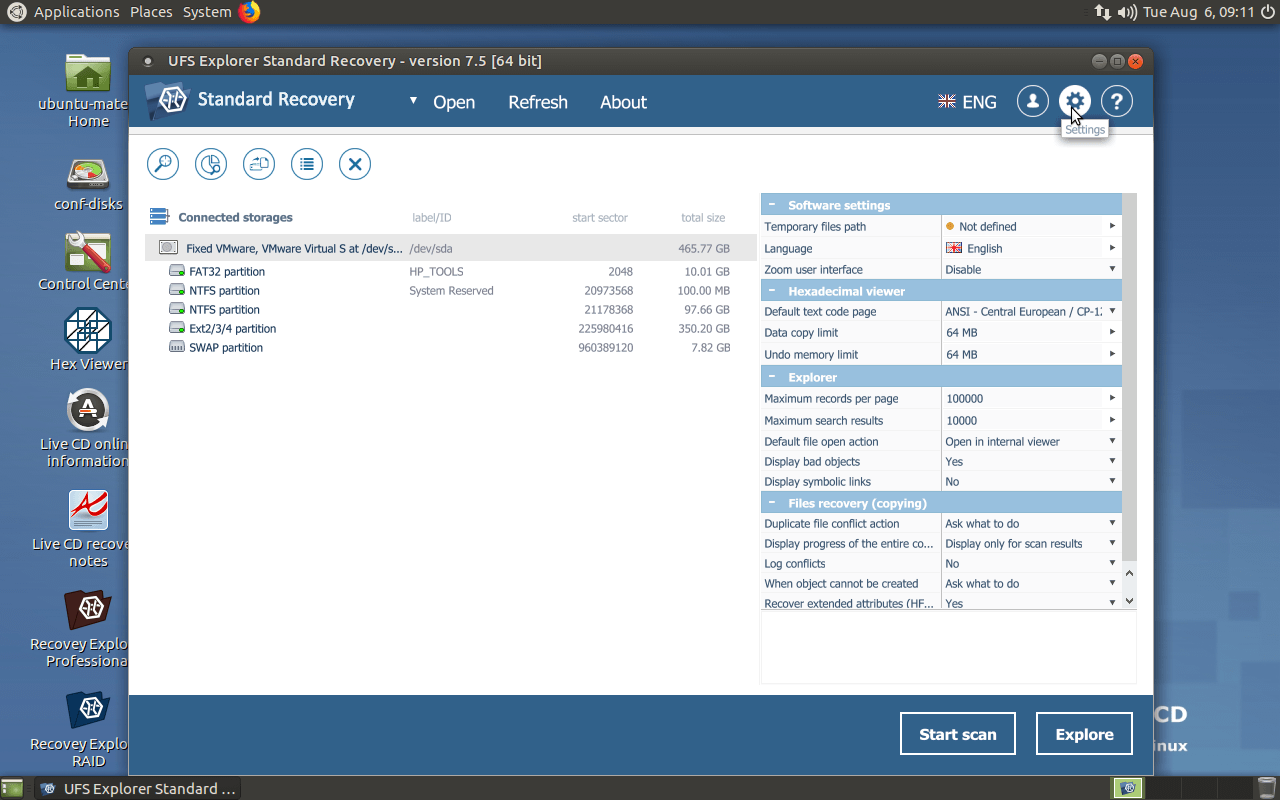
Launch UFS Explorer Standard Recovery from the desktop and, if needed, change its parameters in the settings pane.
Note: To use the functionality of the program on UFS Explorer Backup and Emergency Recovery CD to its fullest extent, a Linux version of the license is required.
-
Find your drive among the options under connected storages in the left pane and scan it for lost files with the help of the corresponding button below or in the toolbar above the list of storages, or the analogous storage context menu option.
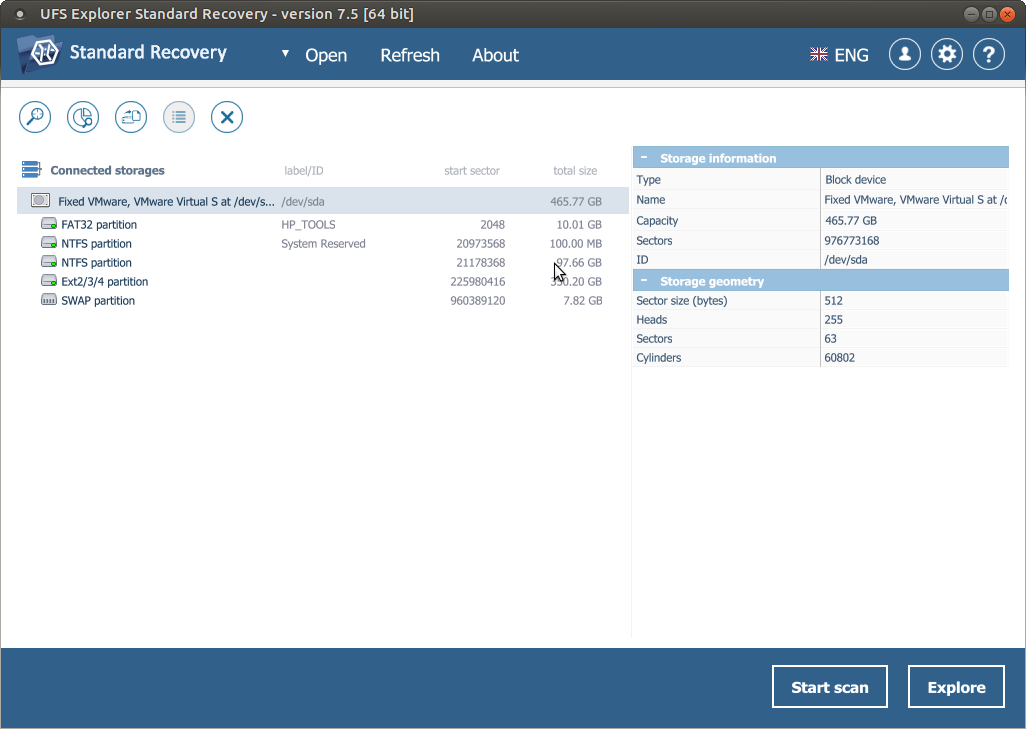
Note: If the drive is missing from the list of devices, you are likely to have a physically flawed drive/enclosure that should be handled only by a qualified data recovery specialist.
-
Specify the desired scan parameters. If you are sure which file system you are dealing with, deselect the remaining ones to speed up the procedure. After that, click "Start scan" and wait for the process to complete.
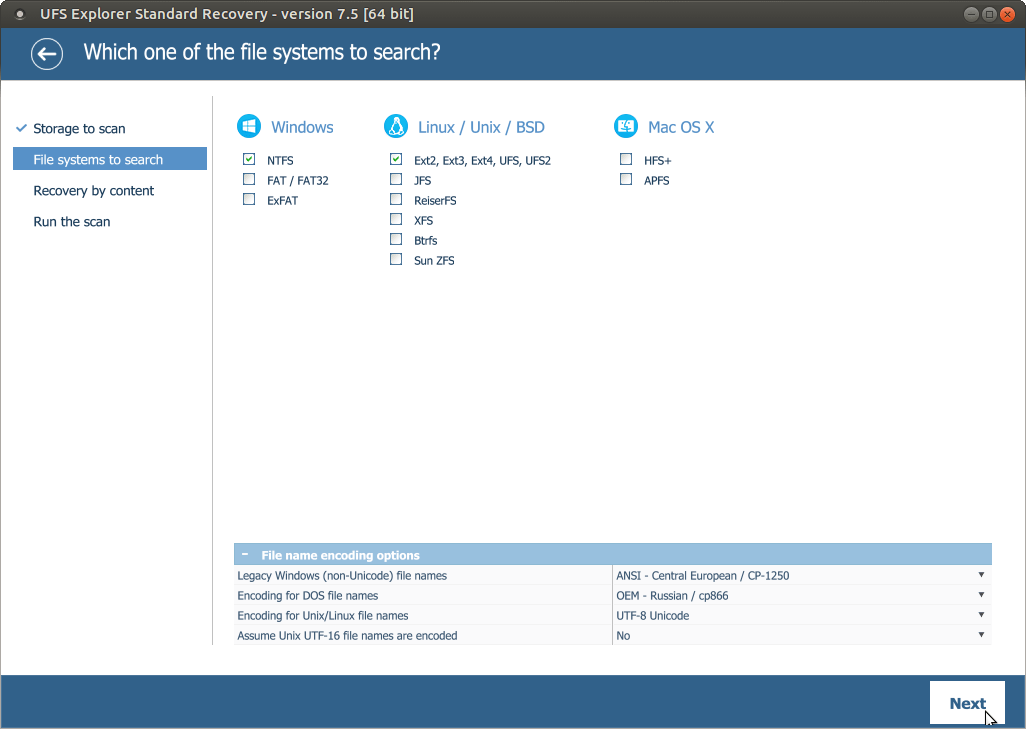
Hint: For more scan configuration instructions, please refer to the article dedicated to scanning a drive with UFS Explorer.
-
Inspect the file system reconstructed by the program: you may sort the files by name, date, type, employ quick or advanced search and preview images, videos, audio files or PDF documents. After that, click "Define selection" and pick out the items you want to copy by putting ticks next to them.
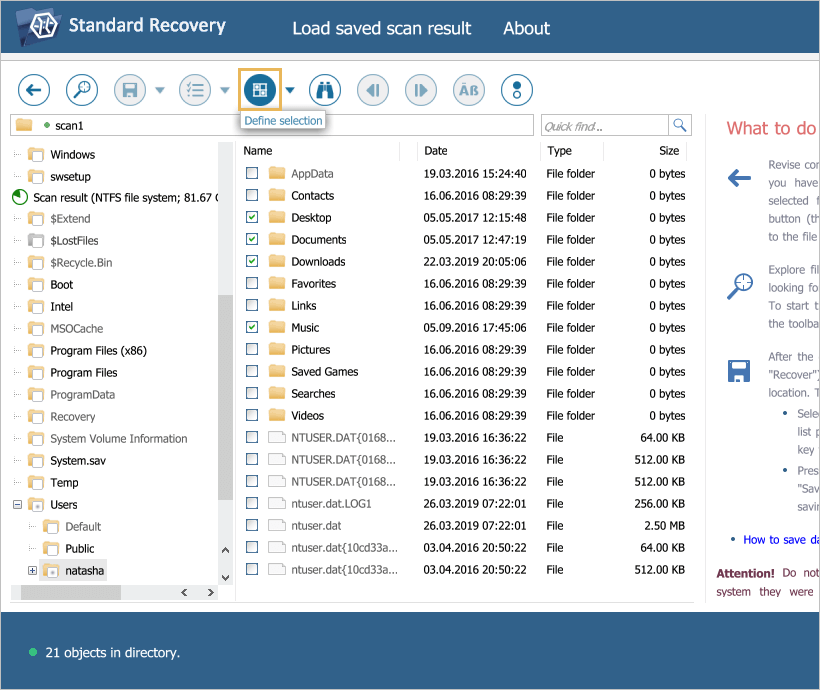
Hint: Please find more instructions on how to work with found files and folders in the article Evaluation and saving the results of data recovery.
-
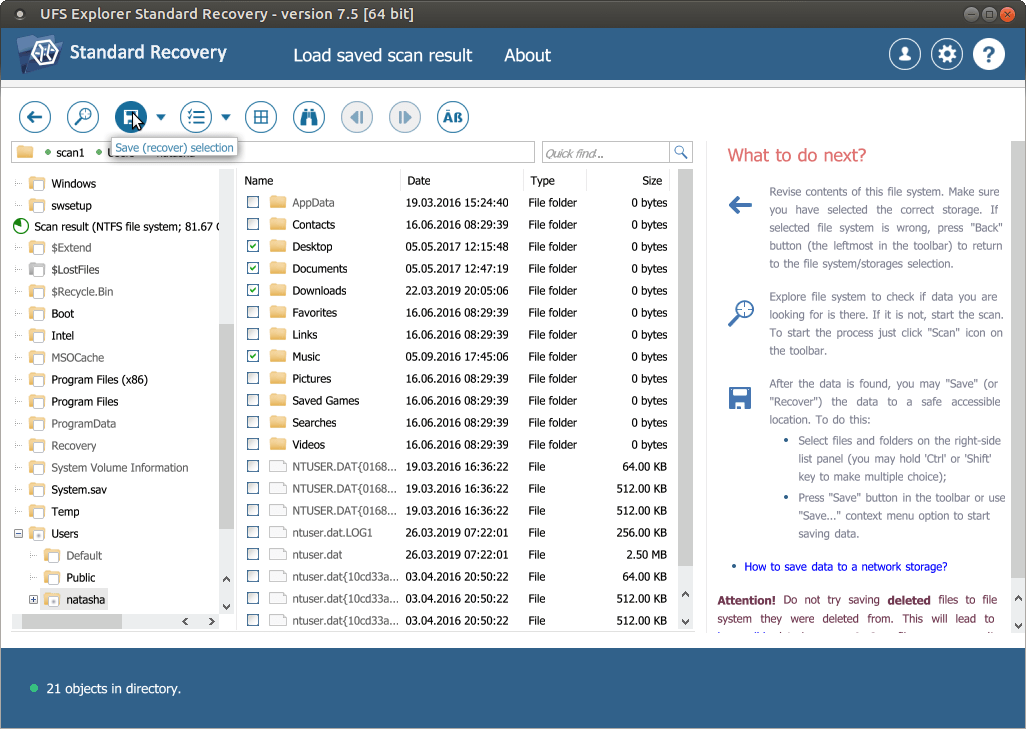
Choose a destination folder for these items. See to it that you are not trying to copy them to the same storage from which they are being restored as this can cause irreversible data loss.
Last update: June 24, 2024