How to recover data from a defective drive
If a hard disk drive has been affected by some sort of physical damage, every extra operation performed with the failing device may lead to the further degradation of its state. Also, such a drive may be unstable or contain multiple bad sectors that cannot be read out in a normal way, making the process stumble every time and causing the rotational scoring of defects. This approach is likely to result in the total breakdown of the storage medium with quite low chances to recover the needed information. In view of this, it is critically important to reduce the number of references to the faulty storage and the time spent on the extraction of valuable data.
With UFS Explorer, it is entirely possible to minimize the wear and tear of drives and perform the least "intrusive" retrieval of the necessary data. This guide will explain how you can properly handle defective storages by means of this software. Also, the procedure is briefly reviewed in the following video guide:
Disabling the default disk polling procedure
The disk polling procedure is performed by the system to "question" the drive whether it is ready and search for all supported partition tables, RAID metadata, and file systems. Such an operation does not imply any control over the connection timeout and may "hang" if encountered a defective block or series of defects. Instead of connecting the drive and running the software "by default", it is recommended to deactivate disk polling first using one of the following methods:
Method 1
-
Install and run UFS Explorer.
Hint: If you have any difficulties with the installation of the utility, please refer to the installation manual for UFS Explorer.
-
Connect the drive after the program has been started.
Hint: If you need to attach an internal hard drive from another computer, you can plug the disk into the motherboard of your PC or сonnect the drive externally with a USB to SATA/IDE adapter using the given instructions.
-
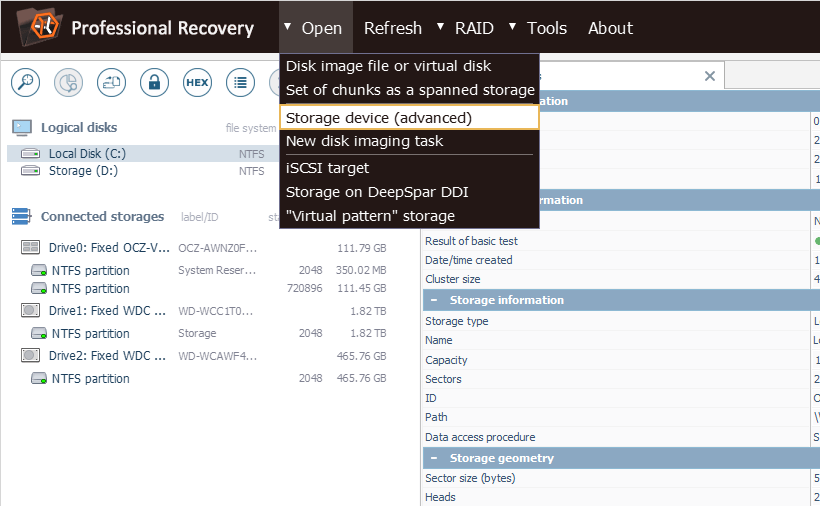
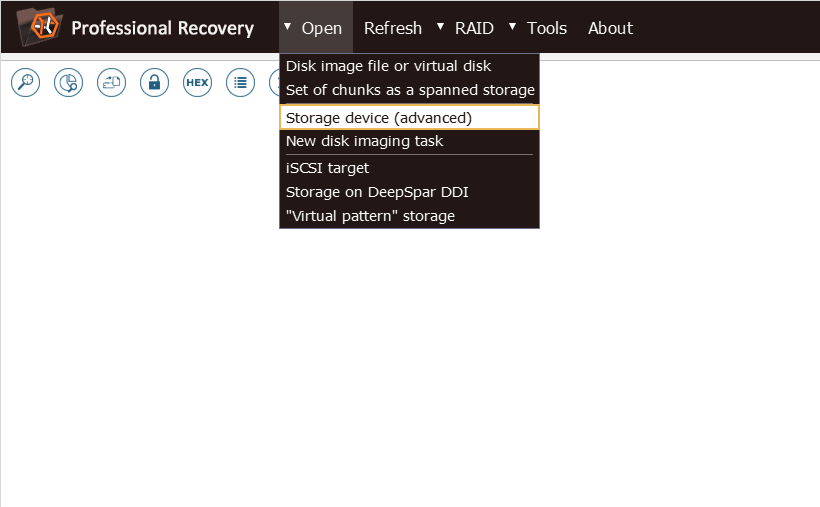
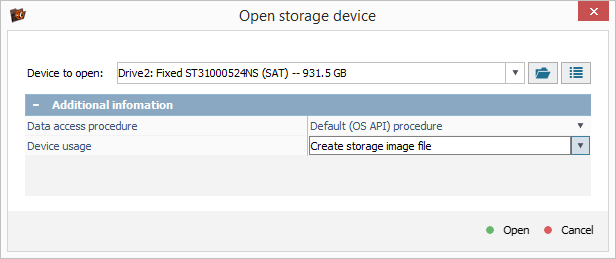
Use the "Storage device (advanced)" option from the main menu to open the drive in the software interface.
Method 2
-
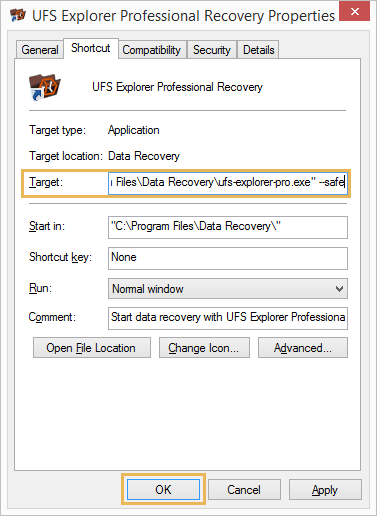
Install UFS Explorer.
-
Open the software "Properties", insert the "--safe" key into the "Target field" and click "OK".
-
Launch the software.
-
Use the "Storage device (advanced)" option from the main menu to open the drive in the software interface.
Creating a disk image in the "controlled" mode
Unlike with normally working HDDs, saving a disk image is a vital step in the process of data recovery from a defective drive. Moreover, owing to the peculiarities of such drives, the imaging procedure substantially differs from conventional data transfer to another storage medium. Having opened the storage in the program with the "Storage device (advanced)" option, depending on the further scenario, you can choose one of the following methods:
Method 1 – Creating a simple disk image
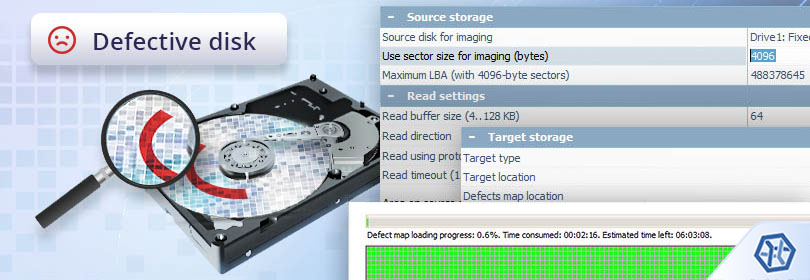
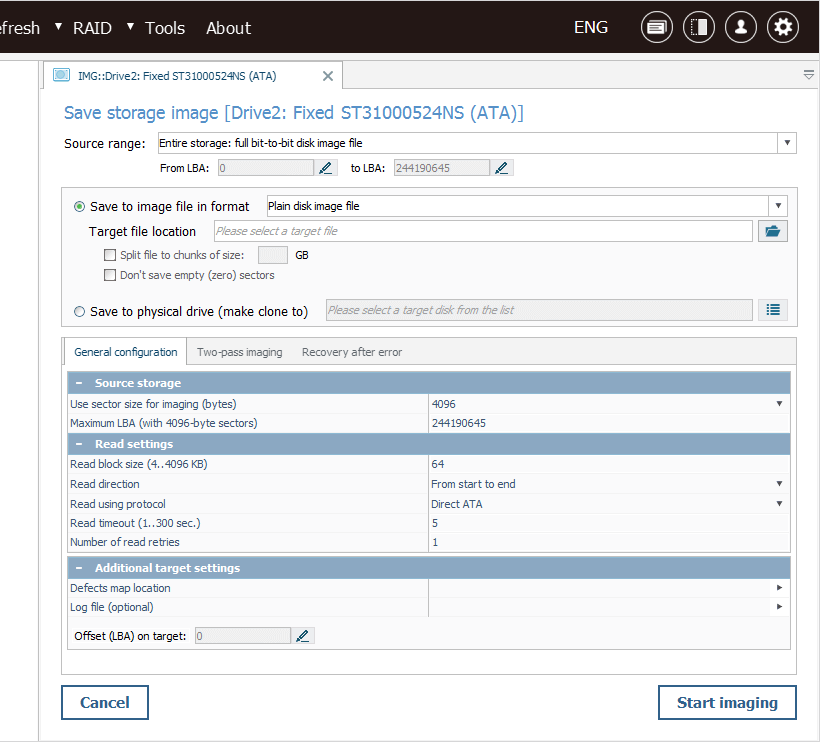
The "Create storage image file" option will immediately get you right to the dialog for creating a disk image, without additional access to the storage, and is recommended when an image of the whole drive is required. If possible, the procedure should be performed after the comprehensive analysis of defects allocation which will allow choosing the most optimal configurations. The process itself is described in detail in How to create an image of a defective drive.
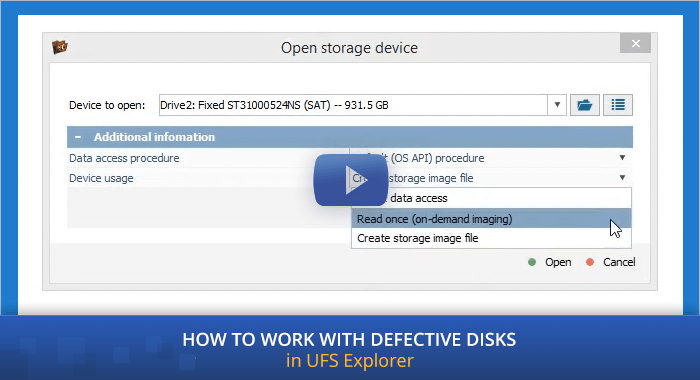
Method 2 – On-demand disk imaging
The "Read once (on-demand imaging)" option can be chosen when time is of the essence and only a small part of data from the drive is needed. In this case, the program will perform one-time reading of the "requested" storage blocks and immediately transfer the processed data to a sparse image file. The following reads of these blocks will be performed from the disk image.

In addition to that, it is recommended to choose reading in the "direct ATA" or "direct SCSI" mode which provides the possibility to gain control over reading errors and reduce the risk of "hanging" of the polling procedure (as it may also be caused by the specifics of the bridge, failures in the disk microprogram, and other factors). If a failure occurs during or after polling, work with the same image can be resumed by opening the drive again and using the existing image file. This will prevent extra requests to the data that has already been read out.
-
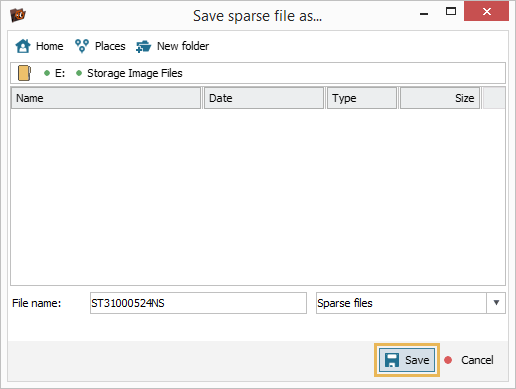
Provide a path and a file name for the SDLSparse disk image file. Click "Save" to proceed.
-
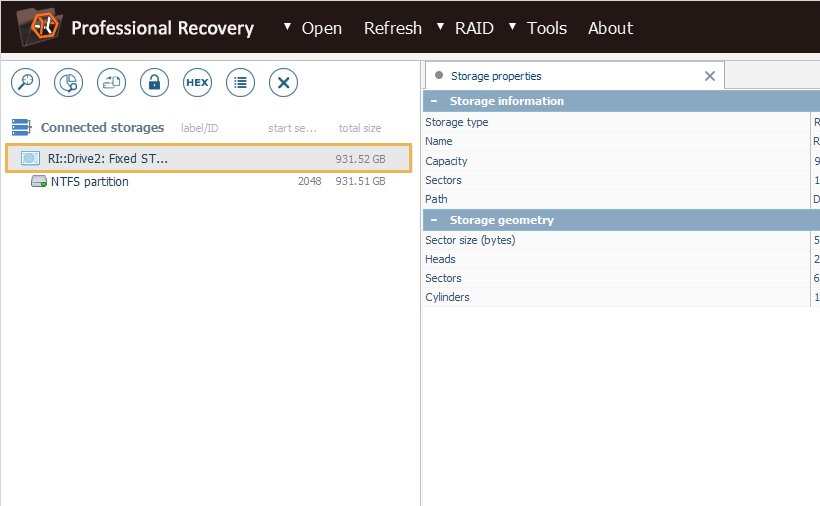
After completion of the polling procedure, the software will display the drive in the interface with the recognized partitions. Select the needed one to get access to its content. If you cannot see it in the list of storages, use the recommendations set out in the If the file system has not been found section.
-
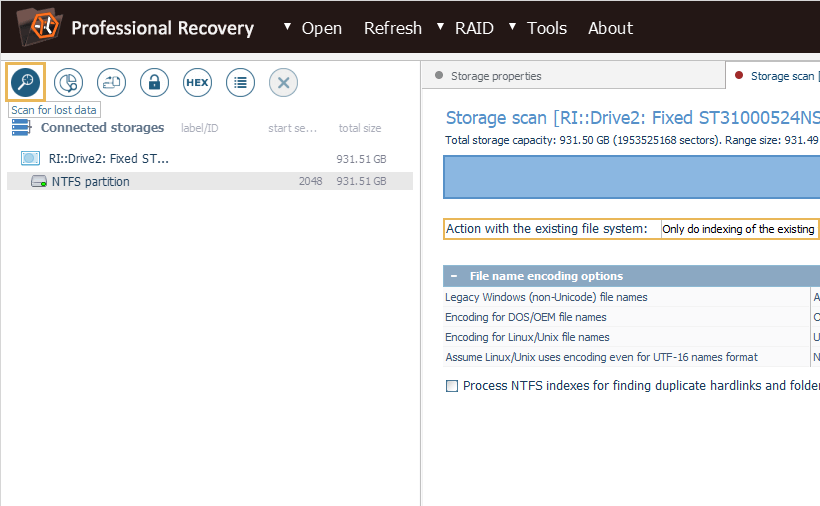
If the file system has a branched structure and you need to look for the necessary files, file system indexing can be performed. For this choose the "Scan for lost data tool" tool and select the "Only do indexing of the existing file system" option. Otherwise, just skip this step.
-
Decide on the files you need and save their content to a disk image:
-
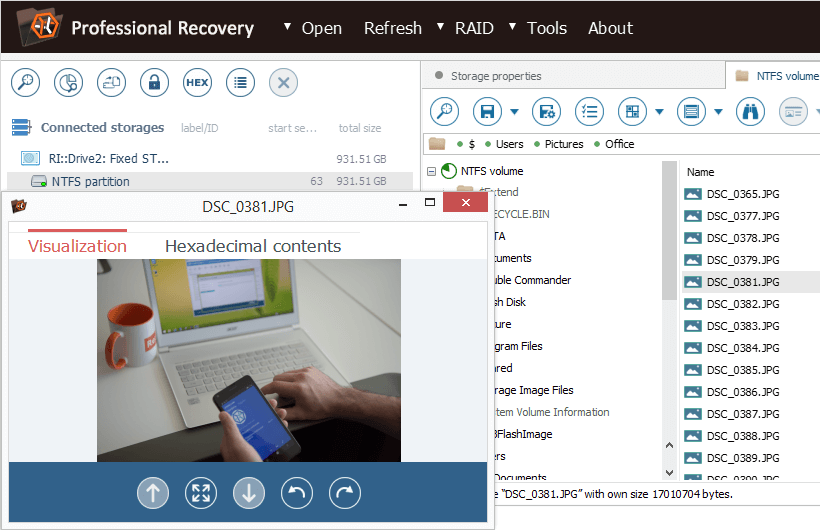
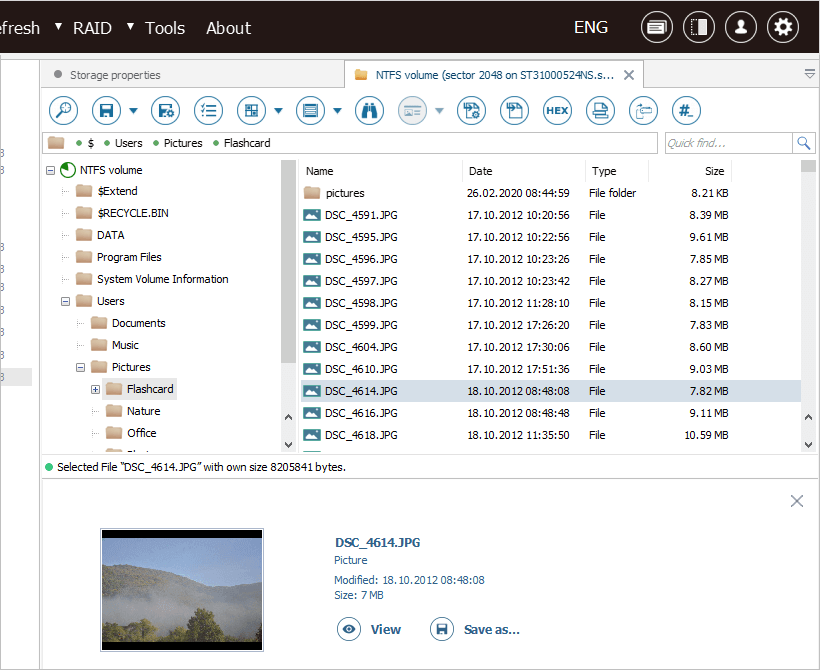
A. If only a few files are required that are not likely to be located within the defective area, you can access them directly in the file system and the software will transfer their content to the sparse image right away.
-
B. If a big portion of data is needed, it is possible to select the all the wanted items and create a disk image from their content:
-
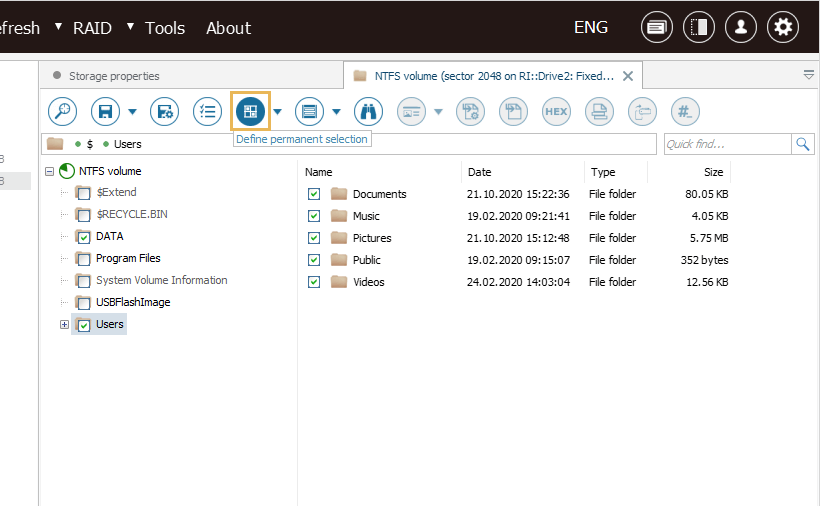
Choose "Define permanent selection" and pick out the desired folders and files.
-
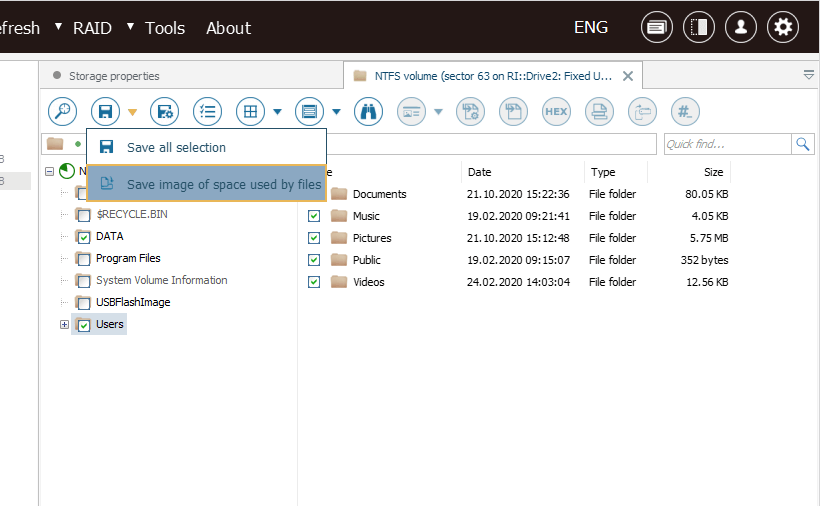
Get the "Save image of space used by files" tool to open a dialog for the controlled imaging procedure.
-
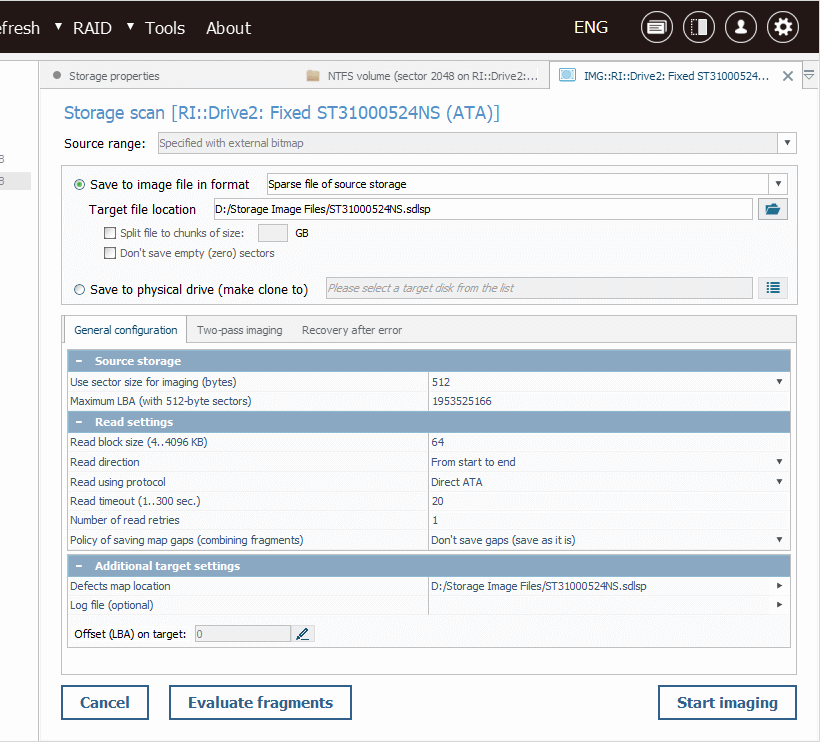
The image will be created on the basis of the generated file location map. The software will perform reading in blocks of a fixed size with the "merging" of ranges in cases of file fragmentation and cross-fragmentation. Other parameters for imaging can be adjusted as described in How to create an image of a defective drive.
-
-
C. When all the files are needed, but their volume on the file system is significantly less than the size of the storage, for most supported file systems you can create an image from the occupied file system space which won’t include the "free space" areas and the data of deleted files. For this:
-
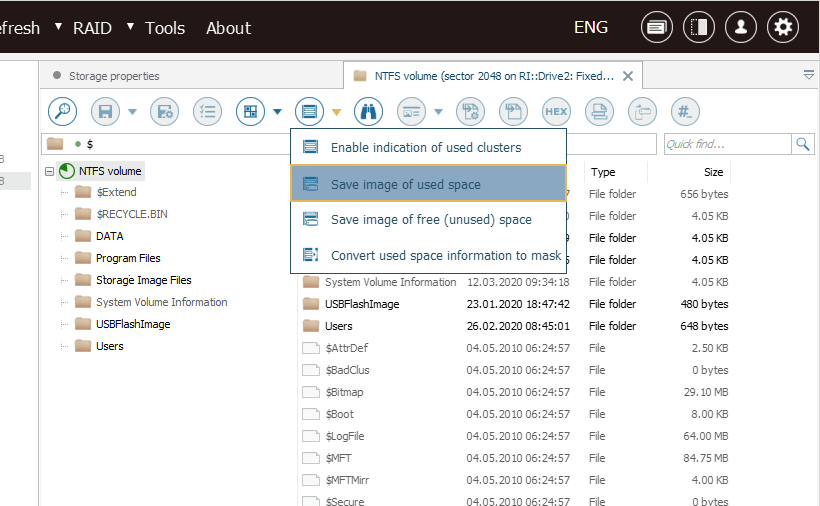
Choose the "Save image of used space" option to create a map of occupied file system blocks as specified in the file system metadata.
-
After that, a dialog for the controlled imaging procedure will open in which the "source range" will be substituted by the generated map. Other settings for imaging can be specified as described in How to create an image of a defective drive.
-
-
-
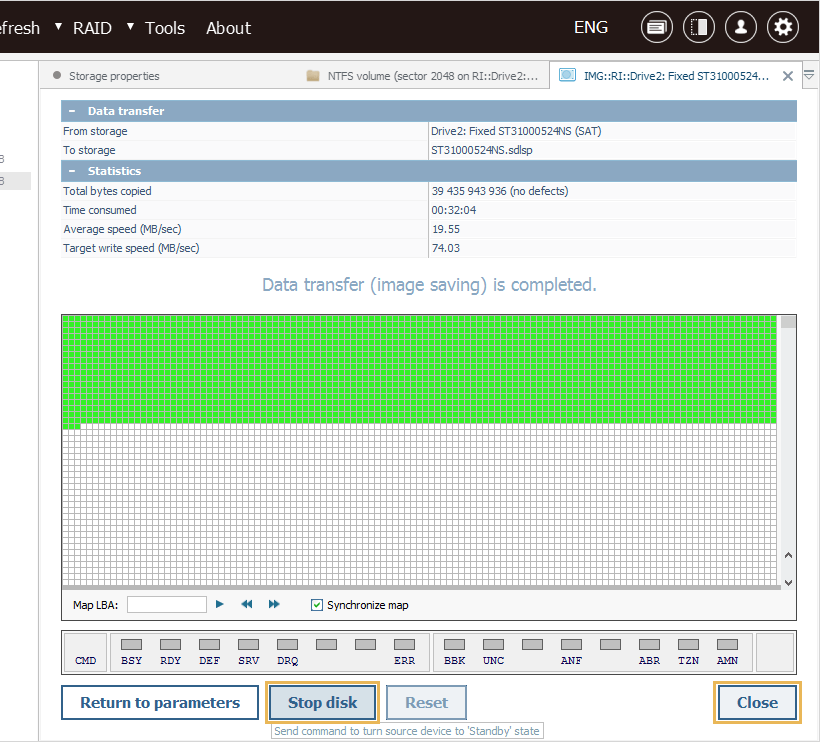
After the imaging procedure is completed, if possible, disable the drive using the "Stop device" option and close the problem storage in the program.
-
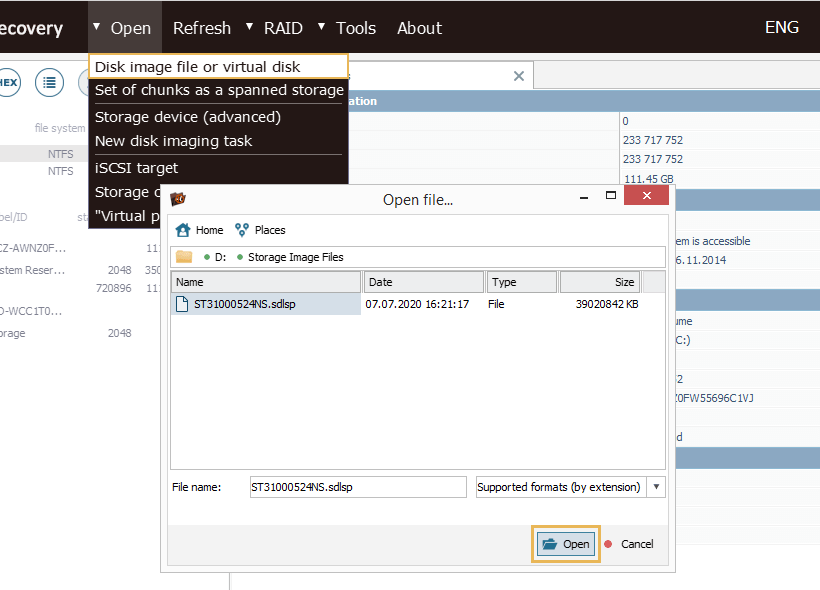
Open the created disk image using the "Disk image file or virtual disk" option in the main menu and perform further operations on it instead of the original storage. If you need to save more files, you can resume the work by repeating the steps described above, but it is strongly recommended using an existing image file instead of creating a new one.
If the file system has not been found (the partition table has been damaged):
-
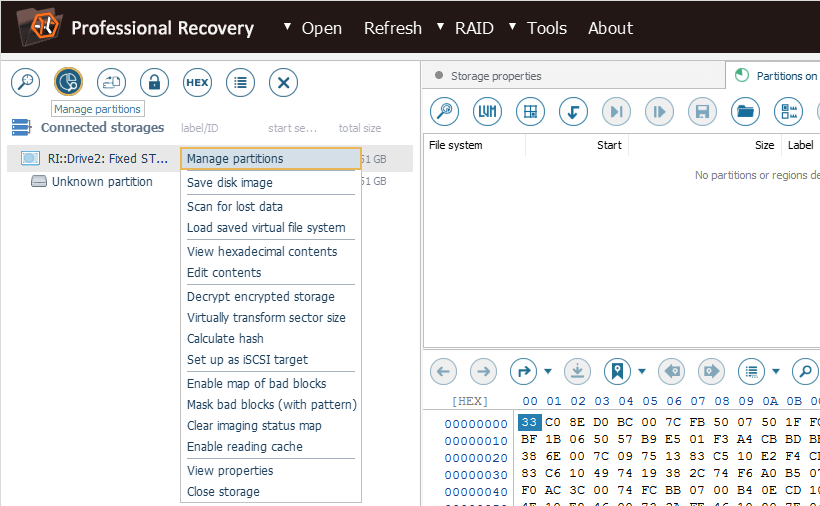
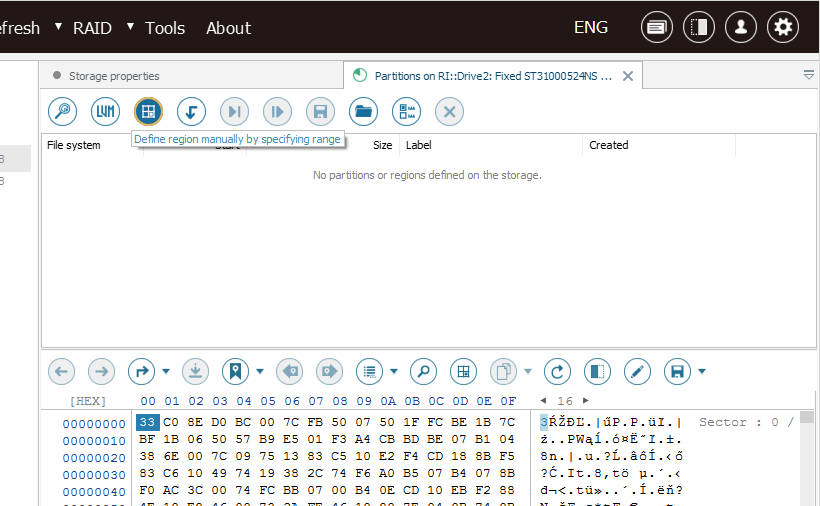
If the file system wasn’t located by the software, select the drive in the list of storages and choose "Manage partitions" in its context menu to open the Partition Manager.
-
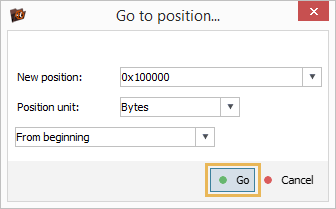
Check the presence of a file system by performing one-time transitions to the "standard" offsets, such as: 0x7e00, 0x100000, 0x5000, 0xC805000, and others.
-
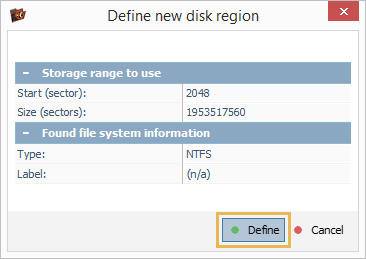
If the file system was found in the process, define the partition manually at the given offset.
-
Check the end of the partition for the probability of having a file system after it.
-
If not, start the scanning procedure with the enabled "jumps" mode. However, this kind of scanning should be performed under supervision, with the prevention of a significant load.
-
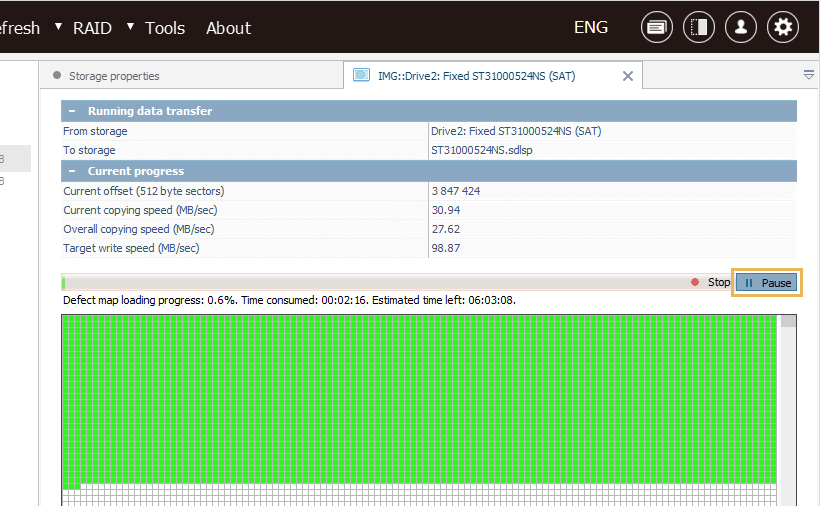
If the partition still cannot be found, it is recommended to save a full image of this storage. If the image is saved to the same sparse file, the imaging procedure takes into account the ranges that have already been saved during disk polling and partition search.
Reduction of the load on the drive
To save the operating resources of the drive and extend its lifespan, the following measures can be adopted:
-
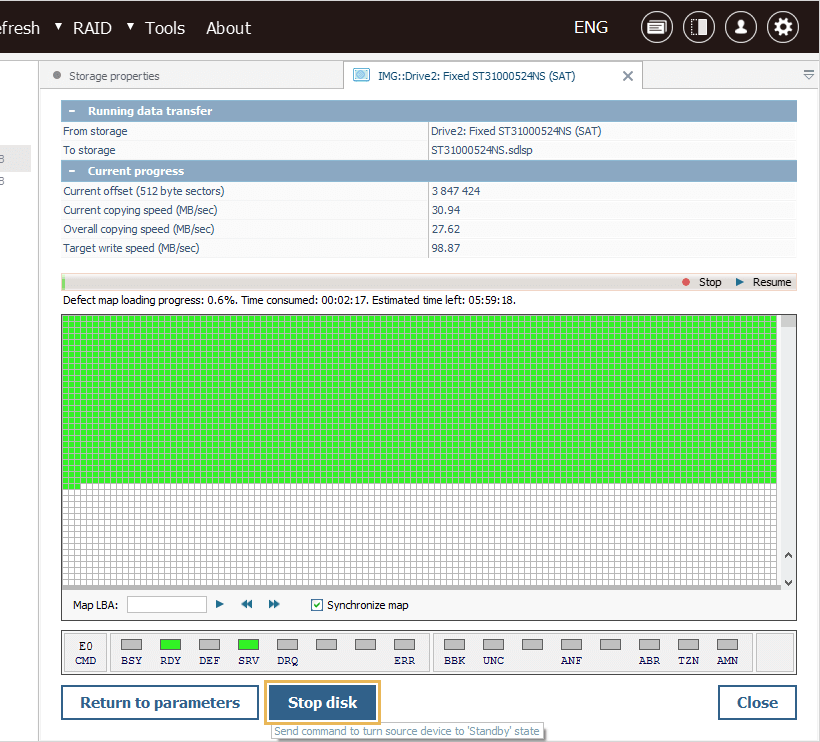
If the imaging process takes a long time, you can prevent overheating of the storage device by pausing the procedure from time to time and pressing the "Stop disk" button. This will put the drive in a "stand by" mode (with the spindle stopping and heads parking) and reduce its working temperature.
-
If there is a break during work or the work is performed with the saved scan result, it is also recommended to "turn off" the defective drive using the "Stop device" function.
Last update: April 15, 2022