How to recover data from WD My Cloud Home
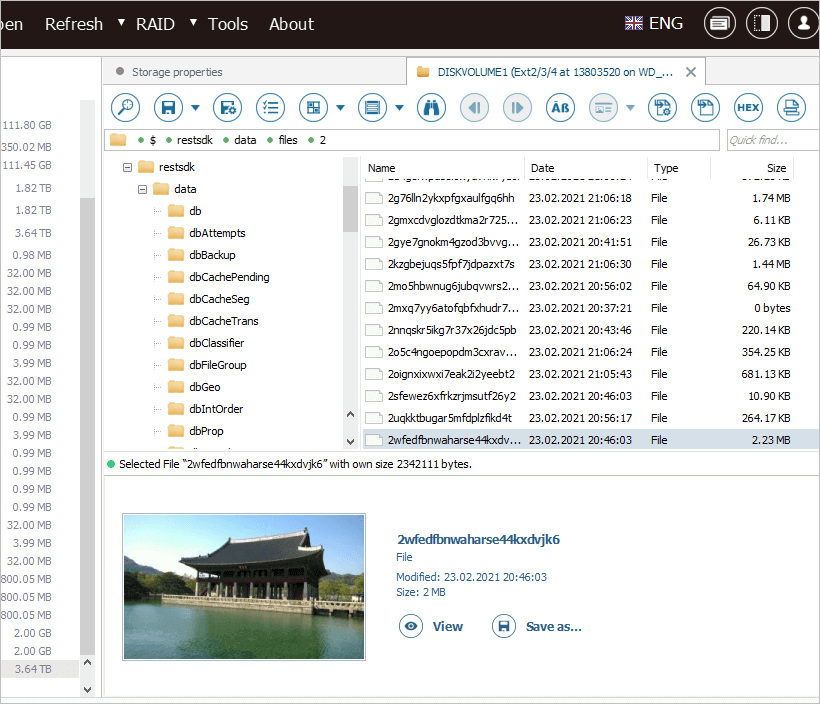
Though at first sight WD My Cloud Home and WD My Cloud Home Duo may look like typical NAS units based on the Ext4 file system, the methods employed to store data on them have their own peculiarities that must be considered when it comes to the recovery of lost files. Instead of using the file names and directory structures defined by the user, system algorithms create their own ones that get actually written to the storage. These names resemble arbitrary character sequences and are referred to as "content IDs" whereas the meaningful file names are specified along with them in a special "Files" table within an index database. In addition, this table keeps a unique ID for each file, information about the folder it belongs to and some other metadata. This database is required for presenting the file system in a comprehensible form rather than its technical layout.
UFS Explorer Professional Recovery identifies the volumes of WD My Cloud Home and WD My Cloud Home Duo, allows recovering the data lost from them and transforms the obtained file system in a usable form relying on the above-mentioned index database. Follow the provided instruction to learn how you can utilize this software tool to perform the recovery procedure.
Hint: Alternatively, such volumes can be processed using the Recovery Explorer Professional software product.
-
Remove the drives from your WD My Cloud Home.
Shut down the NAS unit, take it apart and carefully extract the drive(s) residing in it. As WD My Cloud Home models are not meant to be routinely opened by the user, this manipulation may require certain technical skills. Please refer to the support documentation for the device if you are not sure how to perform it correctly.
-
Connect the removed drive(s) to the computer.
Attach the drive(s) taken out from the enclosure to the PC. It is recommended to use the fastest interface available to you, for instance, SATA port(s) on the motherboard.
Hint: To learn how you can plug the disk into the motherboard of the computer or connect the drive externally using a USB to SATA/IDE adapter, please rely on the corresponding video instruction.
-
Install UFS Explorer Professional Recovery on the computer and launch the program.
Run the software with elevated privileges and, if necessary, modify its settings. The attached drive(s) will be displayed in the left pane of the main window. All the logical volumes will be listed under the physical devices.
Hint: If you have any difficulties with the installation of the utility, please refer to the installation manual for UFS Explorer Professional Recovery.
-
Find the WD My Cloud partition holding your data.
Scroll down the list of connected storages and find the Ext2/Ext3/Ext4 partition with a special "cloud" label – this is the one which keeps the user files and it is typically distinguished by the largest size.
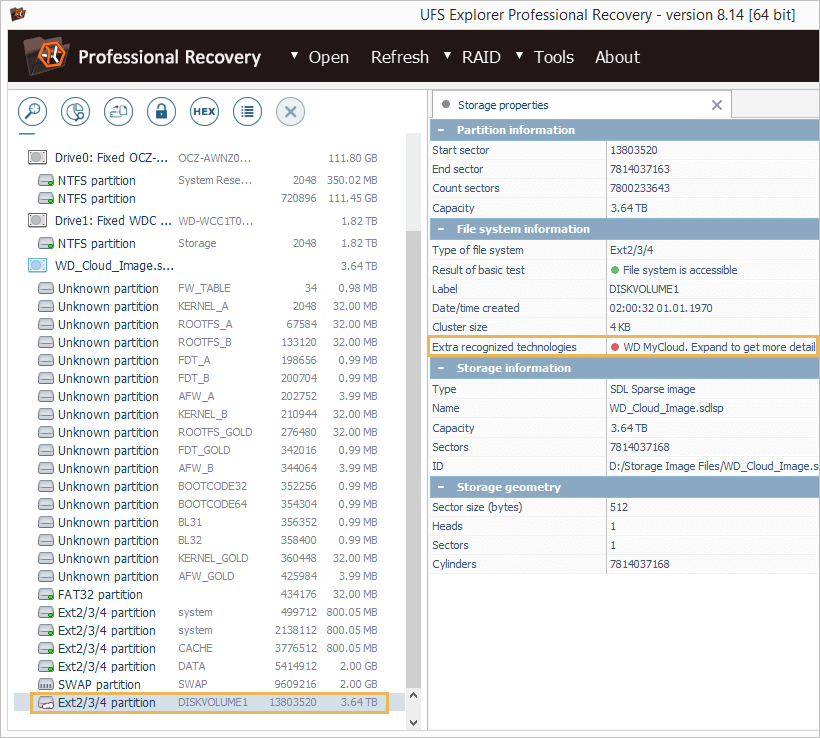
In case of WD My Cloud Home Duo, this partition will be located on the reconstructed complex storage (SPAN or RAID 0, depending on your configuration).
-
Give the software a command to find the respective index database and interpret the file system.
To view the content of this volume with the correct file names and folders structure, you will need to map it using the corresponding database file.
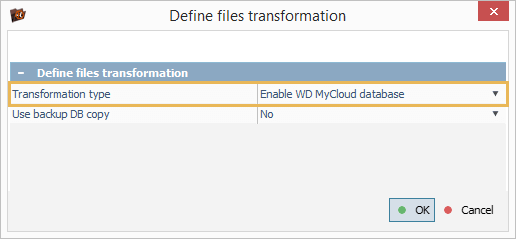
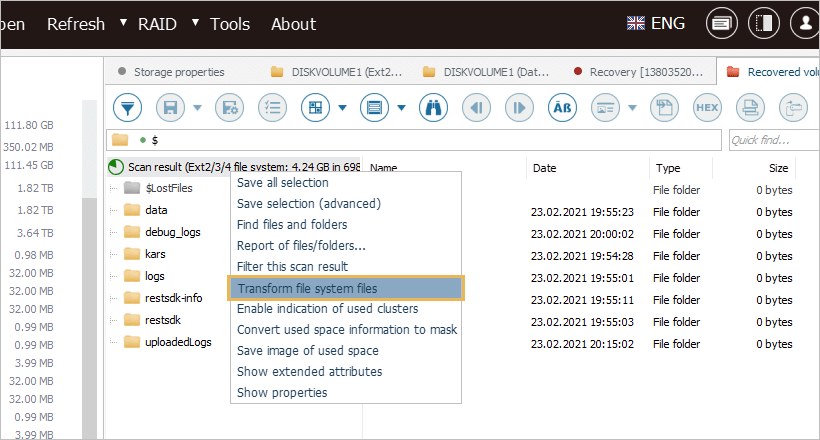
For this, open the partition context menu and choose the "Transform file system files" option.
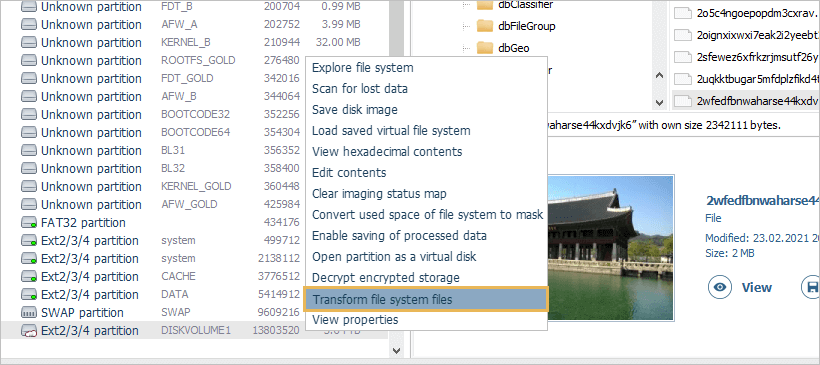
Ensure that "Transformation type" is configured as "Enable WD My Cloud Database" and hit "OK".
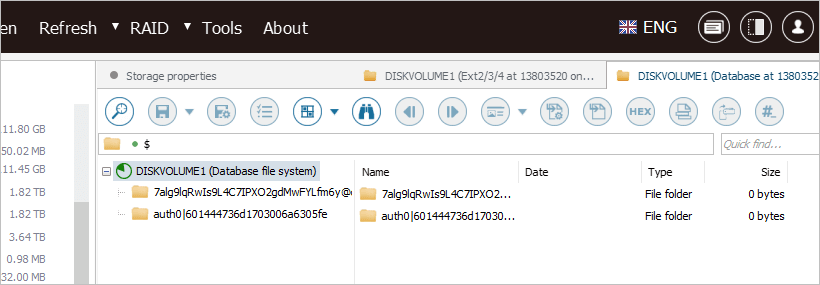
The application will automatically locate the database file and perform the transformation on the basis of it.
-
Access the transformed storage or scan it for the missing data.
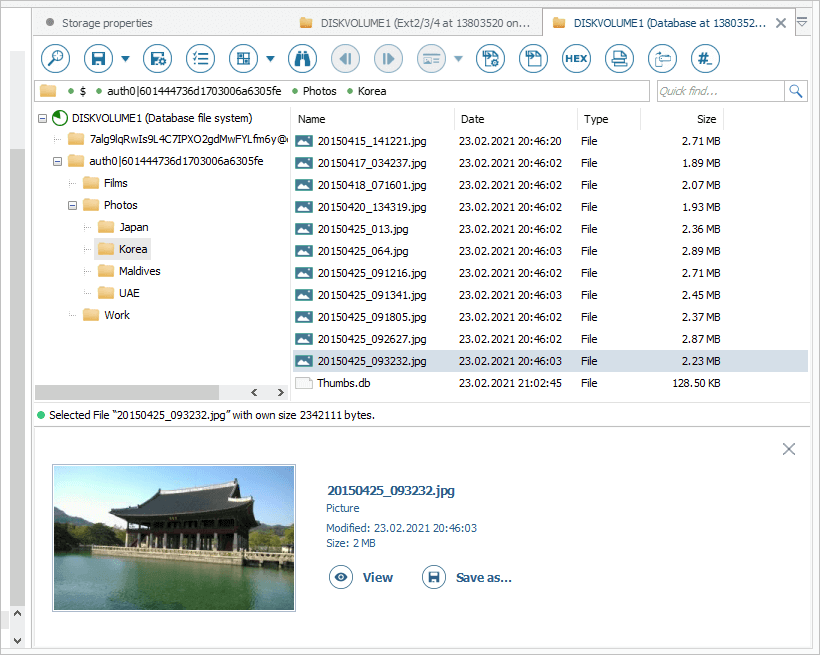
After that, the content present in the volume can be explored normally in the software interface.
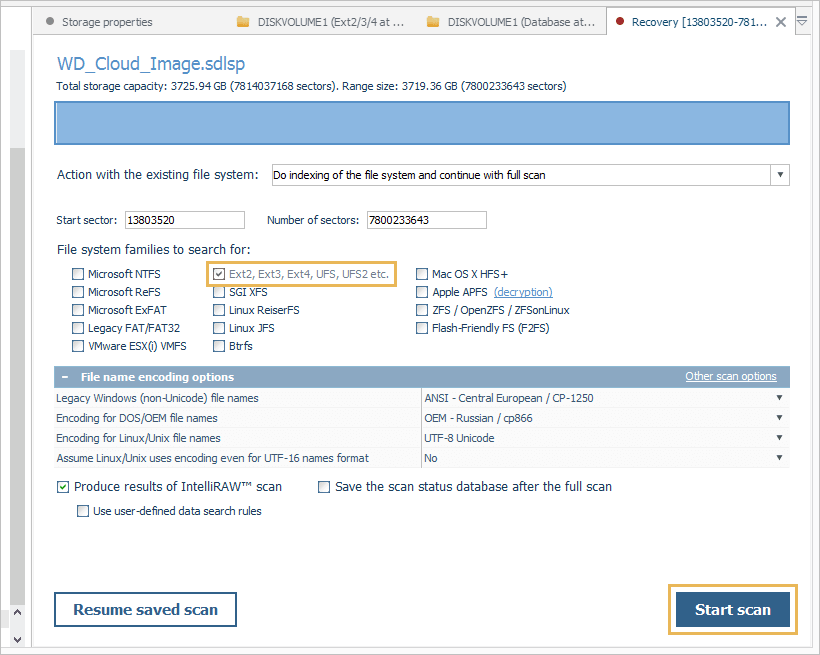
If you need to regain deleted or lost files, launch a scanning operation: select the respective tool in the toolbar, deselect all file systems except Ext and press "Start scan".
-
Repeat the transformation step for the result of scan.
Wait until the program finishes the scanning process.
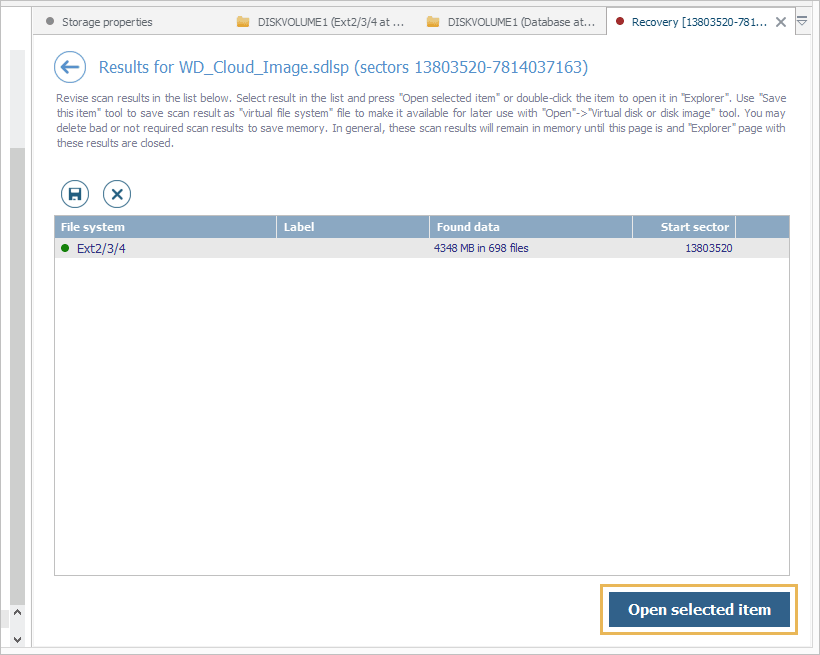
After that, open the obtained file system item, select the scan result presented in Explorer and choose the "Transform file system files" option in its context menu. Verify the "Transformation type" and click "OK".
-
Choose the recovered items you need and save them to another
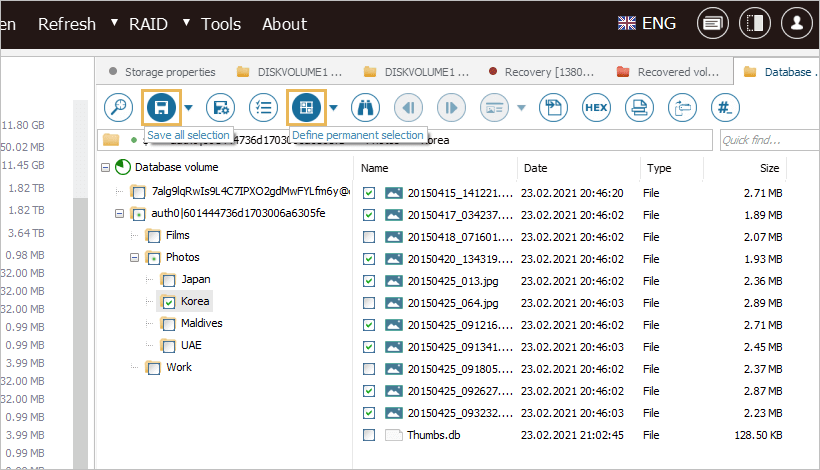
Examine the restored file system. Find the necessary folders/files, click "Define selection", check them off and press the "Save selection" button.
In the opened dialog provide any safe local or network folder which is not found on the source drives.

Hint: If you are going to save the recovered data to a network storage, please check the provided guide.
Last update: October 08, 2021