How to recover data from Drobo with enabled mSATA cache
Drobo is well known for making data storage products that are easy-to-use, and, at the same time, able to boast a vast choice of additional features. Along with the proprietary BeyondRAID technology, which provides a high level of data protection and simplifies the overall storage maintenance, some models of Drobo also allow taking advantage of increased performance thanks to Drobo Accelerator Cache. However, as most good things, advanced functionality often comes with a price. And, in this case, it is the risk to lose important files when things go wrong for whatever reason. That is why it might be helpful to look more closely at Drobo Accelerator Cache and learn how it can be handled in the context of data recovery from Drobo.
What is Drobo Accelerator Cache?
Though not unique as such, but still a very unusual feature of some Drobos is the presence of a small extra slot on the underside of the appliance. This slot is referred to as Drobo Accelerator Bay and intended for an optional SSD module in the mSATA form factor. When added to the setup, the module is used as a cache for frequently accessed data. The patented Drobo’s software determines which chunks on the main storage become "hot" and places them onto the mSATA drive to speed up their further reading. The entire technology goes by the name of Drobo Accelerator Cache, or simply hot data cache.
The model range equipped with the Drobo Accelerator Cache includes:
-
Drobo 5D, 5Dt, 5D3;
-
Drobo 5N, 5N2.
The feature is enabled automatically once the mSATA card is installed into the dedicated slot. The status of the cache then switches to "active" in the Drobo Dashboard software.
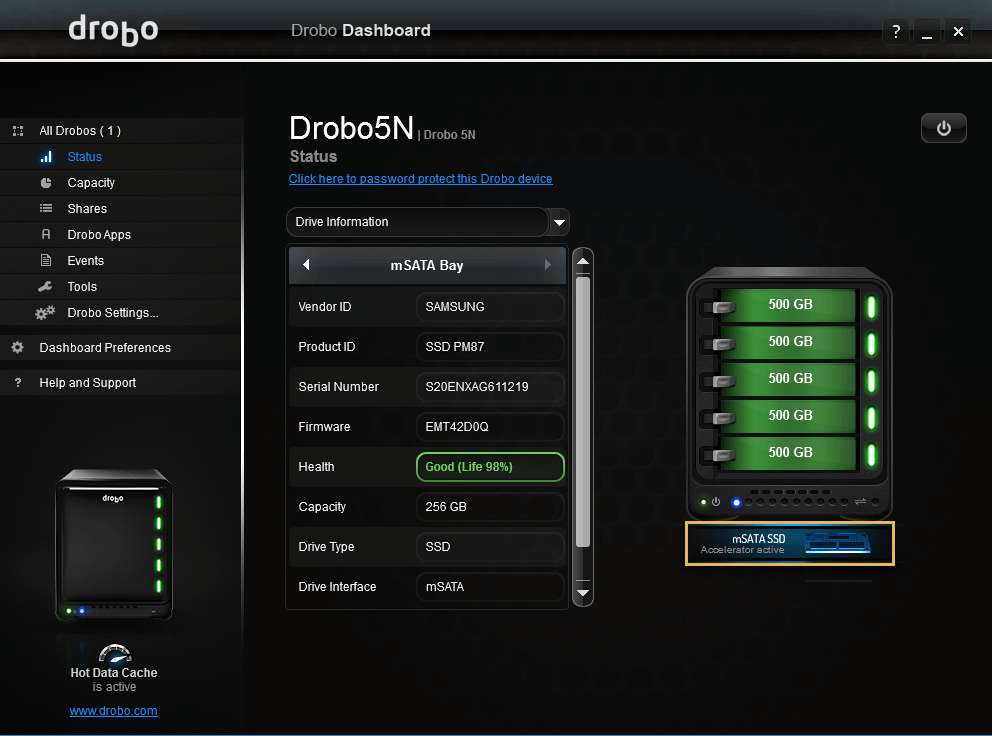
Under these circumstances, writes that are small and transactional in their nature go to the faster mSATA SSD. Therefore, when the system needs to access this data, it can promptly read it off this device.
As data is being read from the storage, Drobo optimizes its placement in the background. When read patterns change over time, Drobo migrates the chunks in and out of the mSATA drive, depending on the frequency of read requests.
Such an approach makes it possible to accelerate small random reads, while using more capacious drives from the primary BeyondRAID set for storing larger "cold" files.
The only way to disable Drobo Accelerator Cache is to power the unit off correctly and disconnect the mSATA module. The data from it is then transferred to the principal storage, and the appliance can be brought back to its normal operation.
Data recovery specifics associated with this technology
The mSATA SSD is not used as a component of the main BeyondRAID drives set and, as a rule, doesn't take part in its recovery. Despite this fact, as long as it is active, the cache still stores some important data, like portions of file system metadata or small user's files. As a safeguarding mechanism against sudden power cuts, Drobo relies on an internal battery, which is able to keep it running long enough to flush this data to the primary storage. Yet, any mishap caused by an improper NAS shutdown, malfunction or sudden removal of the mSATA SSD, let alone physical issues with the unit itself, may prevent it from getting to the array. With parts of its data remaining solely in the cache, the BeyondRAID volume will lose its integrity and won't be read out completely even after its reconstruction. Such a problem adds another layer of complexity to the overall Drobo recovery process addressed in a separate guide.
Starting from version 9.14, UFS Explorer Professional Recovery offers the support for Drobo Accelerator Cache. The software is able to recognize the Drobo cache partition and allows applying the cached data to the assembled Drobo BeyondRAID volume for further access or data recovery manipulations. This also creates an opportunity to use the cache in an effort to restore the files affected by defective blocks or in case of certain types of drive failures. In the latter instances, the cache may not only be helpful in the BeyondRAID reconstruction, but also improve the chances for successful results delivered by the method of recovery by known content.
How to recover data from Drobo with enabled Accelerator Cache
To restore data from Drobo with enabled Accelerator Cache, you can employ UFS Explorer Professional Recovery as per the following instruction:
-
Remove the mSATA card from the Accelerator Bay of your Drobo.
Shut down the device and follow the removal procedure described in its user manual. You may need to put the chassis on its side in order to access the slot at the bottom.
-
Attach the mSATA card holding the Drobo Accelerator cache to the computer.
Connect this SSD along with the drives extracted from the primary bays of the appliance.
-
Install UFS Explorer Professional Recovery, if it hasn’t been installed yet, and run the program.
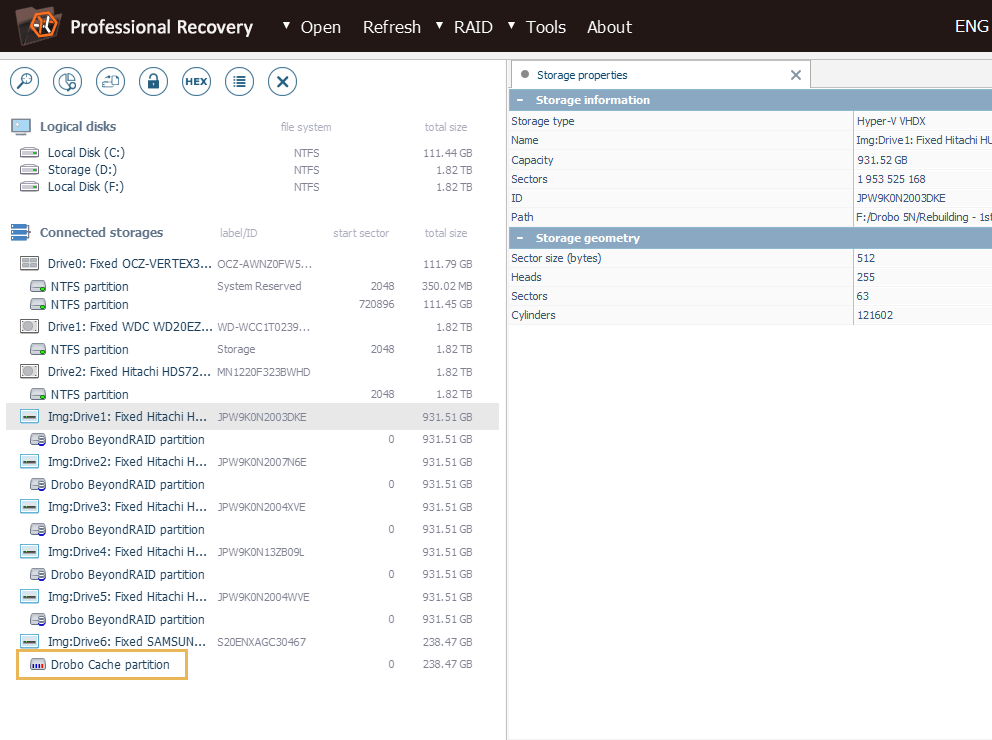
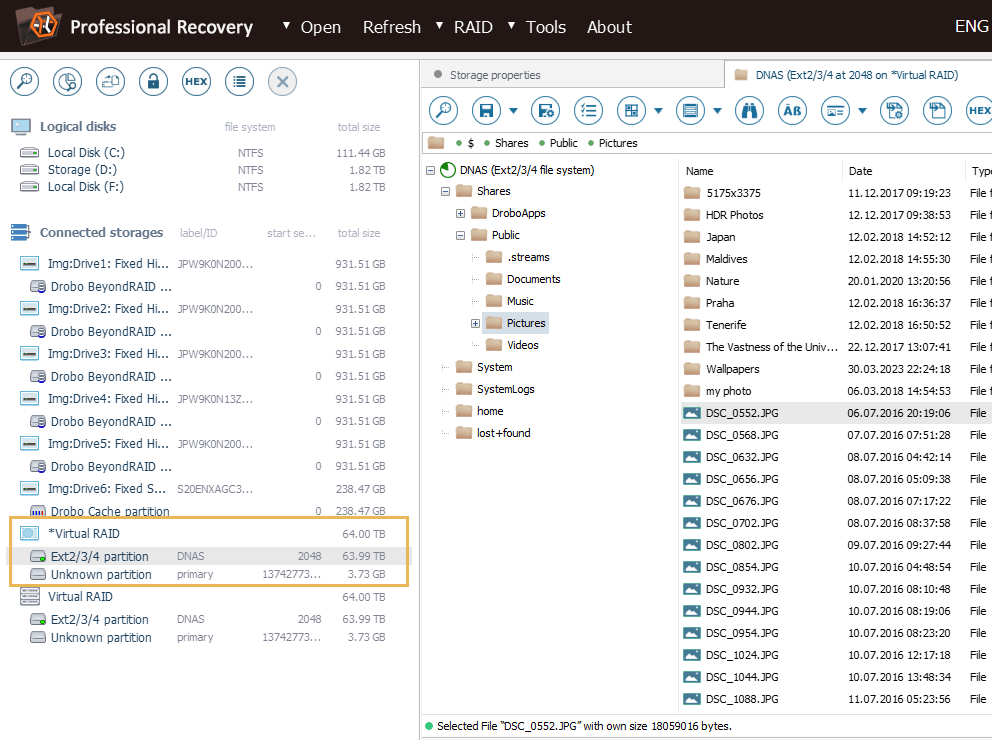
The software will detect the attached drives and list them in the left pane of the main screen. All of them but mSATA SSD will contain volumes recognized as "Drobo BeyondRAID". The mini flash storage, in its turn, will comprise a "Drobo cache" partition indicated with a special service partition icon.
Hint: If you have any difficulties with the installation of the utility, please refer to the installation manual for UFS Explorer Professional Recovery.
-
Use the primary Drobo drives to assemble BeyondRAID.
First off, it is necessary to build the BeyondRAID set from its member drives as explained in the Drobo recovery guide. Please mind that mSATA SSD doesn’t constitute a part of the array.
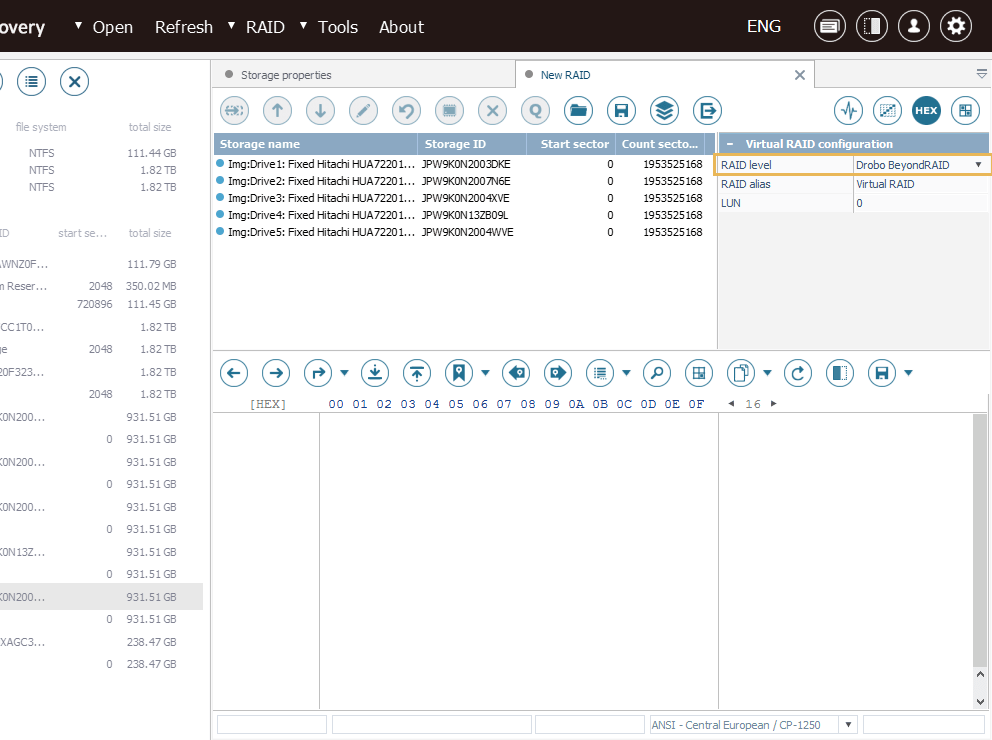
If the required BeyondRAID configuration has been lost, for instance, as a result of a reset to factory defaults, it may also be possible to retrieve it using Drobo BeyondRAID Assistant. Please also note that, due to the specifics of Drobo, the size of the obtained virtual storage is likely to be much larger than the total capacity of the drives it consists of.
-
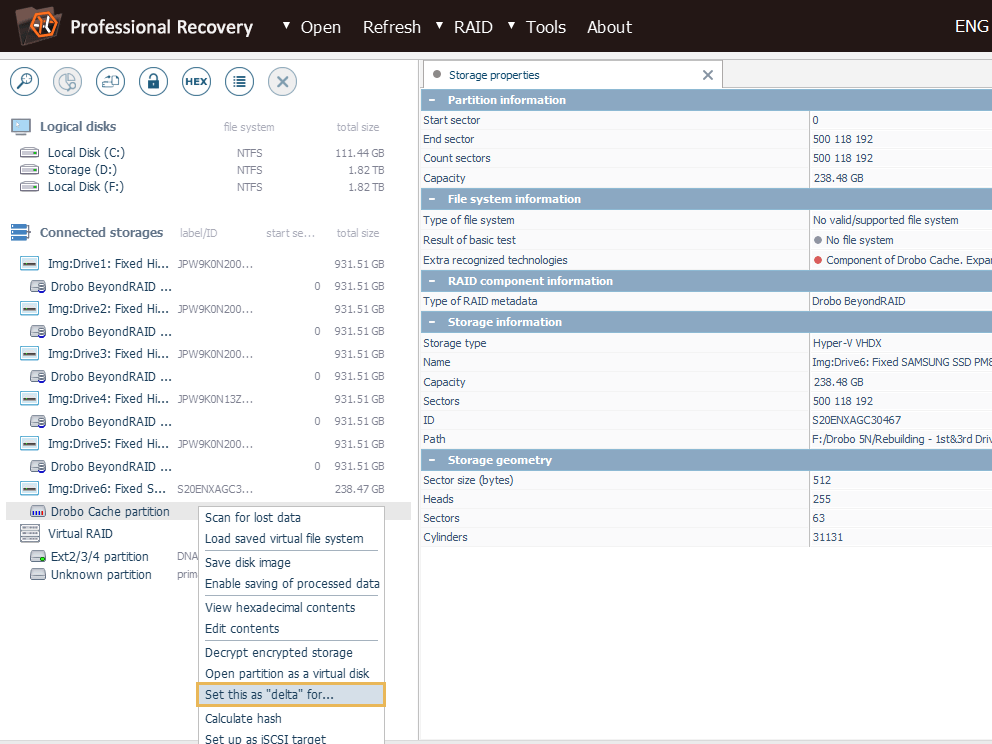
Set the "Drobo cache" partition as "delta" for the assembled BeyondRAID set.
After successful reconstruction of BeyondRAID, use the "Set this as delta for..." option in the context menu of the "Drobo cache" partition in order to merge its content with the data residing in the cache.
-
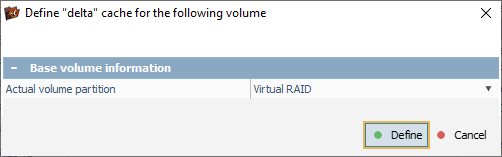
Choose the BeyondRAID storage as the "base data volume" for the "Drobo cache" partition.
In the opened dialog, check if the software has picked the proper storage automatically. If not, use the drop-down menu to select it. After that, click the "Define" button and wait till the program loads the metadata required for correct reading.
-
The newly mounted virtual storage will have the transformed content of the Drobo volume.
You can open the partition in Explorer and look through the available folders and files.
-
Scan this partition if you need to restore deleted or lost data.
In case the necessary data is missing, you may need to launch a storage scan to bring it back. For this, adjust the scanning settings, or keep the default ones, and click "Start scan".
Hint: More information about configuring the scan can be found in the instruction on scanning a drive with UFS Explorer.
-
Pick out the needed restored items and save them to any other safe storage.
Wait for the software to finish scanning. Following this, inspect the recovered file system. Click "Define permanent selection" to save the wanted items, put ticks next to them and press "Save all selection". In the opened dialog, provide any valid local or network location which is not found on any of the drives from your Drobo.
Hint: The information provided in Evaluation and saving the results of data recovery may facilitate your work with the obtained folders and files.
In case you face any complications in the course of this procedure, please also check what may go wrong during data recovery from Drobo.
Last update: May 19, 2023