How to recover data from Drobo
Data recovery from Drobo NAS, DAS and SAN involves specific methodology due to the fact that such devices employ the proprietary BeyondRAID technology. Though such a system relies on data protection techniques similar to the traditional RAID, it significantly differs from any of the standard RAID levels. The configuration of traditional RAID is set up manually while Drobo chooses the needed algorithm itself, on the basis of the requirements of data availability at the particular moment, which will allow the array to withstand the physical failure of up to two drives. Still, like any RAID set, BeyondRAID is not able to protect its data in the event of any logical issue, like mistaken deletion of files, software crash or incorrect rebuild.
To restore data lost from Drobo under such circumstances, one can use UFS Explorer and the following instructions. Optimal performance can be achieved with newer versions of the software starting from 9.16. The procedure is illustrated here on the example of UFS Explorer RAID Recovery, which supports BeyondRAID on up to 5 drives. It can also be accomplished with the help of the Network RAID Edition of UFS Explorer. For configurations built on more drives (up to 8), UFS Explorer Professional Recovery can be employed. If the required BeyondRAID configuration has been lost, for example, due to Drobo’s factory reset, it may be possible to find it using Drobo BeyondRAID Assistant. Some models of Drobo may also feature a supplementary mSATA SSD module intended for Accelerator Cache – such setups can be processed via UFS Explorer Professional Recovery, albeit entail additional manipulations in the program.
How to use UFS Explorer to recover data from Drobo BeyondRAID
In order to recover data from your Drobo BeyondRAID volume using the RAID edition of UFS Explorer, please perform the following procedure:
-
Extract the drives from your Drobo.
Turn the device off and take the member drives out of it one by one. Mark the order of drives defined by the bays from which they were removed. Keeping the order may be important if you need to return the drives back to the storage.
Hint: If you don’t know how to remove the NAS drives correctly, please, use the video tutorial.
-
Attach the Drobo drives to the PC.
Connect all the drives extracted from the appliance to the computer. It is advisable to employ the fastest possible interface, for example, SATA ports on the motherboard. For convenience, follow the initial order of drives.
Hint: To learn how you can plug the drive directly into the motherboard of the computer, connect it using a USB to SATA adapter, external enclosure or expansion card, please refer to the corresponding instruction.
-
Install UFS Explorer RAID Recovery on the computer and run the application.
Launch the program with administrator rights and, if needed, change its settings. The attached Drobo drives will be displayed in the left pane of the main window. The volumes they contain will be recognized as "Drobo BeyondRAID" and presented under the physical drives.
Hint: If you have any difficulties with the installation of the utility, please refer to the installation manual for UFS Explorer RAID Recovery.
-
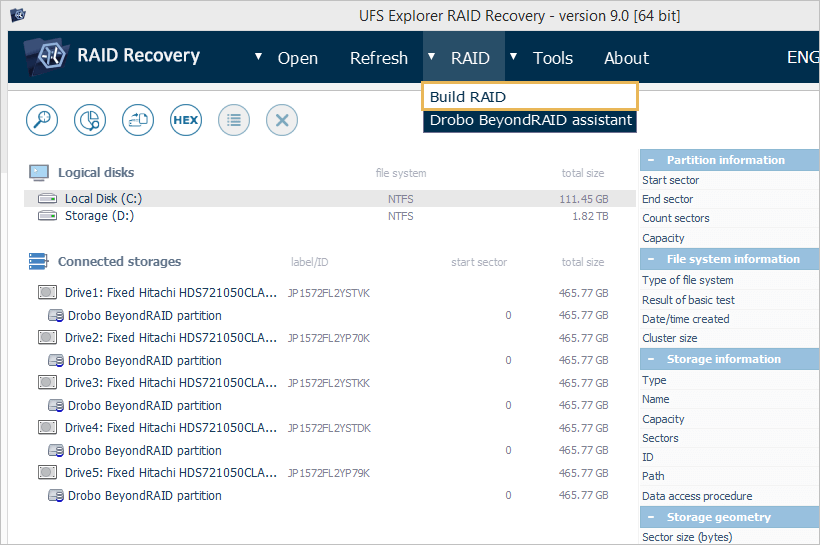
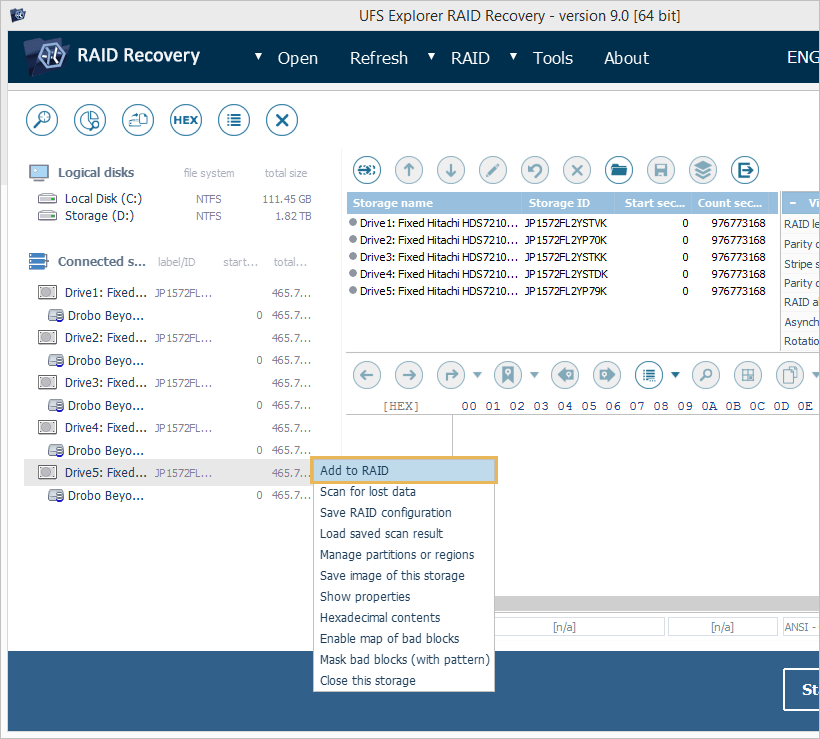
Use RAID Builder to assemble BeyondRAID from the member drives.
Open RAID Builder by choosing the "Build RAID" item in the "RAID" menu and add each drive to the array in any order. For this, you may click on them twice or use the "Add to RAID" option in the drive context menu. In the configuration sheet, choose Drobo BeyondRAID as the RAID level. In case of multiple LUNs, define the LUN number starting from "0" for the first LUN. After that, you can press "Build this RAID" to mount the storage in the list of devices.
-
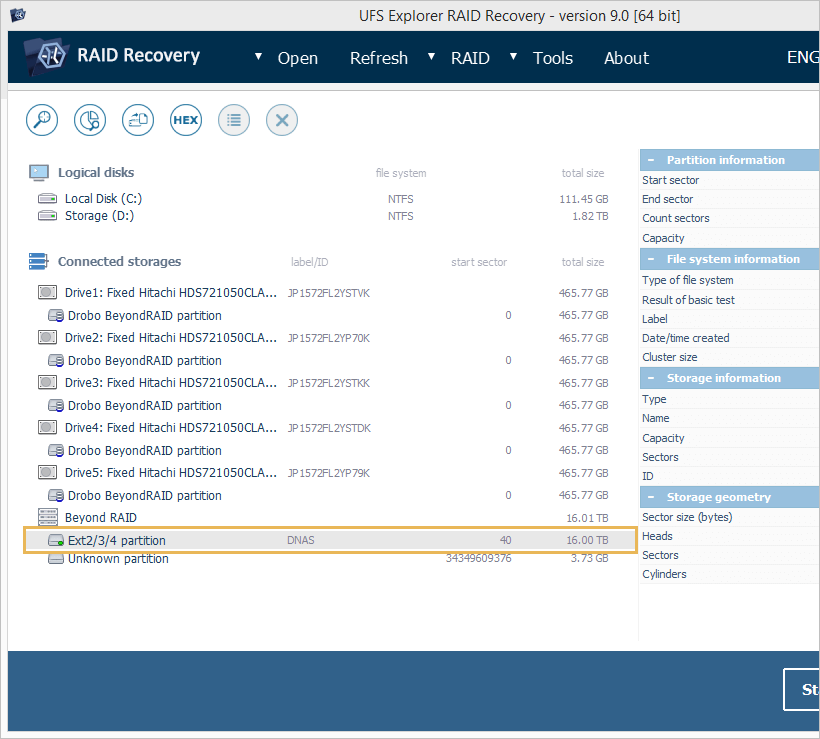
Find the assembled BeyondRAID with the partition holding your data.
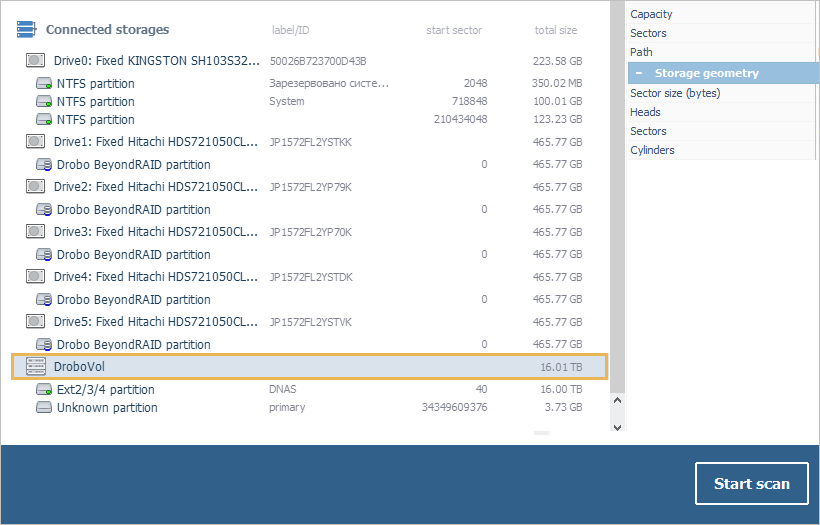
Explore the list of storages and find the reconstructed BeyondRAID – it will be marked with a special icon for easier identification. Select an accessible partition and look over its content. Don’t worry if it’s size many times exceeds the total capacity of the available member drives (such as 16 TB, 64 TB). This is absolutely normal, since Drobo initially creates a much a larger thinly-provisioned virtual volume with an eye to the future. This measure is taken in order to be potentially able to provide this capacity as new drives are added to the unit or smaller ones are replaced, without the need to reformat the storage.
-
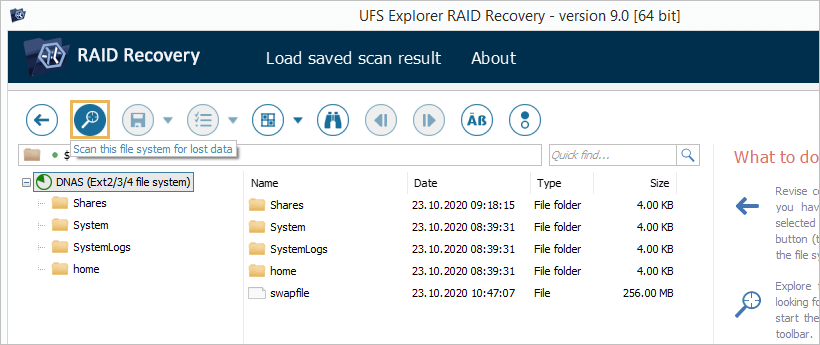
Scan the partition to restore deleted or lost files.
Run a storage scan to get back the missing data. If necessary, adjust the scanning settings, or keep the default ones, and press "Start scan".
Hint: More information about configuring the scan can be found in the instruction on scanning a drive with UFS Explorer.
-
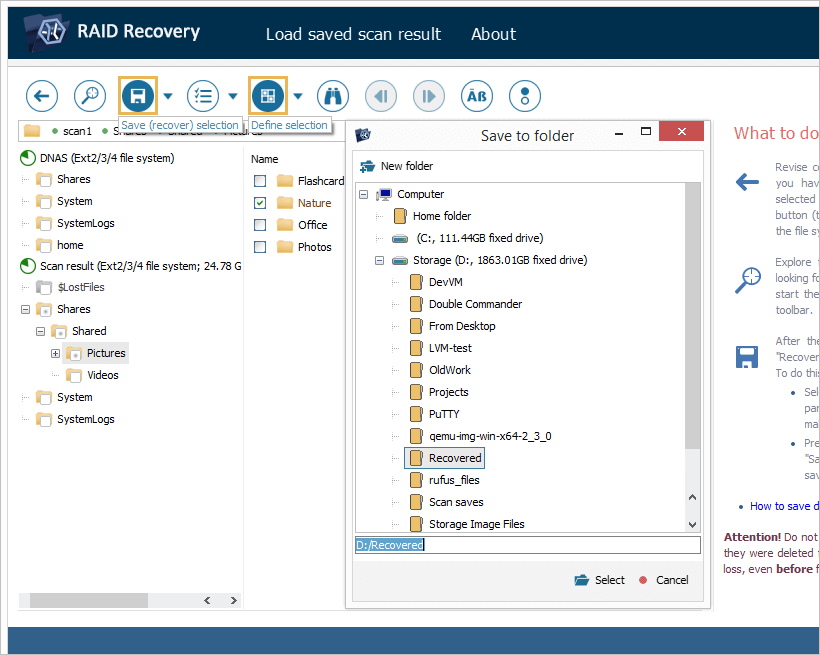
Choose the needed recovered items and copy them to any safe location.
Wait until the program finishes the scanning process. After that, explore the restored file system. To save the wanted items, click "Define selection", mark them off and press "Save selection". In the opened window, provide any valid local or network folder which is not found on any of the Drobo drives.
Hint: The information provided in Evaluation and saving the results of data recovery may facilitate your work with the obtained folders and files.
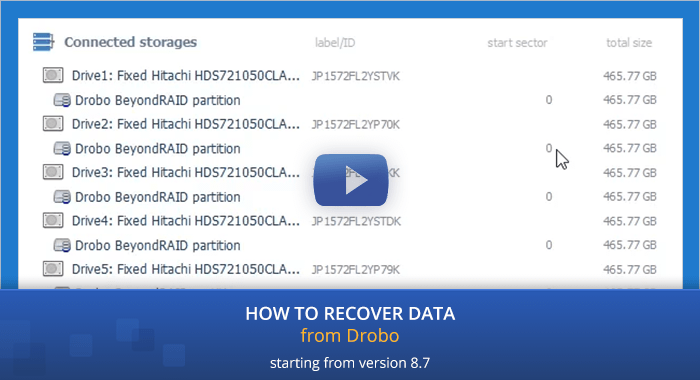
To get a more accurate understanding of the recovery procedure, please, watch the following video:
Search for the missing BeyondRAID configurations
The necessary Drobo volume (the one that holds the actual data) may not be assembled successfully using the described approach in the event of its loss. Such a situation may occur, for instance, when Drobo has been restored to the factory settings and the system has created a new "empty" BeyondRAID set on top of the existing one. Yet, if the previous configuration it hasn’t been entirely overwritten, it may be possible to retrieve it using Drobo BeyondRAID Assistant as explained hereunder:
-
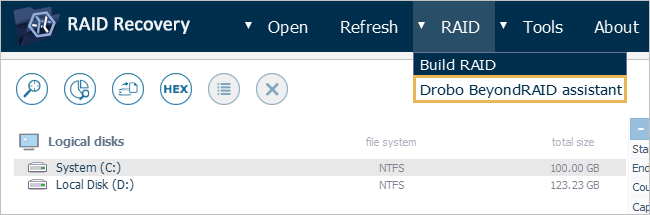
Launch Drobo BeyondRAID Assistant using the corresponding option from the "RAID" item of the main menu.
-
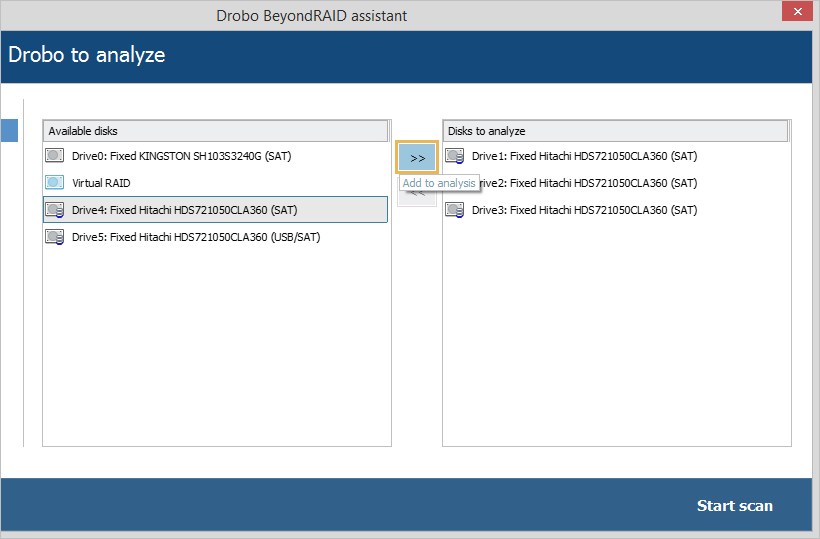
Choose the drives that will be scanned by the program from the list in the left pane of the opened dialog. Use the arrow-like buttons to add/remove the selected storage. All the drives on which the Drobo "markup" was detected will be picked out for examination automatically.

-
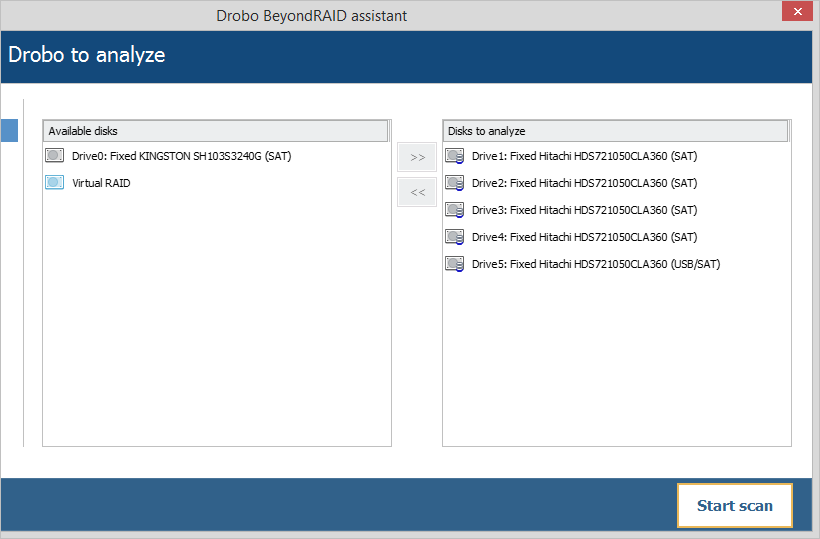
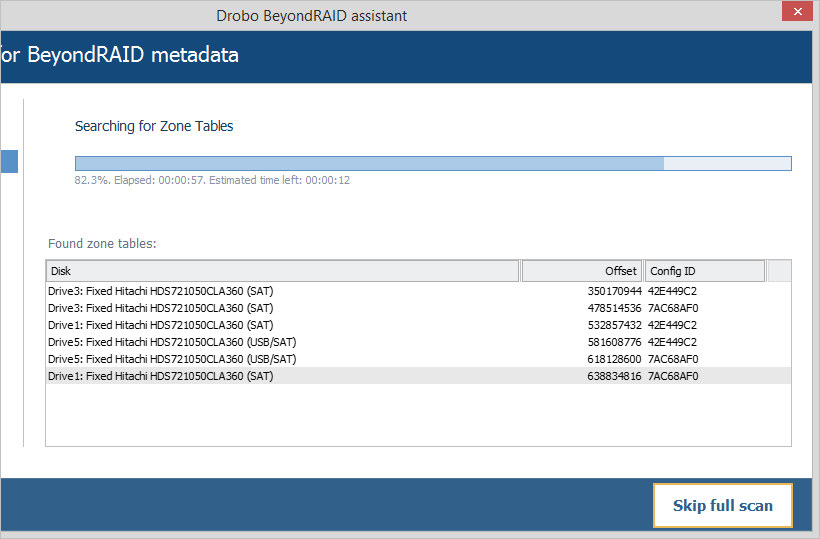
Press the "Start scan" button to begin analyzing the selected drives set. The software will look for copies or older fragments of metadata tables that will allow it to restore the lost virtual file systems. After the necessary configuration is located, you may stop the search using the "Skip full scan" button.
-
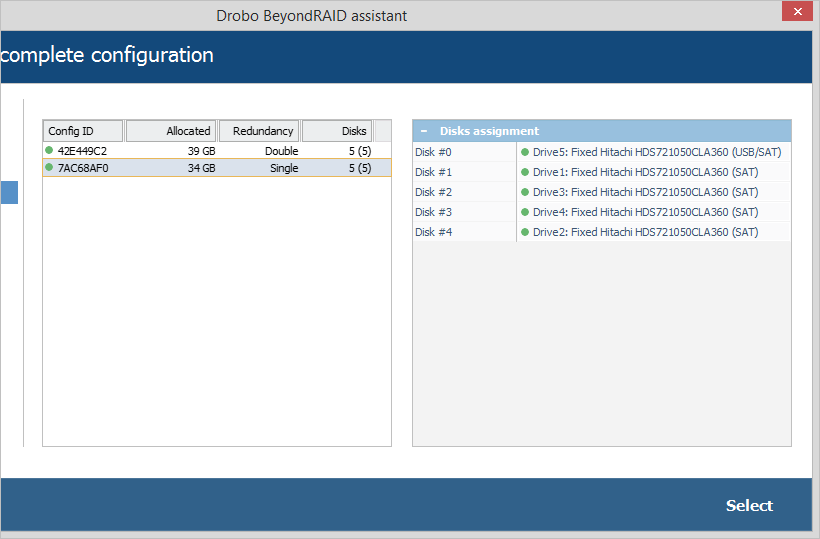
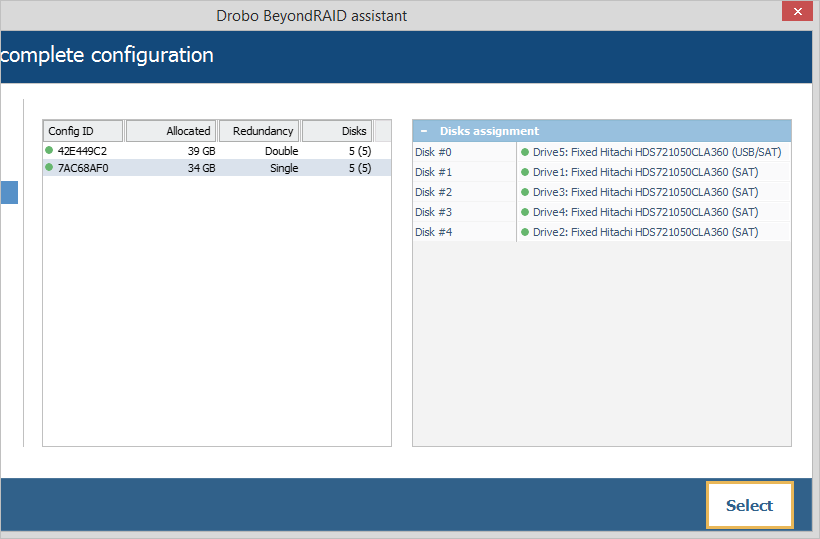
Once the procedure is completed, Drobo BeyondRAID Assistant will show the found BeyondRAID configurations along with their properties, such as an ID, the amount of allocated data, the type of redundancy, the number of member drives and their enumeration. The newer configurations will be listed closer to the bottom.
-
Choose the required configuration and press the "Select" button.

-
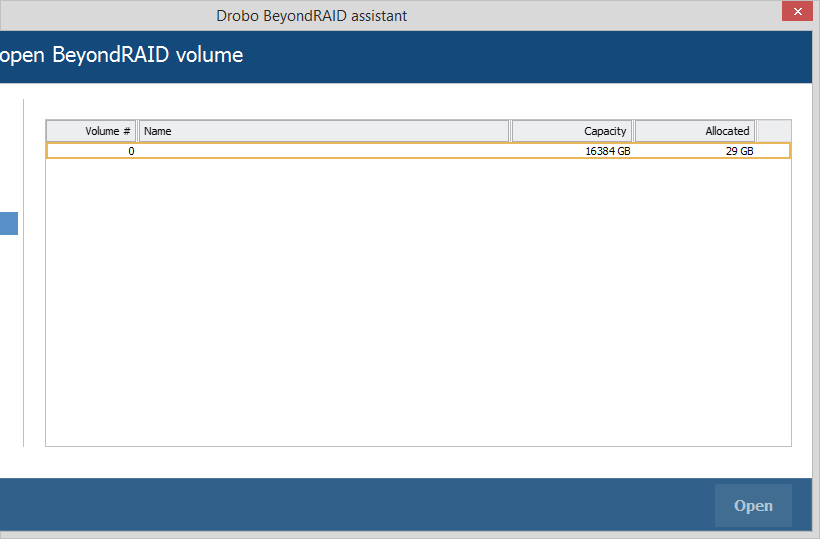
The program will display the Drobo volume found on it. Click "Open" to add it to the tree of connected storages in the main window of the program. After that, you may perform further data recovery operations on the reconstructed Drobo volume.
-
In case of an incorrect choice of a Drobo volume, you can get back to Drobo BeyondRAID Assistant and select another one after the scan. The repeated scan will find all configurations faster.
Handling Drobo with an enclosed mSATA SSD cache module
Besides BeyondRAID, certain models of Drobo, like Drobo 5D and Drobo 5N, may employ the company’s patented Accelerator Cache technology. The device is then equipped with an optional mSATA module housed in a dedicated bay at the bottom. Frequently requested files are placed to the speedier mSATA card, which makes it possible to access them even faster and thereby increase the overall storage performance.
Unlike the drives in the primary bays of Drobo, the mSATA SSD doesn’t constitute a part of the BeyondRAID set. Yet, serving as a cache, it may contain important data, for example, small user’s files or even critical file system information. When the appliance gets turned off properly, this data makes its way to the main array, so the module is not required for its assembly of and subsequent recovery process. However, if Drobo is forced to shut down abruptly, experiences a serious crash or hardware malfunction, this data may not be transferred and gets stuck in the cache. With the lack thereof, BeyondRAID may remain inaccessible, even after its reconstruction. Under these circumstances, it becomes necessary to apply the cached data to the Drobo BeyondRAID volume.
Fortunately, such a problem can be easily addressed with the help of UFS Explorer Professional Recovery. Starting from version 9.14, the software supports Drobo Accelerator Cache and allows performing the transformation procedure to enable correct reading of the resulting storage. The detailed instructions can be found in a separate guide on Data recovery from Drobo with enabled mSATA cache.
What else may go wrong during data recovery from Drobo?
Drobo storage devices are known to be quite specific in regard to their internal workings. As has been mentioned, they take their own approach to providing data redundancy, and, in general, are packed with many peculiar features. In order to implement all their advanced possibilities, they employ complex proprietary algorithms and lots of metadata to keep everything under control. That is why data recovery from them may be challenging and is often associated with various unexpected issues. Some of them may be managed by utilizing a proper recovery technique, while others, unfortunately, just have to be accepted as a given. The most common complications include:
-
No accessible partitions on the assembled BeyondRAID set
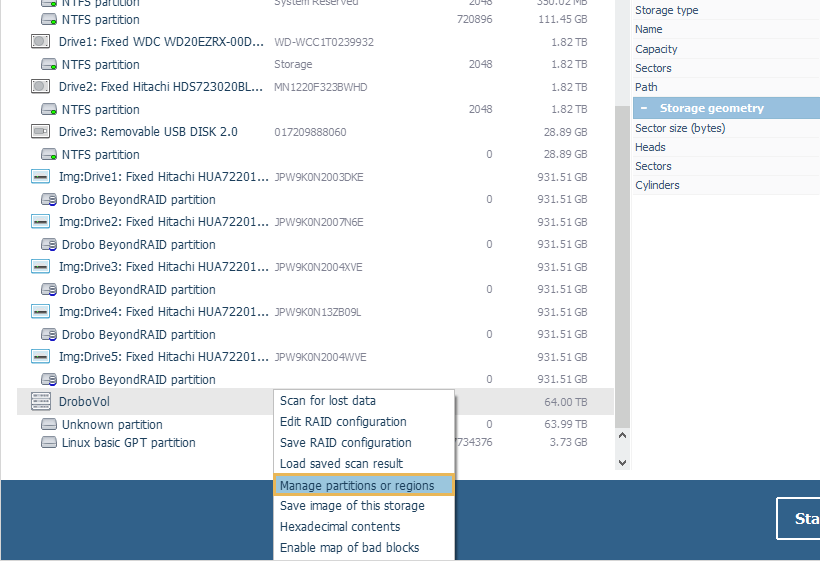
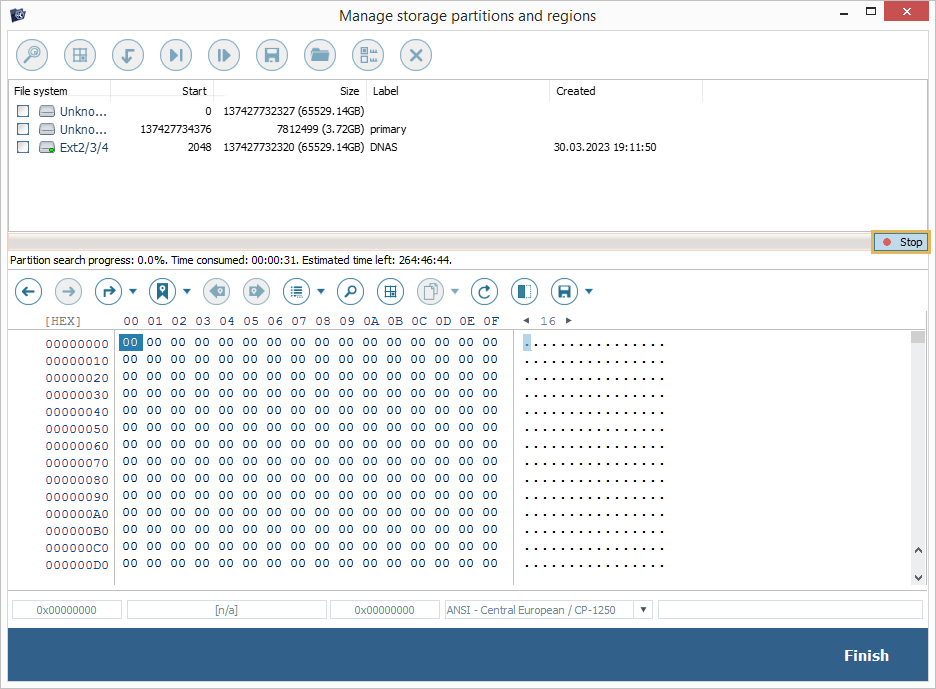
If, after all reconstruction manipulations in the software, you cannot see any "green" partitions mounted under BeyondRAID, you may also try finding valid file systems on the storage by their remaining distinctive structures. For this, choose the "Manage partitions or regions" option from its context menu in order to launch Parition Manager.
In the opened dialog, get the "Search undetected partitions by metadata" tool and tick off the file system type to be identified – as a rule, NAS boxes rely on Ext4 while DAS and SAN solutions get their file system defined by the host. In case you have any doubts, just pick out several possible options.

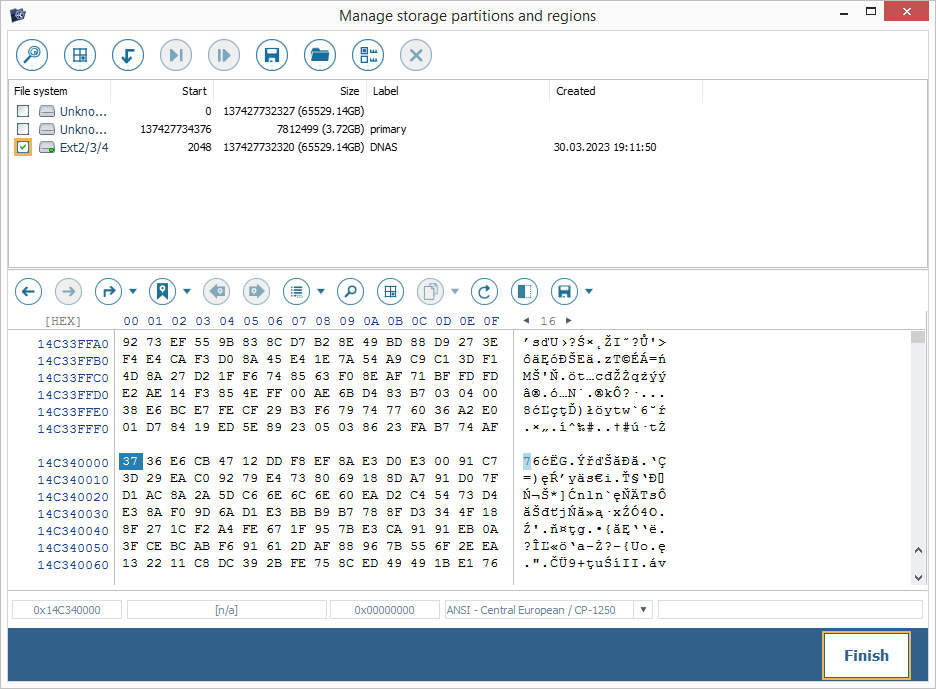
Once you click "OK", Partition Manager will initiate the scanning operation and enumerate the spotted partitions. You may wait till its completion or hit the "Stop" button if you are already satisfied with the results.
When any of the discovered partitions looks valid, put a tick next to it and hit the "Finish" button to add it to the list of storages.
-
Very slow scanning speed
You shouldn’t be surprised to discover that it make take 10 days of continuous scanning to restore approximately 10 "real" terabytes of Drobo’s data. Drobo recovery is not particularly fast compared to more conventional storages, especially when it contains a lot of small files. Due to the complexity of its internal structures, dealing with this device requires a lot of patience. But, as noted earlier, in order to obtain the maximum possible speed, it is recommended to ensure that the applied version of UFS Explorer is not older than 9.16. Newer software has been enhanced to provide accelerated general read and scan operations on BeyondRAID, primarily on non-allocated space within the array.
-
Failed attempts to reconstruct the configuration
The possibility to restore Drobo’s layout depends directly on the state of its metadata, which may get easily damaged or lost, even without any obvious causes, destroying the chances to get any usable files out of the device. The problem here is its very intricate data mapping strategy. The content is stored in differently sized virtual blocks that are arranged in the array across a set of mirrored or parity "zones". Their types and locations on the drives are maintained using a special table, the so-called zone map. This map is essential for the ability to read the data. When it is missing, there is no other way to predict and find the zones for each block, that may be situated in totally random places, and then trace those zones to actual physical drives. Though the map itself is usually available in several copies, they get updated concurrently, so any faulty modification is likely to affect all of them at once, whereas its previous state will be permanently lost.
Last update: May 19, 2023