How to recover data from a LUKS-encrypted volume
LUKS is one of the most popular cryptographic techniques used on Linux-powered computers and some NAS appliances. It provides robust resistance against brute-force attacks, ensuring that sensitive information stored on the disk remains protected from unauthorized access. However, this does not guarantee the safety of the data itself, which can be accidentally deleted by a legitimate user or even vanish without any obvious reason. Fortunately, files lost from partitions based on this format can often be restored. Yet, before attempting data recovery, one needs to decipher the storage using the correct authentication details. UFS Explorer Professional Recovery allows decrypting such volumes directly in the program’s interface, offering swift access to the data, along with the effective means to regain deleted or lost files. Follow the provided guidelines to unlock your LUKS-encrypted partition and recover its content with the help of this software.
General specifics of LUKS
LUKS (Linux Unified Key Setup) is an open-source disk encryption standard designed specifically for the Linux platform. It operates at the kernel level using its device mapper driver, while the encryption and decryption mechanisms are provided by the dm-crypt module.
The original version of LUKS was released in 2005. It relies primarily on the AES (Advanced Encryption Standard) algorithm in the XTS mode and employs the SHA-1 hash function for integrity verification. In 2018, several enhancements to LUKS were introduced, and this newer standard is often referred to as LUKS2. The revised version supports more encryption algorithms alongside AES (including Twofish, Serpent, Camellia), additional encryption modes (such as GCM, CCM, etc.) and stronger hash functions (like SHA-256 and SHA-512).
LUKS is utilized on a wide range of storage configurations, from individual internal or external devices to complex setups involving multiple drives, for example, ones created using the Linux LVM or mdadm RAID technology. It is also a common solution for the encryption of NAS shares, especially in NAS boxes produced by the QNAP brand.
Under Linux, LUKS can be activated during the distro installation process, provided that the corresponding encryption option is selected. This variant encrypts all partitions and swap space, except the /boot partition and GRUB, which are typically not encrypted to ensure system booting functionality. LUKS encryption can also be applied on a per-partition basis using the cryptsetup command-line utility. On supported NAS appliances, encryption can be activated during the creation of a NAS volume if the user enables the appropriate checkbox.
When a partition is encrypted by LUKS, all its content is transformed into unreadable ciphertext. The system also generates a unique master key, which will be used to unlock the storage. This key is never visible to the user, but it is ciphered on the basis of the user’s authentication details, which may include:
a passphrase/password;
a key file stored on an external storage medium.
A passphrase or password is a character sequence, typically up to 512 characters long, supplied by the user when they set up encryption and requested upon system startup or access to an encrypted portable storage device. There may be additional passphrases/passwords if more than one valid user has access to the storage.
A key file is a separate file stored on a removable medium, for example, a USB flash drive. The file may contain a simple passphrase, a block of random characters or even binary data like an image, music or video. The USB flash drive then acts like a physical key, enabling decryption of the master key when connected to the computer.
To decipher the encrypted data, the user must provide their personal passphrase/password or key file. The system then hashes this input and compares it with the stored hash of the master key, which may reside in one or more key slots, depending on the number of passphrases/passwords configured in LUKS. In case of a match, the master key gets decrypted and can be used to decode the actual data content. However, all the information required for decryption is stored as metadata within the LUKS header and key material section that follows it. When those storage areas become damaged, it is absolutely impossible to read the encrypted data, even with the correct passphrase or password.
The simplest method to unlock a LUKS-encrypted volume is to enter a passphrase/password associated with any valid user when prompted by UFS Explorer. It must be borne in mind, though, that the presence of at least one correct passphrase/password is crucial for the decryption process. Without it, decryption cannot proceed, and the data remains unreadable.
LUKS implementation on QNAP NAS
The majority of NAS products manufactured by QNAP support full-disk encryption. This feature is based on the LUKS technology, typically with the 256-bit AES algorithm in the CBC mode. However, the QNAP-specific implementation of LUKS slightly differs from the standard version encountered in Linux systems.
An encrypted partition can be created on an individual drive, JBOD configuration or RAID group. When a user opts to enable encryption, they are prompted to define a passphrase between 8 and 32 characters in length. This passphrase is used to encrypt the LUKS master key and is first processed by a QNAP utility called storage_util. This utility transforms the passphrase using the MD5 hash function along with a specific QNAP salt, referred to as YCCaQNAP.
The resulting encryption key is then saved as a 256-byte file with a .key extension. This file can either be created immediately during encryption or added afterward.
LUKS recovery using a passphrase/password
UFS Explorer Professional Recovery offers robust support for encrypted volumes protected by LUKS. The program is compatible with both versions of the LUKS standard (LUKS1 and LUKS2), and can also handle LUKS-encrypted NAS shares. Users can easily unlock encryption directly in the software by specifying a valid passphrase or password and then proceed to data recovery. The recovery process for such encrypted volumes typically involves the following steps:
-
Connect your storage encrypted with LUKS to the computer.
Attach the encrypted portable device to the computer. If you are going to deal with an encrypted system partition, due to high chances of overwriting, it is advisable to remove the drive from the machine and connect it to another PC as an additional storage medium or boot the computer from UFS Explorer Backup and Emergency Recovery CD. It is also worthy of note that if LUKS was used in combination with a TPM, the chip must be present in the computer during the process of data recovery, so in case it is built-in, the procedure is only possible on that very PC.
Hint: If you need to attach an internal hard drive from another computer, you can plug the disk into the motherboard of your PC or сonnect the drive externally using a USB to SATA adapter.
-
Install UFS Explorer Professional Recovery and run the program.
Launch the program with elevated privileges by entering the right login/password upon request. All the attached drives will be listed among the connected storages in the left panel. Logical volumes will be displayed under the corresponding physical devices.
Hint: If you have any difficulties with the installation of the utility, please refer to the installation manual for UFS Explorer Professional Recovery.
-
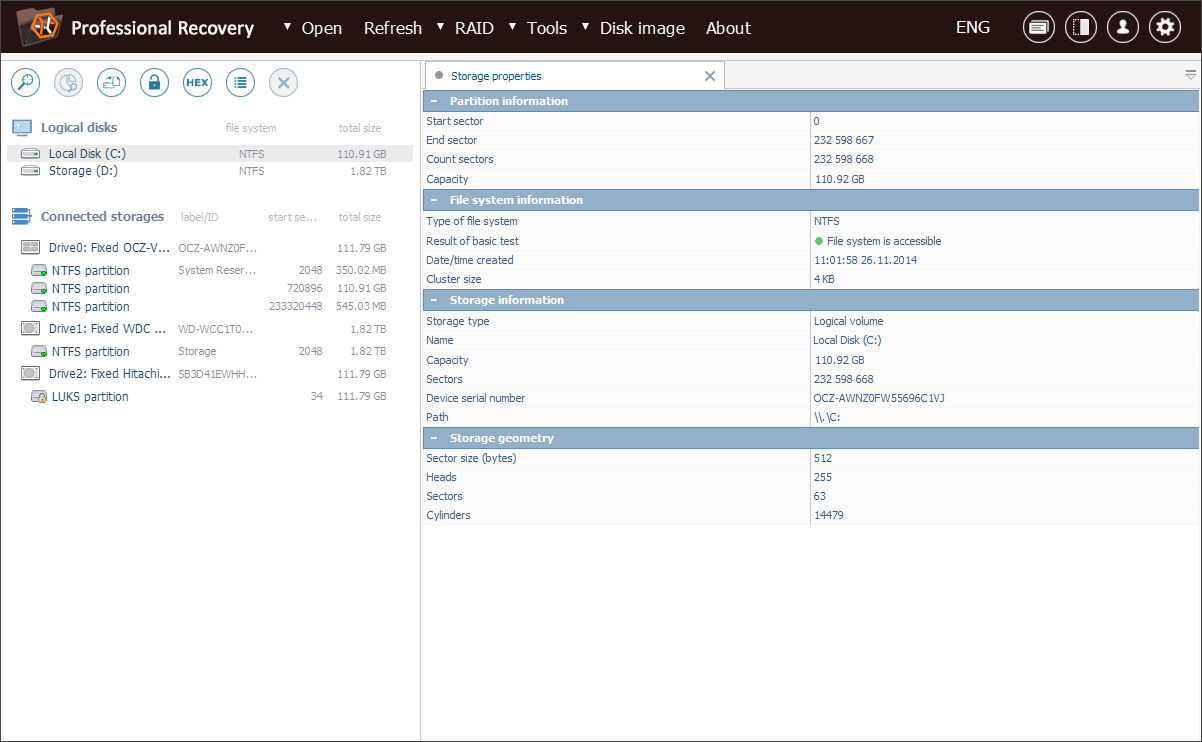
Choose the needed LUKS partition from the list of storages detected by the software.
Check out the tree of storages and select the necessary encrypted volume. You can recognize it by a yellow padlock icon.

-
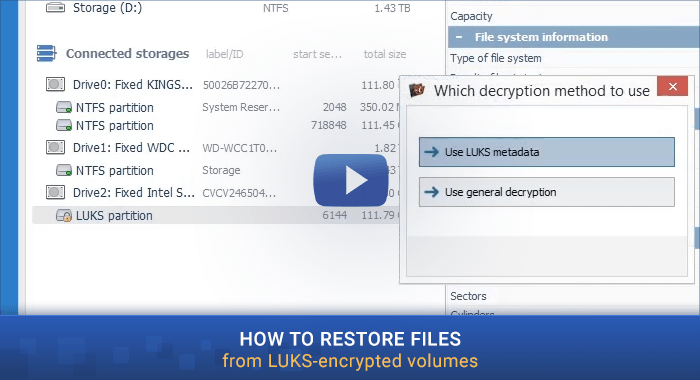
Tell the program to decrypt the volume.
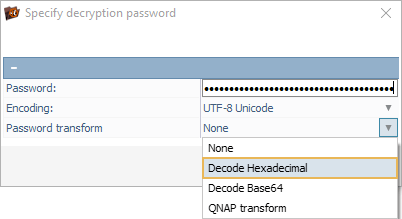
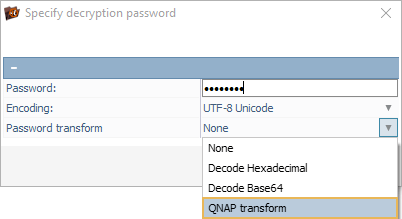
Open its context menu and pick the "Dercypt encrypted storage" option. Choose the "LUKS metadata" decryption technique and enter the correct decryption passphrase/password.
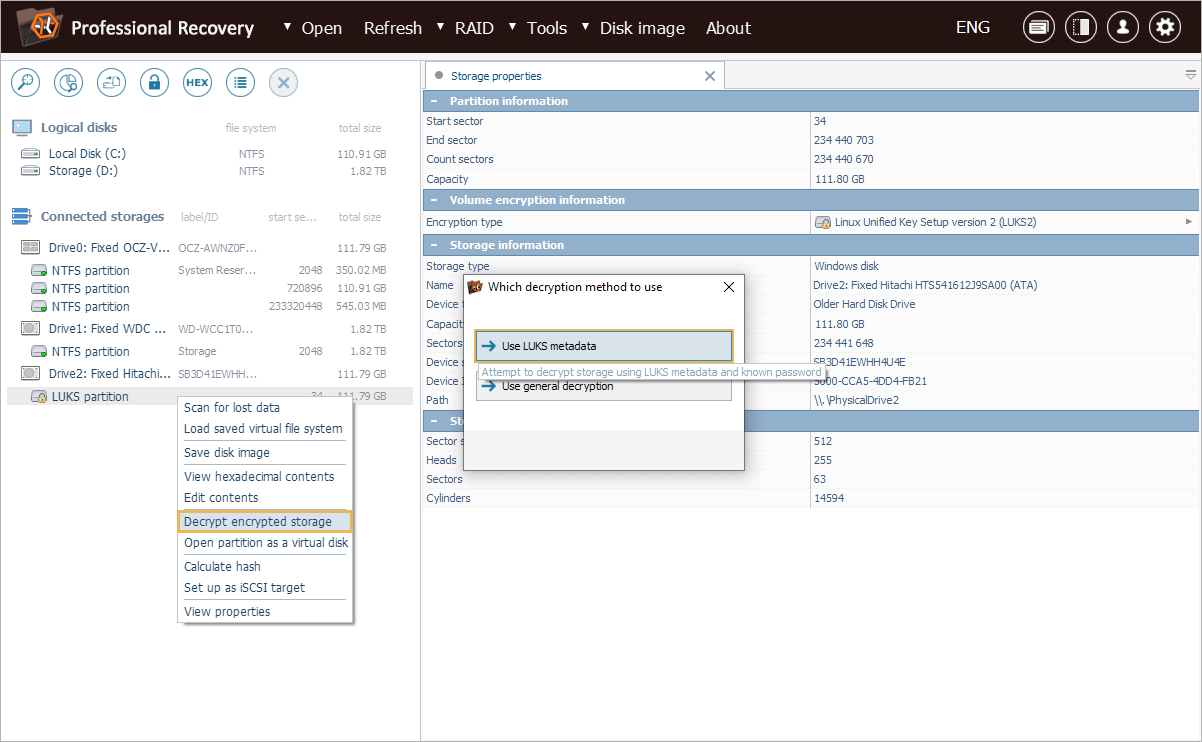
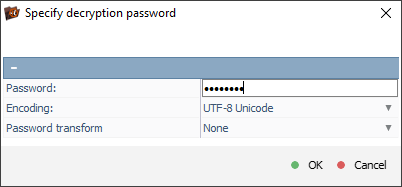
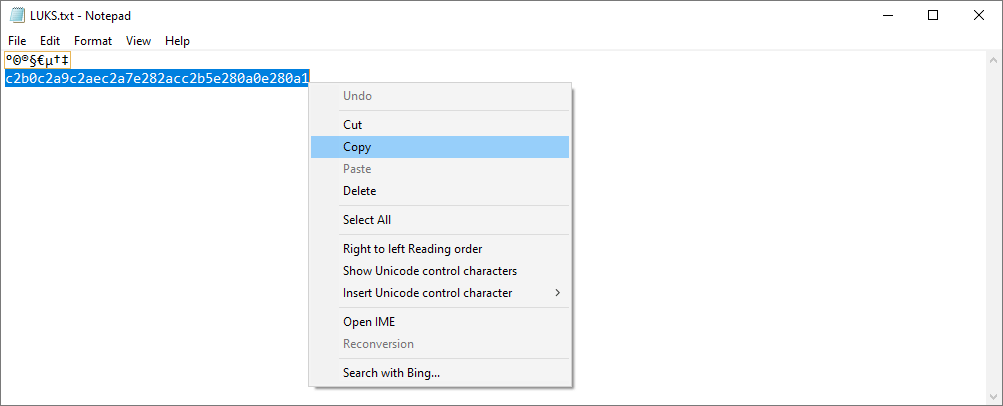
If the passphrase/password includes unprintable symbols, you will need to specify it as the corresponding hexadecimal code and enable the "Decode Hexadecimal" option.
Also, if you are working with a NAS unit of QNAP, you will have to activate "QNAP transform" and enter the passphrase simply as it is.
Hint: More detailed information related to work with NAS units can be found in the instruction on NAS recovery.
-
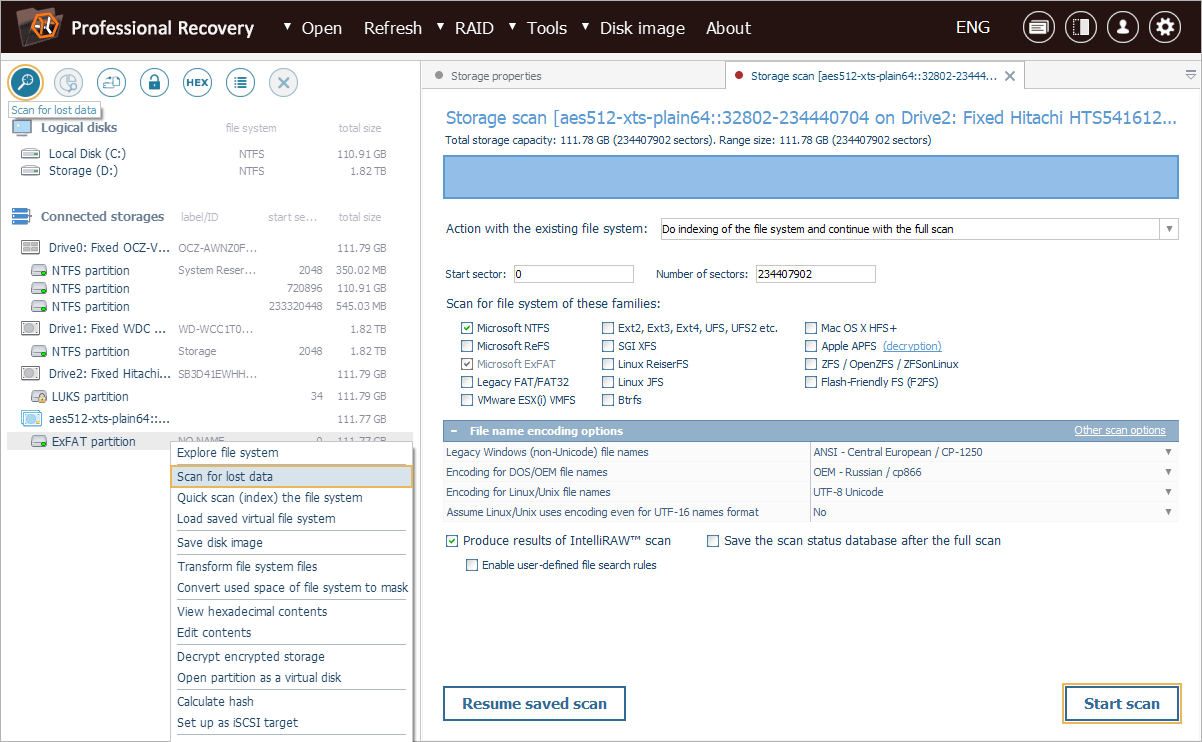
Scan the decrypted partition to locate deleted or lost data.
On completion of the decryption process, you can explore the intact file system directly in the software interface. To find the deleted or lost folders and files, you will need to perform storage scan. For this, pick up the respective tool from the toolbar, deselect all unwanted file systems and press "Start scan".
Hint: More information about configuring the scan can be found in the instruction on scanning a drive with UFS Explorer.
-
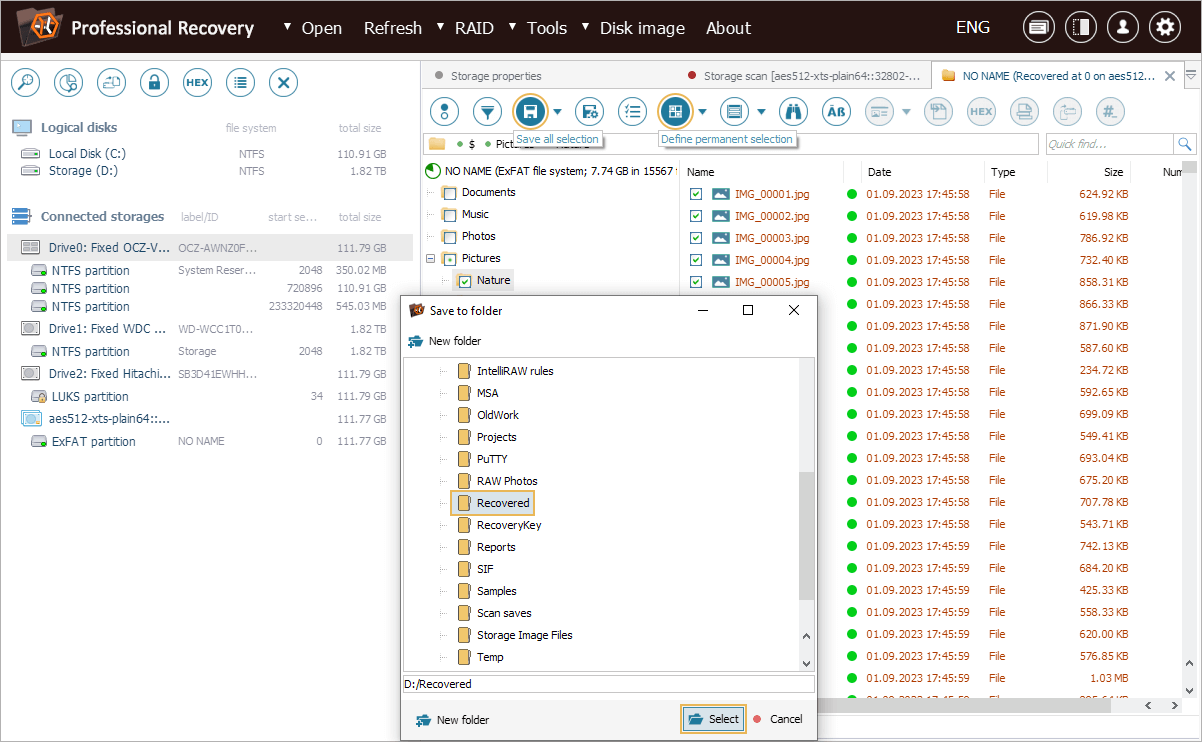
Choose the needed recovered items and copy them to another storage device.
After the end of the operation, you can take a look at the files and folders restored by the software and decide on the ones you want to copy. To specify which items need to be saved, press "Define selection", place ticks next to them and click "Save selection". After that, define a safe destination location for the restored data.
Hint: The information provided in Evaluation and saving the results of data recovery may facilitate your work with the obtained folders and files.
LUKS recovery in a video-guide
The whole course of action is also explained in the following video:
Last update: December 27, 2024