Creating a bootable (live) USB drive using third-party software
Certain cases of data recovery require the use of a live USB (live CD/DVD), for instance, when the original operating system isn’t functioning and there is no possibility to transfer the affected storage to another computer. Besides data recovery, bootable drives are frequently employed for testing, diagnostics and troubleshooting, malware removal or other purposes. Such a device contains an OS installation which is ready to run directly from an external storage device instead of the computer’s internal hard drive and works entirely in the RAM without interfering with the configuration of the primary system. The environment itself is represented by an ISO file that is mounted to a USB flash drive, a portable hard disk drive connected via USB, or less commonly – burnt to a blank CD or DVD.
This article offers some guidance on how you can use third-party software to create a bootable storage medium with UFS Explorer Backup and Emergency Recovery CD – a comprehensive data recovery package which includes the Ubuntu Linux distribution with a set of preinstalled UFS Explorer and Recovery Explorer software tools. This solution makes it possible to handle almost any data loss issue without starting the host OS.
Preparation for the procedure
Creating a bootable storage medium with an ISO image involves the use of the following elements:
-
an ISO file with a live OS (in our case – UFS Explorer Backup and Emergency Recovery CD);
-
an external storage device large enough to hold the ISO file – a USB drive is a preferred option, yet, a rewritable DVD can also be utilized;
-
specialized software that will mount the ISO file to this digital medium (Rufus and UltraISO were picked out in this instruction as examples, but you may use any other application of your choice or even the standard means of the operating system);
-
a secondary computer that will host the whole mounting process.
Creating a bootable USB stick (live USB) using Rufus
Rufus is a free open-source utility for Microsoft Windows that allows creating a bootable USB drive from an ISO file. The software is portable, thus, it doesn’t require installation and all its settings will be saved to the program’s directory.
-
Download the ISO file of UFS Explorer Backup and Emergency Recovery CD to any functioning Windows-based computer.
-
Prepare a USB stick or another flash digital medium capacious enough to place the downloaded ISO file. Plug the device into the PC. If it contains any necessary files, move them to another storage, since all the existing data on it will be permanently erased.
-
Go to the official website of Rufus and download the executable file of the software. After the download is completed, launch the application on the same computer.
-
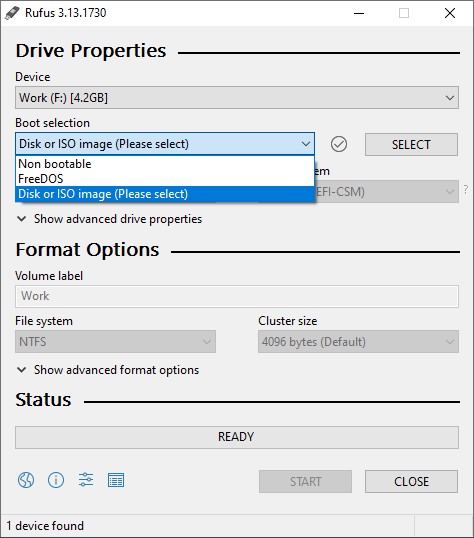
The program will automatically detect your USB stick and display it in the "Device" box. If not, select this storage manually from the drop-down menu.

-
Ensure that the "Boot selection" is set to "Disk or ISO image".
-
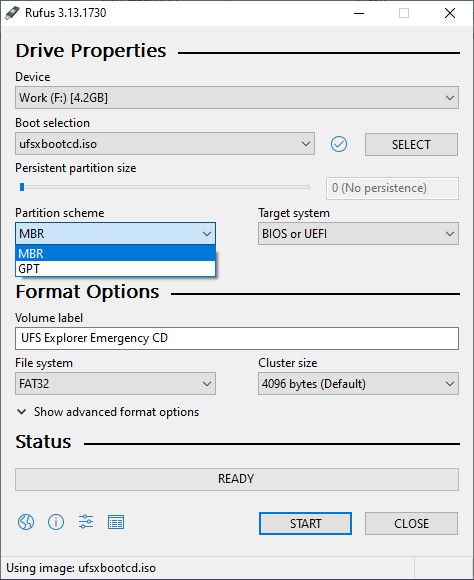
Click "Select" and in the opened dialog navigate to the downloaded ISO image of UFS Explorer Backup and Emergency Recovery CD (the default file name is iso). Select the file and hit "Open".

-
See to it that the "Partition scheme" is set to "MBR" and the "Target system" – to "BIOS (or UEFI-CSM)". Provide any preferred name for the "Volume label" and press the "Start"
-
Rufus will begin to copy the content of the ISO file of UFS Explorer Backup and Emergency Recovery CD to the chosen USB device. When the process is finished, simply close the program. The bootable storage will be ready for use.
Creating a bootable USB stick (live USB) using UltraISO
UltraISO is one of the popular paid applications produced by EZB systems for creating, modifying and burning ISO images. The software runs under Windows and allows choosing between a regular installed and a portable version.
-
Download the ISO file of UFS Explorer Backup and Emergency Recovery CD to any operable computer running Windows.
-
Get a USB flash drive or an external USB hard drive with the capacity sufficient to locate the prepared ISO file. If there are files you need, copy them to another storage to prevent their irreversible loss.
-
Acquire the latest version of the UltraISO installer file form the official website of the software.
-
When the download is finished, open the file and follow the on-screen prompts to complete the installation.
-
Launch UltraISO from the last window of the Installer or by using its desktop shortcut.
-
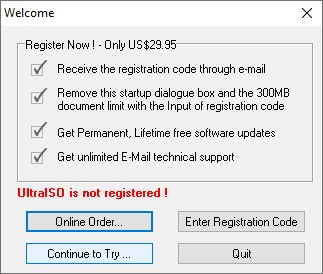
Click "Continue to try" to enter the Trial Mode or purchase the full version of the application by pressing the "Online order"
-
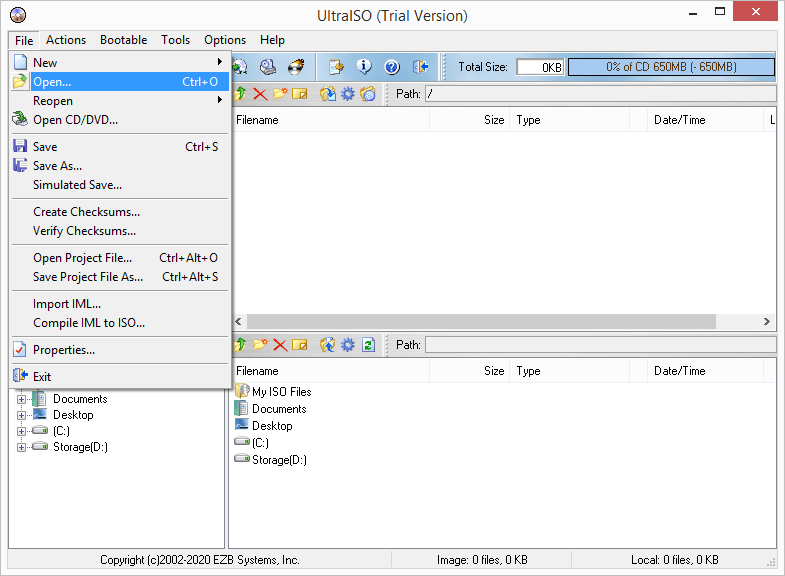
Click on "File" in the main menu and then choose "Open".
-
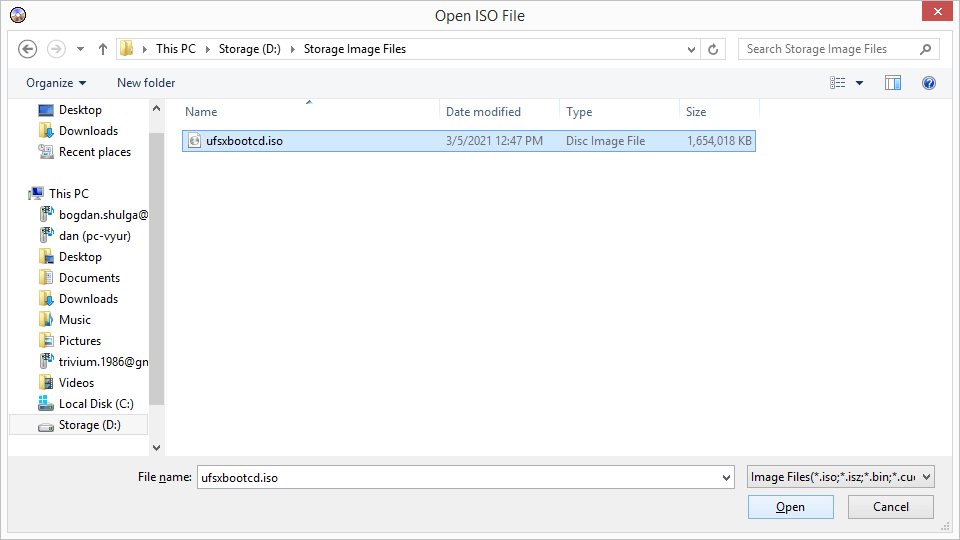
In the pop-up window go to the downloaded ISO image of UFS Explorer Backup and Emergency Recovery CD (the default file name is iso) and double-click the file to load it into the program.
-
Connect the prepared USB storage to the computer using a free USB port.
-
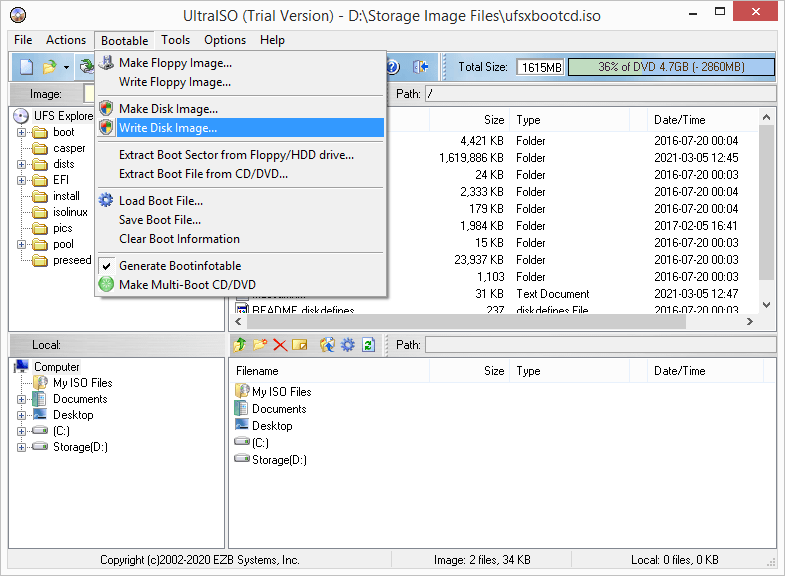
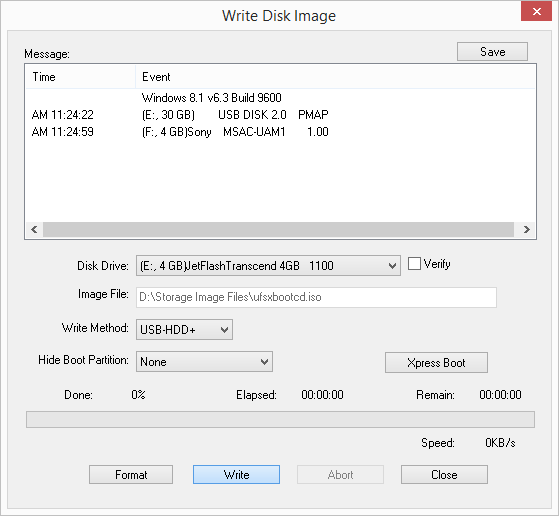
Open the "Bootable" menu and select "Write Disk Image…" to pick out the proper writing method.
-
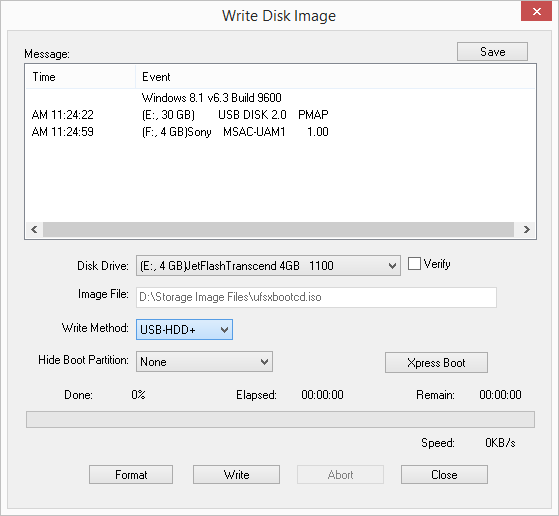
Set the "Write method" option as "USB-HDD+". Also, ensure that the correct USB device is selected as "Disk Drive".
-
If required, format drive using the "Format" button before starting the writing process. After that, hit "Write" to initiate the writing procedure.
-
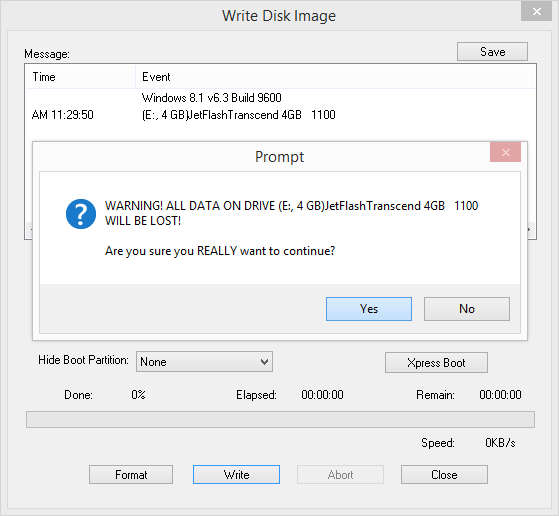
Click "Yes" to confirm the operation. Please note that any data contained on the USB drive will be overwritten.
-
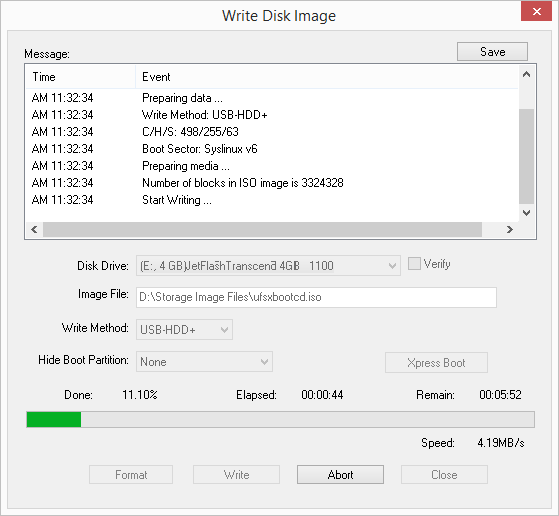
UltraISO will go ahead to creating your bootable USB storage. This process may take some time, and once it is accomplished, you may close the application and use the created bootable storage.
Creating a bootable DVD (live DVD) in Windows
Windows 7 and later releases of this OS make it possible to burn an ISO image to a CD/DVD without any special software. However, using optical media for this purpose is usually not recommended due to their obsolescence and much lower speed.
-
Download the ISO file of UFS Explorer Backup and Emergency Recovery CD to a functioning computer running Windows 7 or later. Ensure that its drive is capable of writing to optical disks.
-
Insert a blank writable DVD disk (DVD-RW). The use of a CD is not possible in this case, as the size of the ISO file will exceed the capacity of this digital medium.
-
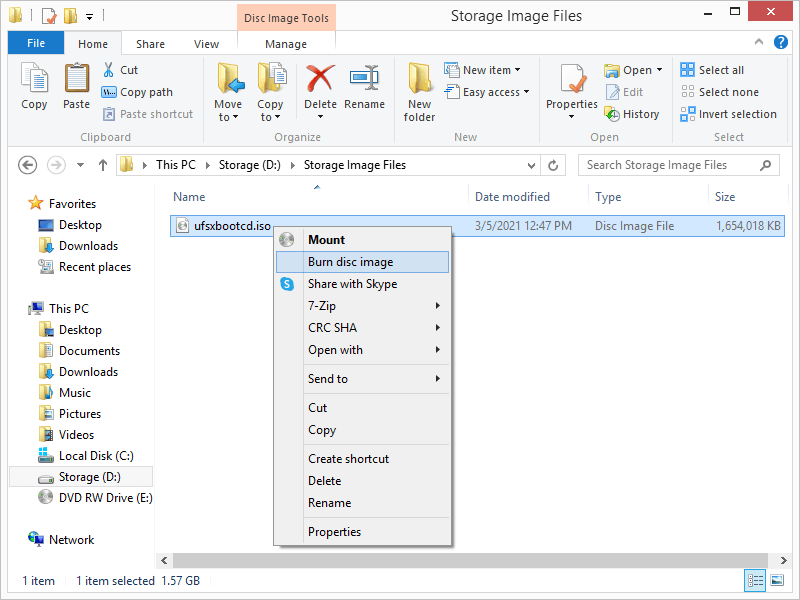
Open Explorer and browse to the folder where the ISO file of UFS Explorer Backup and Emergency Recovery CD was saved (the default file name is iso).

-
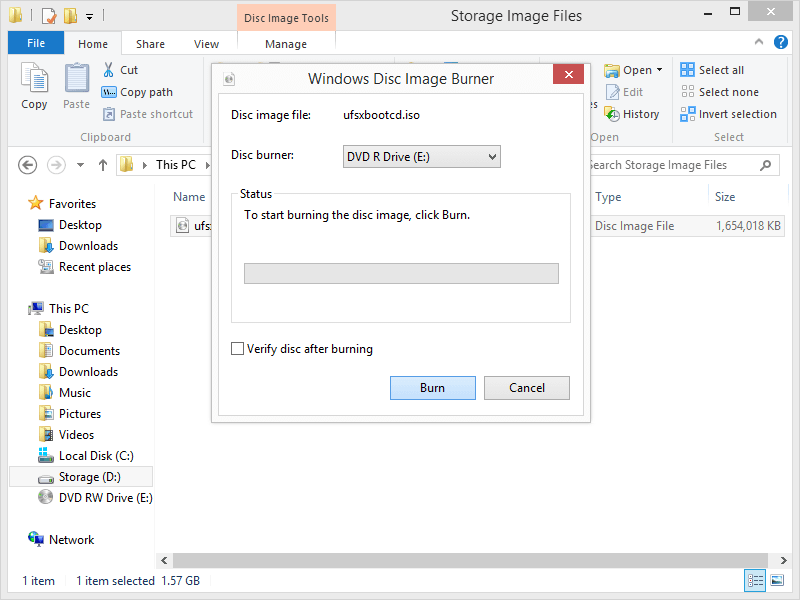
Right-click the ISO file and select "Burn disk image" in its context menu.
-
In the opened window of the Windows Disk Image Burner select your DVD disk as the "Disk burner" and hit "Burn". Close the software after the process is completed and use the created live DVD for your needs.
Last update: August 17, 2022