How can one recover data from a virtual machine?
Virtual machines offer numerous benefits for both home users and businesses, making it possible to exploit hardware resources more economically while getting the most out of the capabilities of various operating systems: several machines share the same hardware and provide for simultaneous use of different independent OS environments, for instance, Windows and Linux, which in no way hinder the work of the host system. However, such factors as unexpected shutdowns, software malfunctions or human errors may leave the host unaffected but cause serious damage to the virtual machine that in its turn may result in losing data from it or in the virtual disk it is based on becoming unreadable.
As a rule, the content organization of a virtual disk is similar to the one of an ordinary physical drive. It means that virtual disks have logical volumes, file systems, folders and files. However, when it comes to recovering data from it, you need to deal with a file of a special format or its copy instead of a physical storage. Such files are usually located in a separate folder under the directory of the corresponding virtual machine.
Each of the major virtualization software vendors has its own implementation of a virtual disk: if you have VMware, you most likely should look for a VMDK file, if you use Microsoft's products like Virtual PC or Hyper-V – VHD or VHDX files, and a VDI file in case you employ Oracle's VirtualBox. At the same time, some virtual disk formats are compatible with other VM products, for instance, VirtualBox is capable of working with VDI, VHD, VMDK and some other types of files.
Hint: More information about virtual machines and their peculiarities can be found in the corresponding article. In case of simple inaccessibility of files stored on a virtual disk, please refer to data access on virtual machines.
How to restore data from a virtual disk with UFS Explorer Standard Recovery
SysDev Laboratories offers UFS Explorer and Recovery Explorer products that support the most common virtual disks, including those of VMware, Hyper-V, VirtualBox, QEMU, and XEN, and both sparse and flat VMDK formats, and perform efficient data recovery from a virtual layer of the host system.
Nevertheless, you should mind that it is only possible to recover missing files until they get overwritten with some other information. For this reason, it is highly recommended to power off the virtual machine and avoid using it until data recovery is completed. By keeping the affected virtual machine running after you’ve detected data loss, you risk causing even more damage to the corrupted logical structures or even irreversibly destroying the remaining data.
To carry out the procedure using UFS Explorer Standard Recovery, take the following steps:
-
Download and install UFS Explorer Standard Recovery. Pay attention to the downloaded version of the software and remember that it must correspond to the operating system it will be run on.
Hint: If you have any difficulties with the installation of the utility, please refer to the installation manual for UFS Explorer Standard Recovery.
-
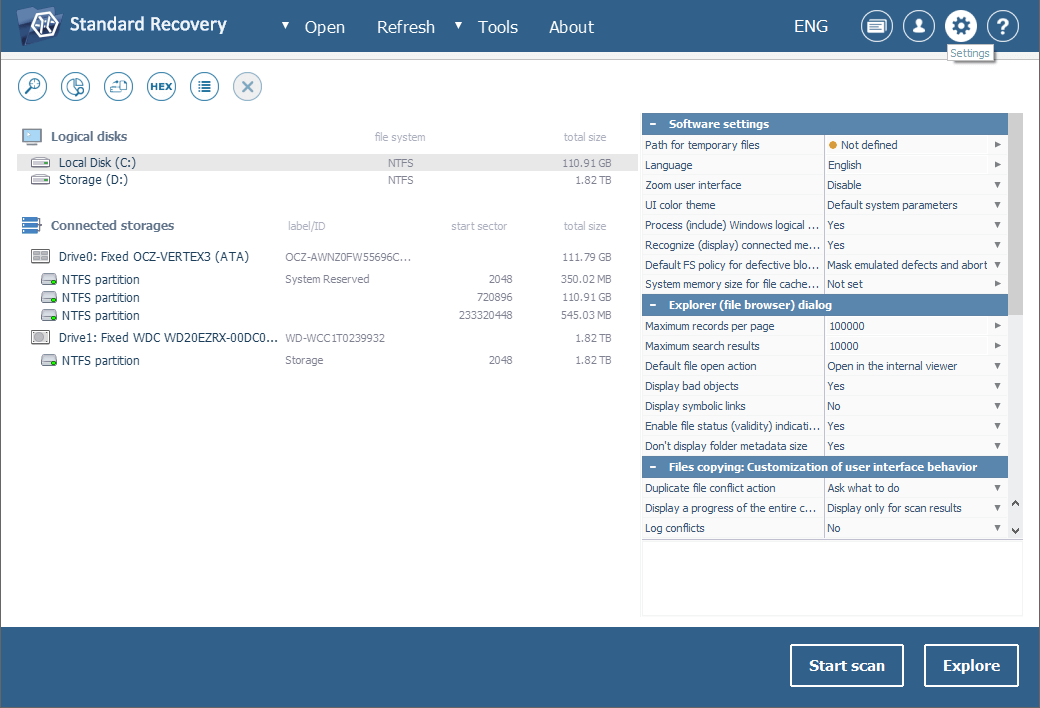
Launch the program and modify its parameters, if it is necessary.
-
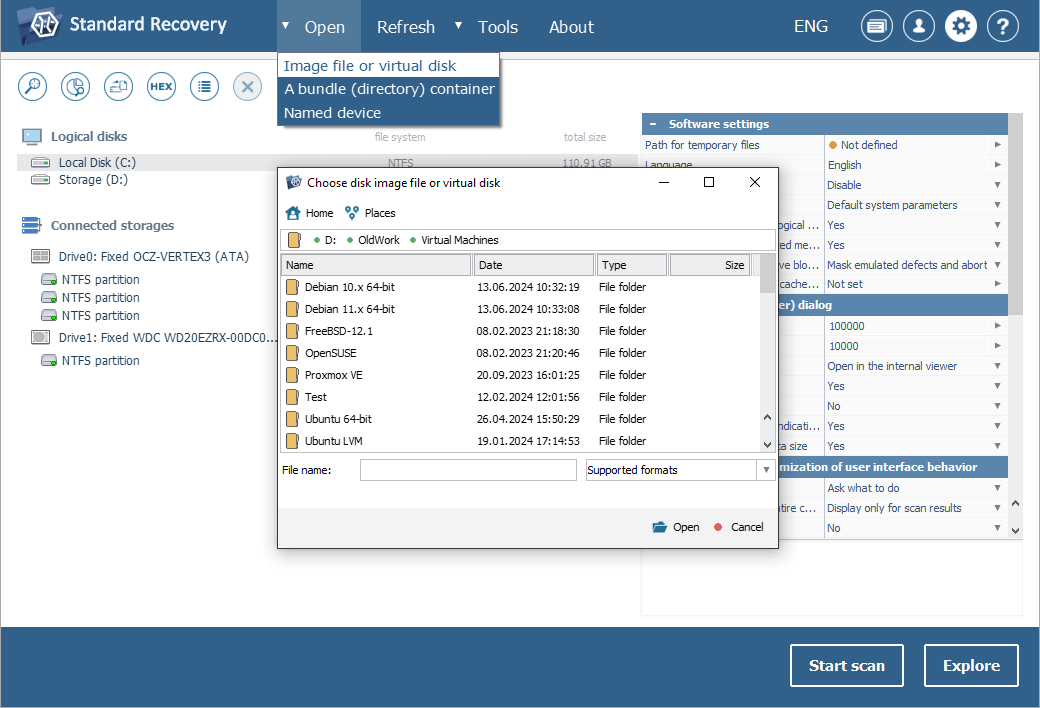
Unlike regular data storage media physically connected to the computer you run the program on, virtual disks do not show up automatically in its interface, but should be opened manually. To mount your virtual disk in the software, choose the "Open" tool from the main menu and click "Image file or virtual disk". Navigate to the file which represents your virtual storage. Then select it and press the "Open" button.
-
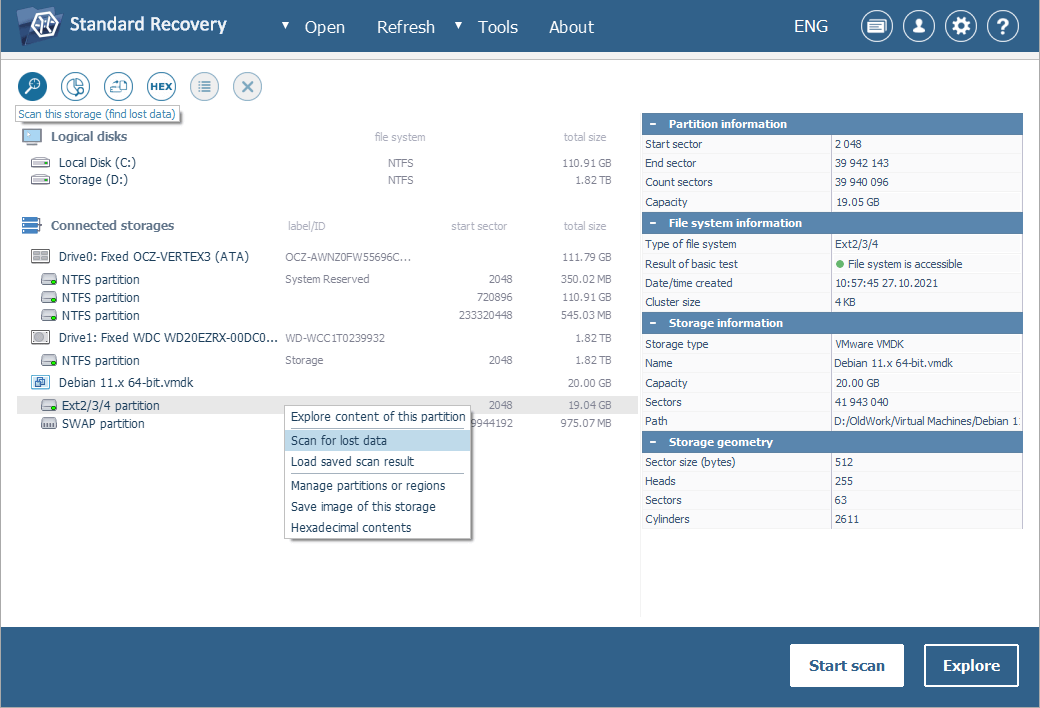
Find and select the mounted virtual disk in the left pane of the main window and scan it for lost data using the context menu "Scan for lost data" option, the "Start scan" button in the bottom right corner or the "Scan this storage" tool from the toolbar at the top of the left panel. Set the desired scanning parameters and proceed.
Hint: Please find more information about how to configure the scan in the article dedicated to scanning a drive with UFS Explorer.
Wait till the scanning procedure is over.
-
Explore the presented folders/files and find the ones you are going to copy. You may sort them by various criteria or preview them in the embedded viewer. The process can also be accelerated with the help of the quick search field and the advanced "Find in this folder" search tool.
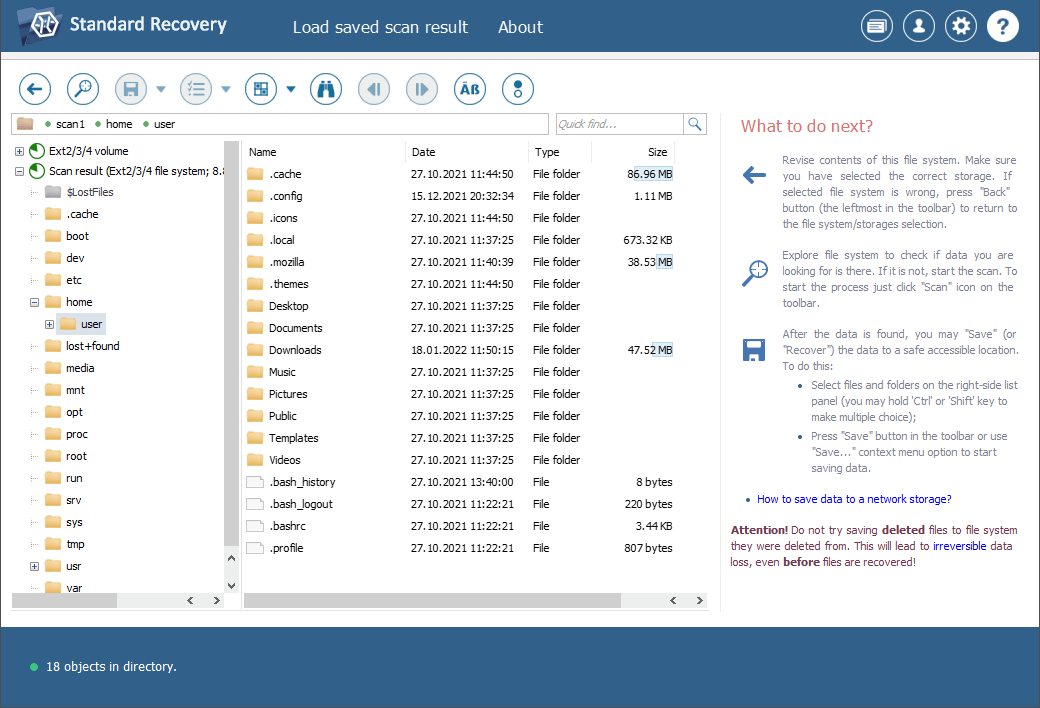
Hint: Please refer to the article Evaluation and saving the results of data recovery to find more information about how to work with the obtained folders and files.
-
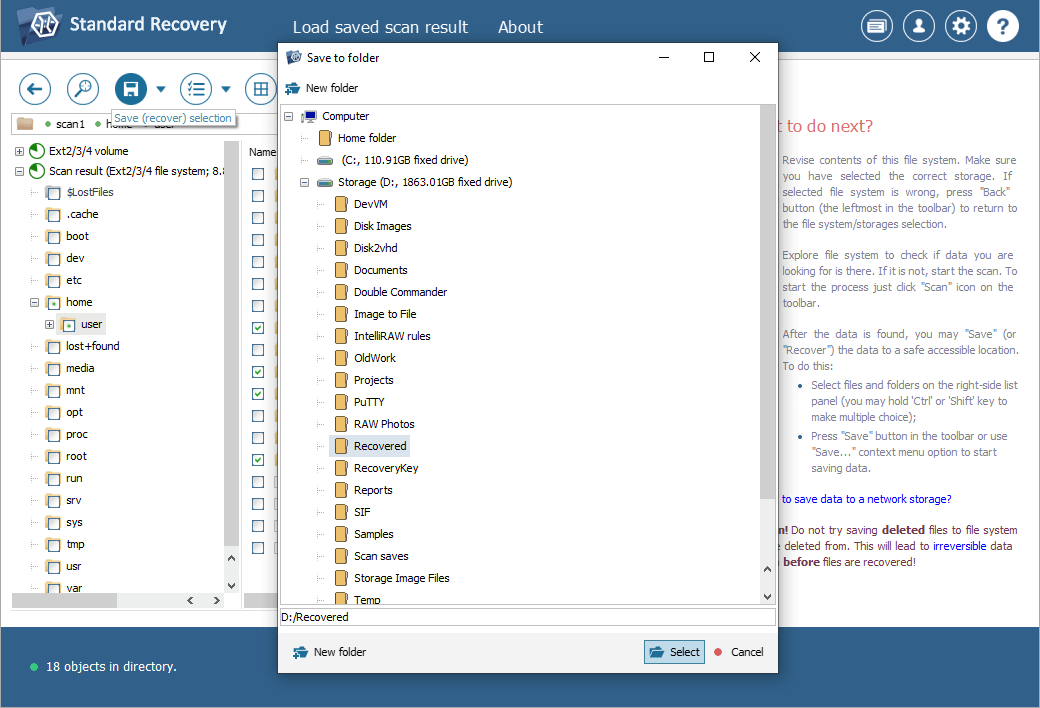
Click "Define selection" and choose all files/folders you are going to recover.

-
Copy the selected files to the host PC internal storage or any external storage (like a portable SSD or HDD, a memory card or a USB memory drive) using the "Save current selection" tool.
More complicated instances of data loss from virtual machines
Some virtualization products implement specific techniques related to the optimization of virtual disks performance or providing their compatibility with the host OS which make data extraction from them much more complicated. Among such technologies are:
Chunked virtual disks were introduced by VMware to create FAT-compatible virtual disks. Since FAT has limitations to the size of files, VMware products support splitting a virtual disk into fragments (chunks) that are no larger than 2 GB each. To read such chunked virtual disks it is required to assemble the chunks into one virtual image. For this purpose, UFS Explorer Professional Recovery is equipped with a special tool "Disk image of chunk files". On the other hand, you can also work with such a storage in UFS Explorer RAID Recovery using its integrated RAID Builder tool ("New RAID" option) to assemble "Span of storages" from the chunk files.
Parallels virtual machine's bundles were introduced for Parallels Desktop for Mac, in which a virtual disk is packed into a single file along with its snapshots. To get lost data back from this kind of a virtual disk one must extract it from the VM package first. The UFS Explorer Professional Recovery software allows you to recover missing information from Parallels VM packages.
ESX Storage is a storage space introduced by VMware for ESX/ESXi hosts which enables them to use a number of physical storage systems to store virtual disks. Such disks can be shared over the network from the server, however, there is a common issue when virtual disk files are shared as blank. The file of such a virtual disk should be first transferred from the server to the "local" storage in order to get access to it. Also, ESX/ESXi servers employ a special clustered VMFS (VMFS6) file system, which allows running multiple virtual machines in parallel, with concurrent access to their virtual disks. UFS Explorer Professional Recovery is capable of opening ESX/ESXi virtual disks and supports the VMFS (VMFS6) file system, serving as an efficient solution for access to files of such storages as well as data recovery from them.
Last update: June 04, 2024