Storage access restrictions of macOS: Removing them for data recovery
In the general run of things, if an operable storage device is properly attached to the computer, it instantly appears in the list of connected storages found in the left-hand pane of the UFS Explorer main window. From there it can be accessed for subsequent data copying or recovery of lost files. However, the users of Macintosh laptop and desktop machines often face a confusing problem. An intact drive which keeps the data to be restored may simply be unavailable in the program’s interface. In some cases, inaccessibility of the storage medium may be indicated by an exclamation mark icon displayed next to it. The software encounters obstacles during work with macOS drives due to several typical issues. Effective solutions to them can be found in this article.
Lack of administrative privileges
Administrator rights are required for any data recovery tool to work with physical drives, thus, the absence of the latter will certainly prevent UFS Explorer from accessing any storage device connected to the Mac, except for disk images or virtual disks which are not in fact real storage systems.
In this case, as long as you have an administrator password, you need to:
-
log into an administrator account;
-
restart the application with administrative privileges by entering the correct user/ password.
The following video tutorial shows how to run the software with elevated privileges from either an Administrator or Standard user account:
Use of the T2 security chip or Apple M1
The T2 security chip is Apple's second-generation processor that has been implemented in some modern Macs since 2018. It provides encryption and many other security features integrated directly into the computer’s hardware. Also, starting from 2020, the company began a transition from the use of Intel processors to its in-house M1 chip (Apple Silicon) built into the latest machines. Along with numerous pros, these technologies have one big disadvantage from the perspective of data recovery. They encrypt information on the system drive using a hardware key. As the decryption key is not available, data on such Macs cannot be dercrypted by means of software. A special approach of deriving the decryption key from the security chip is required, that has not been implemented in any known data recovery or even computer forensic software. However, UFS Explorer is still able to run on such systems and recover data from external storage media.
In order to learn whether your Mac has Apple M1 or T2 security chip, you can refer to the System Information application:
-
Step 1. Go to the Apple menu and choose About this Mac.
-
Step 2. Check the property listed after the model of your Mac. The item labeled Chip followed by Apple M1 means that your computer is supplied with this component. If you see the Processor item instead, your Mac is based on an Intel processor with the name specified right next to it.
-
Step 3. Click the System Report button below your Mac’s overview.
-
Step 4. In the sidebar, select Controller (or iBridge, depending on the version of macOS). If your Mac has the Apple T2 security chip, the Model Name property will indicate Apple T2 chip.
System Integrity Protection is enabled
In macOS 10.13 High Sierra and later a special security feature called System Integrity Protection (SIP) keeps third-party software from gaining access to the system disk. In essence, its role is to avert any modifications to system files performed by viruses and other malware. It preserves the integrity of the OS and ensures its normal functioning, however, along with that, it doesn’t allow useful applications like data recovery tools to read the startup drive (Macintosh HD or Apple SSD).
Therefore, if you have one of the latest macOS versions and want to restore some files that have been lost from the drive on which the system is installed, you need to go one of the following ways:
-
disable SIP manually as specified below;
-
connect the drive to another computer as a secondary disk. In order to implement this method, you will need to take the storage out from the current machine and use a hard drive enclosure to insert it into another computer;
-
boot your Mac using UFS Explorer Backup and Emergency Recovery CD. The procedure can be performed by following the instructions from Data recovery using a bootable USB drive. Please note that this option requires a Linux license for UFS Explorer.
Otherwise, UFS Explorer won’t be able to access this disk, even when run with administrator privileges.
-To deactivate System Integrity Protection in High Sierra and later you may follow these simple steps:
-
Step 1.Restart your Mac (open the menu and choose Restart).
-
Step 2.On startup, press and hold the Command + R This will make your Mac enter the Recovery Mode.
-
Step 3.In the Utilities menu choose Terminal to launch the Terminal application.
-
Step 4.In the command line window type in csrutil disable and press the Enter
-
Step 5.For the changes to take effect, restart your Mac again by clicking the Apple logo and selecting Restart.
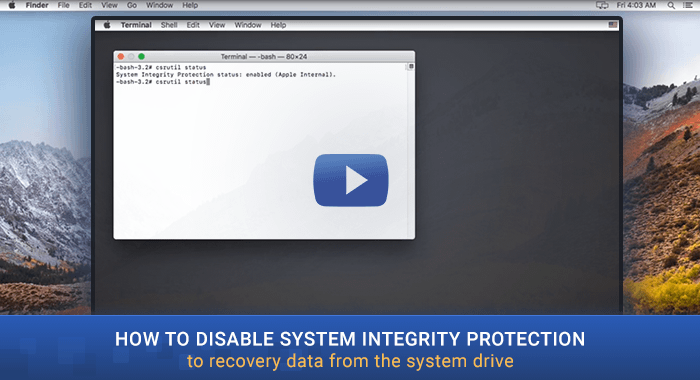
-To make sure that SIP is indeed off after the restart, you may:
-
Step 1.Open the Terminal from the Utilities on the top of your Mac.
-
Step 2.Type in the csrutil status command and press Enter.
After that, you can run UFS Explorer and scan the drive for lost data. Having finished the recovery procedure, don’t forget to turn the SIP feature on by booting into the Recovery Mode again and typing csrutil enable in the Terminal.
Watch this video instruction which demonstrates the whole process step by step:
- If the Recovery Mode is not working in macOS 11 Big Sur, you may try the following solutions:
-
When you are unable to boot into the Recovery mode using the Command + Rkeys, check the Command + Option + R and Shift + Option + Command combinations as well.
-
If the attempt fails anyway, as has been previously mentioned, you may run the machine with the help ofUFS Explorer Backup and Emergency Recovery CD and carry out the steps of Data recovery using a bootable USB drive.
-
Another possible option is to use a USB flash drive with a bootable installer. Such an installer provides a set of utilities similar to those available in the Recovery Mode. However, the drive itself must not be created on the same Mac to avoid overwriting of the data on the system drive caused by the download of the installer.
To create such a bootable installation medium, you can proceed in accordance with the instruction:
-
Prepare a free USB stick with the capacity of at least 14 GB. Ensure that it doesn’t contain any necessary data.
-
Use another Mac to download the installer for macOS Big Sur from the App Store.
-
An Install macOS app will be downloaded to the Applications folder. Quit the installation process, if it starts automatically.
-
Connect the prepared USB flash drive to the same Mac which stores the installer file.
-
Launch the Terminal from its Utilities
-
In the Terminal, enter the following command and press Return to carry it out:
sudo /Applications/Install\ macOS\ Big\ Sur.app/Contents/Resources/createinstallmedia --volume /Volumes/MyDrive
Please note that the “My drive” argument in this case must be replaced with the actual name of your USB flash drive.
-
In the pop-up window, specify your administrator password and hit Return
-
Type Y to confirm that you are ready to erase the volume and press Return.
-
After erasure is completed, you may be warned that the Terminal wants to access files on a removable volume. You should click OK to proceed.
-
When the copying process is finished, the volume will have the name Install macOS Big Sur. Quit the Terminal and remove this USB stick.
-
Connect the created drive with a bootable installer to the affected Mac.
-
Restart the machine. On startup, press and hold the Option
-
Release the key when you see a dark screen with bootable volumes.
-
Select the one holding your bootable installer and press Return.
-
If prompted, choose the preferred language.
-
In the Utilities menu, choose Terminal to launch the Terminal app.
-
In the Terminal, type in csrutil disableand press the Enter
-
To apply the change, reboot your Mac once again.
Disk connection or health problems
If the above given measures don’t help and the drive remains inaccessible anyway, the storage is likely to have physical or connection issues which are required to be handled to make data recovery possible.
Last update: August 07, 2022