How to recover data from HP EVA SAN
HP StorageWorks Enterprise Virtual Array, or HP EVA for short, was once an exceedingly popular SAN solution in the enterprise IT landscape. But as technology evolved, new players emerged in the industry, offering superior capabilities and drawing most organizations to migrate away from EVA. Beyond doubt, at present it is considered to be outdated. Yet, in spite of this, there are still many businesses and institutions that keep using HP EVA SANs due to their existing infrastructure, budget constraints or other factors. And knowing how to recover data from these systems will certainly remain relevant in the foreseeable future. So, let’s look into this process and its essential details.
Peculiarities of data recovery from HP EVA SAN
Data recovery from HP EVA SAN presents some unique challenges, not only in view of the age, but also the proprietary nature of the system and the complexities involved in its architecture. The most important aspects of the latter are described in the basics of HP EVA SAN and should be taken into account during the recovery process. However, particular mention should be made of the following:
Hardware specificities. HP EVA SANs utilize multiple hardware components, which brings about connectivity issues and complicates data recovery efforts. There are usually one or more EVA disk shelves connected to one or two SAN controllers using the Fibre Channel or SAS interface, depending on the generation of the system. The number of accommodated drives starts from a dozen in most configurations and may potentially scale up to hundreds in larger setups. Such drives feature native Fiber-ATA (older models) or SAS (newer models) connections that are not as widespread as consumer interfaces like SATA. While it is possible to access them within their respective shelves, finding suitable hardware may be problematic as well, especially for older-generation HP EVA SANs.
Layered logical structure. To optimize performance and provide efficient utilization of the storage capacity, HP EVA SANs extensively employ virtualization. The storage involves multiple layers of abstraction, from the physical drives at the lowest level to the virtual volumes called Vdisks presented to servers or hosts at the highest level. Obviously, this impacts the data recovery process and requires additional steps for the extraction of the essential storage parameters and its correct assembly from the underlying elements. A significant role here is played by Vraid, a proprietary technology that provides RAID-like redundancy features within the HP EVA SAN environment. In contrast to the traditional RAID that is directly bound to a set of physical drives, Vraid is virtual and is operated through the dedicated software means within the SAN. Vraid allows a single disk group to be used for multiple Vdisks, and these Vdisks may have different Vraid levels (Vraid0, Vraid1, Vraid5, Vraid6), depending on the desired data protection requirements. The data is evenly distributed across all the drives in the group, and the thin provisioning capabilities offered by Vraid allows allocating the space for Vdisks from this shared pool on demand. The SAN configuration metadata is typically stored only on a subset of 4–5 drives, while the rest of the drives just contain a pool member description.
Compatibility issues. Most generic data recovery tools may not be compatible with the aforesaid proprietary configurations used by HP EVA. Yet, without specialized software tailored to its unique architecture, it is extremely difficult to access, analyze and recover data from such a system. That is why Data recovery plugin for HP StorageWorks EVA, designed as an extension to UFS Explorer Technician, can come as a valuable instrument for the experts dealing with data loss on HP EVA SANs. This plugin is geared to address the unique characteristics and complexities of HP EVA SANs, ensuring maximum efficiency of the data recovery efforts.
Preparation for the procedure
Preparing for data recovery from an HP EVA SAN involves several critical stages:
Hardware preparation. You will need to prepare a dedicated workstation, on which the recovery operations will be performed, and equip it with all the necessary adapters, cables, etc. to establish connectivity with the storage interface used by your model of HP EVA SAN. The possible options include:
-
For HP EVA P6300/P6500 with SAS drives
To connect the drives from the latest generation of HP EVA, it's recommended to attach the entire disk shelf to a compatible SAS HBA board with the help of a standard SFF-8088 cable.
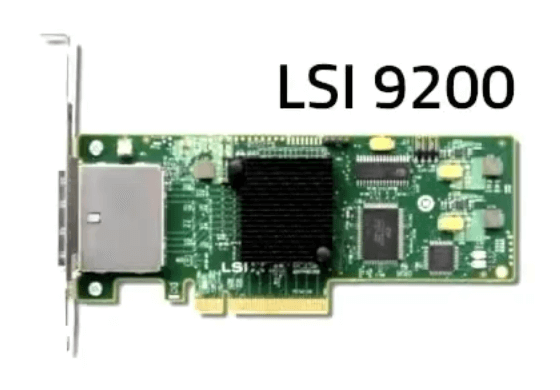
Pic. 1. SAS Host Bus Adapter
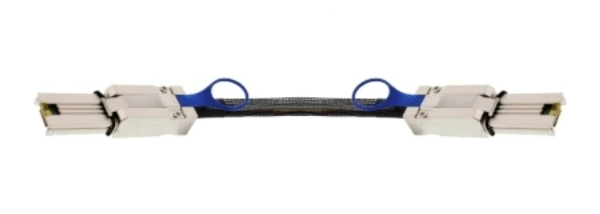
Pic. 2. SFF-8088 cable
-
For HP EVA 4400-8400 with Fiber-ATA (FATA) drives
To connect the Fibre Channel drives from EVA 4400, 6400 or 8400, a special rare adapter can be used.
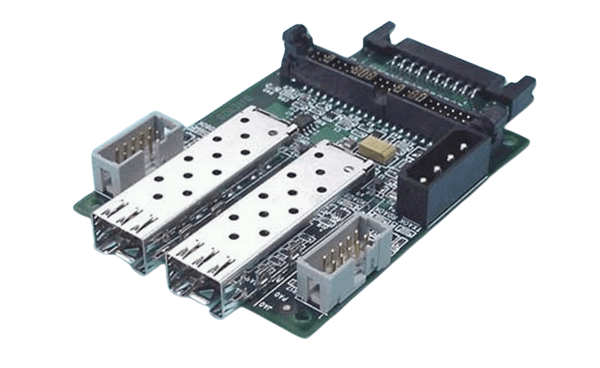
Pic. 3. Rare adapter for FC drives connection
As an alternative, you may connect the entire shelf to a computer via a Fibre Channel HBA board.
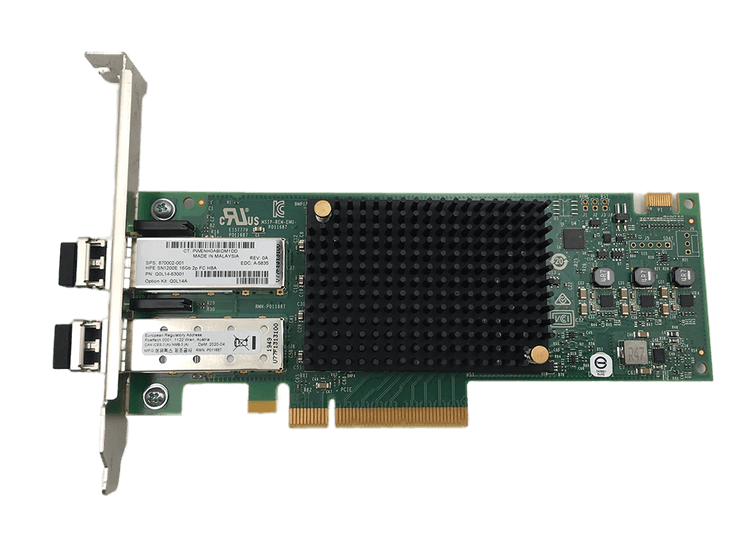
Pic. 4. FC Host Bus Adapter
To establish Fibre Channel connection to the shelf itself, you will need a board that operates in the default peer-to-peer mode and the corresponding driver installed.
You will also need a pair of optical cables and a Fibre Channel switch with the Fibre Channel "fabric" capability, for example, HP StorageWorks 8/24 SAN switch.
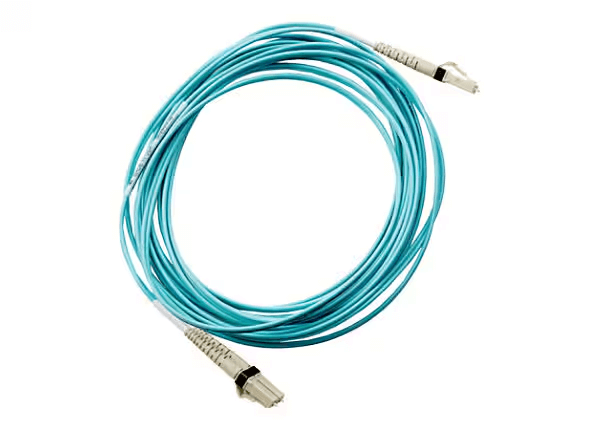
Pic. 5. FC optical cables
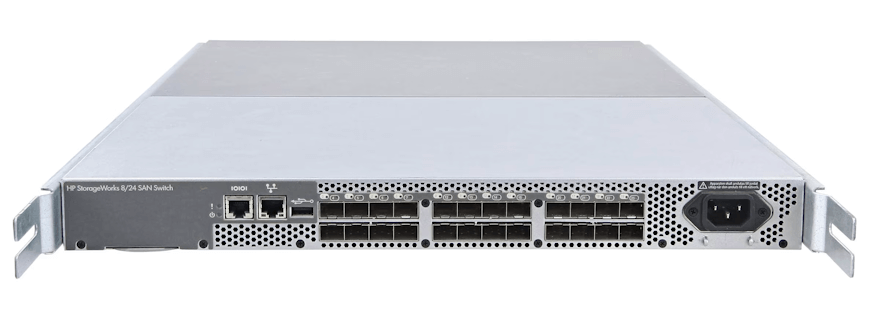
Pic. 6. HP StorageWorks 8/24 FC SAN switch
Once connected to Fibre Channel fabric, the shelf is presented as a Fibre Channel Target and is available for connection by the client computer. The connected Fibre Channel drives will be recognized as SCSI devices.
-
Old HP EVA 3000-7000, 4100-8100 with FATA drives.
Old FC drives used by the initial models of HP EVA SAN are not compatible with newer disk shelves. Furthermore, such models rely on M5314 disk shelves that do not support peer-to-peer connections.
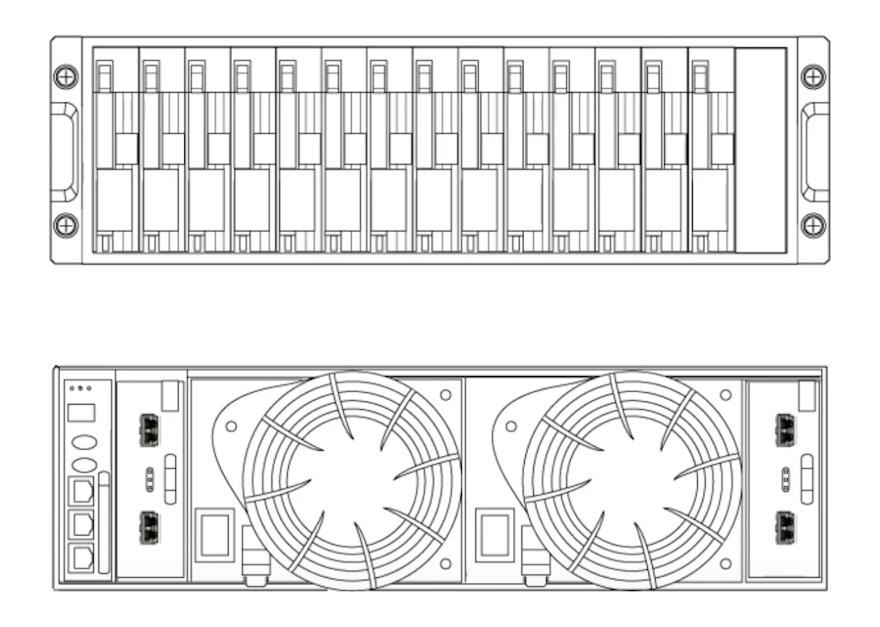
Pic. 7. M5314 disk shelf
Accessing data from such systems require either the use of special adapters or a Fibre Channel HBA board in the Arbitrated Loop mode.
Pic. 8. Special adapter for old-generation FC drives
Yet, even in this mode, the shelf cannot be initialized without a special procedure. This procedure can be performed, for instance, by the SAN controller, booted without disk shelves.
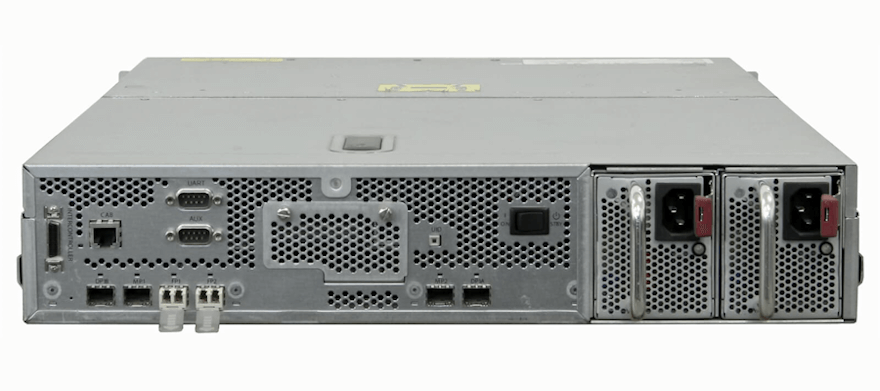
Pic. 9. SAN controller
Disk imaging. Having connected and obtained access to the drives from the HP EVA SAN, it is highly advisable to create a disk image for each of them and proceed working with the copies instead of the original devices. Considering the age of the system, such a safety measure is important to ensure the preservation of the data in the event of degradation or physical drive failure. More detailed instructions as to the imaging process are provided in How to create an image of a drive.

Plugin installation and activation. Download Data recovery plugin for HP StorageWorks EVA from the respective product webpage and follow the on-screen instructions to install this component. After that, it will automatically appear among the plugins in the interface of UFS Explorer Technician and can also be accessed via its Plugin Manager. To exploit the full functionality of this plugin and be able to save the recovered data, you will also need to activate the product’s license. Otherwise, only a preview of the reconstructed virtual volumes will be available in the software.
How to recover data from HP EVA SAN
Having completed the preparations, you can rely on the following instructions to perform logical data recovery:
-
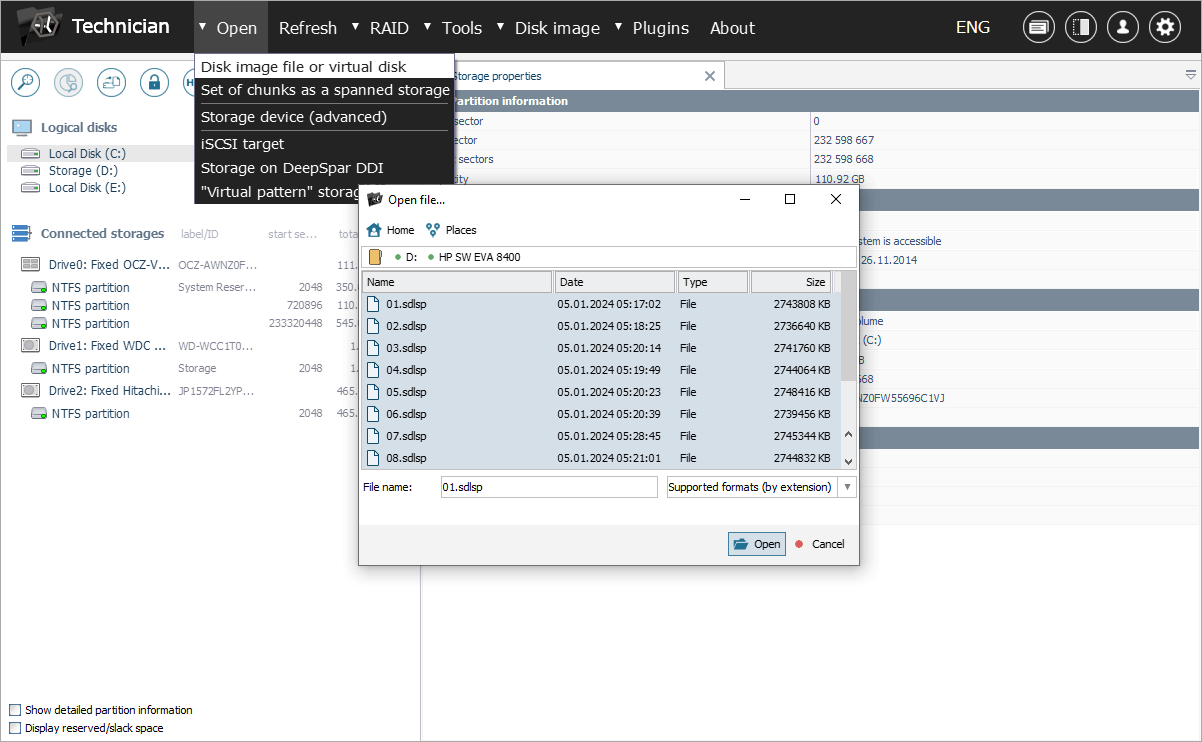
Load the disk images you’ve created for HP EVA drives into UFS Explorer Technician.
For this, get the "Disk image or virtual disk" option from the "Open" menu, browse to the location where the disk images are stored, select each item and hit the "Open" button. After that, you should see them displayed among other detected storages in the left pane of the main window.
The program will automatically recognize and mark the SAN pool constituents with a special icon.
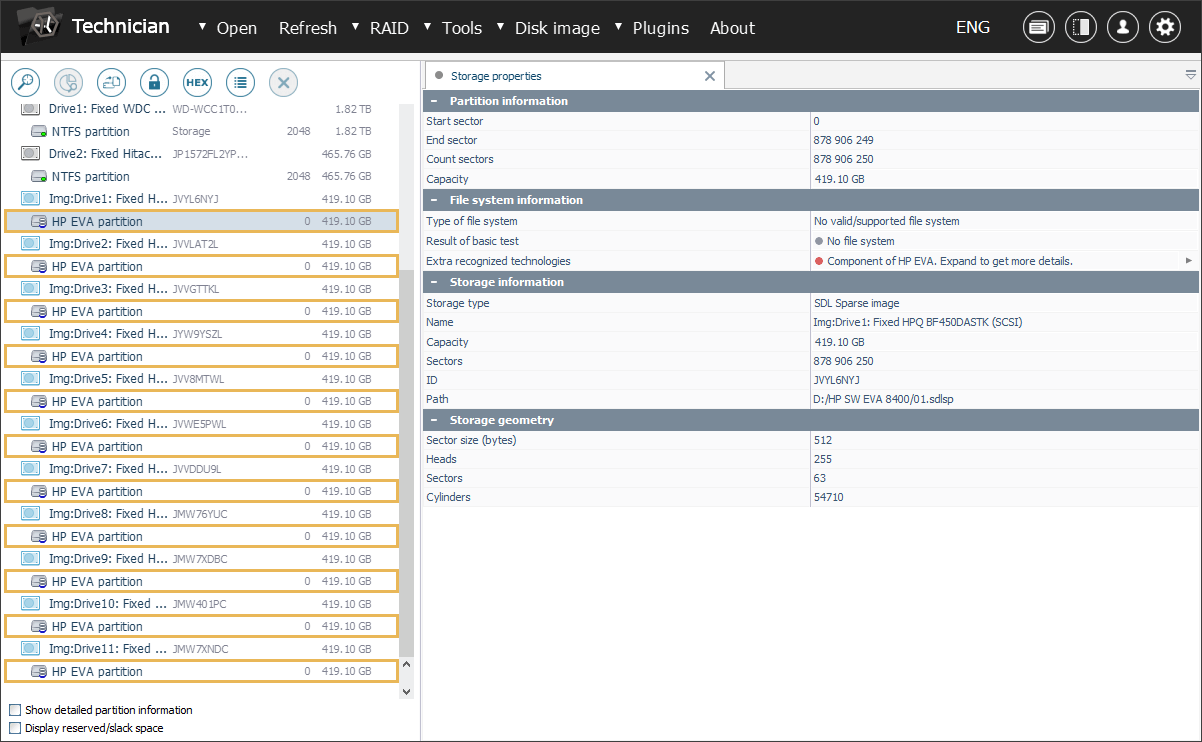
If a drive belonging to EVA lacks such an icon, this may indicate damage to its metadata. Another possibility is that the SAN has excluded this component from the pool or even haven’t included it from the very start.
-
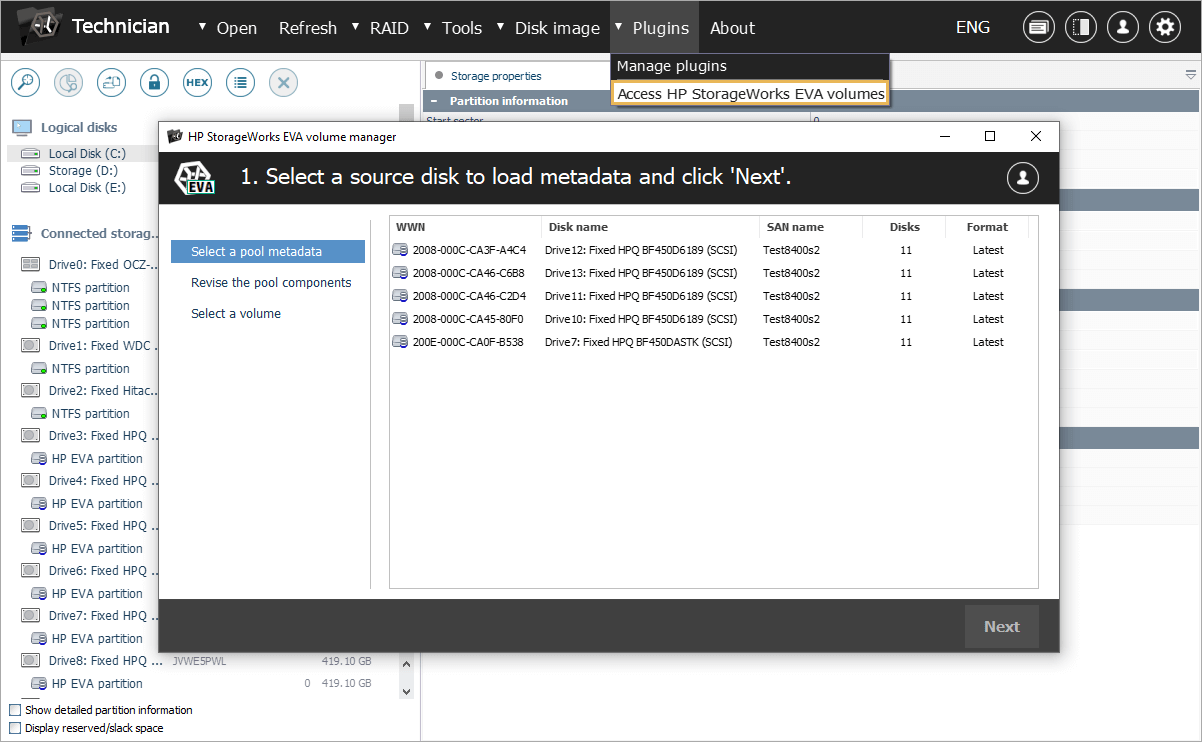
Launch the respective plugin to start searching for the available EVA configurations.
Go to the "Plugins" menu and use the "Access HP StorageWorks EVA volumes" option. In the opened window, you will be presented with a list of configuration metadata versions found on the source drives. Select one of them to proceed.
Yet, please be aware that the system may periodically update or change the current set of "metadata" drives, which may result in some of them having outdated metadata.
-
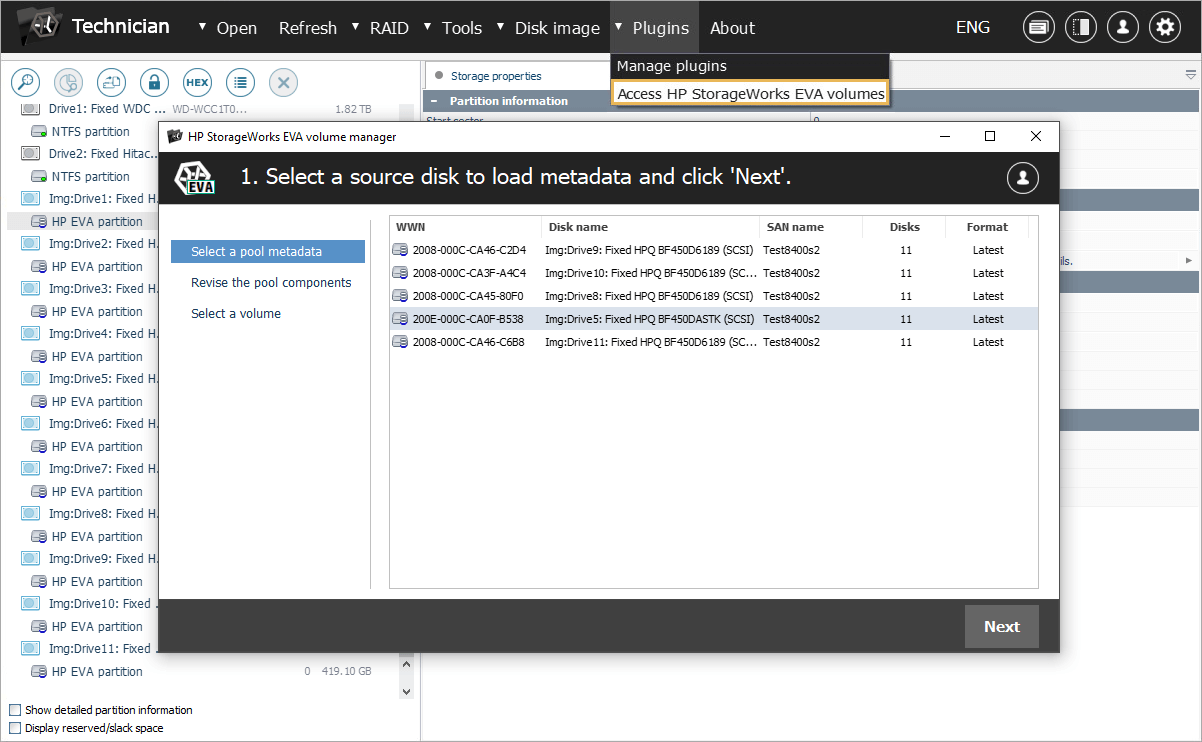
Verify the identified members of the SAN pool and, if required, assign the missing ones.
After the selected metadata version is loaded, the system displays a set of drives detected as components of the SAN pool.
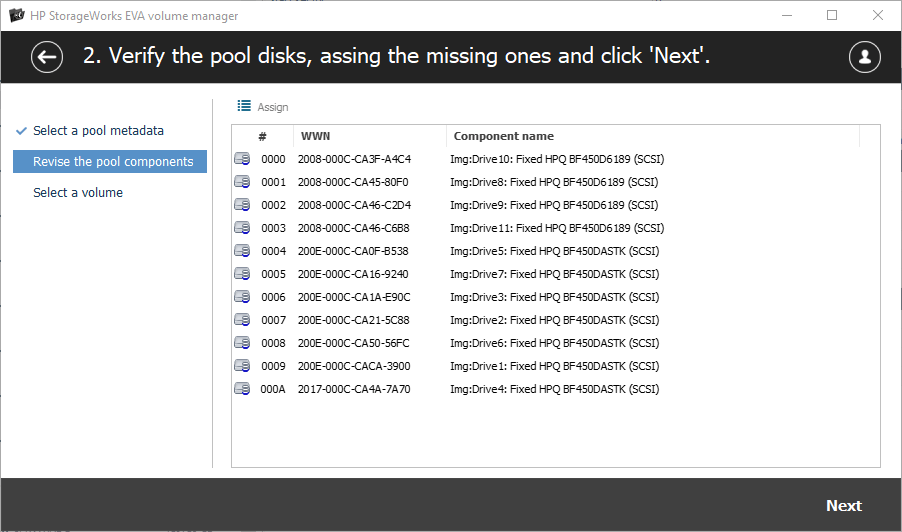
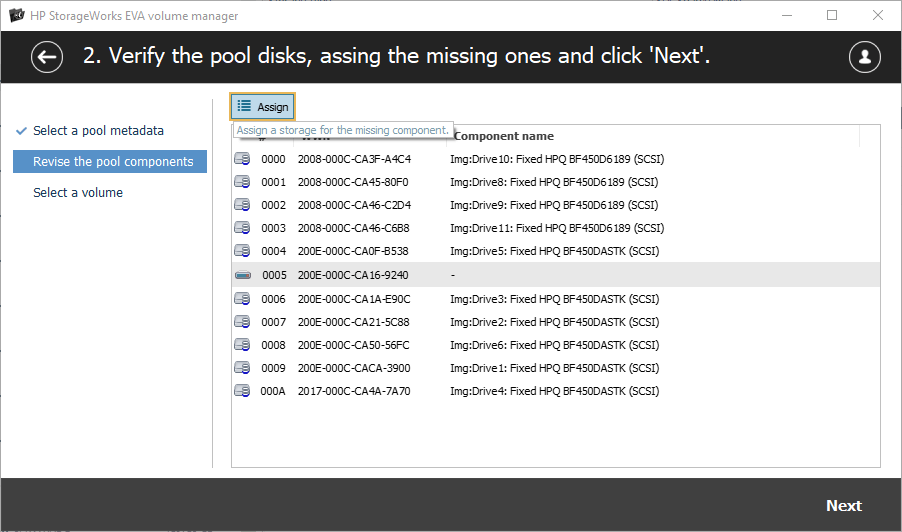
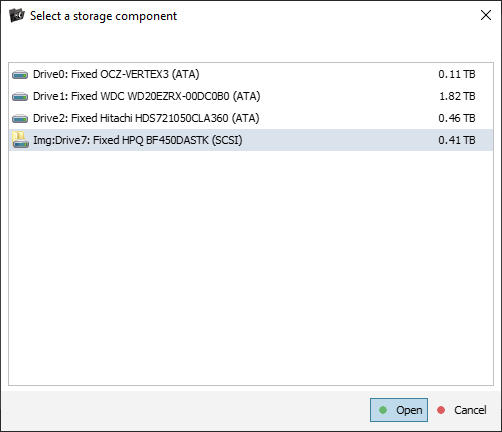
In the event that a drive was not recognized automatically, for example, due to metadata damage, it is possible to add it manually via the "Assign" button.
It also has to be noted that the software supports redundancy for Vraid1, Vraid5 and Vraid6 configurations, whereas Vraid0 volumes require all drives to be present for proper reconstruction.
-
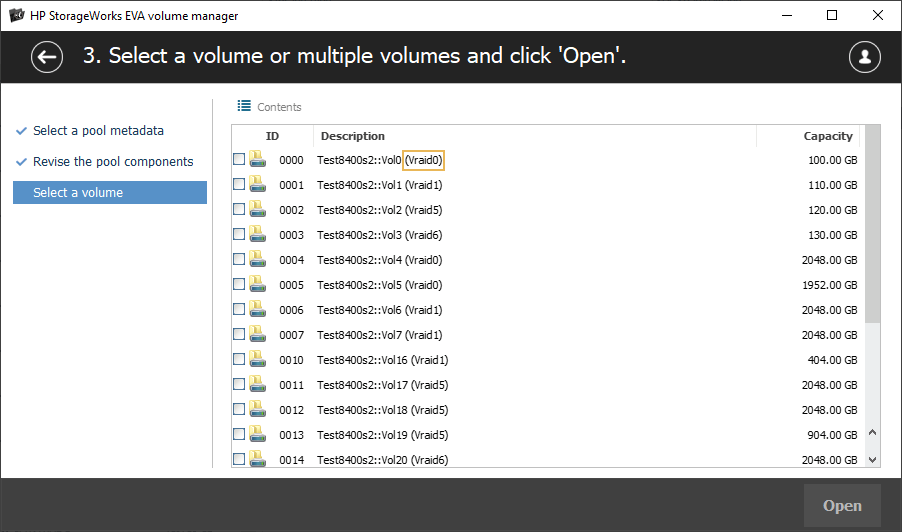
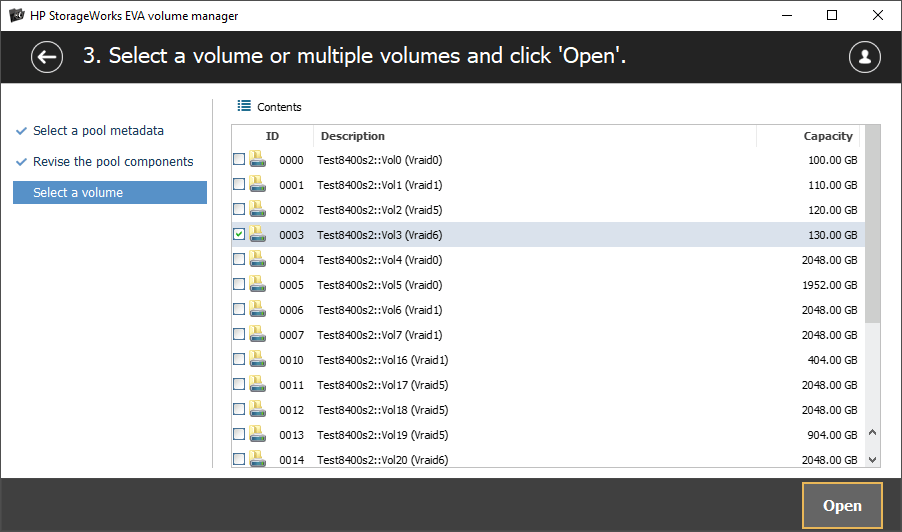
Look through the list of reconstructed SAN volumes and evaluate their content.
Each SAN volume is designated by its "Vraid" type, along with information about its size. The program also offers a preview function that allows you to examine the file system within each volume, determine its state and the presence of recoverable data.
-
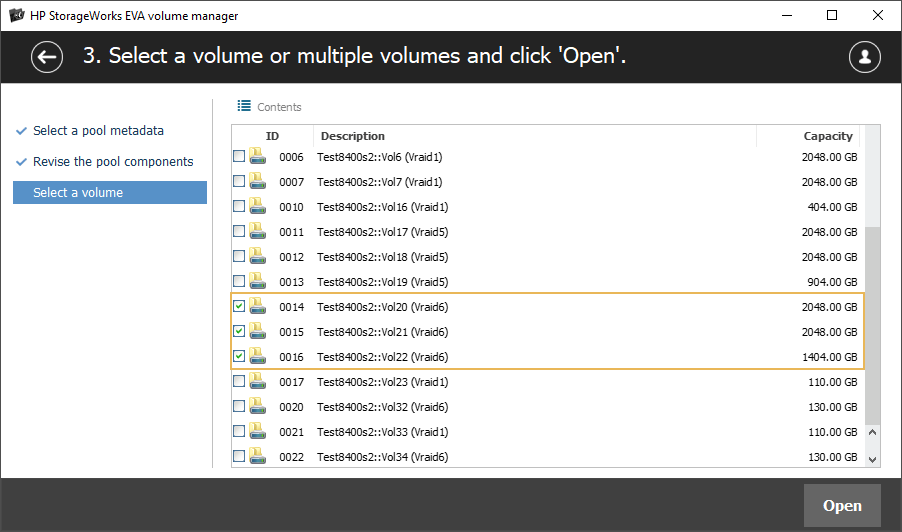
Select all the volumes that seem valid and hit the "Open" button to mount them in the program’s interface for further manipulations.
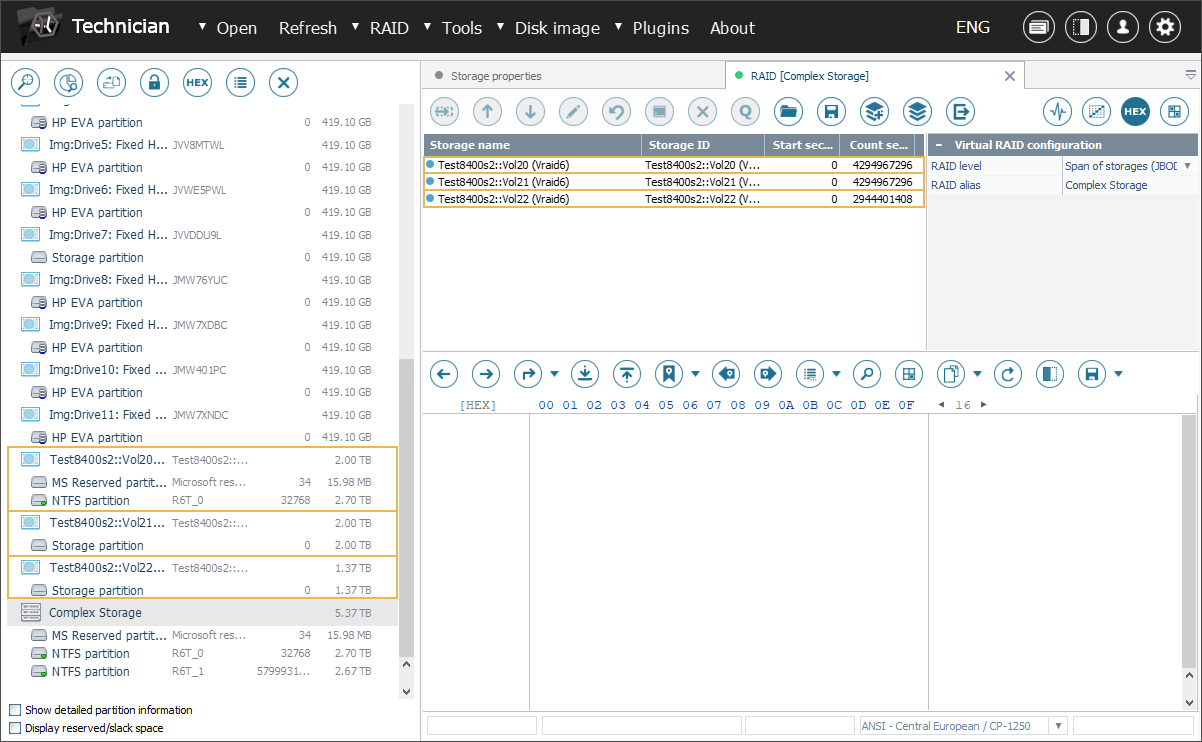
Provided that the plugin’s license has been activated, the selected volumes will show up in the storages list and become accessible for further data recovery operations such as scanning or copying.

Volumes larger than 2 TB may introduce an additional complexity here due to the size limitations imposed by HP EVA SAN systems. Such volumes may comprise multiple components of a smaller size that should be spanned together with the help of RAID Builder.
HP EVA SAN recovery in a video guide
The following video will walk you through the HP EVA SAN recovery process step by step:
Last update: April 25, 2024