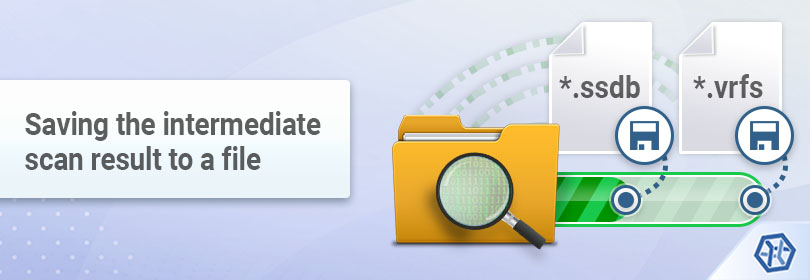
Saving the intermediate scan result to a file and its further use
To extract the missing data with the help of UFS Explorer, one needs to launch a scan for the problem digital medium or a partition on it in the utility as described in Performing a drive’s scan and then copy the retrieved folders and files to any safe location. However, it happens at times that the copying process cannot be initiated right away, for instance, when the storage capacious enough to place the recovered data isn’t prepared yet, or there is an urgent necessity to pause the scan and restart the software or the operating system. On the other hand, closing the program will lead to the loss of the unsaved recovered information whereas repeating a scan may be undesirable in view of its duration, especially for large and slow storage devices. Under such circumstances, it is advised to save the obtained scan result as a separate file and then open it later in order to work with the required content. Such a file won’t include the data itself, only the information about the structures on the scanned storage, thus, it will occupy far less space but will still allow avoiding a repeated scanning procedure. Moreover, the software makes it possible to save it’s the intermediate progress of a scanning procedure and continue it afterwards from where it was interrupted.
For achieving that goal, UFS Explorer employs two proprietary file types – *.ssdb files are created for the results of an unfinished scanning procedure (a scan status database) while an accomplished scan result is saved as a *.vrfs file (a virtual file system file). Please follow the provided instructions if you want to save the in-between or final scan information during work with UFS Explorer or load the already saved file for further processing.
Note: The virtual file system files (*.vrfs) created with UFS Explorer Professional Recovery can be utilized only in this very software edition. The rest of the scan result types are cross-compatible through all editions of UFS Explorer, provided that the support for the processed storage (specific storage technology) is available in the corresponding program.
Saving the current scan state to a file (*.ssdb)
For UFS Explorer of the Standard, RAID and Network RAID editions
-
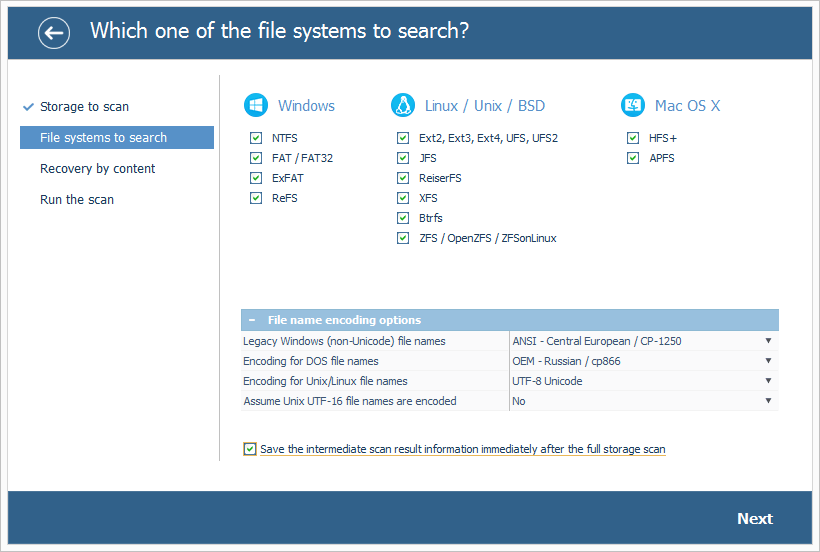
You may set up automatic saving of a scan’s state before starting to analyze the selected storage. Just enable the checkbox next to the "Save the intermediate scan result information immediately after the full storage scan" option presented at the stage of choosing file system types.
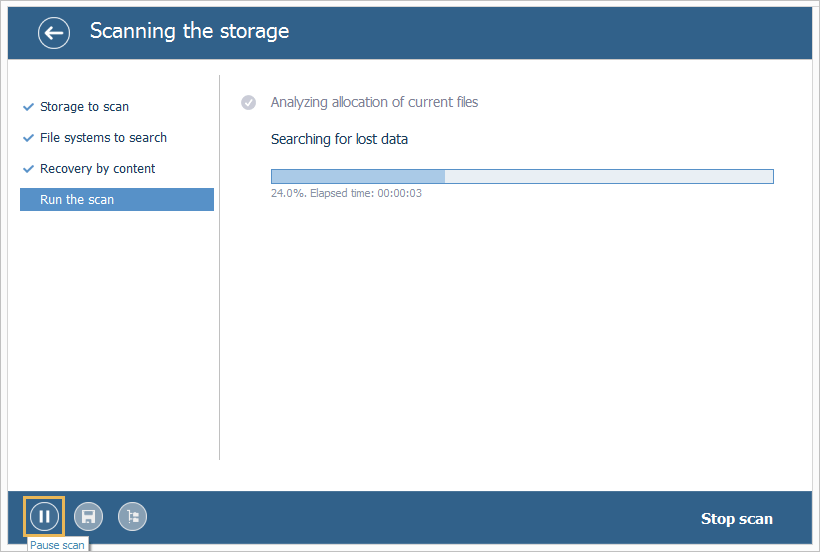
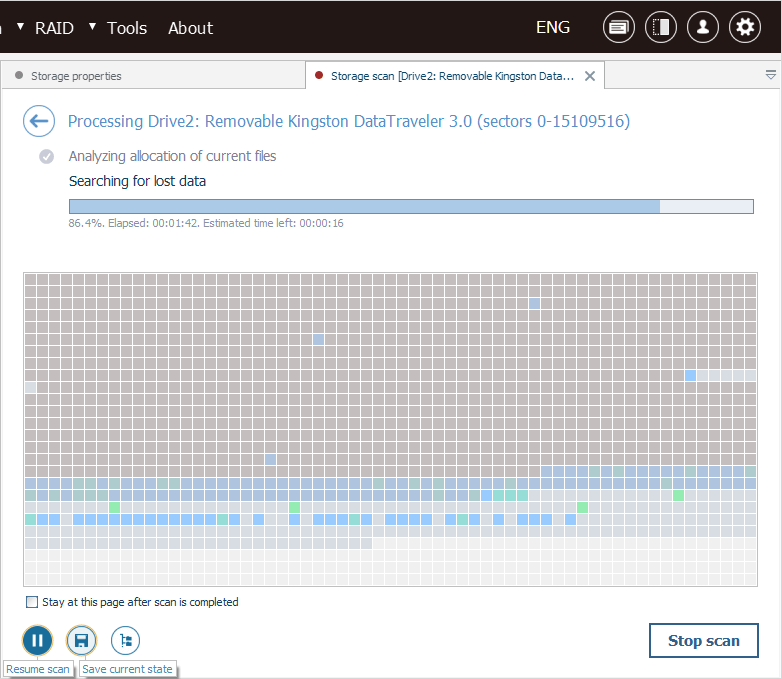
Alternatively, you may pause the ongoing scanning procedure by pressing the "Pause scan" button in the lower left corner of the program’s interface.
-
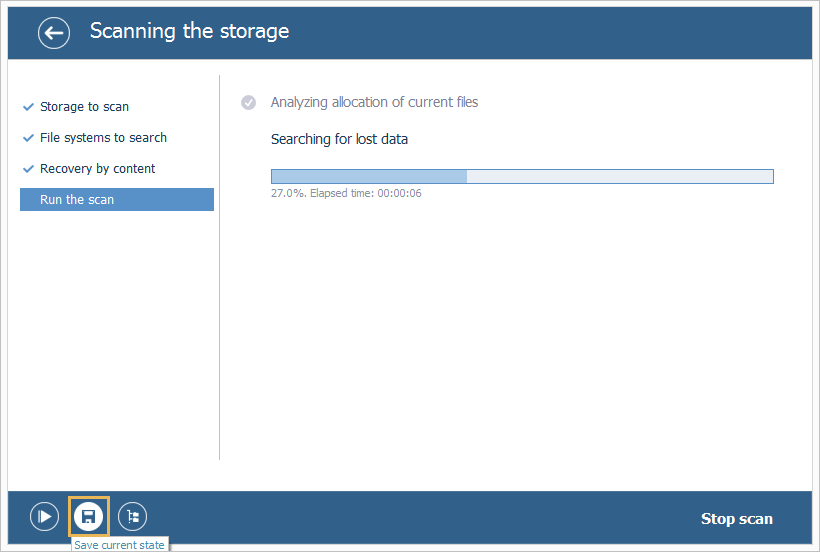
Save its progress with the help of the "Save current state" button.
-
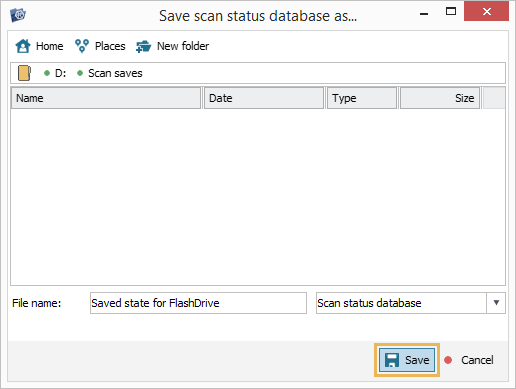
Provide the name for the scan status database, choose a location for this file that is not found on the scanned storage and hit "Save".
For UFS Explorer Professional Recovery
-
When configuring parameters for a scan, you may enable the "Save the scan status database after the full scan" option, and the program will save the obtained scan status database automatically.
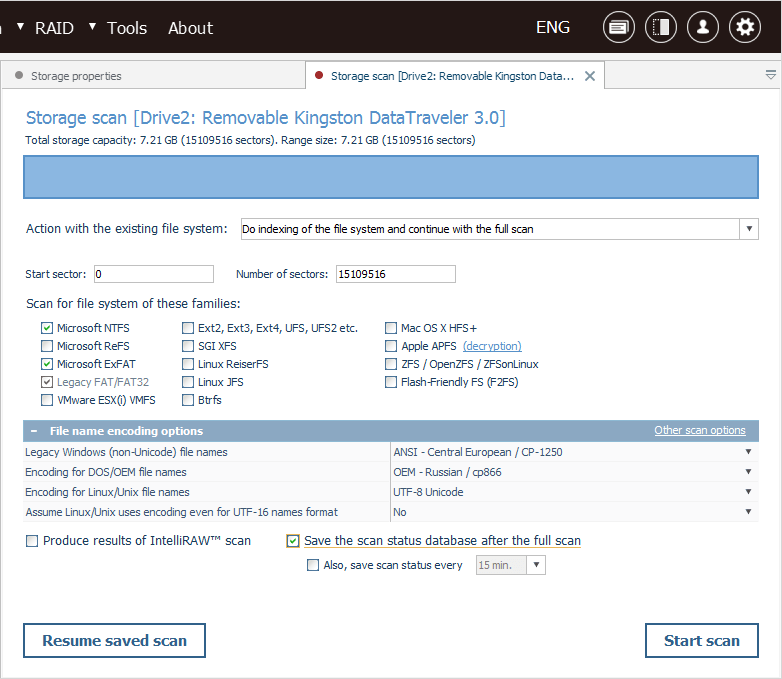
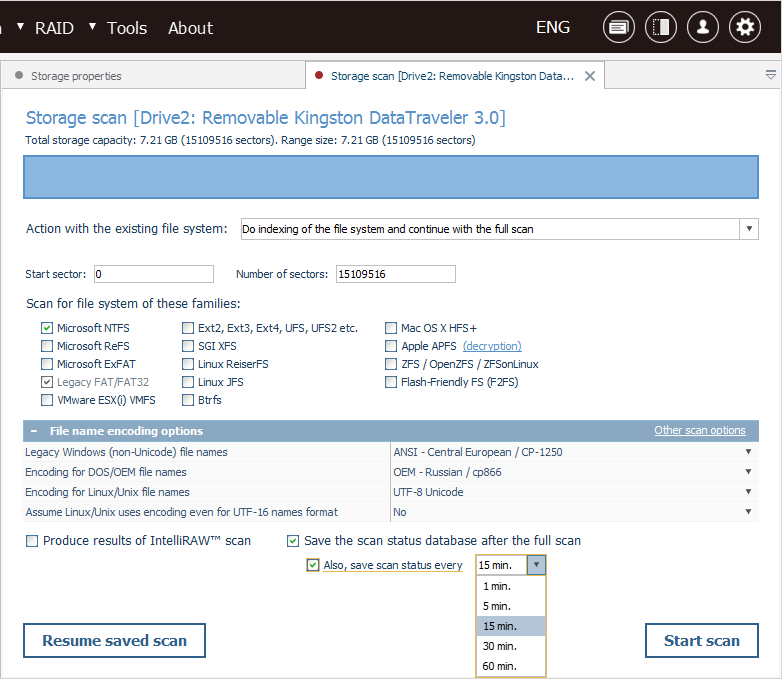
It is also possible to set up periodical saving of the state of a scan by ticking off the checkbox next to "Save scan status every" and choosing the required interval from the drop-down box.
As an alternative, you may pause the already started scanning operation with the "Pause scan" button in the lower left corner and then save its progress manually with the help of the "Save current state" button.
-
Specify the name for your scan status database, pick out a destination folder for this file that is not located on the scanned storage and click "Save".

Resuming the scan from the saved state
-
Prepare the processed storage device once again and run UFS Explorer.
-
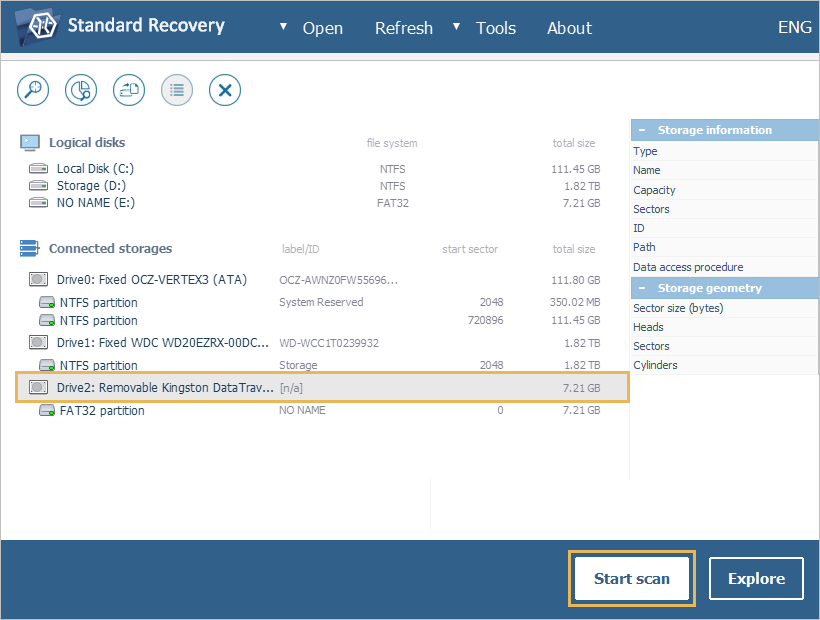
Select this storage from the list in the left pane of the interface and start its scan using the "Scan" button or the corresponding option in the storage context menu, but do not launch the procedure.
-
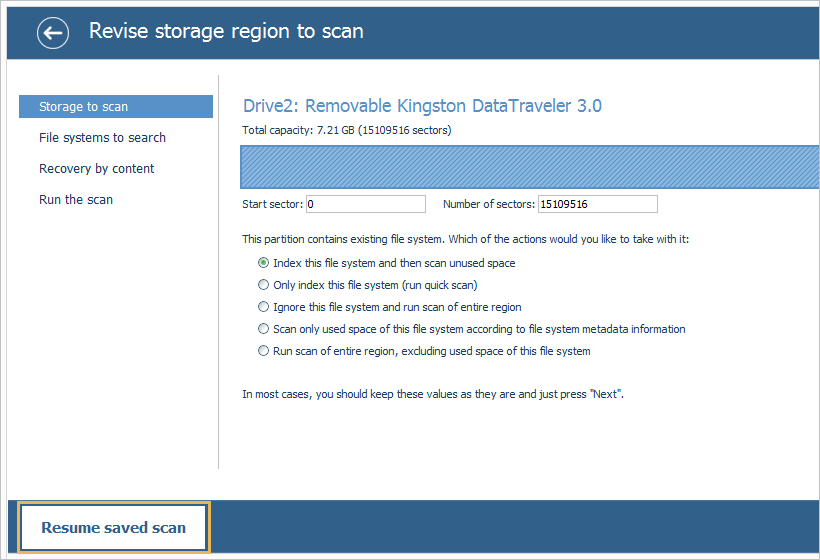
Hit the "Resume saved scan" button at the bottom left of the opened window.
-
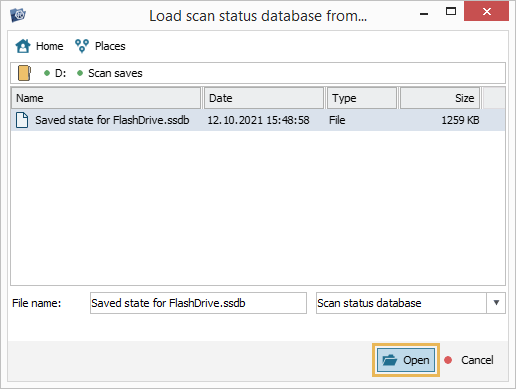
Navigate to the previously saved *.ssdb file and press "Open". The scanning process will begin right away from the spot when it was saved.
Saving the scan result information to a file (*.vrfs)
For UFS Explorer of the Standard, RAID and Network RAID editions
-
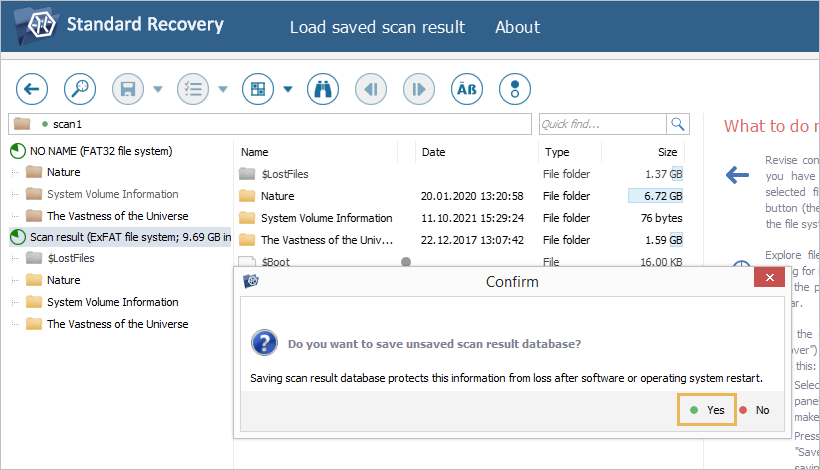
Immediately after the scanning procedure is completed, the software will suggest saving the scan result database to avoid the loss of the obtained data. Click "Yes" to proceed to saving.
-
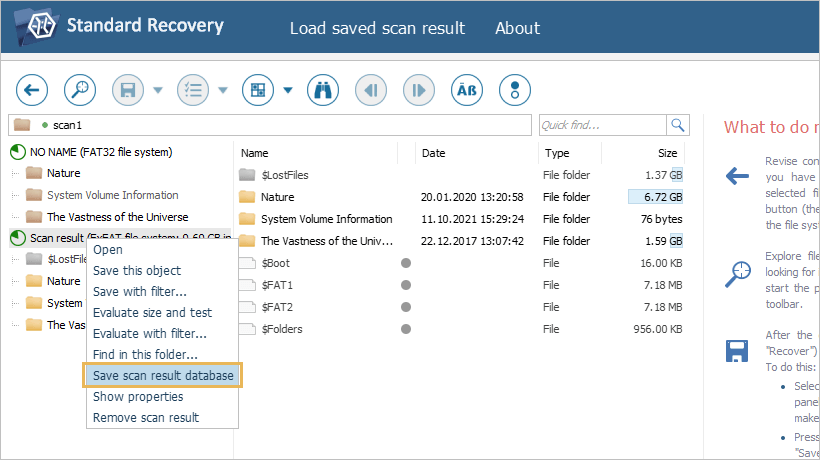
If for some reason you’ve canceled the operation, you can save this information anyway: select the required Scan result item in Explorer and choose the "Save scan result database" option available in its context menu.
-
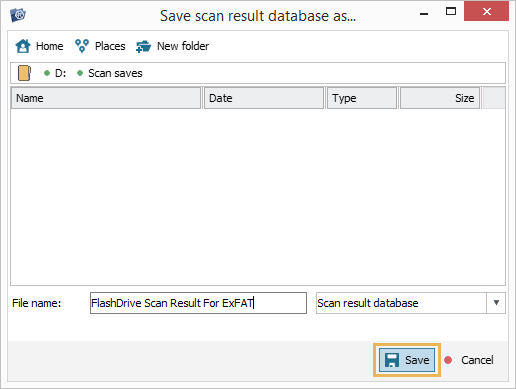
Enter the name for this file, choose the folder for it that is not located on the scanned storage and press "Save".
For UFS Explorer Professional Recovery
-
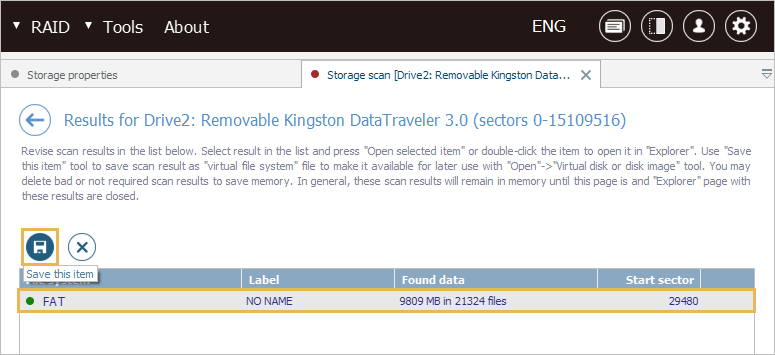
After the scanning operation is finished, select the required File system item from the list and press the "Save this item"
-
Enter the name for the file of the virtual file system, choose the location for it other than the scanned storage and hit "Save".

Loading the created scan result file to UFS Explorer
For UFS Explorer of the Standard, RAID and Network RAID editions
Method 1: Using the storage context menu
-
To load the previously saved scan information into the program, first of all, connect the scanned storage device to the computer.
-
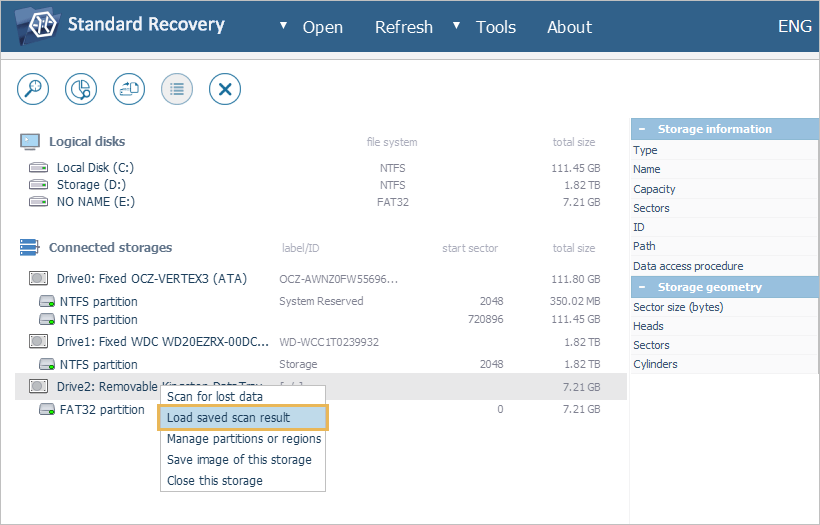
Run UFS Explorer and select the drive or a partition on it among the storages in the left panel.
-
Right-click the item and choose the "Load saved scan result" from the context menu.
-
Navigate to the *.vfs file you’ve created earlier and click "Open" to start working with the retrieved content.

Method 2: From the Explorer window
-
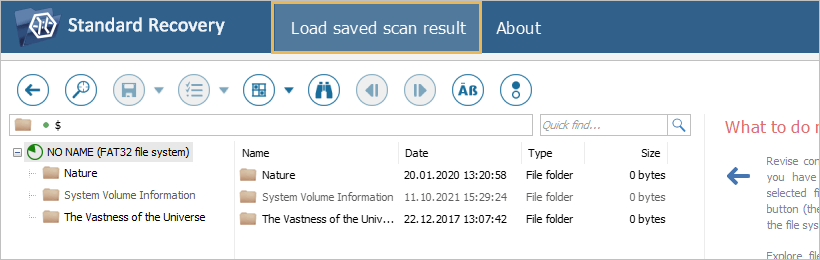
The saved scan result database can also be loaded from Explorer: to use this approach, double-click the partition on the connected storage device you’ve scanned or select it and press the "Explore button".

-
Click the "Load saved scan result" button from the menu at the top of the software interface.
-
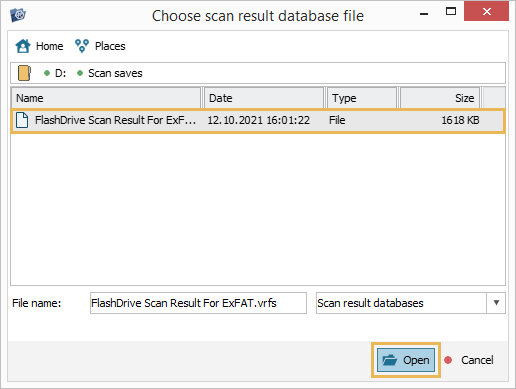
Go to the *.vfs file that was created before and hit "Open" to upload it into the program.
For UFS Explorer Professional Recovery
Method 1: Using the storage context menu
-
To open the previously created scan result database, first of all, attach the processed storage device to the computer.
-
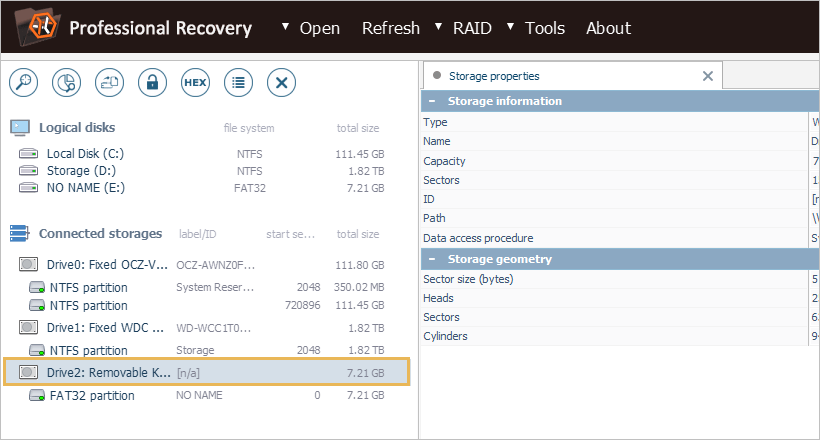
Launch UFS Explorer and find the drive (or a partition) in the list of connected storages.
-
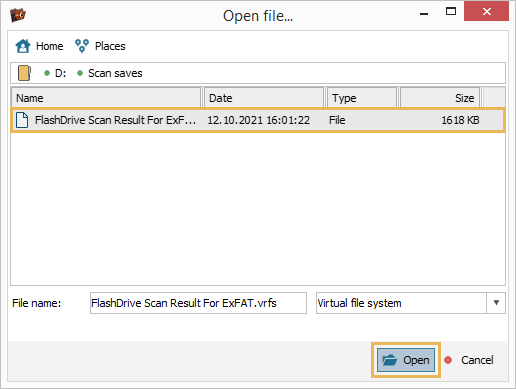
Select the item and use the "Load saved virtual file system" option in its context menu.

-
Browse to the location where the *.vfs file was previously saved and hit "Open" to start working with it in the software.
Method 2: Using the option in the main menu
-
Connect the scanned storage device to the computer and run UFS Explorer.
-
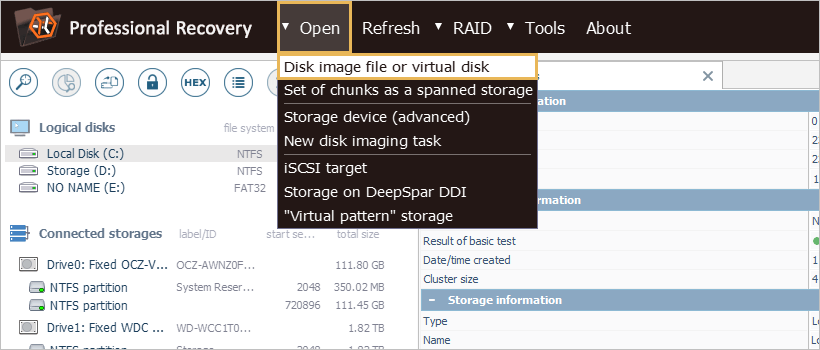
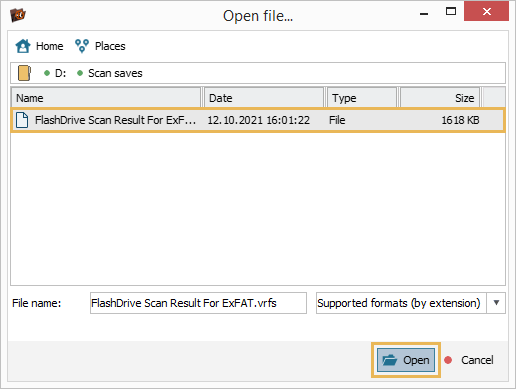
Choose the "Virtual disk or disk image" option from the "Open" item of the main menu.
-
Find the created *.vfs file and press the "Open"
-
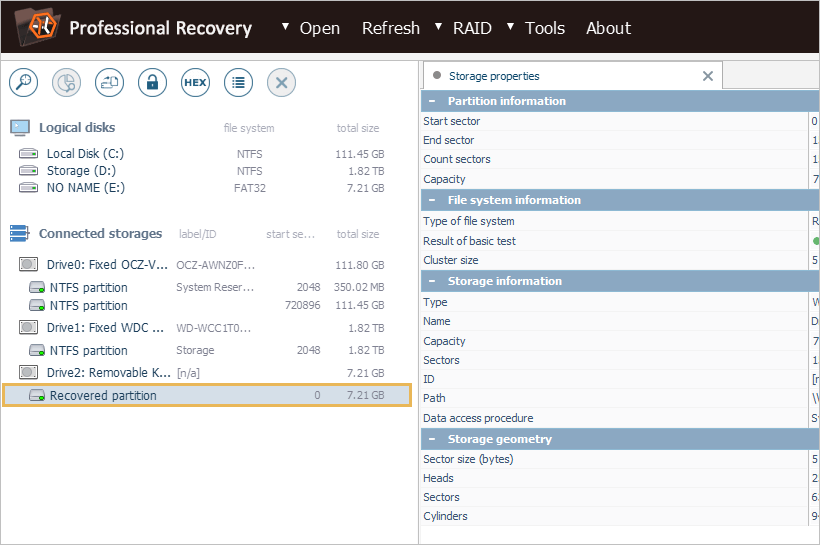
The application will load it as a separate virtual partition mounted under the corresponding drive in the tree of attached storage After that, it can be handled in the interface like any conventional volume.
Last update: August 15, 2022