How can one recover data from a NAS device?
NAS (Network-attached storage) is a handy technology enabling shared access to a general centralized storage. It may be available for several computers, workstations or any other devices featuring network connection capabilities. Being much smaller, less expensive and easier to maintain than traditional file servers, such systems can boast the same functionality and reliability. This has led to their wide popularity among both corporate and home users who rely on them to serve their data storage and backup needs. Still, like any device, NAS units are exposed to failures and outages resulting in the loss of crucial information. Moreover, unlike typical PCs or Macs, they usually don’t have inbuilt undelete functions. Recovering data from them though possible, requires taking into account the peculiarities of this very storage type.
NAS specifics to take into account before data recovery
Whilst some NAS boxes contain only one drive with a single volume, such devices are found very rarely even among ones oriented towards personal use. As a rule, NAS units are multi-disk storage systems, with their hard drives linked together with the help of the RAID technology, which also serves for increased performance and provides protection against drive failure. RAID 0, RAID 1 and RAID 5 are by far the most common layouts used in NAS. Yet, some manufacturers, like Drobo and Synology, provide their own developments in this regard, which open up new possibilities but at the same time, add significant complexity to the process of data recovery.
Hint: All the basic RAID concepts are described in the peculiarities of data organization on RAID. To learn more about particular NAS technologies, like Drobo BeyondRAID and Synology Hybrid RAID, please refer to the corresponding article.
In fact, NAS is not merely a digital storage, but a networked appliance with its own CPU and a customized Linux operating system. Such a device is plugged into a router with the help of an Ethernet cable, providing access to its files via network file sharing protocols (NFS, SMB, AFP, etc.), and cannot be connected directly to the PC via USB. Owing to the lack of low-level access to physical drives arising from the storage specifics and mediocre CPU characteristics of such devices, data recovery from NAS requires taking the drives out of the NAS box and connecting them to a computer.
There are also several other factors to be kept in mind before starting the procedure:
- once overwritten, the data becomes irrecoverable. When it comes to NAS devices, the overwriting may occur not only as a result of the user’s actions like saving new data to the affected drives or full-formatting them, but can be also provoked by the system regular operations or the TRIM command (in case your NAS is composed of SSDs). That is why it is highly recommended that you stop using your NAS as soon as you encounter a data loss issue, receive a critical error or assume a physical failure of a drive;
- encryption of NAS drives in most cases doesn’t hinder data recovery as long as you have the correct password or the corresponding recovery key, the encryption key is still available, and the area on the storage containing critical decryption metadata remains intact or at least is not damaged hardly;
- depending on the level of the RAID your NAS unit implements, the system can compensate the failure of one drive (RAID 3, RAID 4, RAID 5, RAID 7, etc.) or two drives (RAID 6, etc.), and the recovery of lost or deleted files is possible, provided that the rest of the drives of the array remain operational;
- in case you assume any kind of physical issue, please take your storage to a reliable data recovery center or at least create disk images of the damaged disks and work with their copies instead of the original storages themselves. Please mind that attempts to replace a failed drive and rebuild the array (especially when made by an inexperienced user) before data recovery may cause data overwriting, i.e. its irreversible loss.
Warning: Please familiarize yourself with the peculiarities of the imaging process for defective drives.
How to recover data from a RAID-based NAS with UFS Explorer RAID Recovery
If the critical files were lost from the NAS drives due to some kind of logical failure, like mistaken deletion, quick formatting, corruption or software-related issues, the right data recovery instrument will be able to return the missing information. SysDev Laboratories offers UFS Explorer and Recovery Explorer as effective software solutions that allow working with RAID of various levels and types, including standard RAID (RAID 0, RAID 1E, RAID 3, RAID 5, RAID 6, RAID 7, etc.), nested arrays (RAID level 10, 50, 60, 50E, etc.) and custom RAID layouts along with vendor-specific configurations, like Drobo BeyondRAID or Synology Hybrid RAID. The programs support most Linux-based file systems, including Ext, XFS and Btrfs, which are generally responsible for managing data on NAS volumes.
To restore files from NAS with the help of UFS Explorer RAID Recovery, you will need to do the following:
-
Prepare a host computer you will attach the NAS drives to for data recovery purposes. It is recommended to use a Windows PC, as it doesn’t support Linux file systems and won’t be able to write any data to the problem drives. Please also make sure that this PC allows connecting all the drives of your NAS unit (has enough USB ports and/or SATA ports on the motherboard, depending on the drives connection methods you’re going to use).
Download and install the program onto it, ensuring that the currently running operating system matches the version of the program.
Hint: Please refer to the article сovering the choice of the right OS for NAS recovery for more detailed information.
-
Find a storage large enough to place all the files recovered from your NAS drives or several data storage media in case you don’t have one that is capacious enough to save all of them. You may use the internal drive of the host PC you’re using for data recovery, or any portable data storage device, or a network location.
-
Turn the NAS hardware off and get the drives out of the box. Pay attention to the order of the drives and label them according to the bays they belong to.
Hint: If you are not sure how to remove the NAS drives correctly, please, refer to the video tutorial.
-
Power off the host computer and connect all the drives you’ve taken out of the NAS box to it – the best option is to use SATA ports found on the motherboard. If the system doesn’t have enough vacant SATA connectors, it is possible to use USB to SATA adapters or disk enclosures, though the latter approach will considerably affect the speed of the recovery procedure.
Note: If you don't know how you can plug the disk into the motherboard of the computer or сonnect the drive externally using a USB to SATA/IDE adapter, please rely on the video tutorials.
-
Start the computer and launch UFS Explorer RAID Recovery. If needed, change its parameters in the corresponding pane.
-
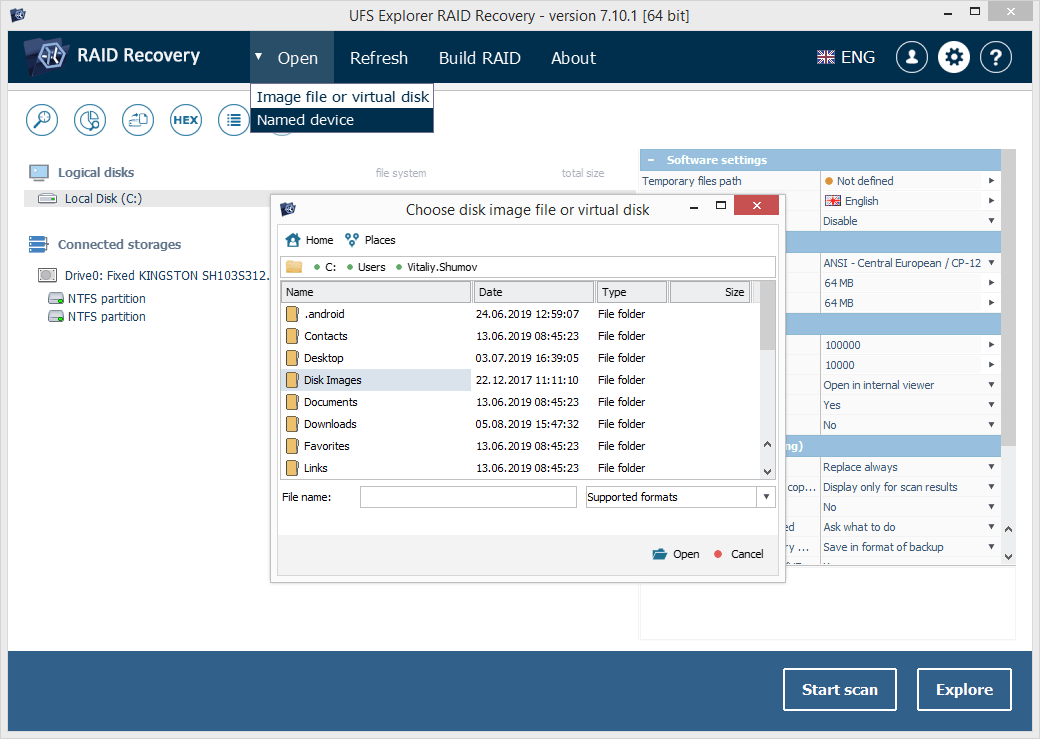
If you’ve created disk images to use them instead of the physical drives, open all of the disk image files with the help of the "Image file or virtual disk" option from the "Open" main menu item.
-
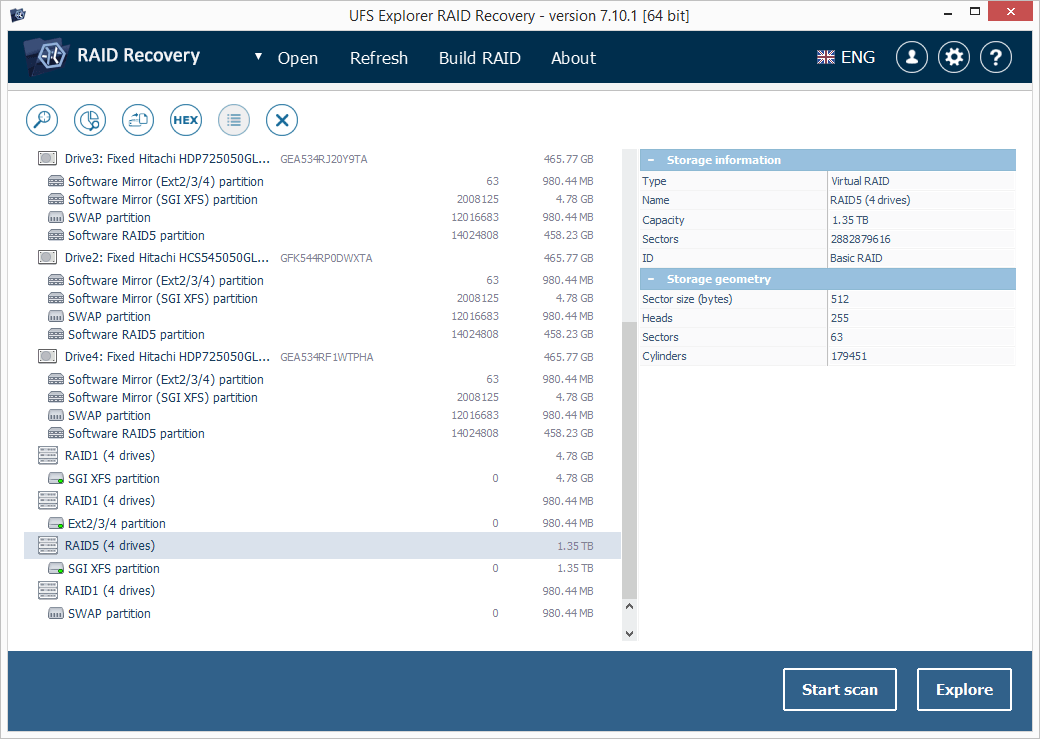
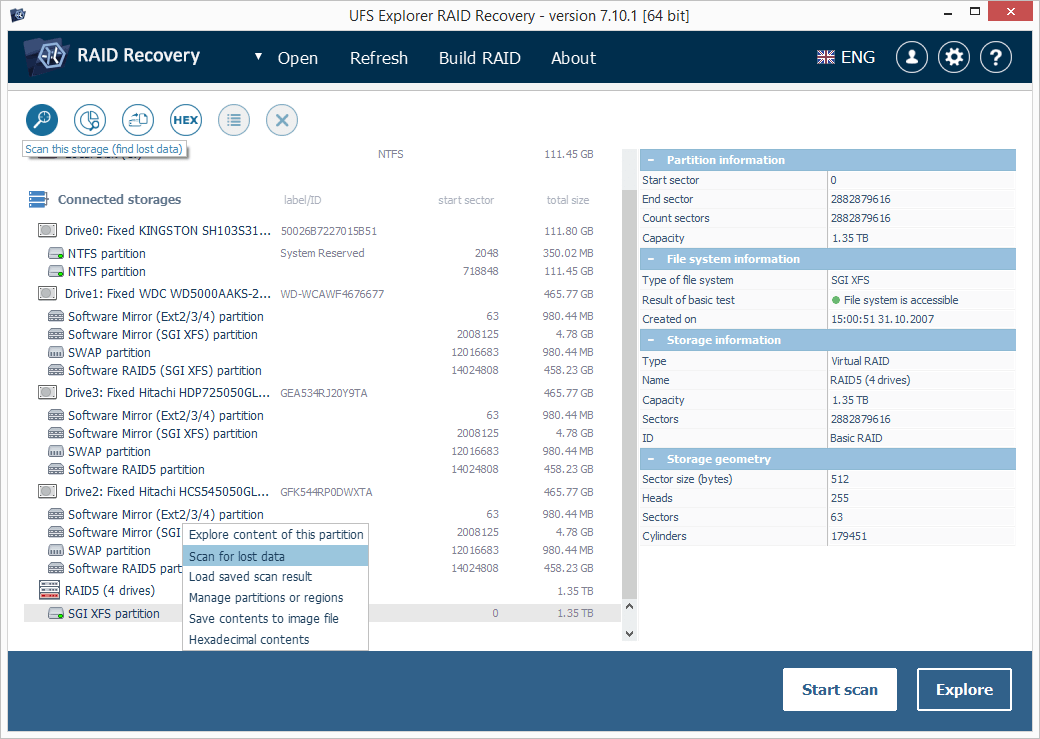
Explore the list of connected devices in the left pane of the main screen:
-
7.1 If the RAID metadata wasn’t severely damaged, you will be able to find the assembled storage among the options in the list. It can usually be identified by the corresponding icon, RAID level and the number of the drives.
-
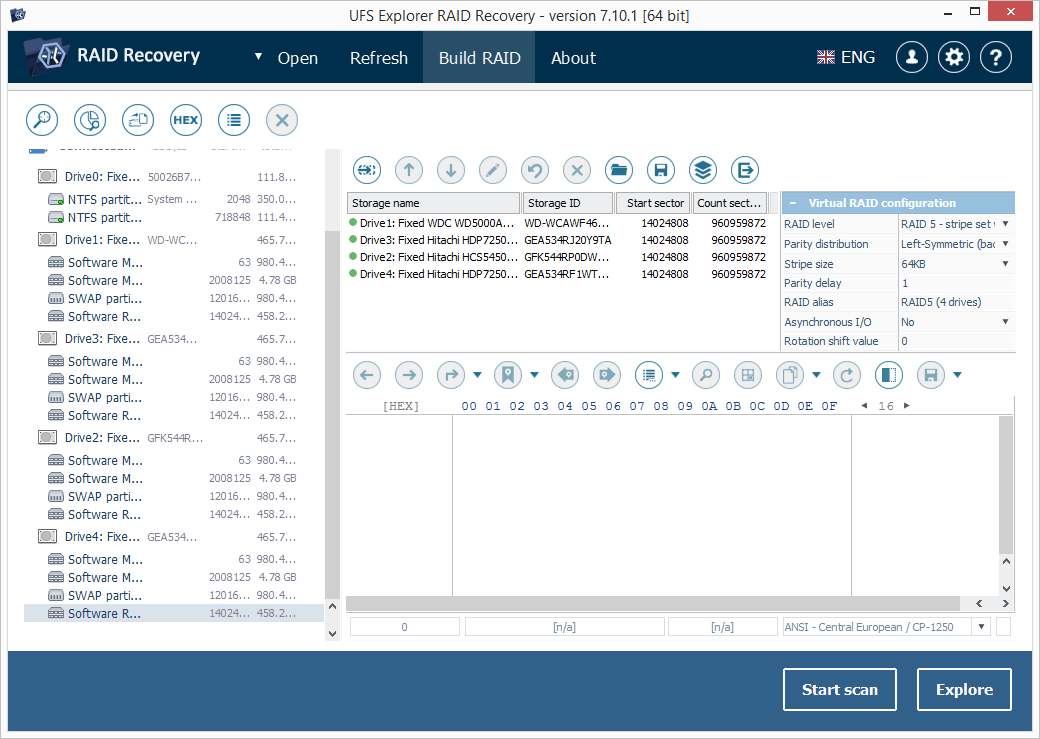
7.2 In case the program can’t perform an automatic assembly of the RAID configuration, you can assemble it manually from the member drives/disk images.
-
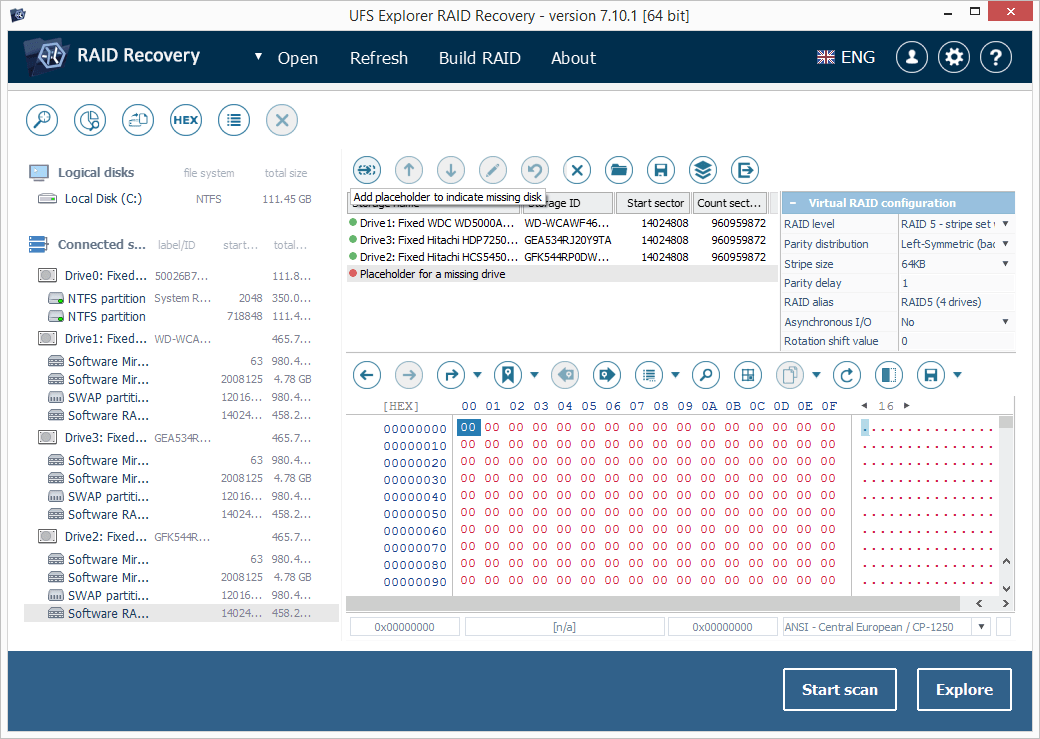
7.2.1 For this, click "Build RAID" and add each component to RAID using the respective storage context menu option. For most NAS models the largest "data" partitions are to be chosen rather than entire drives: as a rule, such volumes have the same size on each drive and the same non-zero offset.
-
7.2.2 If the array is in the degraded mode, add a placeholder to indicate the missing constituent using the respective tool from the toolbar.
-
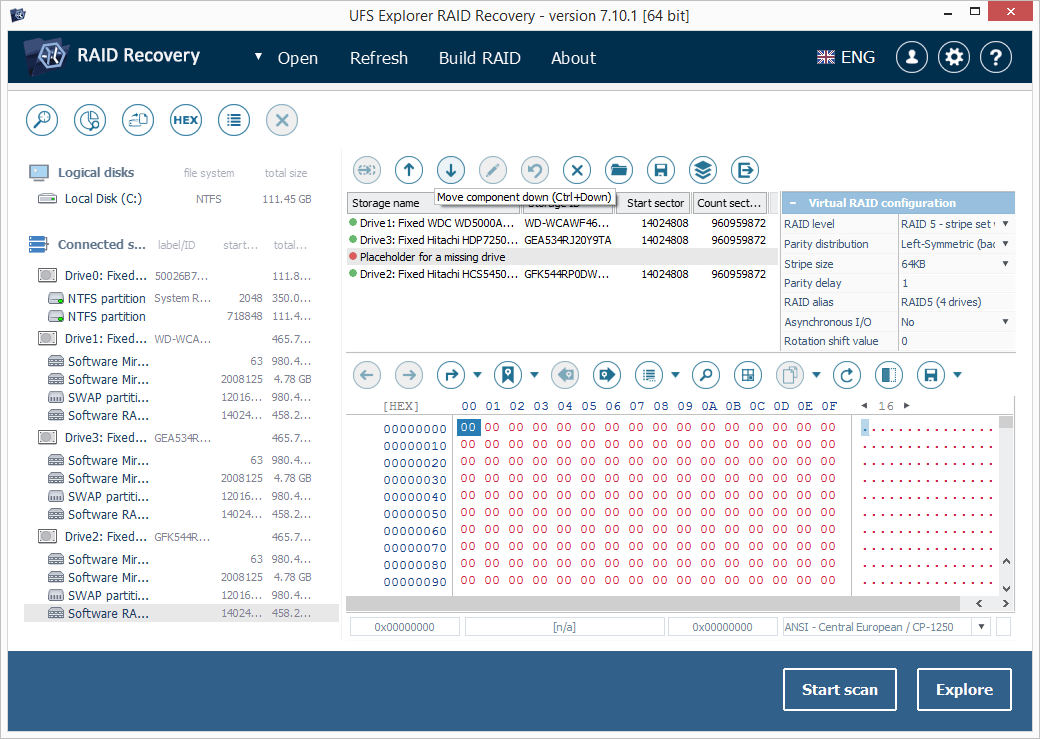
7.2.3 Adjust the order of the drives using the arrow-like buttons from the toolbar and define the correct RAID configuration in the RAID parameters sheet.
-
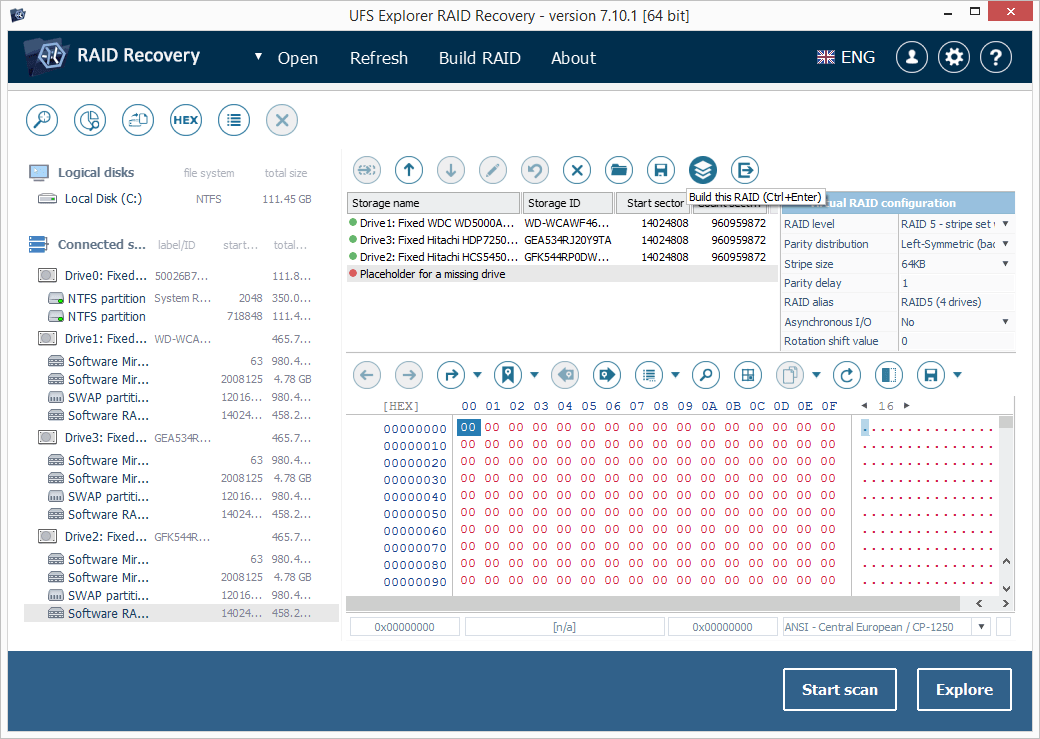
7.2.4 When finished, press the "Build this RAID" button.
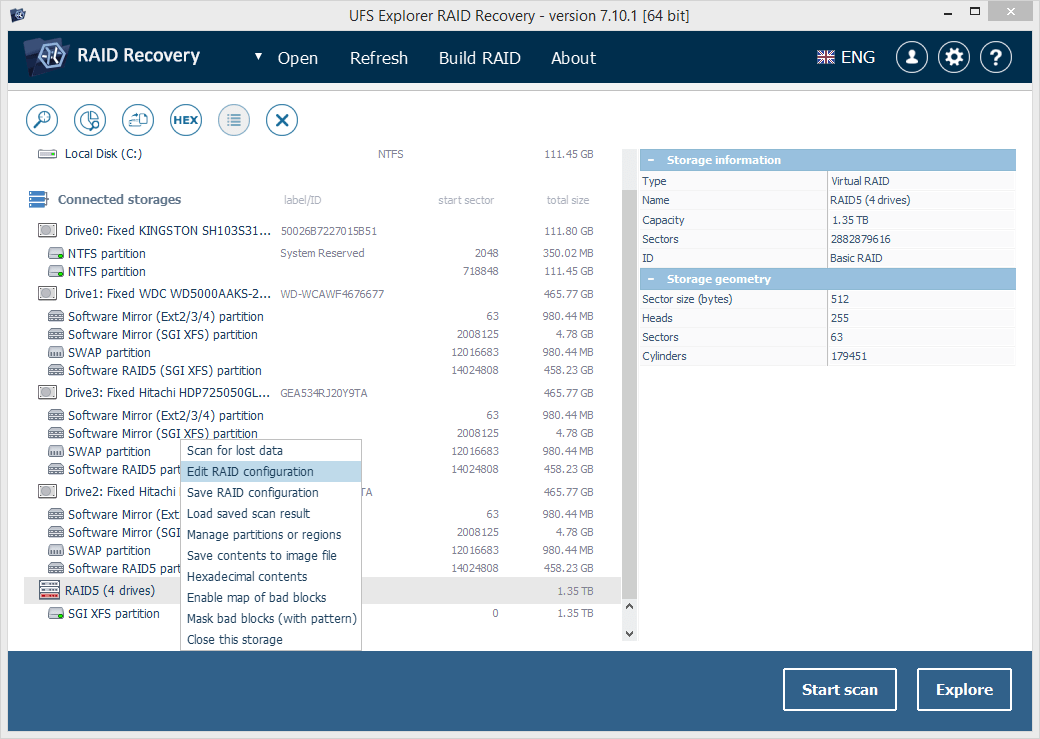
Note: If you don’t know which RAID configuration your NAS is based on, refer to the NAS documentation. You may make any number of reconstruction attempts, as the software operates in the read-only mode without modifying any information on the source disks. For this use the "Edit RAID configuration" storage context menu option which will open the array in RAID Builder for revision.
Note: The procedure may slightly differ if your NAS makes use of a specific RAID configuration instead of conventional RAID.
-
-
-
Open the volume mounted under the assembled RAID in the inbuilt Explorer-like previewer of the program to check its content. If the files seem damaged (you can also understand that something is wrong with the array by the corresponding icon next to it), this may signal that RAID parameters were defined incorrectly. Right-click the RAID storage in the left pane, choose "Edit RAID configuration" and try adjusting them. Press "Build this RAID" again upon completion.
-
To scan this volume for lost data use the respective button or the storage context menu option.
-
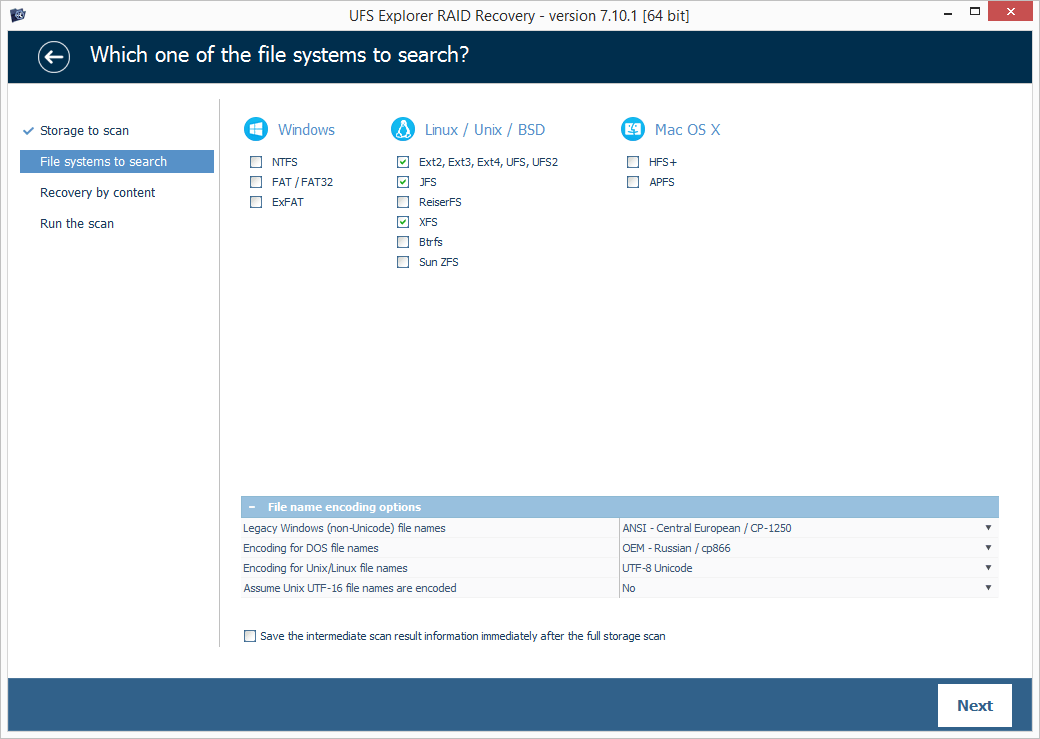
Specify the desired scan parameters, press "Start scan" and wait for the process to end up.
Hint: More information about configuring the scan can be found in the instruction on scanning a drive with UFS Explorer.
-
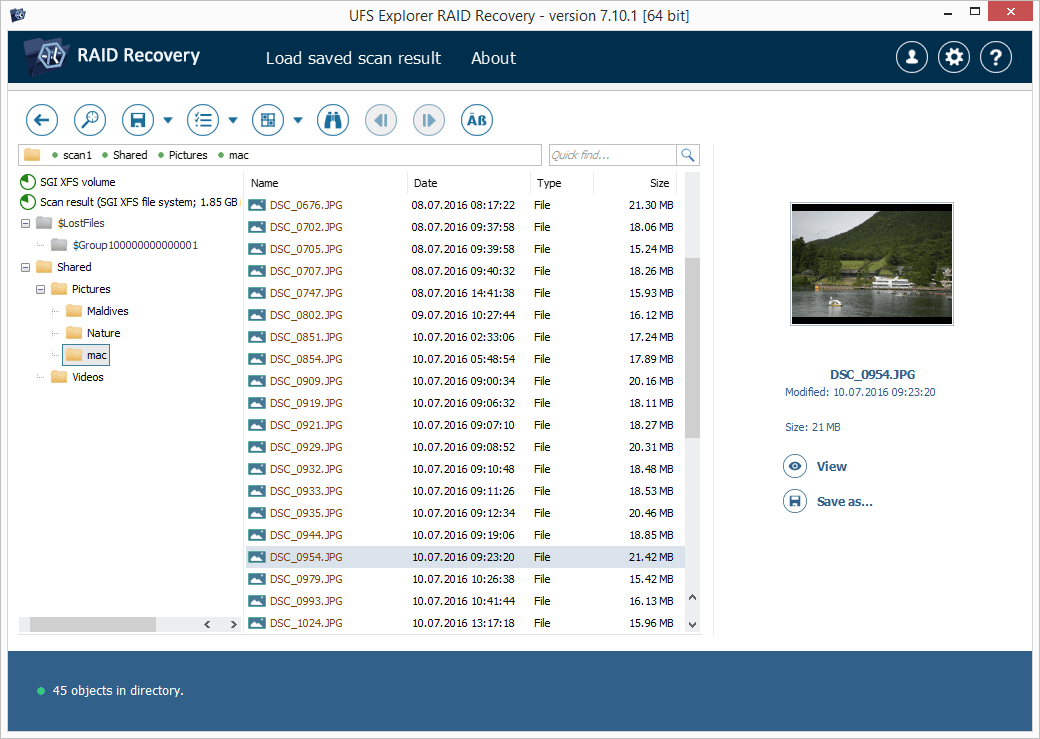
Examine the presented result. If the "Set up displaying of file status" function is turned on, circular icons will appear next to each file, representing their state. A green icon implies that a file is "good" and has a correct header; a red icon characterizes a severely damaged (zeroed) file; a gray icon may mean that a file was partly corrupted or its integrity cannot be checked in view of the format’s specifics. The deleted folders and files that have been recovered will be listed with red names.
The software also lets you sort the found elements by name, date and size, employ quick or advanced search and preview images, videos, audio files or PDF documents directly in its interface.
Hint: The information provided in Evaluation and saving the results of data recovery may facilitate your work with the obtained folders and files.
-
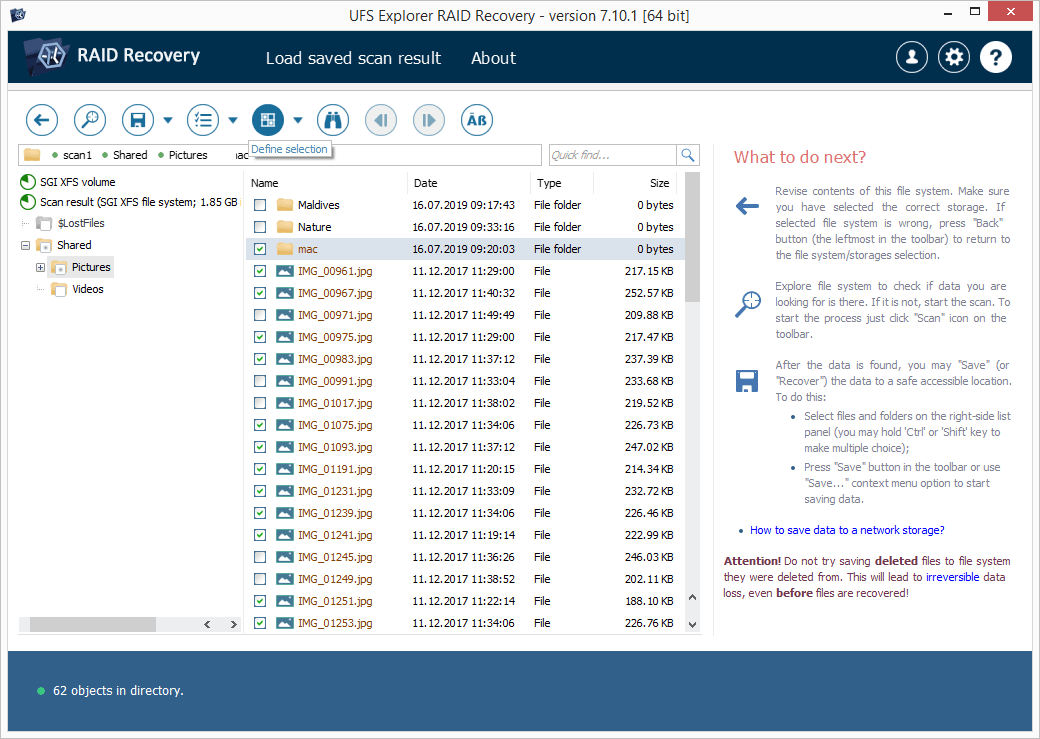
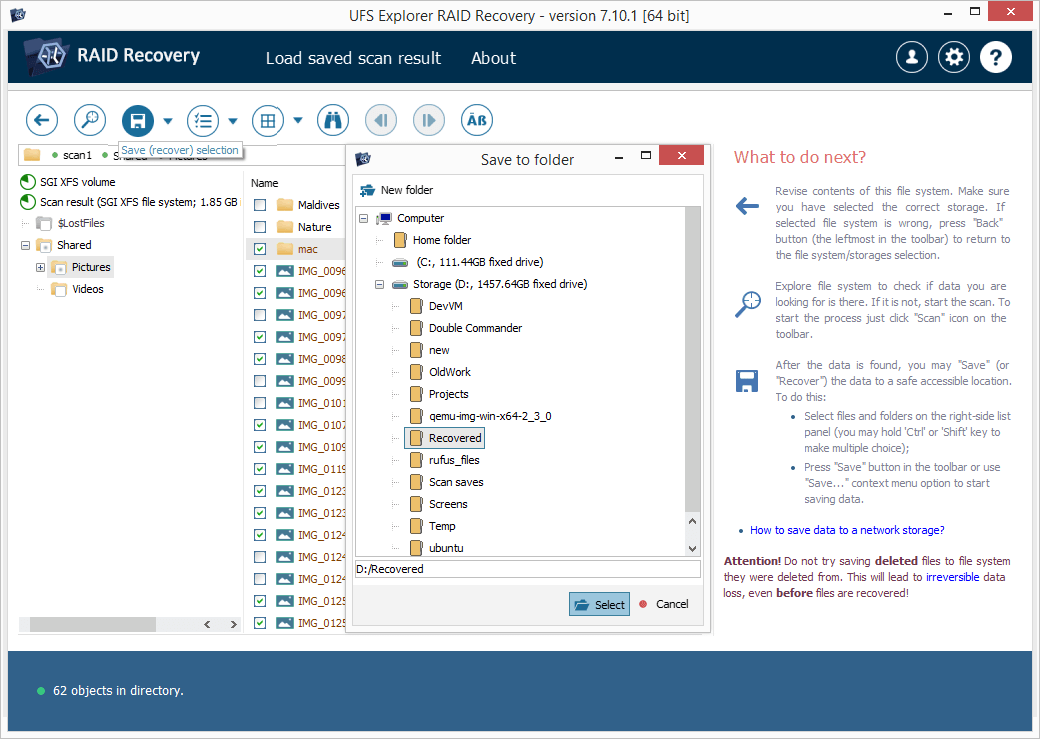
Click "Define permanent selection" and mark the items you would like to copy by putting ticks right next to them.
-
Press "Save selection" and select a destination folder for these files in the opened window. Please mind that this folder must not be located on any of the NAS drives, as saving the restored information to them may overwrite the actual data they contain, leaving no chance to recover it.
Hint: If you are going to save the recovered data to a network storage, please check the provided guide.
Hint: The whole process is also demonstrated in the video guide to NAS recovery.
Last update: June 04, 2024